In this post, we are going to go over 4 different techniques for grafting fruit trees. Can you imagine one tree giving you two, three, or even four different kinds of fruit!? Aside from how interesting and beautiful it can be, there are many benefits to this and in many cases grafting can save a tree from not producing at all or being very sick. We will also go over the benefits of grafting and when should you try to do it.
Oh man oh man oh man! I had the pleasure of sitting down with an older farmer a couple of days ago. We were talking about olive trees and somehow got to talking about grafting fruit trees. He got up, fetched a knife and a couple of branches from the nearby mulberry tree, and started demonstrating grafting techniques to me. What a treat it was to learn all this from someone with so much experience!
Of course, you and I both know I am going to forget everything in about 10.34 seconds, so I am writing it down. All about grafting fruit trees techniques, and sharing this valuable information with you, of course!
4 Techniques of Grafting Fruit Trees…

Before we start, I’ll take a moment to link to all the great fruit tree information here on the blog. If you are a beginner or if you’ve grown fruit for a while, you can find great information in these posts.
- 5 Steps For Choosing the Best Backyard Fruit Trees.
- How to Plant Bare Root Fruit Trees.
- How to Prune Fruit Trees to Keep Them Small.
- How to Thin Fruit Trees and Why You Should Do It.
- Grafting Fruit Trees – A Step-by-Step Picture Tutorial. Make sure to visit this post after this one so you can see a demonstration of the techniques that we will talk about in this post live in the field.
What is Grafting…
Grafting means to unite a shoot or a bud with a growing plant by insertion or by placing in close contact. It is the joining of two living trees from the same family. For example, an apple with another variety of apple or a pear or an apricot or something else from the Rosaceae family.
Another example is an orange with another variety of orange or lemon or grapefruit or something else from the Rutaceae family. You can’t graft an orange tree with an apple tree since they are not in the same plant family and can’t “communicate”. Grafting makes it possible to have one tree giving you 2 or more kinds of fruit!
Why Would You Want to Graft a Fruit Tree…
There are many reasons, but the bottom line to remember is that we want to take advantage of one tree to grow the crop of another. Let me give you a couple of examples…
Example 1 – let’s say you have an established red apple tree. The location of this tree is perfect in your homestead, the root system is strong, you get a lot of delicious red apples from it, and it’s big and strong enough to survive the Winter.
Your friend told you about this great green apple tree she has on her homestead, and now you think it might be nice to have a variety of green apple as well. But, you don’t have room for another tree, or maybe you don’t want to wait years before another tree starts producing fruit.
The solution? Grafting.
Join a small shoot or a bud of the green apple tree with your established red apple tree, and you have one tree producing two kinds of apples. You are still spending the same amount of time taking care of one tree, you don’t water more than before, and you didn’t use up any more space on your homestead, yet, you now have another variety of apples for your family to enjoy!
Example 2 – another example… Let’s say you have an olive tree of variety A. that has been on your homestead for years as part of the beautiful view of your backyard. The problem is that a certain type of fly comes through your area around the month of July. This fly loves your olives. The fly lays its eggs in your olives, ruining them completely.
By the beginning of August, your yard is full of brown, bad olives. You don’t want to spray with chemicals, you don’t want to take the tree down, and you really want to enjoy a crop of olives. What can you do in order to save the tree? How can you use this established tree to produce great olives? The answer is grafting.
You know about an olive tree of variety B. This variety start producing olives a bit later, at the end of July or beginning of August after the fly is gone. You graft variety B on the established tree of variety A and you save the tree!
There are a million examples, but I hope these help you understand some of the reasons for grafting a bit better.
Method One…
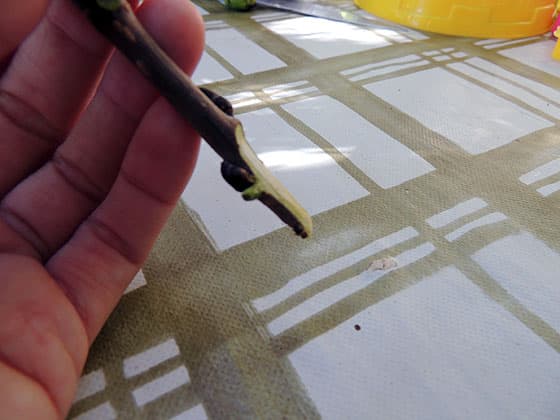
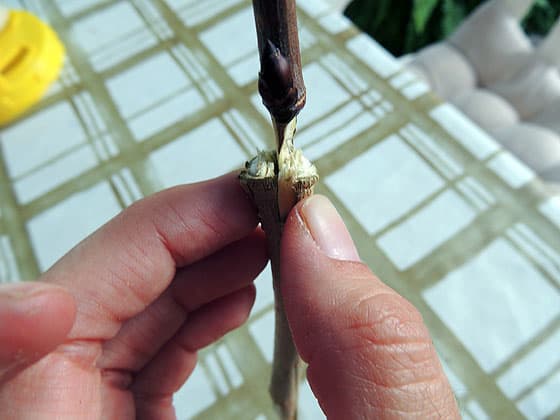
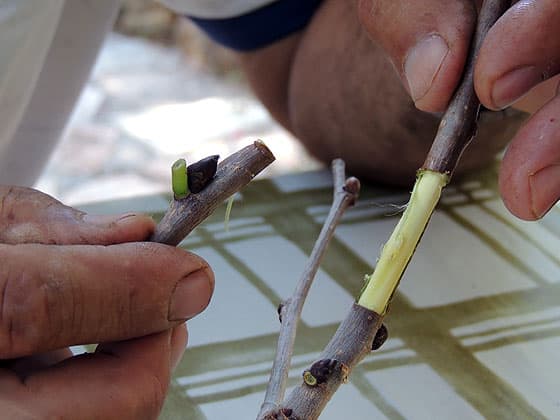
For better understanding let’s say we are grafting tree A on tree B. The first way of doing this is by taking a shoot of tree A, hold it upright and cut half of the width of the lower one inch of the shoot, exposing the inside of the small branch. Next, go to tree B and find a nice size branch that you want to graft tree A on.
Shorten the branch of tree B by cutting some of it. Then cut off half of the width of the top of the branch to match the same cut you did to the shoot you took from tree A and join the two branches together. Make sure that the bark of shoot A touches the bark of branch B. Trees grow as new cells are added beneath the bark, those cells carry water and food throughout the tree. The bark of the two parts should touch for a better rate of success.
Next, wrap the joined area with medical cotton gauze or a piece of fabric to hold them firmly together. Cover the whole thing with a plastic bag, for a greenhouse effect. Make a couple of holes in the bag for ventilation
You should graft in late winter when the tree is bare of leaves. When Spring comes and temperatures start to rise, the shoot (A) will start growing. Open the bag gradually as the shoot is filled with leaves. A few weeks later, when more branches grow from the tree and it looks like everything is growing as it should, you can take the gauze off.
Method Two…
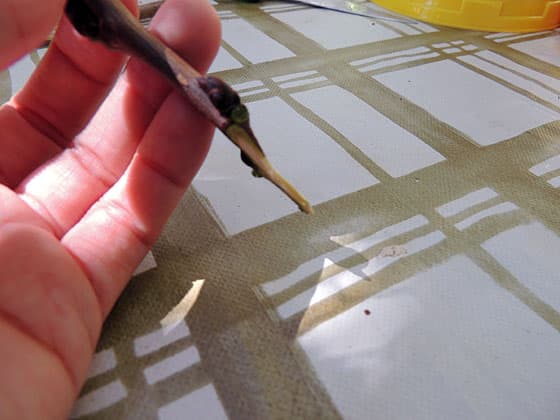
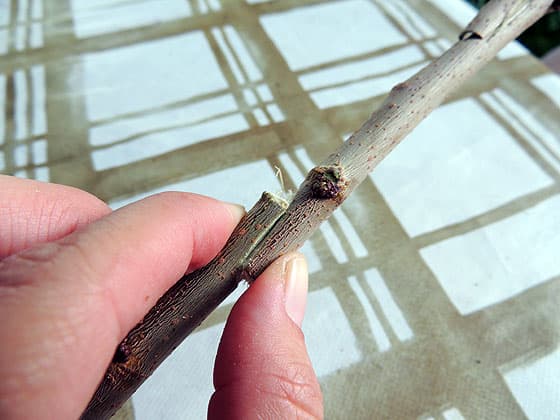
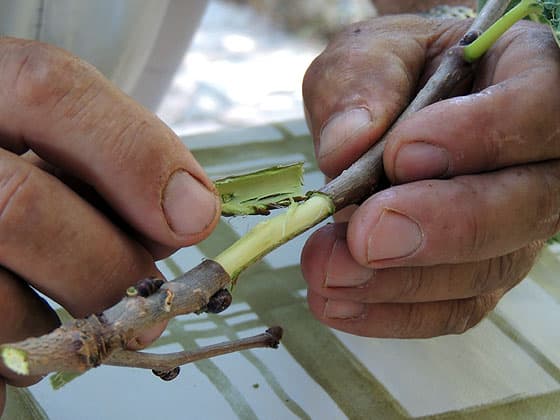
For this method, we need to cut shoot A’s end into a thin tip, exposing the middle of the shoot from both sides. It’s better to still keep a little bit of the bark on one side. Then, peel off only the bark of branch B. Insert shoot A between the bark and the rest of the branch of tree B. Again, make sure the remaining bark of shoot A is lined up with the bark of tree B.
This method is good if you want to graft a few shoots on a wide branch. You can then peel the bark in, let’s say, three places around the wide branch and insert three shoots. Do the same as in method 1. Wrap the grafted area, cover it with a plastic bag, and so on.
Method Three…
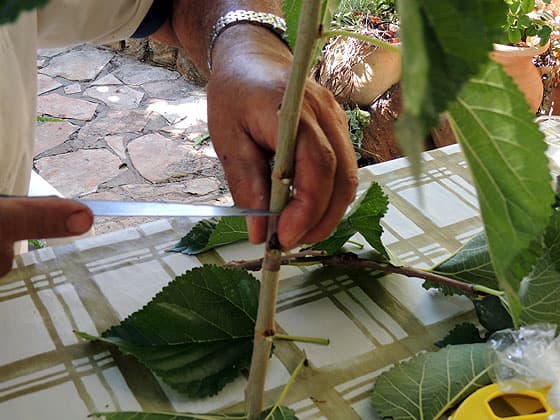
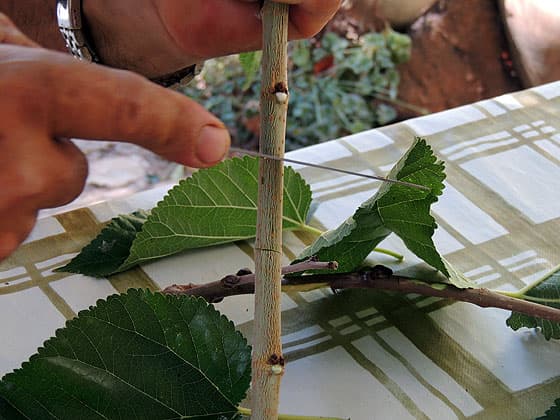
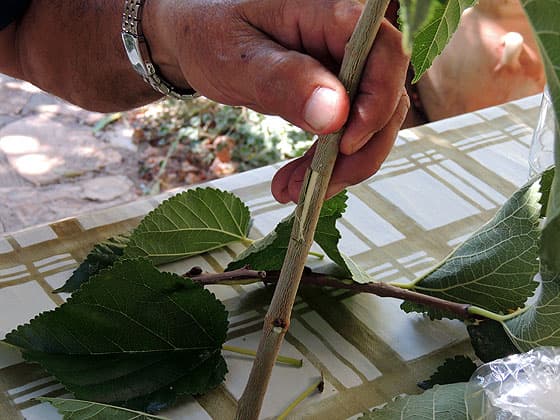
In this method, shoot A will be cut the same way it was in method 2, but the branch of tree B (after we shorten it and clean from leaves) needs to be cut lengthwise in the middle, we basically split the branch in two about an inch deep. Then, insert shoot A into branch B.
Again, make sure the remaining bark on shoot A is lined up with the bark of tree B. The rest of the process is the same, wrap, cover with a plastic bag and so on.
Method Four…
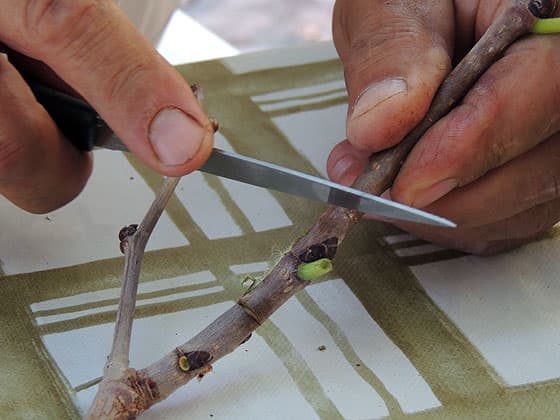
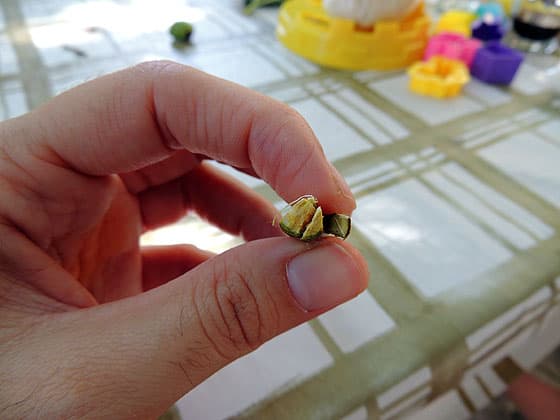
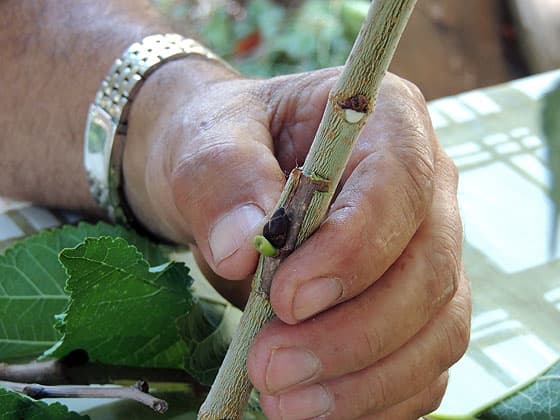
In this method, you don’t have to cut the branch you want to graft short, you just leave it as is… Find a nice size bud on tree A. Make a crosswise cut half an inch under the bud and another half an inch above the bud. You are only cutting the bark here, not the whole branch.
Next, make a lengthwise cut behind the bud from the top crosswise cut to the lower one. Again, cut only the bark. Very gently, not to ruin the bud, loosen the piece of bark with the bud until it comes completely off.
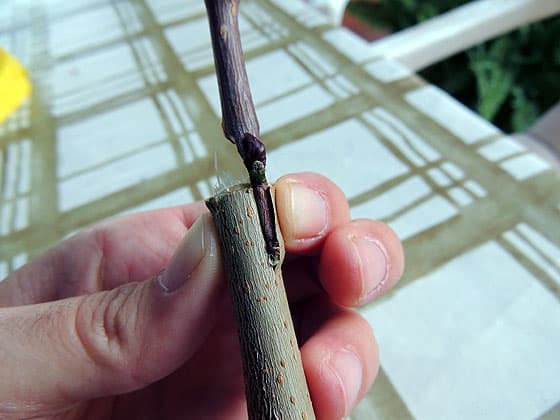
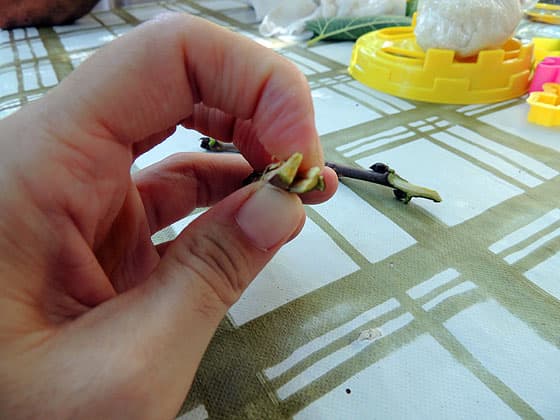
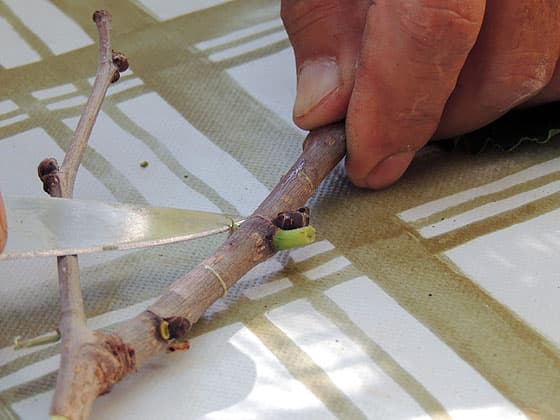
Next, go to tree B and find the branch you want to graft. Place the piece of bark with the bud from tree A on the branch of tree B and mark its top and bottom. Put the bud aside, and make two crosswise cuts on tree B where you marked, cutting only the bark.
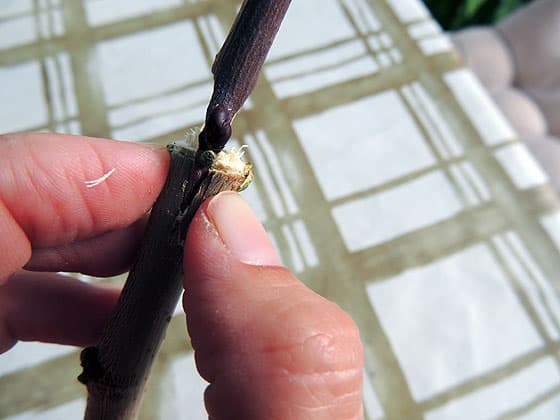
Then, make another cut lengthwise in the middle to connect the two cuts you made in the previous step. We are opening a small bark window here for the bud from tree A. Take the bud from tree A and insert it into the bark window on tree B.
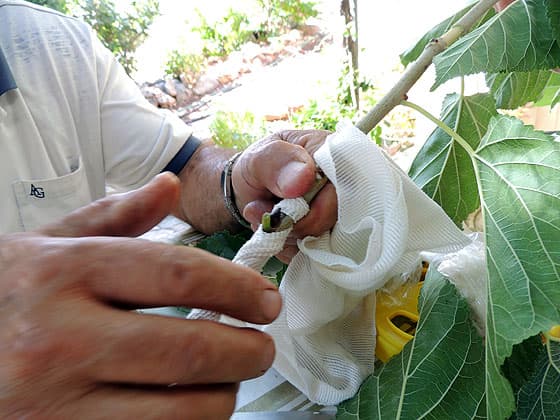
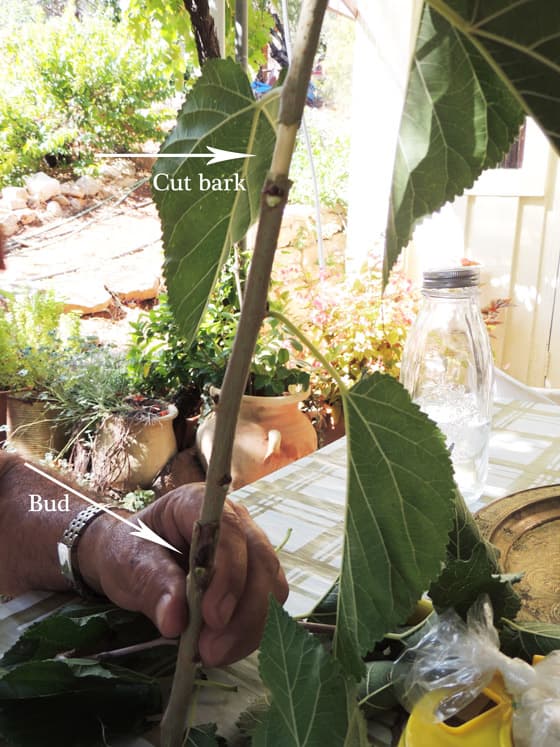
Wrap the area with medical gauze, but be careful not to cover or damage the bud itself. Lastly, cut a piece of the bark of tree B about ten inches or so above the grafted area. We do this to make sure the water and food the roots send up the tree, stay in the grafted area. Without the bark, the top area of the branch will dry out and eventually you will be able to cut it off.
There is no need to cover with a plastic bag. Remember to do this in late winter. New growth will emerge in spring from the bud, and a few weeks later you can take the gauze off.
An Example of an Old Grafted Tree…
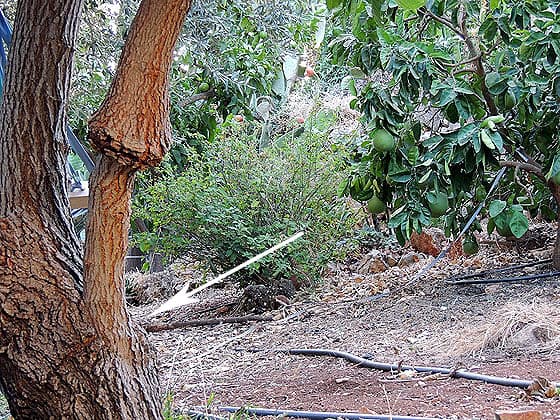
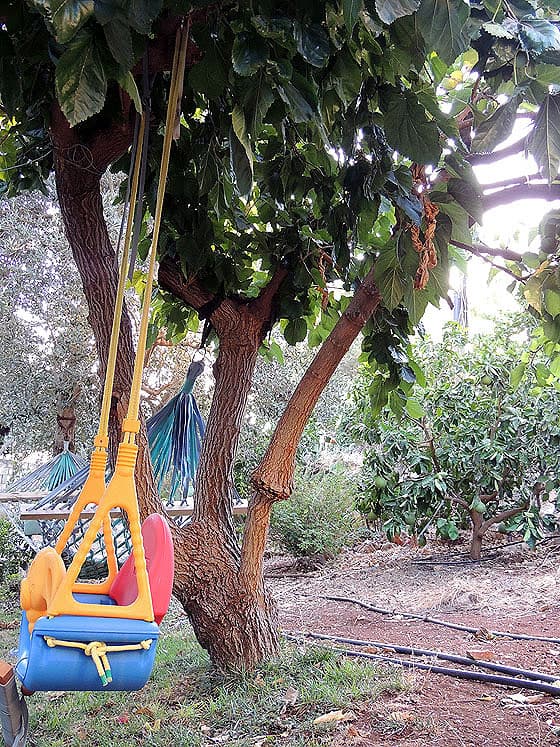
Here is an example of an old grafted mulberry tree. You can see the difference in the color of the bark between the two trees. It’s in my ex-mother-in-law’s yard, and every year she gets two kinds of mulberries from the same tree. I am not sure what technique was used to graft this tree, but the fruit of the second tree is much sweeter and bigger than the fruit of the first one.
Do you see the difference? How magical is that!? What do you think? Have you ever grafted a tree? Do you own a grafted fruit tree? Do you have a problem with a fruit tree you own that grafting might be able to solve? Share with me in the comments below!
I hope that this post was helpful. I really enjoyed sitting down for this demonstration. It was such valuable information from someone who has so much experience. Now, for me, it’s time to practice!
More Gardening Tutorials…
- How to Plant Bare Root Strawberries
- Growing Mesclun in the Home Garden
- How to Make Seed Tapes
- The Complete Guide to Growing Potatoes

Hi! I’m Lady Lee. I help homesteaders simplify their homesteading journey while still producing a ton of food! I am a single mother of four, I was born in Israel and raised in an agricultural commune called a Kibbutz. Now I homestead in central NC.
I am moving from my family’s homestead in New Mexico to Eastern Oregon, the climate, elevation and soil conditions are similar. On my new property there are several different apple trees that seem to be producing some sort of bland flavored apple. On the old property there are a couple of Granny Smith apple trees, and I would really like to skip planting seeds and waiting some number of years before they grow enough to bear fruit. I was wondering if you think it is possible to graft cuttings from one tree to another if it can’t be done on the same day? If it can be done, what suggestions do you have? I think it will take between three and four days to make the move. What few grafting that I have done have been done within thirty to forty-five minutes of starting the process and finishing.
Your thoughts and insights would be greatly appreciated.
I think that three or four days won’t be a big deal. Maybe it will help to keep the cuttings in a damp paper towel. Apple on apple should definitely work!
Thank you for the excellent tutorial. I have been wondering how to carry out fruit tree grafting. Now that you have explained , it will be much more easier to carry out all your instructions.
I’m so happy that you found it helpful! I know it can be an intimidating task. I hope it will work out well for you!
I’m trying to save a lemon tree bitten off by a deer. Put the two parts together as you wrote. Then I put on tree wound grafting compound and grafting tape over that. It is late August here- I’m keeping it watered. Some of the leaves fell. Do you think the grafted branch will survive?
I am not sure… We usually graft at the end of winter just before the trees wake up in the spring. I don’t know what’s the weather is like where you are but it might be too hot for a graft to survive now. If this one doesn’t survive, maybe try again in late winter.
Also, did you check my other post about grafting? With the step-by-step instructions? At the end of it, there is an example of a lemon tree graft.
Among these 4 methods of grafting, which one is the best method for the beginner. I want to graft an avocado plant from root stock. I am afraid that I will kill the plant.
Did you see my step by step grafting post?
I read all the steps with picture. It’s still winter here in Nepal. Will surely try those steps. Want to ask one thing what would be the best scion from the cultivar? Can I pick any random branch with twig? Very detailed post.
Thanks
I meant this post: https://ladyleeshome.com/grafting-fruit-trees/
We are showing the kind of twig you want to pick and the technique we used. You want a young twig.
Thank you very much.
We have a very prolific 10 yr. lime tree that produces copious amounts of the most disappointing limes you never wanted to taste; bland, semi sweet, weak Kool-Aid.
Multiple large branches to possibly graft from. Is there a limit to the # of types of citrus and # of grafts per tree/branch?
I know a peach tree that has 4 different stone fruit varieties grafted on it and it’s doing great. As long as you make sure you graft well and don’t stress the tree too much you should be fine with grafting a few kinds of citrus on it.
This is so wonderful, well elaborated and true.
Thanks!
I see you deleted my comments to avoid completely embarrassing yourself in front of your internet friends. Maybe you should just make the post better, instead.
Maybe you should just mind your own business. I am not here to satisfy you, I am here to share my experience and knowledge. I have no problem to have a conversation with someone who thinks I am not right in some way or that has a different opinion or experience than mine. I, however, have no time or desire to have a conversation with nasty people who has no respect for others.
This is my home on the web. You are welcome here if you want to voice your opinion and share your knowledge, you are not welcome here if you come to put me down. I share my honest opinion about the experiences I have and about my homesteading Journy and I will not change my post because YOU decided I need to do so.
Please stop bothering me. I suggest that if you don’t like the information on this blog you just go on and find a blog you do like. Or maybe make the effort to write your own blog, it seems like you have a lot to say. I will not discuss this further.
Thank you for all the very interesting info on grafting. I would like to graft onto a six year old mango tree. What would be the best method?
It’s hard to say without seeing the tree and where you want to graft… Maybe method one will be the easiest… But again, it’s hard to say.
Excellent post and what a blessing to have a friend to teach “hands-on”. Your mother-in-laws tree is a bit odd looking to me because I just had a rose “girdle” (I left a support wire on much too long) and it looks just like this.
I am here is Israel visiting and I was just talking to him yesterday. I am hoping to go see his olive trees tomorrow and hopefully learn something new!
i knew that 40 type of fruits can be grown on a single tree, whether these should be of same family.
You mean they can be from different families and still grow on the same tree?
I use these techniques on on orange tree but fail
Oh no. Are you trying to graft one kind of orange with another? I learned that the most important thing is to make sure the bark/skin of the two trees is touching.
Thanks for the tutorial. I’ve never grafted trees ever. Though I’m getting a two fruit grafted tree delivered this spring. Fruit trees are pretty new to me – just since 2011. I still feel a bit hesitant with some of it all.
What kind of grafted trees are you getting? What kind of fruit?
Plums. Shiro and Redheart.
Nice!
If I recall correctly, most commercial grapefruits and oranges are grown on tangerine root stock.
Make sense since they are in the same family. Maybe tangerine root is stronger than the others….
Excellent tutorial 🙂 Thanks for sharing at the HomeAcre hop, be sure to come back to Pint Size Farm, or one of the other hosts, to share again this week. And, congrats on being featured on Sandra’s site.
Thanks for sharing at Home Acre Hop this week! Great post! This will be my featured post for tomorrow 🙂
Thank you Sandra!
great post! I’ve always wondered how to do grafting