
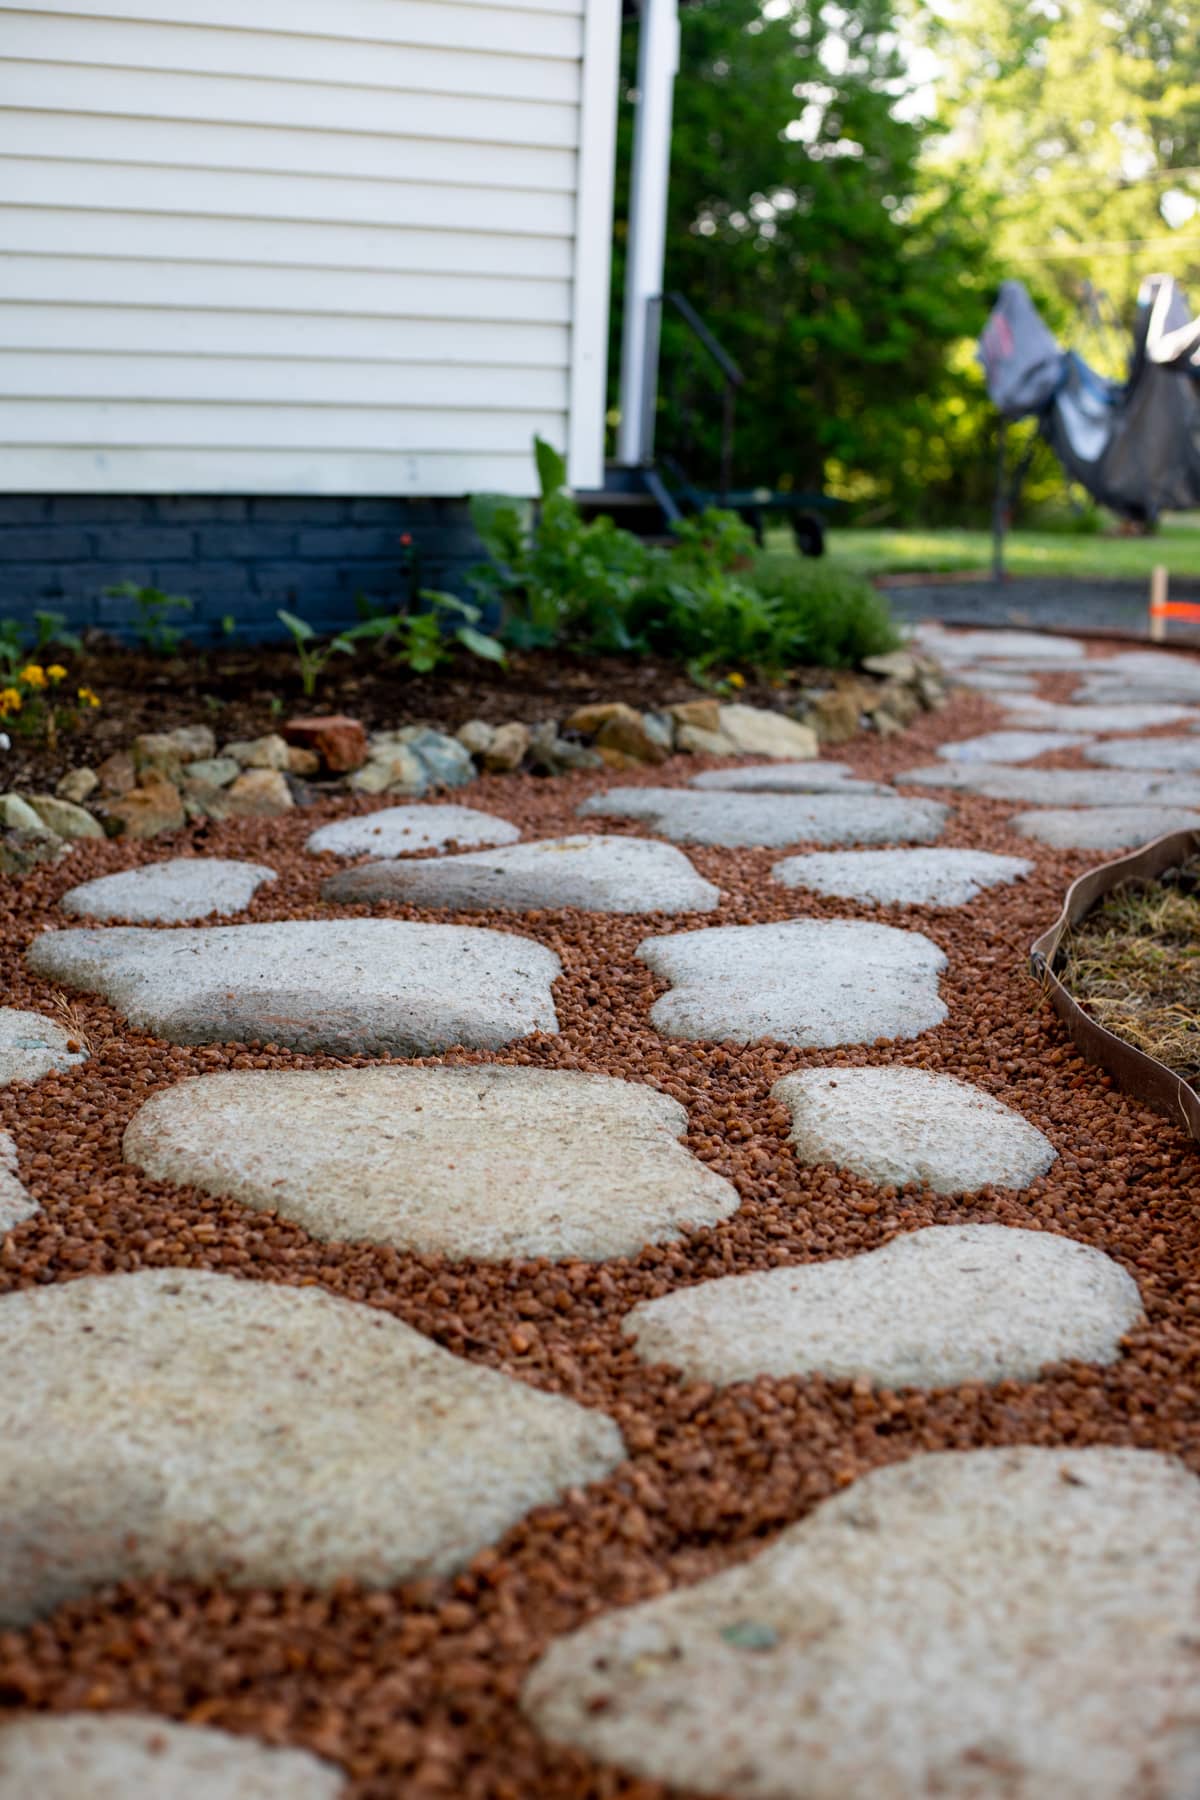
These DIY concrete pavers are very simple to make. It takes some physical labor, but these concrete pavers are simple and allow you to get really creative. This is a very affordable DIY concrete walkway that is pretty and strong! (View the full video in the How-To card below)
A few years ago, I built a garden bed that wraps around the side of my house. For someone who is used to growing her vegetables in neat and straight rows, a round bed like that was a bit hard to swallow at first. Now I love it. It’s a space where I plant both flowers and vegetables, where nothing is straight and everything goes a bit wild during the summer.
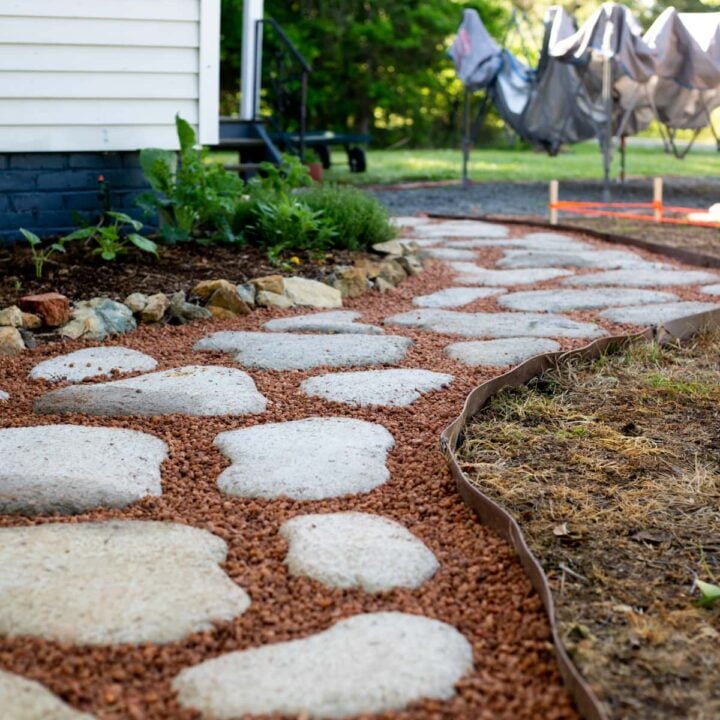
That big garden bed was asking for a walkway right next to it. Something that would work with the rock edge of the bed, a walkway that is as creative, not square or straight, and a bit out of the ordinary
DIY Concrete Pavers…
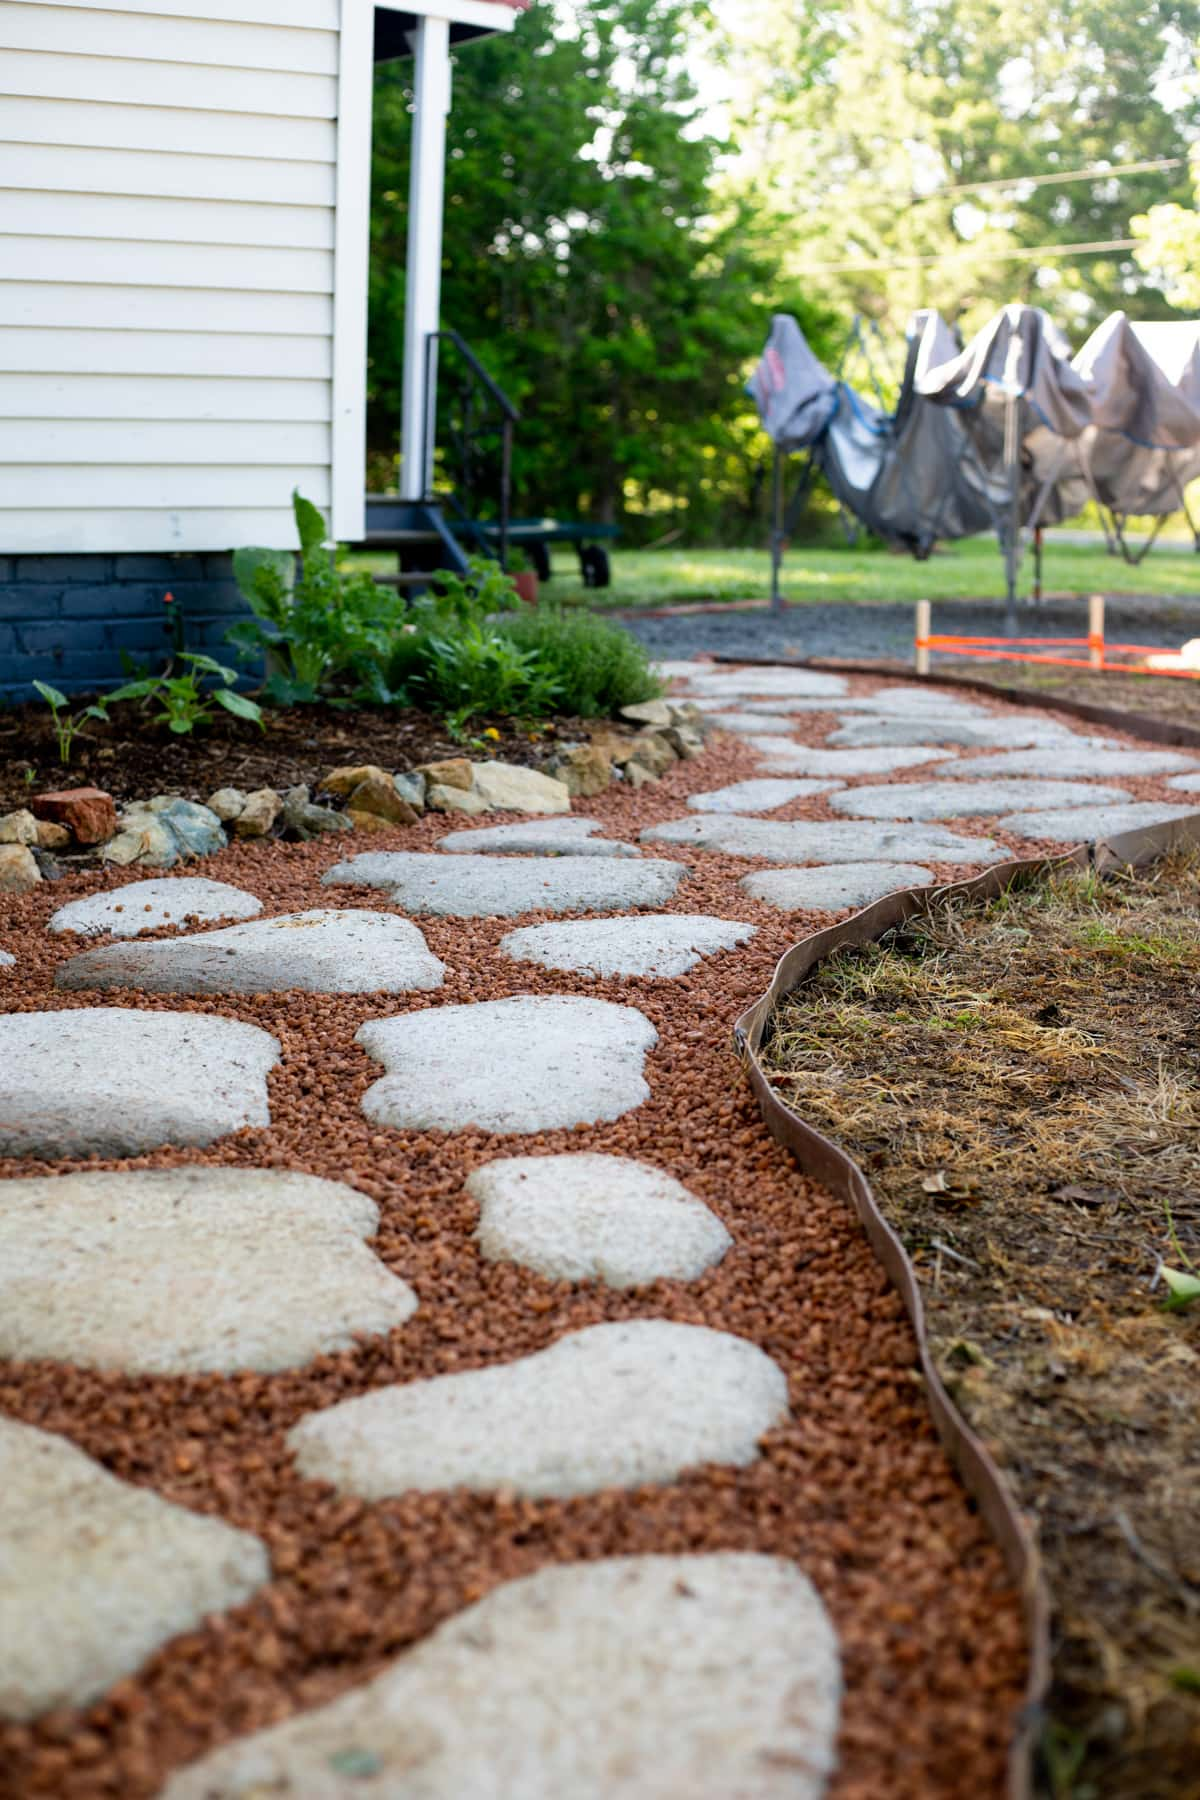
The owner of said walkway, me, was looking for all that creativity yet strength, a walkway that will stay there forever. I was also looking for an affordable solution. A DIY concrete pavers walkway answered all the requirements!
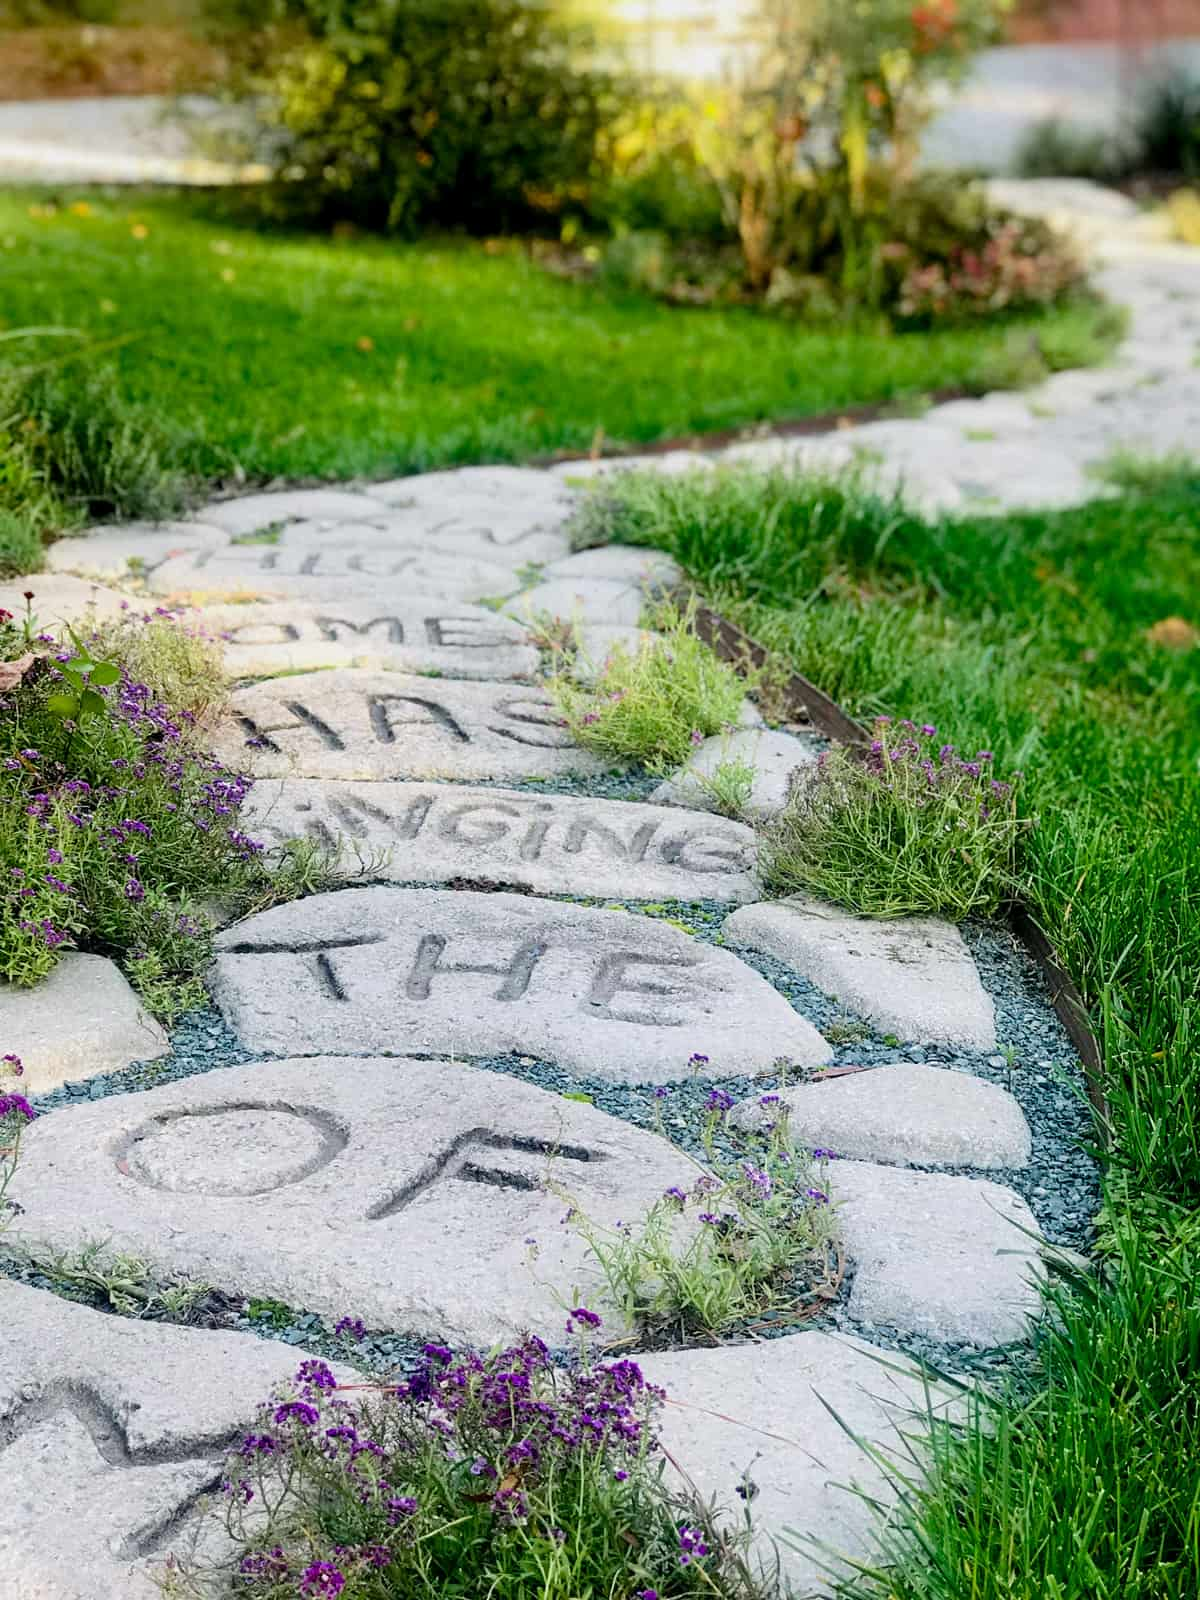
I came across this kind of walkway at my friends’ house a few years ago. It was a walkway leading from a parking area to the front door of their house. It was all made by hand, simple to make (they said). They had a sentence from the bible written into the cement, some pea gravel between the pavers, and some crawling plants and moss between the rocks. It was beautiful and got stuck in my brain. Now, it was my turn to build one.
Materials You’ll Need…
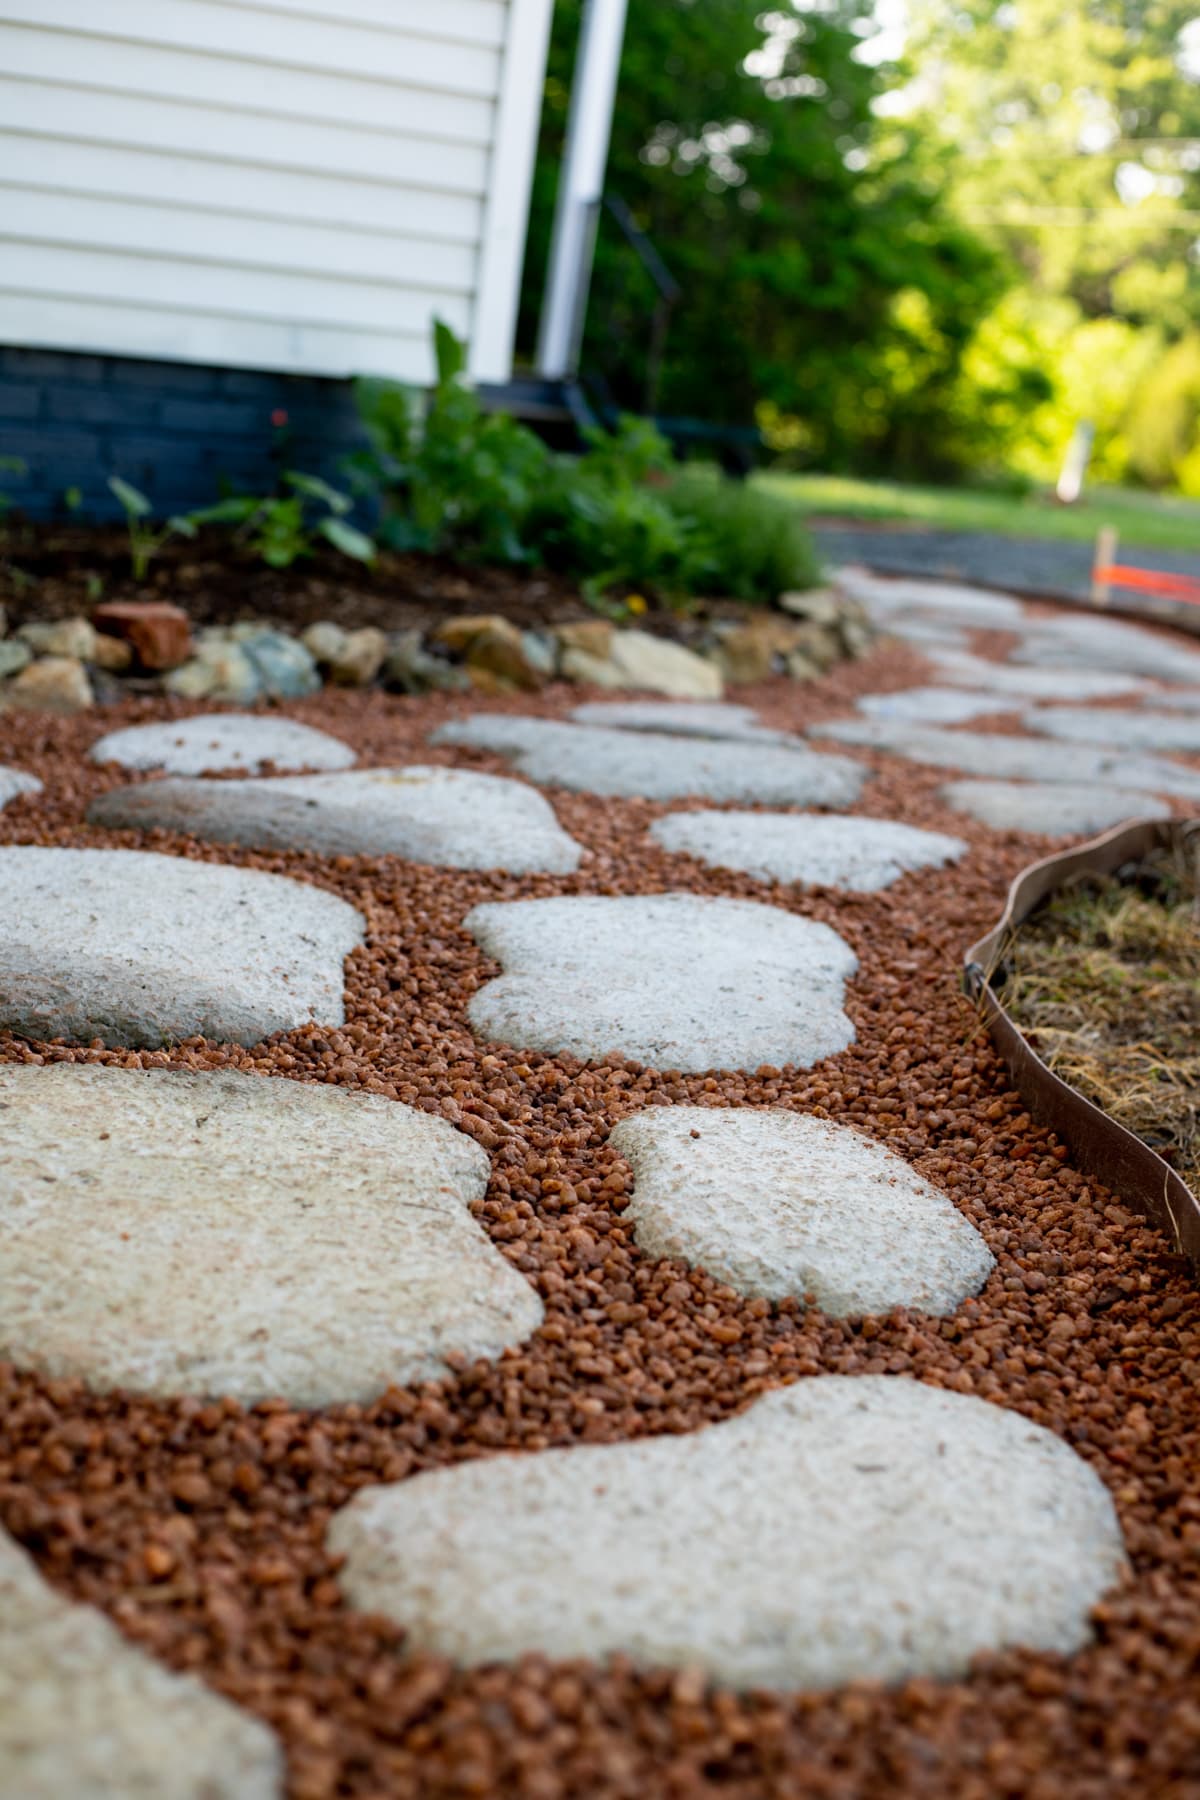
- Edging – you can use whatever edging you like or not use an edging at all, it’s not mandatory. I chose the more expensive garden edging (name and link to what I used in the cost breakdown below), but you can use the cheaper black plastic edging, natural rock, bricks, or anything else.
It was important to me to use edging because I knew that I wanted to fill between the concrete pavers with pea gravel and I needed it to stay in place. If you are not going to use pea gravel, you might not need edging at all. - Concrete – I’ve learned that there are a few different kinds of concrete mixes. Some have more rock in them, some are smoother with less rock. Some dry real fast and some are slower to dry… I used the QuickSet, 4-hour, cement mix from Lowe’s which comes in 50-pound red bags. It’s the cement mix that I use when setting fence posts and such so I am used to working with it, however, I am not sure it was the best mix for these concrete pavers. On one hand, it has more rock in it and it dries really quickly so it was impossible for me to write in my pavers. On the other hand, the surface of each paver has a bit more texture to it and when it’s wet from the rain the pavers aren’t slippery.
So when you’re choosing the mix that you want to work with, consider how important creativity is to you… Do you want to be able to write or draw on your pavers? Do you want to be able to work a bit slower on design and need a mix that won’t dry too fast? Make sure to give it some thought before you decide on your concrete mix. - Glass gems and such – glass gems are just one idea… You can add whatever you’d like to your concrete to make a colorful design. If you like the idea of glass gems, try to search Amazon for “vase fillers” or check out your local craft supply store.
- Pea gravel – again, you don’t have to use pea gravel to fill between your DIY concrete pavers. You can leave the grass to grow there or you can plant plants or use another kind of rock. I used pea gravel that I got from my local Lowe’s in bags.
Equipment You’ll Need…
- Pick Mattock – to dig for the edging.
- Wheelbarrow – to mix the concrete.
- Trowel – I used a metal one to mix the concrete mix with water.
- Gloves – to protect your hands from the concrete mix.
How to Make Concrete Pavers…
Step one – prep the area. I chose to spray the grass that was growing where I wanted my concrete path. You don’t have to do this, you can lay the concrete and make your pavers right on top of the grass and, of course, it will die. But I felt better just killing it before so it wasn’t in my way. Really, there isn’t much prep work to do since we are going to lay the concrete right on the ground, just make sure that there aren’t any large rocks in your way.
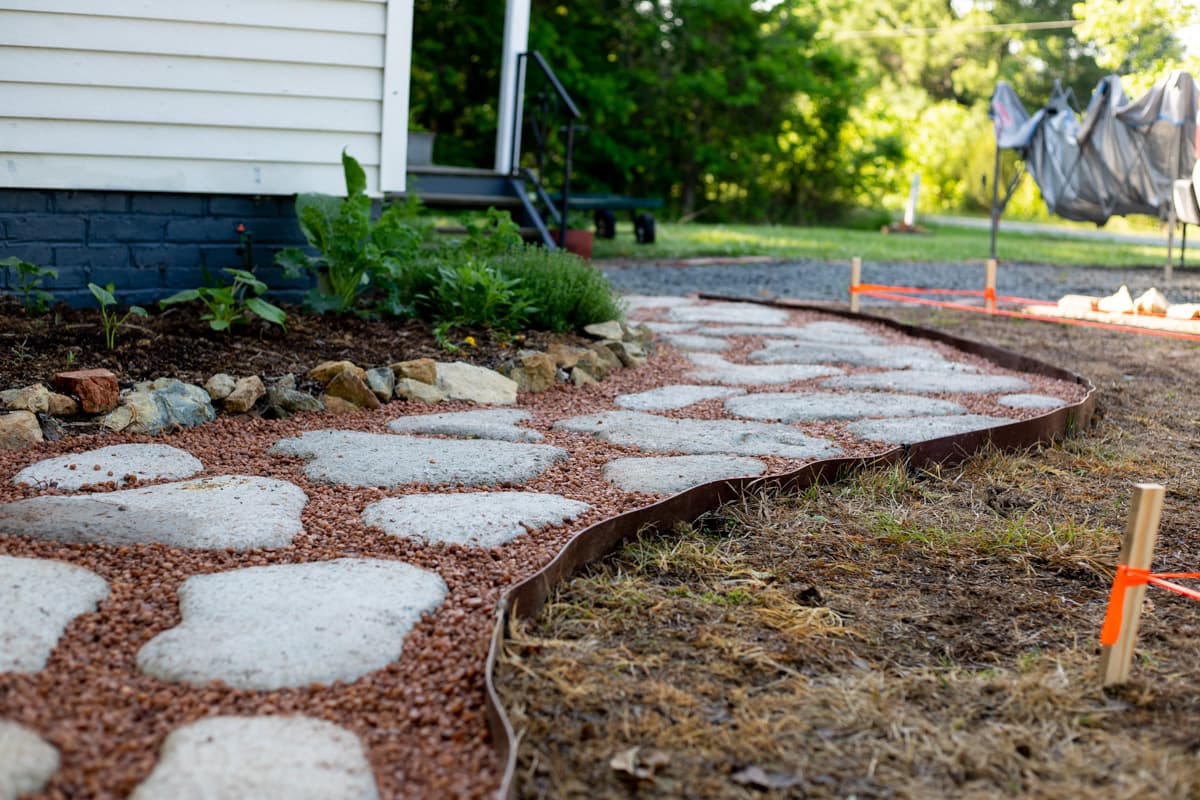
Step two – set the edging. Mark the edge of your path and make sure that it’s as wide as you’d like it. Use the pick mattock to dig a little trench for the edging if you are using the same or a similar kind to what I used. Then set the edging in the trench, fill it back with soil and use stakes to hold the edging in place.
Step three – make the pavers. Add one or two bags of concrete mix at a time to your wheelbarrow or whatever you are using for mixing the concrete. Add a little bit of water at a time and use the trowel to mix the concrete until you get a clay consistency. You don’t want the mix to be too runny because it will make it hard to shape the rocks, but don’t make it too dry as well.
Scoop some of the concrete mix from the wheelbarrow right on top of the ground and use your hands (or molds) to shape it into a paver. I recommend making one larger stepping rock in the center of the path (where your foot falls naturally as you walk) and filling around it with smaller pavers. Add whatever design or design elements into every paver right after you shape it then let the paver dry.
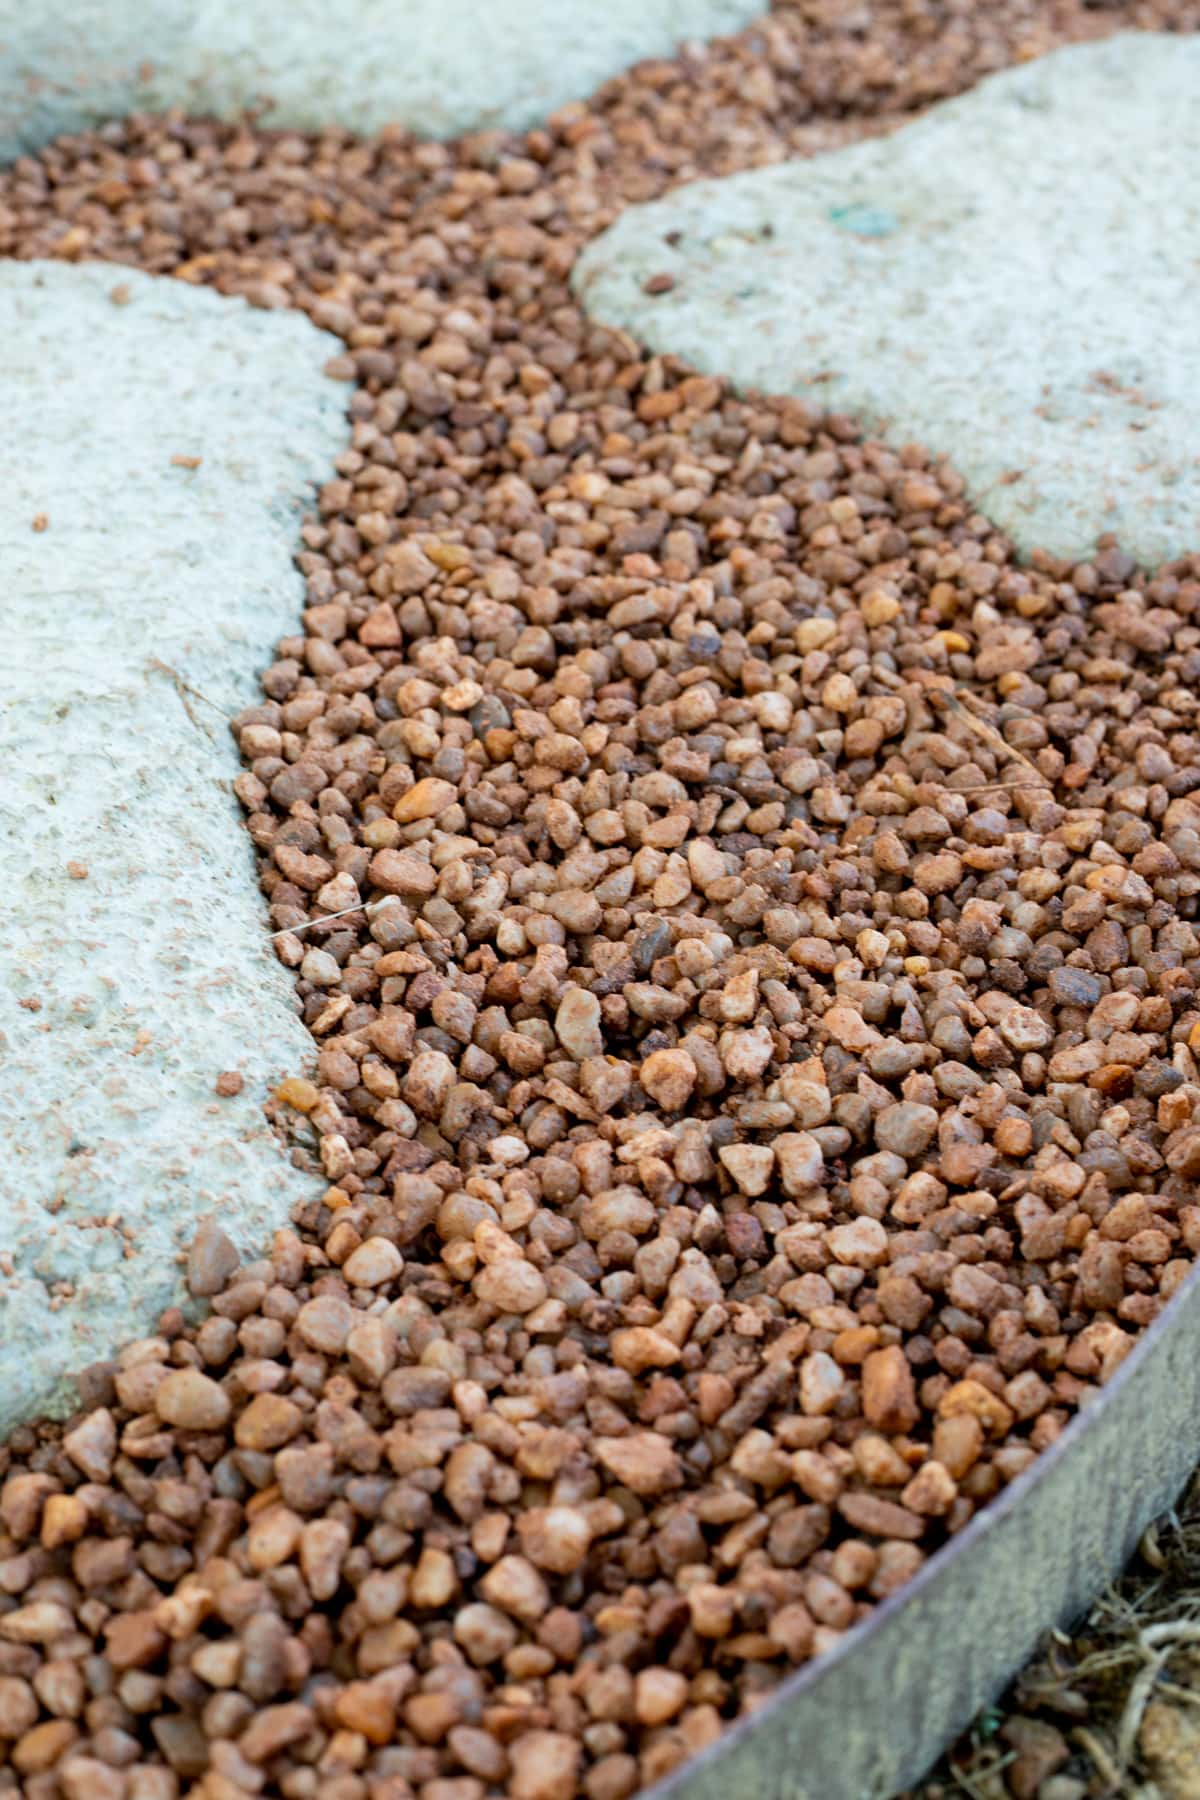
Step four – add pea gravel and/or plants. Once your pavers are dry and set, fill in between them with pea gravel, plants, another kind of rock, or whatever else you can come up with.
How to Maintain a Concrete Walkway…
As far as the concrete pavers go, there isn’t much that needs to be done. Once in a while, you might want to sweep them but that’s about it. As far as the space between the pavers goes, consider one thing… If you choose to fill in between the pavers with pea gravel, you can simply spray the path once every few weeks to kill the weeds that are going to find their way up between the rocks.
If you choose to plant ground covers or other plants in your path, you are going to have to weed the path by hand. I personally really liked the way that my friend’s path looked with the crawling plants in between the rock, however, considering that I have a large vegetable garden to weed I didn’t want the additional labor so I decided to not plant anything between the pavers.
Tips And Things to Consider…
- Have help or do a few bags at a time. This DIY concrete pavers path is simple to make, however, it’s labor-intensive. There is a lot of lifting and bending involved! So if you can get a few extra hands to help you, that’s great. If it’s just you working on it, make sure that you are lifting correctly and protecting your back, and maybe work on a few pavers at a time.
- Add the decorations right after you shape the paver when the concrete mix is still wet. Once it starts drying and setting it’s pretty hard to decorate it.
- If you want to be able to write in your pavers, use a concrete mix that doesn’t have a lot of rock in it.
- Learn how to dye the concrete for a colorful pathway. How about a path where every paver is a different color?
- Make the center of each paver where your foot falls naturally so it’s easy to walk on the path. Before you set the pavers, walk the path and mark where your foot falls naturally. Then, make the center of each paver over that spot.
DIY Concrete Pavers Cost Breakdown…
This breakdown is for a 25 foott walkway and prices are what my local Lowe’s in central NC charges in May 2022.
- 2 rolls of edging – $33.98 per roll (each roll comes with 5 stakes).
- 16 bags of concrete – $5.57 per 50 pounds bag.
- 5 bags of pea gravel – 4 of the bags cost me the full price of $4.28 a bag. 3 of the bags cost me half of the price per bag, $2.14, since they were open (damaged and a few tiny rocks short).
- Gems – I used whatever we had at the house for crafts.
The total cost of this DIY concrete pavers walkway was $182.73 before tax.
Frequently Asked Questions…
My pavers are about two inches thick. This seems to work well, it’s not too thick yet they aren’t going anywhere.
No metal or any other kind of reinforcement in the pavers! It’s simply concrete on the ground.
One 50-pound concrete bag made one large center rock and a couple of smaller ones beside it. For a 25 feet walkway, I used 16 50-pound bags. Of course, it also depends on the width of your path and the size of each paver.
These DIY concrete pavers were very easy to make! There is some physical labor involved but overall, for me, it wasn’t too hard. They are affordable, fun to make, and comfortable to walk on. I hope that this post gave you a little bit of inspiration, there are so many designs you can come up with to make your own DIY concrete pavers path!
More Homesteading Projects…
- Crushed Concrete Driveway For the Farm
- Installing Thin Brick
- How to Build a Dog House From a Barrel
- The Cheapest Way to Pave a Driveway
- How to Build a Chicken Coop From Pallet Wood
- DIY Outdoor Bamboo Screen
- DIY Top Bar Hive From a Barrel
- Homemade DIY Pallet Bookshelf
DIY Concrete Pavers
Learn how to make your own DIY concrete pavers walkway.
Materials
- 2 rolls of garden edging
- 16 50-pound bags of concrete
- 7 bags of pea gravel
- Glass gems or other decorations
Tools
- Pick mattock
- Wheelborrow
- Trowel
- Glove
Instructions
- Step one – prep the area. I chose to spray the grass that was growing where I wanted my concrete path. You don’t have to do this, you can lay the concrete and make your pavers right on top of the grass and, of course, it will die. But I felt better just killing it before so it’s not in my way. Really, there isn’t much prep work to do since we are going to lay the concrete right on the ground, just make sure that there aren’t any large rocks in your way.
- Step two – set the edging. Mark the edge of your path and make sure that it’s as wide as you’d like it. Use the pick mattock to dig a little trench for the edging if you are using the same or a similar kind to what I used (links to materials in the post above). Then set the edging in the trench, fill it back with soil and use stakes to hold the edging in place.
- Step three – make the pavers. Add one or two bags of concrete mix at a time to your wheelbarrow or whatever you are using for mixing the concrete. Add a little bit of water at a time and use the trowel to mix the concrete until you get a clay consistency. You don’t want the mix to be too runny because it will make it hard to shape the rocks, but don’t make it too dry as well.
Scoop some of the concrete mix from the wheelbarrow right on top of the ground and use your hands (or molds) to shape it into a paver. I recommend making one larger stepping rock in the center of the path (where your foot falls naturally as you walk) and filling around it with smaller pavers. Add whatever design or design elements into every paver right after you shape it then let the paver dry. - Step four – add pea gravel or/and plants. Once your pavers are dry and set, fill in between them with pea gravel, plants, another kind of rock, or whatever else you can come up with.
Notes
Frequently Asked Questions...
- How high/thick are the concrete pavers?
My pavers are about two inches thick. This seems to work well, it’s not too thick yet they aren’t going anywhere. - Do you use any reinforcement in the concrete pavers?
No metal or any other kind of reinforcement in the pavers! It’s simply concrete on the ground. - How many concrete bags am I going to need?
One 50-pound concrete bag made one large center rock and a couple of smaller ones beside it. For a 25 feet walkway, I used 16 50-pound bags. Of course, it also depends on the width of your path and the size of each paver.


Hi! I’m Lady Lee. I help homesteaders simplify their homesteading journey while still producing a ton of food! I am a single mother of four, I was born in Israel and raised in an agricultural commune called a Kibbutz. Now I homestead in central NC.