
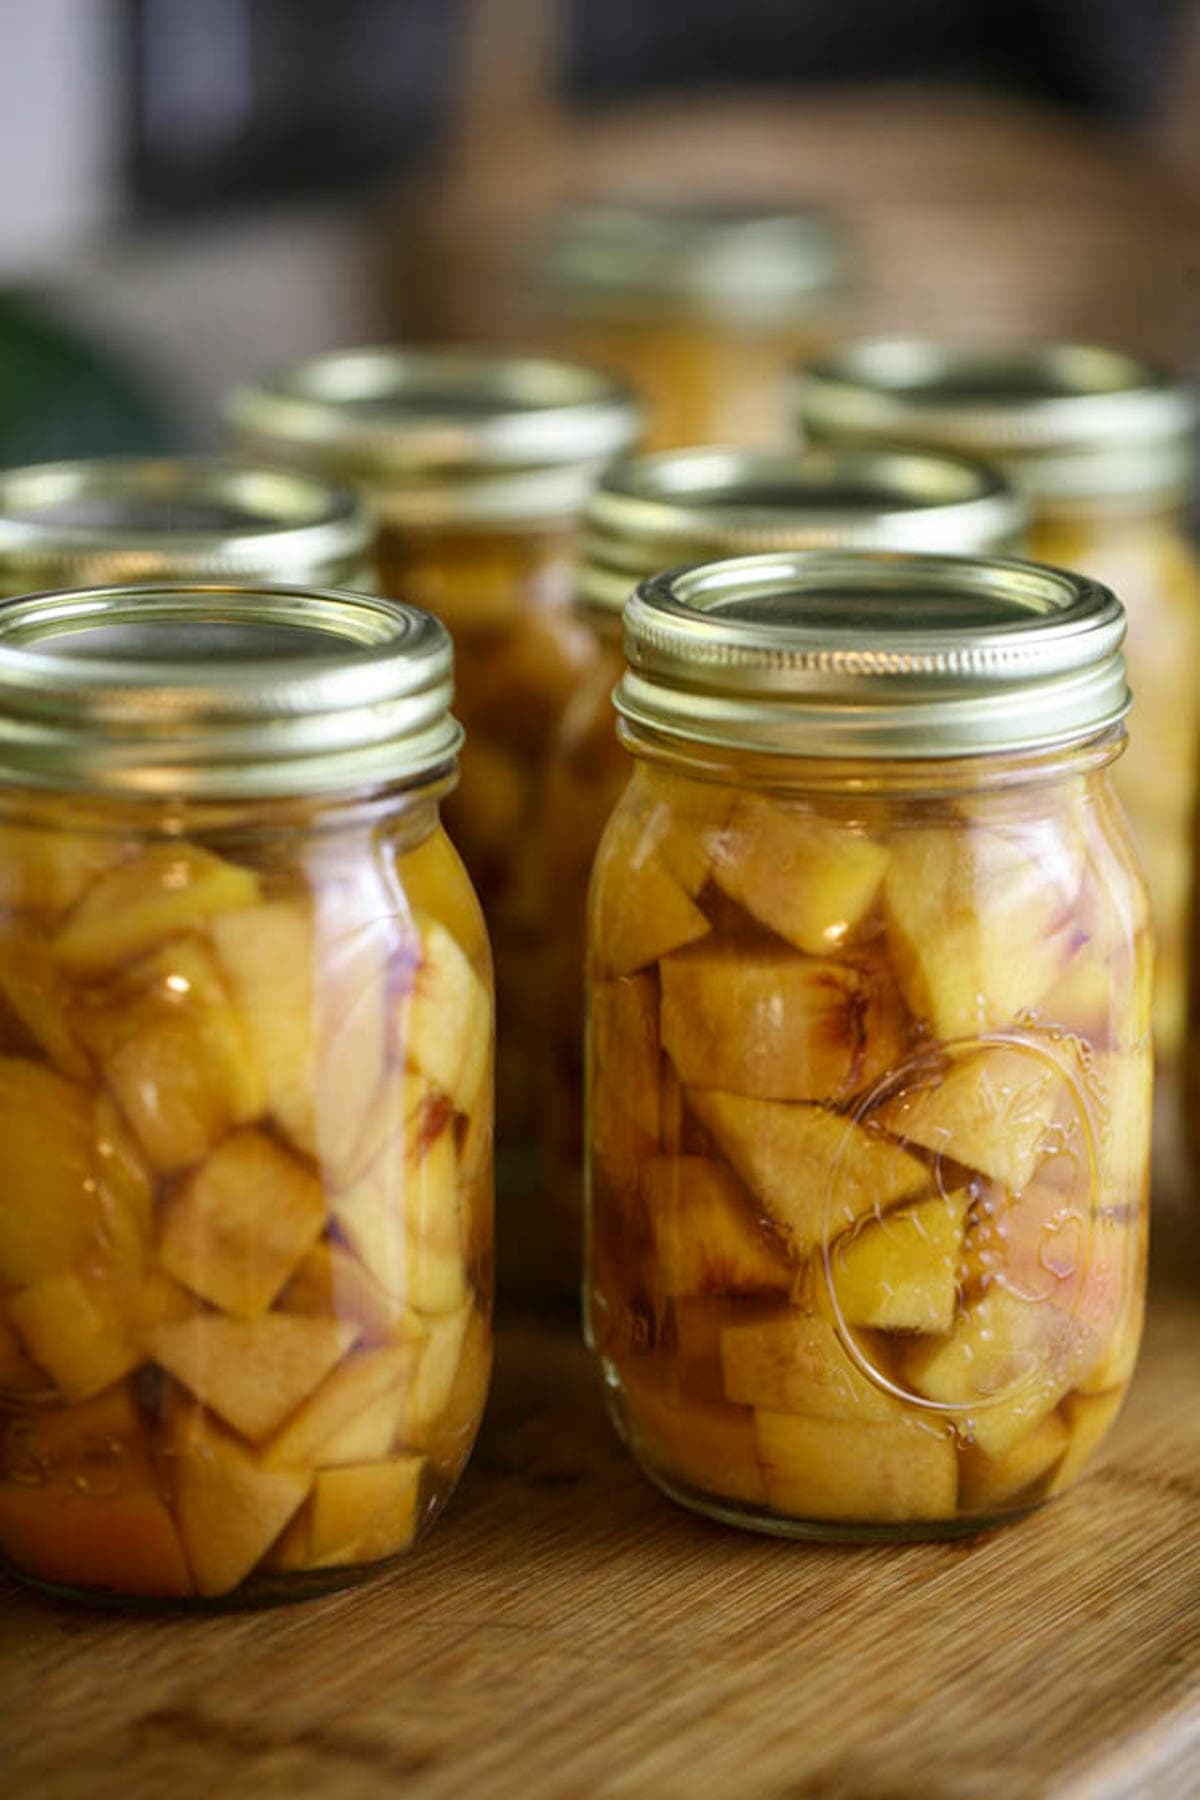
Canning peaches is simple and a great way to preserve the summer harvest. Canned peaches can be used in many different ways and are a great ingredient to have on hand. Learn how to can peaches in syrup at home!
Peaches… I’ve never met anyone who doesn’t like peaches! They are juicy and sweet and beautiful and delicious. You can bake with them, make fruit smoothies, make ice cream, make peach jam, eat them fresh… The possibilities are endless!
I can never get tired of peaches and I am hoping that in the very near future I’ll be planting my own peach tree (or trees!) here on the farm so we can harvest our own peaches. I can eat and use peaches year-round but they aren’t available year-round in the store. So every summer I can as many peaches as I can to last us until the following summer.
Canning Peaches Step by Step…
Canning peaches is very easy. There is some prep work involved but overall the whole process is easy and a lot of fun. I’ll walk you through all the options and the steps below!
Hot Pack Vs. Raw Pack…
- Hot pack – in the hot pack method the peaches are cooked for a few minutes in the syrup before packing them into the jars and processing them in the water bath canner. The cooking removes a lot of the air that is in the fruit, preventing them from floating in the jars and allowing you to pack more fruit into each jar. In the case of peaches, it also prevent them from browning in the jars. This is a great method to follow if you don’t mind the extra few minutes of work.
- Raw pack – in the raw pack method, the fresh peaches are packed into the jars and a hot syrup is poured over them. You then close the jars and process them. It’s easier and faster, however, your peaches might turn a shade browner after a few months in the jars. These method is great for fruit like blueberries and raspberries.
I personally almost always choose the raw pack method simply because it’s quicker. I don’t care much if my peaches turn a shade darker, they are still good to use and taste just as delicious as when they were fresh. If you know that your peaches are going to stay on the shelf for a long period of time, it might be better to choose the hot pack. I’ll walk you through the raw pack method and point out what to do differently if you choose the hot pack method.
Best Peaches For Canning…
- Yellow flesh peaches – it’s best to choose a variety of yellow flesh peach for canning because they are a bit more acidic than the white flesh varieties. In fact, the National Center for Food Home Preservation lists white-flesh peaches as a low acid food and not safe for home canning.
- Freestone or Clingstone peaches – in Freestone peach varieties the flesh separates from the pit easily. Clingstone varieties are varieties that the flesh clings to the pit and it’s a bit harder to separate the pit from the flesh.
Both Freestone and Clingstone varieties are just fine for canning peaches, however, you can guess that prep work is going to be a bit easier with Freestone varieties than clingstone.
Most grocery stores these days sell Freestone varieties, but if you happen to pick a Clingstone variety don’t worry. You just have to cut around the pit when preparing your peaches for canning. That is the only difference.
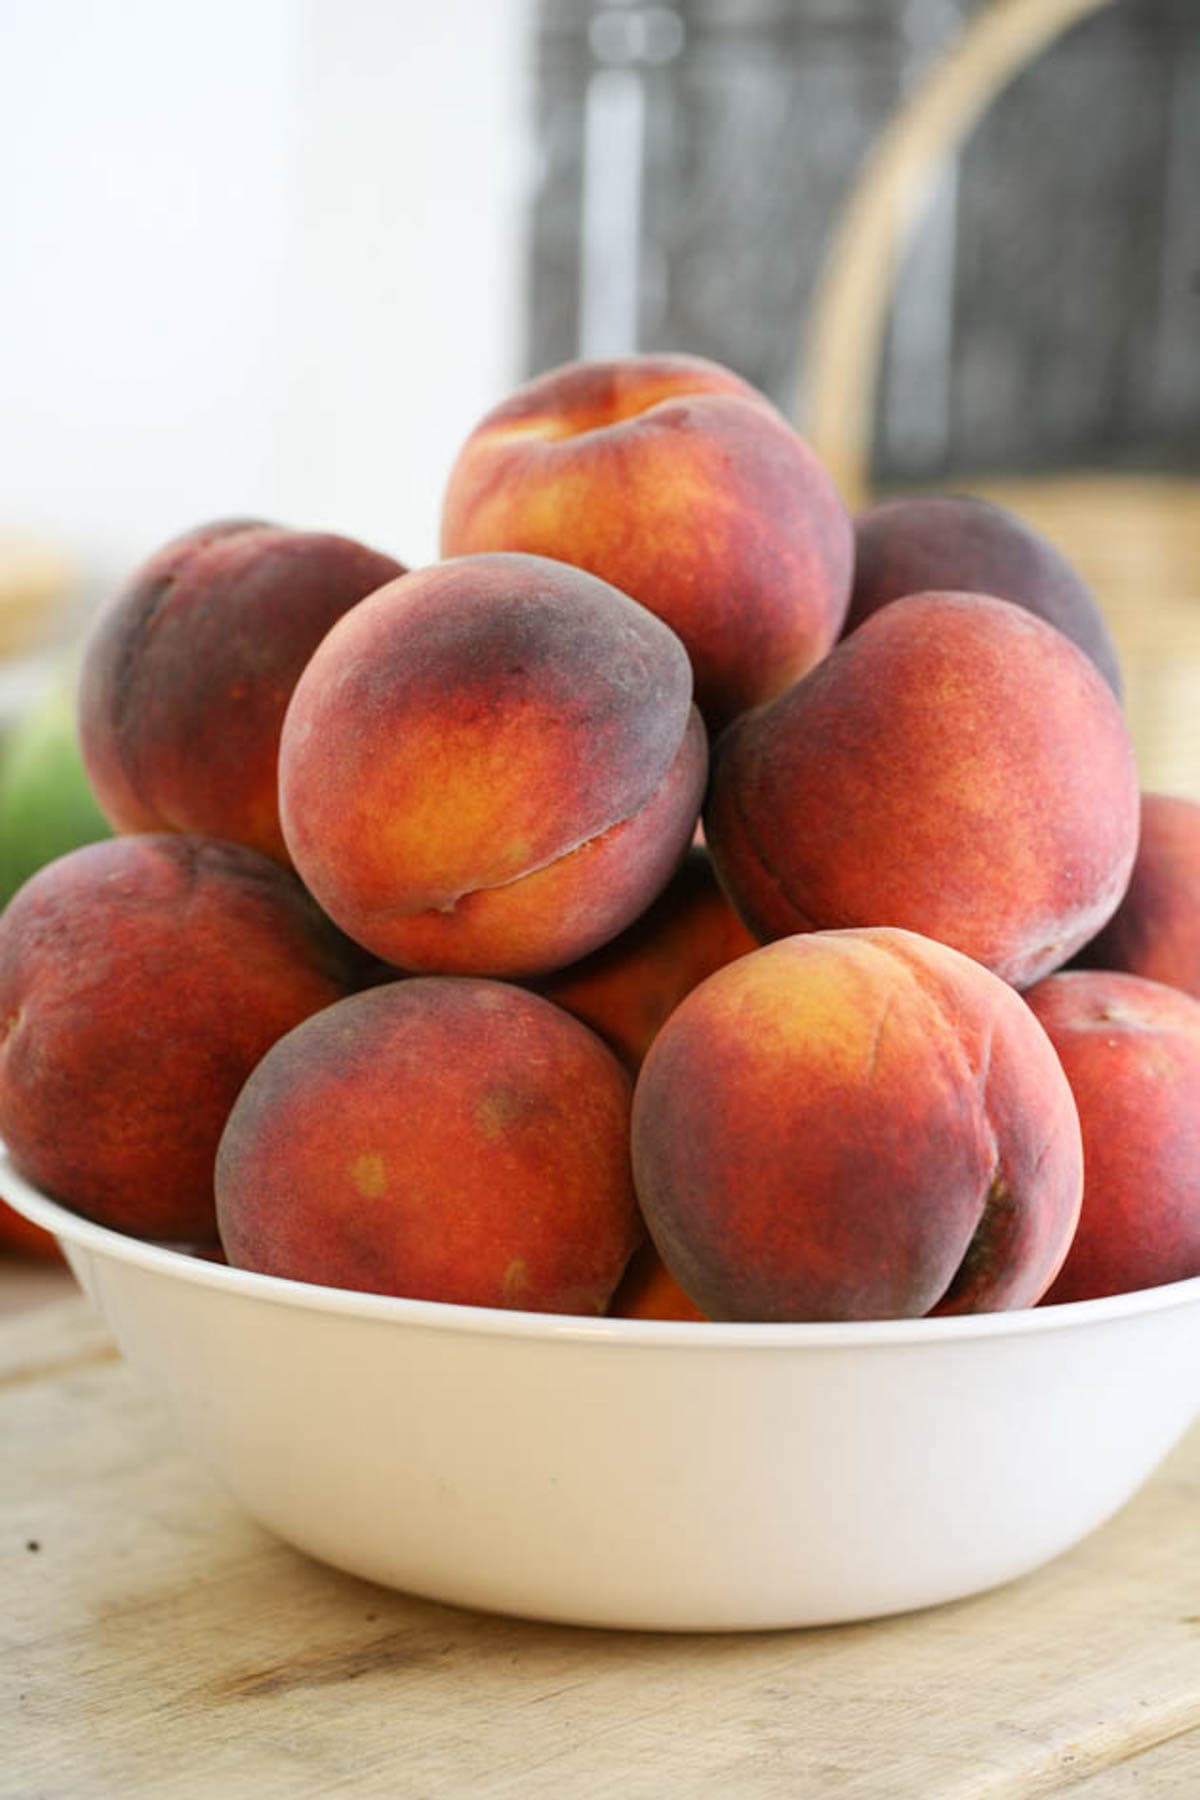
**A side not… If you are a homesteader in the process of choosing fruit trees for your homestead and you plan to can some of your peaches, you might want to choose a Freestone, yellow-flesh peach tree variety. - Ripeness – you want to choose peaches that are not too hard but also not too soft and ripe. It’s a bit harder to peel the hard peaches and they are not as sweet, but it’s a pain to mess with too ripe peaches that are falling apart on you as you try to can them.
Ingredients…
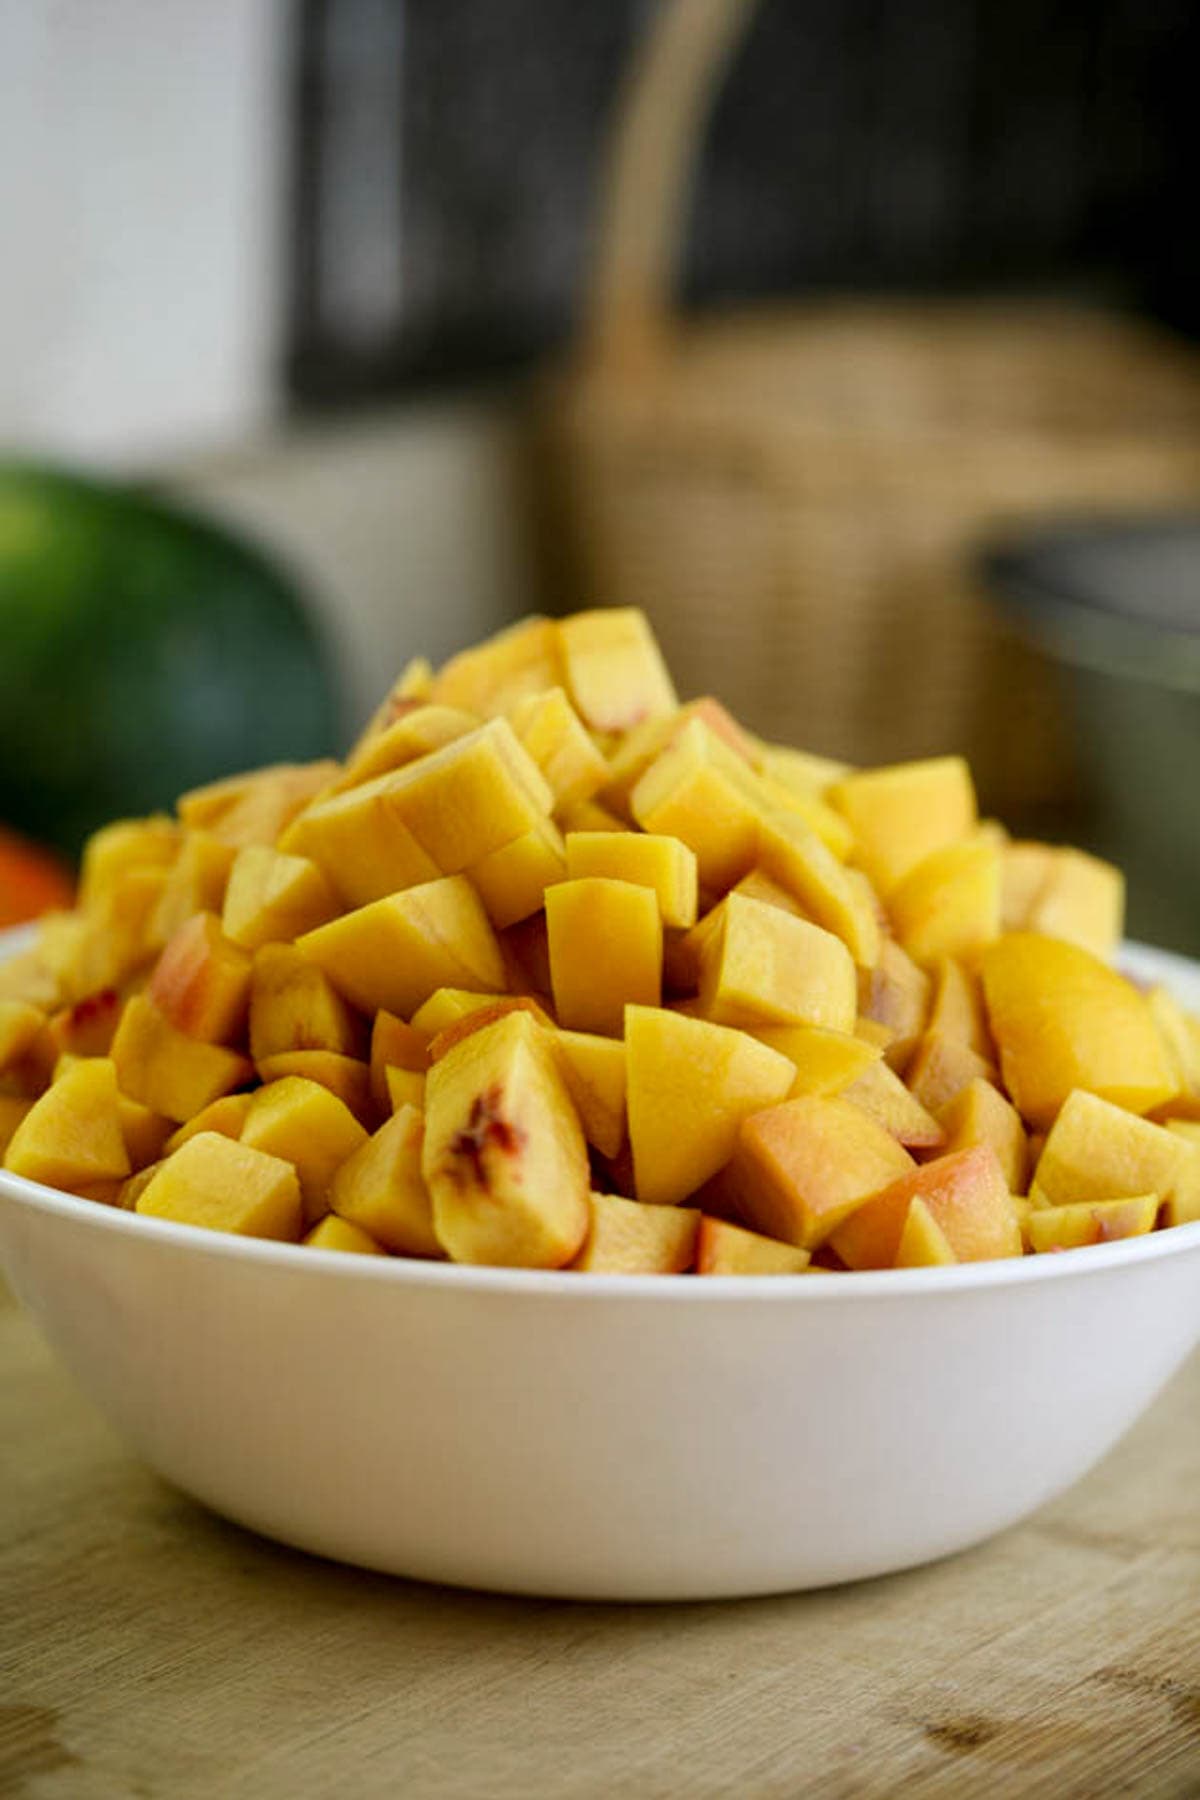
- Peaches – process as many as you want. Just to give you an idea, I ended up with 8.3 pounds of diced peaches to can after I removed the skins and the pit (I started with 10 pounds of peaches). This amount filled 10 pint-jars. One pint-jar holds about two cups of diced peaches (a tiny bit less). I assume that a quart jar will hold somewhere between 3 to 4 cups of diced peaches.
- Seasonings – are optional. Some people like to add a cinnamon stick or a couple of whole cloves to their canned peaches.
- To make the syrup – peaches are actually sweet enough that you can can them in just water, however, the result is not too great (the water simply washes the flavor out). You can also use fruit juice like apple juice or white grape juice, but to me, it kinda messes up the peach flavore a bit. Then, there is the option of making a more sugary syrup or a less sugary syrup…
Since I like keeping things simple, I’m gonna give you two options to choose from:
Option number one uses good old sugar to make a very light syrup. Use 9 cups of water and one cup of sugar.
Option number two is for those of us who prefer canning peaches in honey. Use 9 cups of water and one cup of honey.
Canning Equipment for Canning Peaches…
- A large pot
- A slotted spoon
- A large mixing bowl
- Cutting board
- A knife and a potato peeler
- Jars – you can go with quart jars or pint jars, whichever is just fine.
- Lids and rings
- A saucepan
- A ladle
- A paper towel
- Canning utensils
- Waterbath canner
How to Can Peaches…

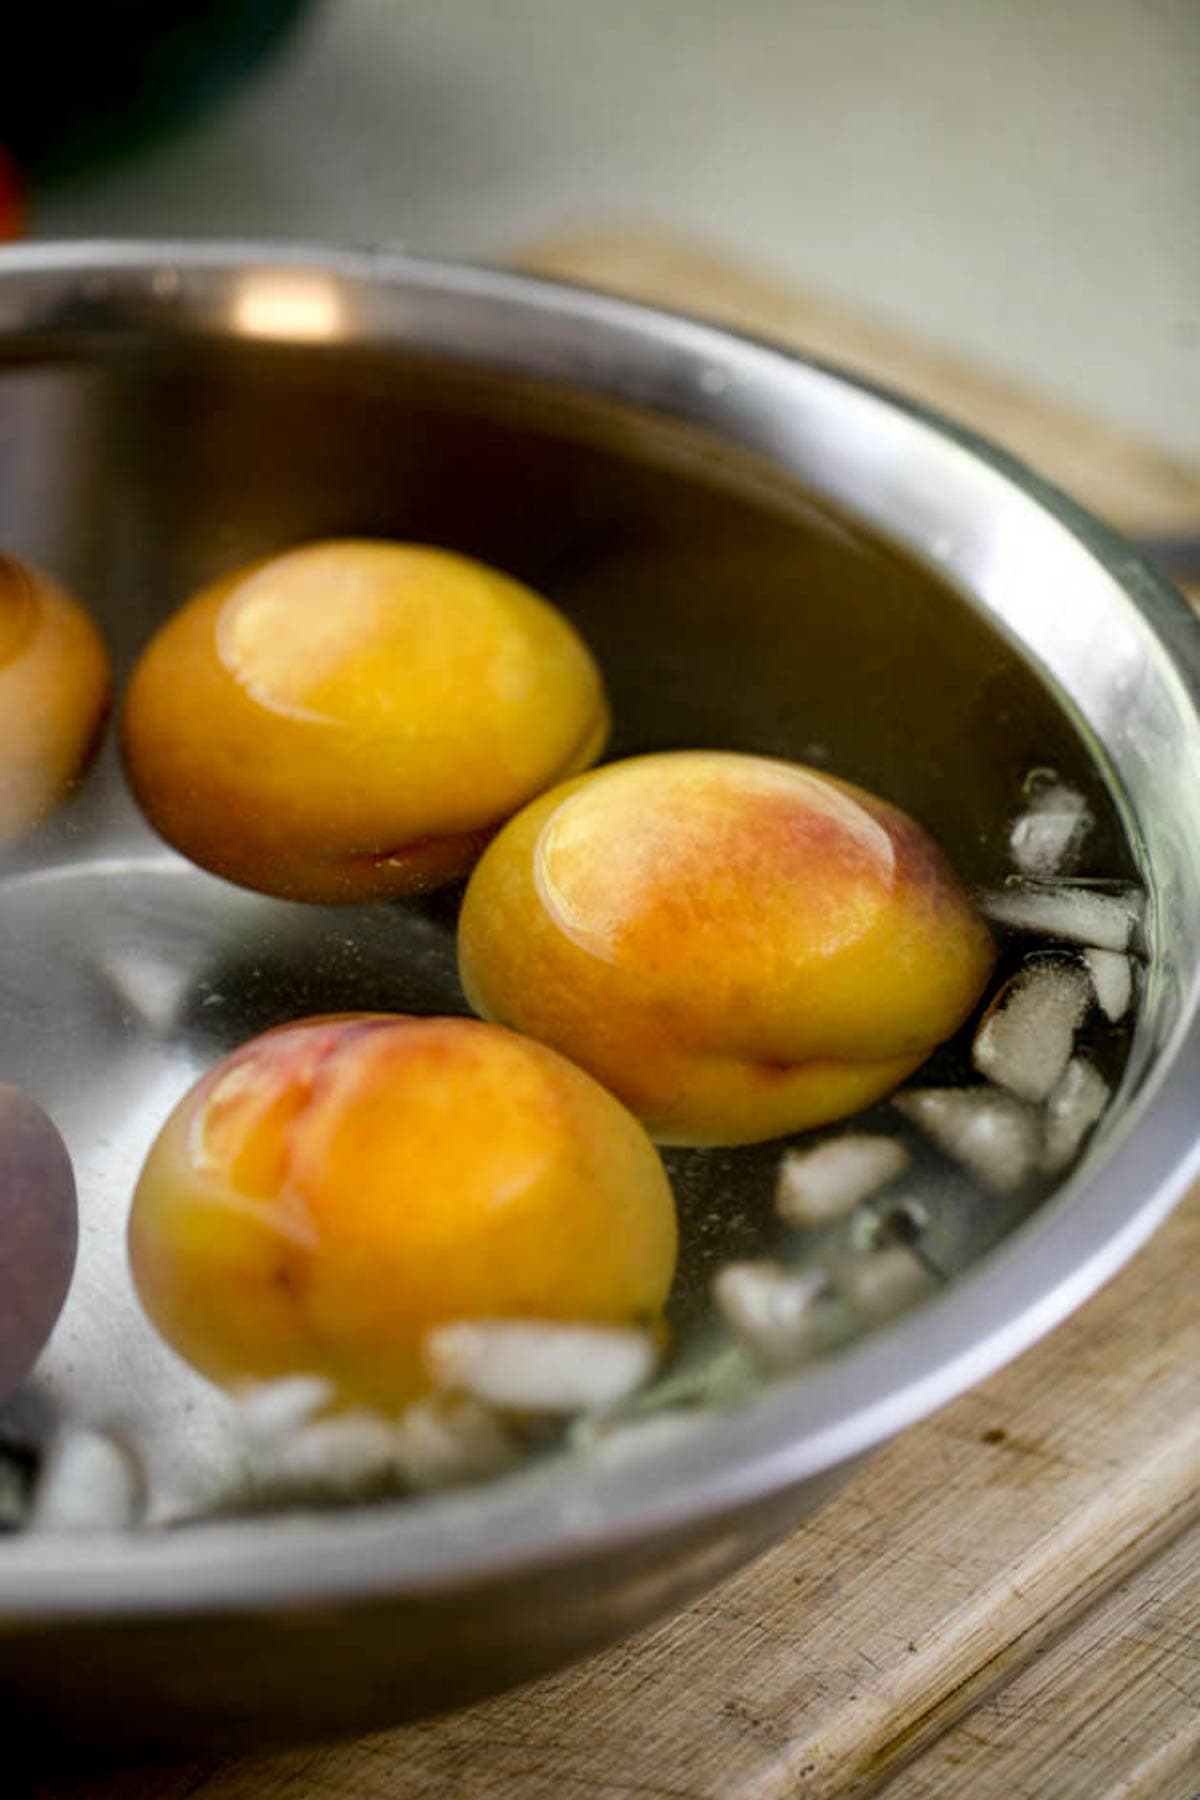
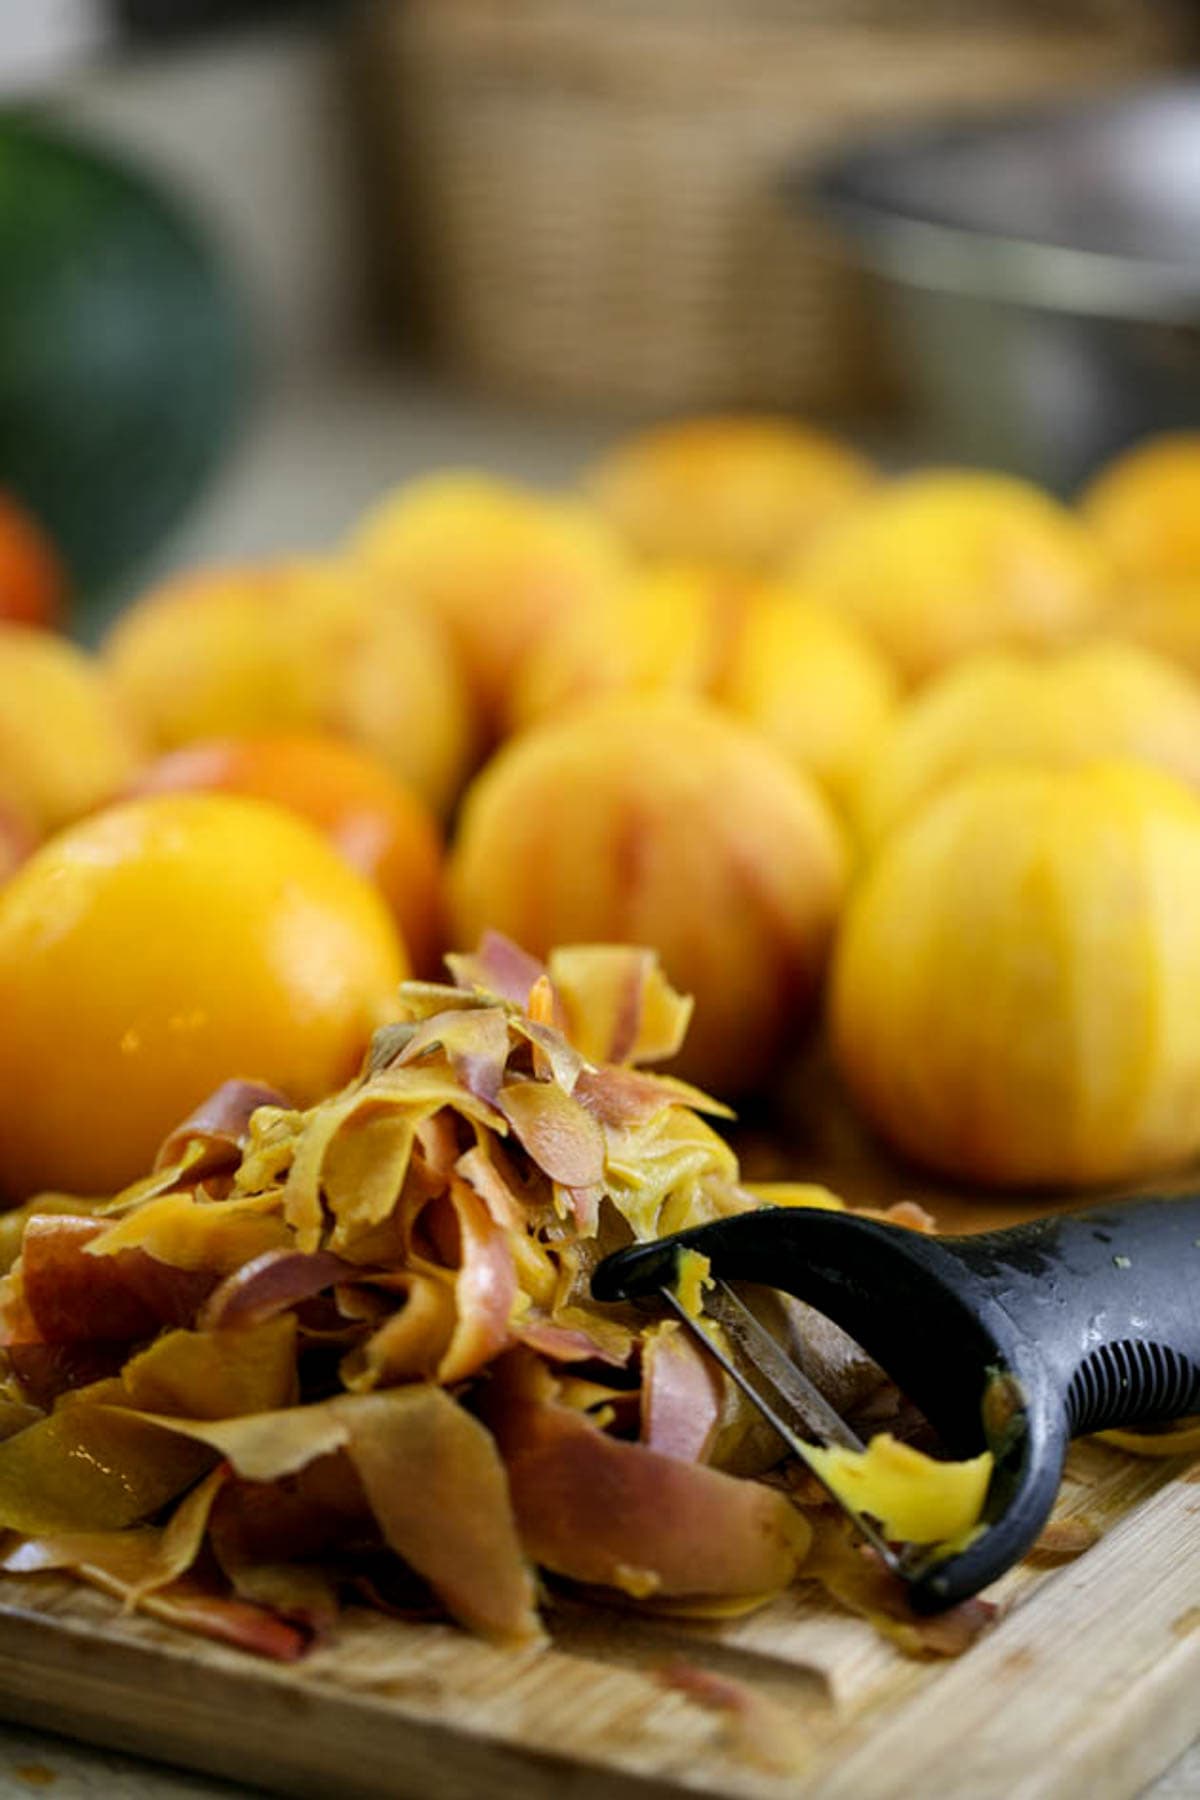

Step one – prep the peaches. First, let’s peel the peaches. Bring a pot of water to a boil. Close to it, on the counter, set a large bowl of water and add ice to create an ice bath. Cut an X at the bottom of each peach and once the water in the pot is boiling add a few peaches at a time and let them hang out in the boiling water for two to three minutes.
When the time is up, use a slotted spoon to scoop the peaches out of the boiling water and right into the bowl of ice-cold water. This will stop the cooking process. Let the peaches float around in the ice-cold water for a couple of minutes. Once they have cooled take them out and peel them.
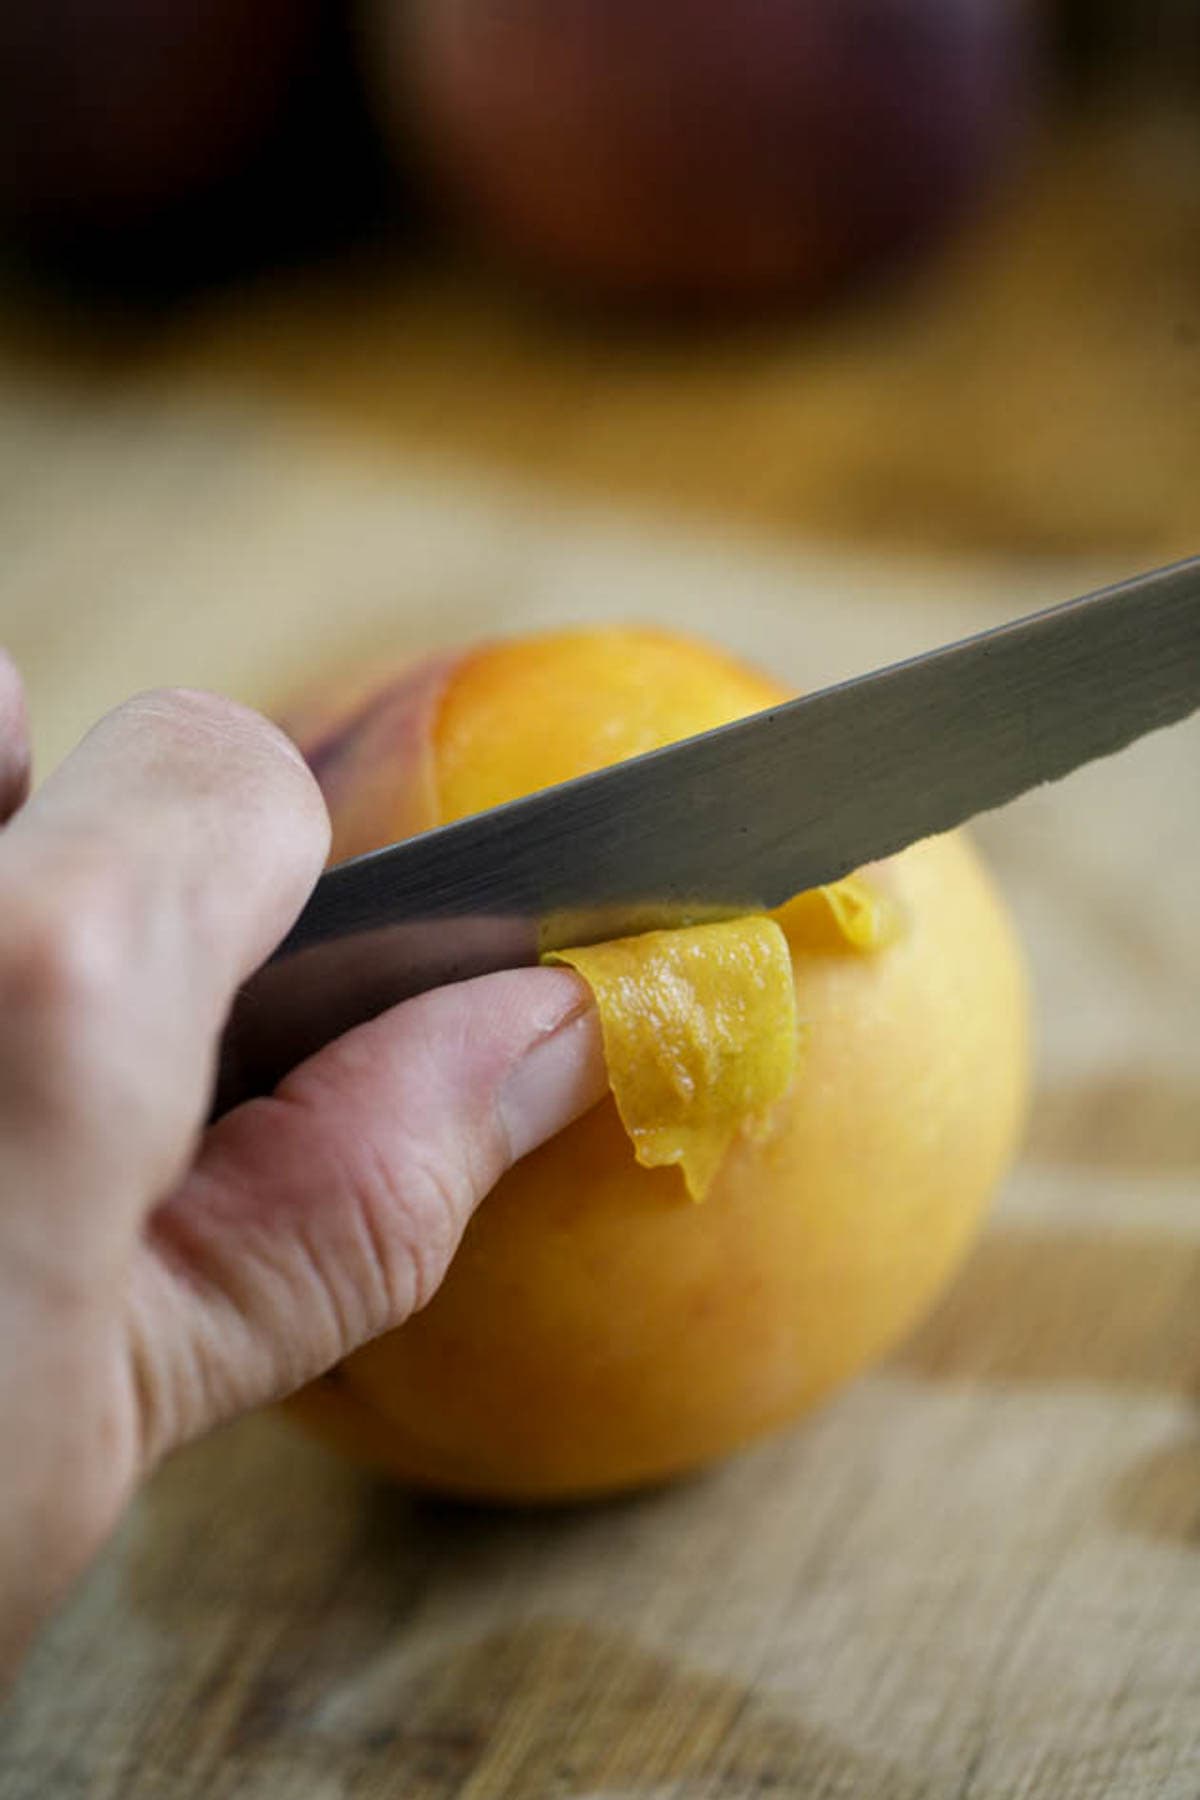
I usually use my knife as you can see in the picture above but in some cases, all you need are your hands. Some peaches peel very easily… And some, not so much… I find that the ripe, softer peaches peel more easily than the firmer peaches. But sometimes even that doesn’t help so I simply use a potato peeler to get the job done.
Next, half the peaches, remove the pit, and either dice or slice the peaches. I can my peaches diced, but it’s up to you. You can can slices, quartered, or even halved peaches (just not whole peaches).
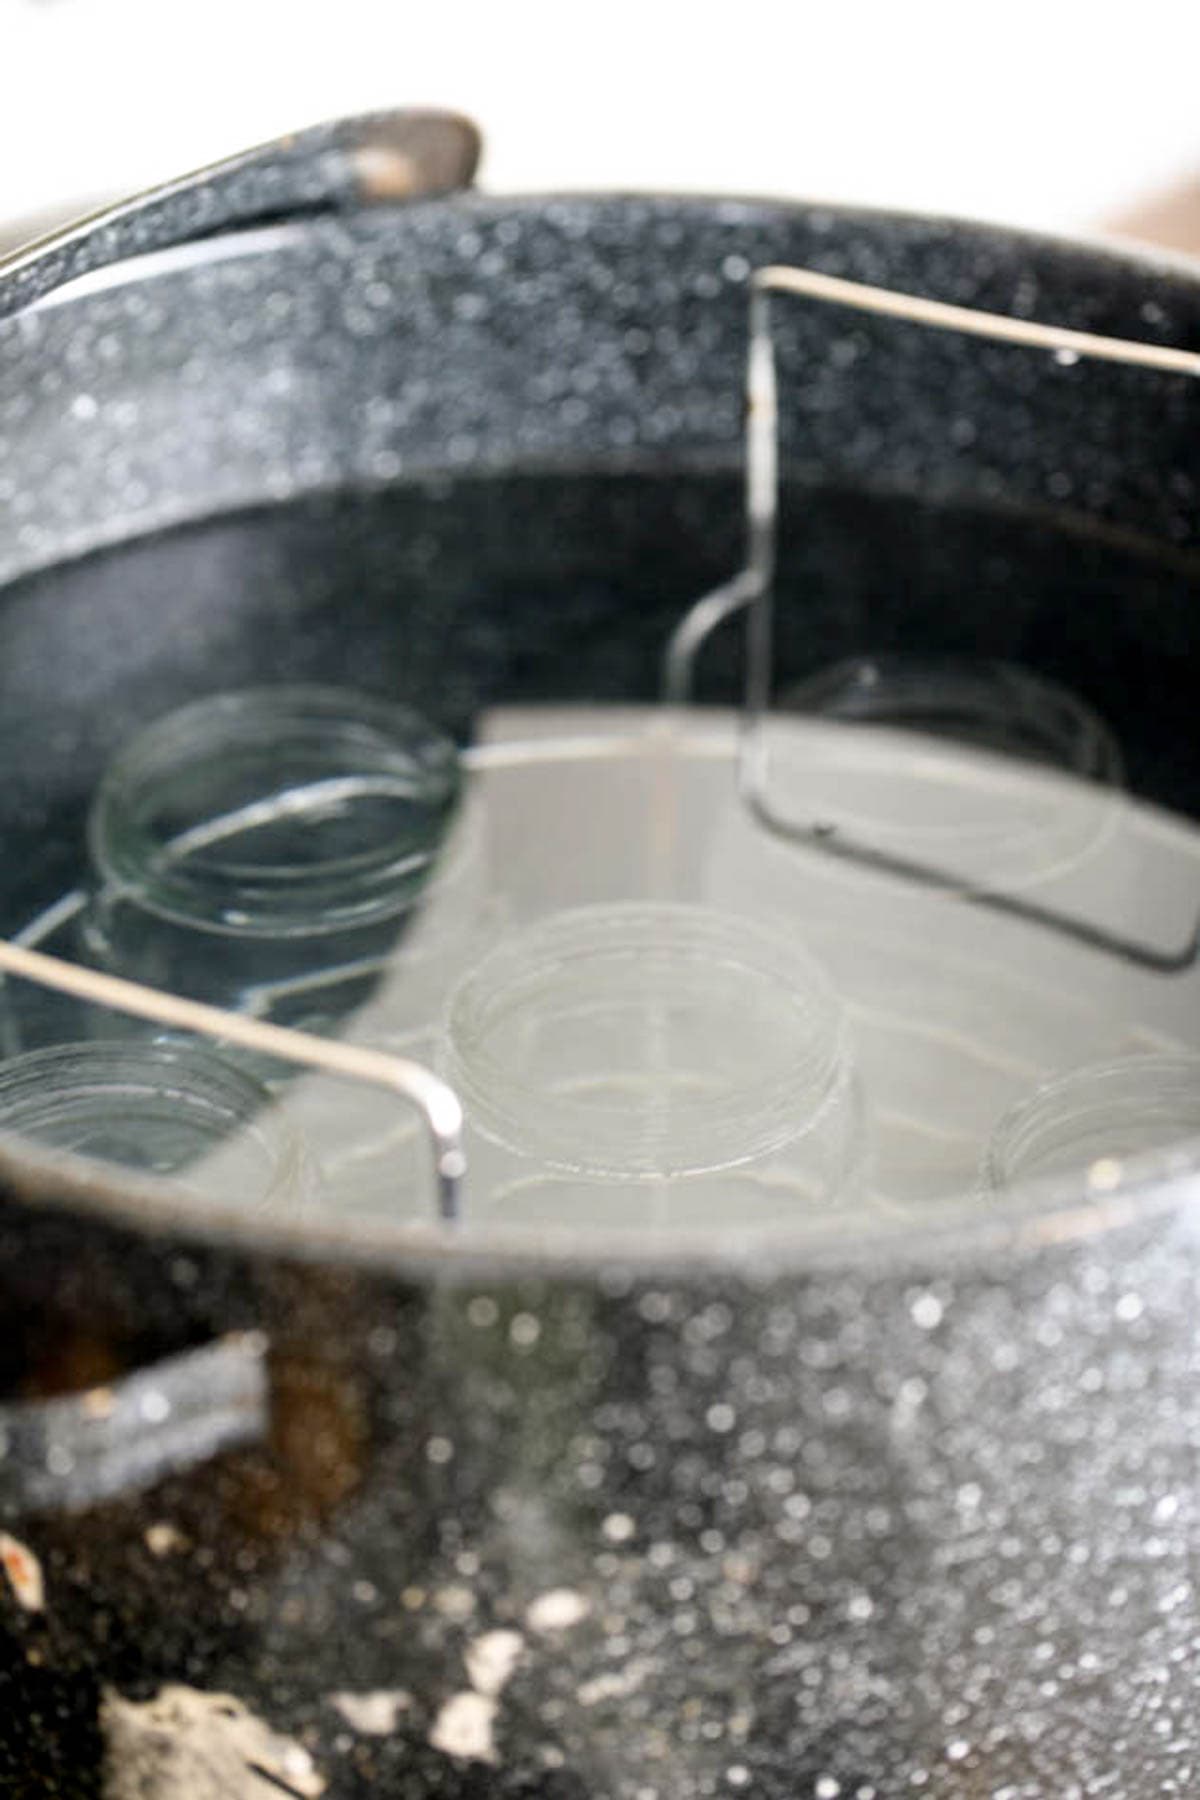
Step two – prep for canning. Fill the water bath canner with enough water to cover the jars by about an inch. Set it on the stovetop, cover the canner, and turn the heat to high. Bring the water in the canner to a boil. Also, make sure to wash your jars, lids, and bands with hot water and dish soap.
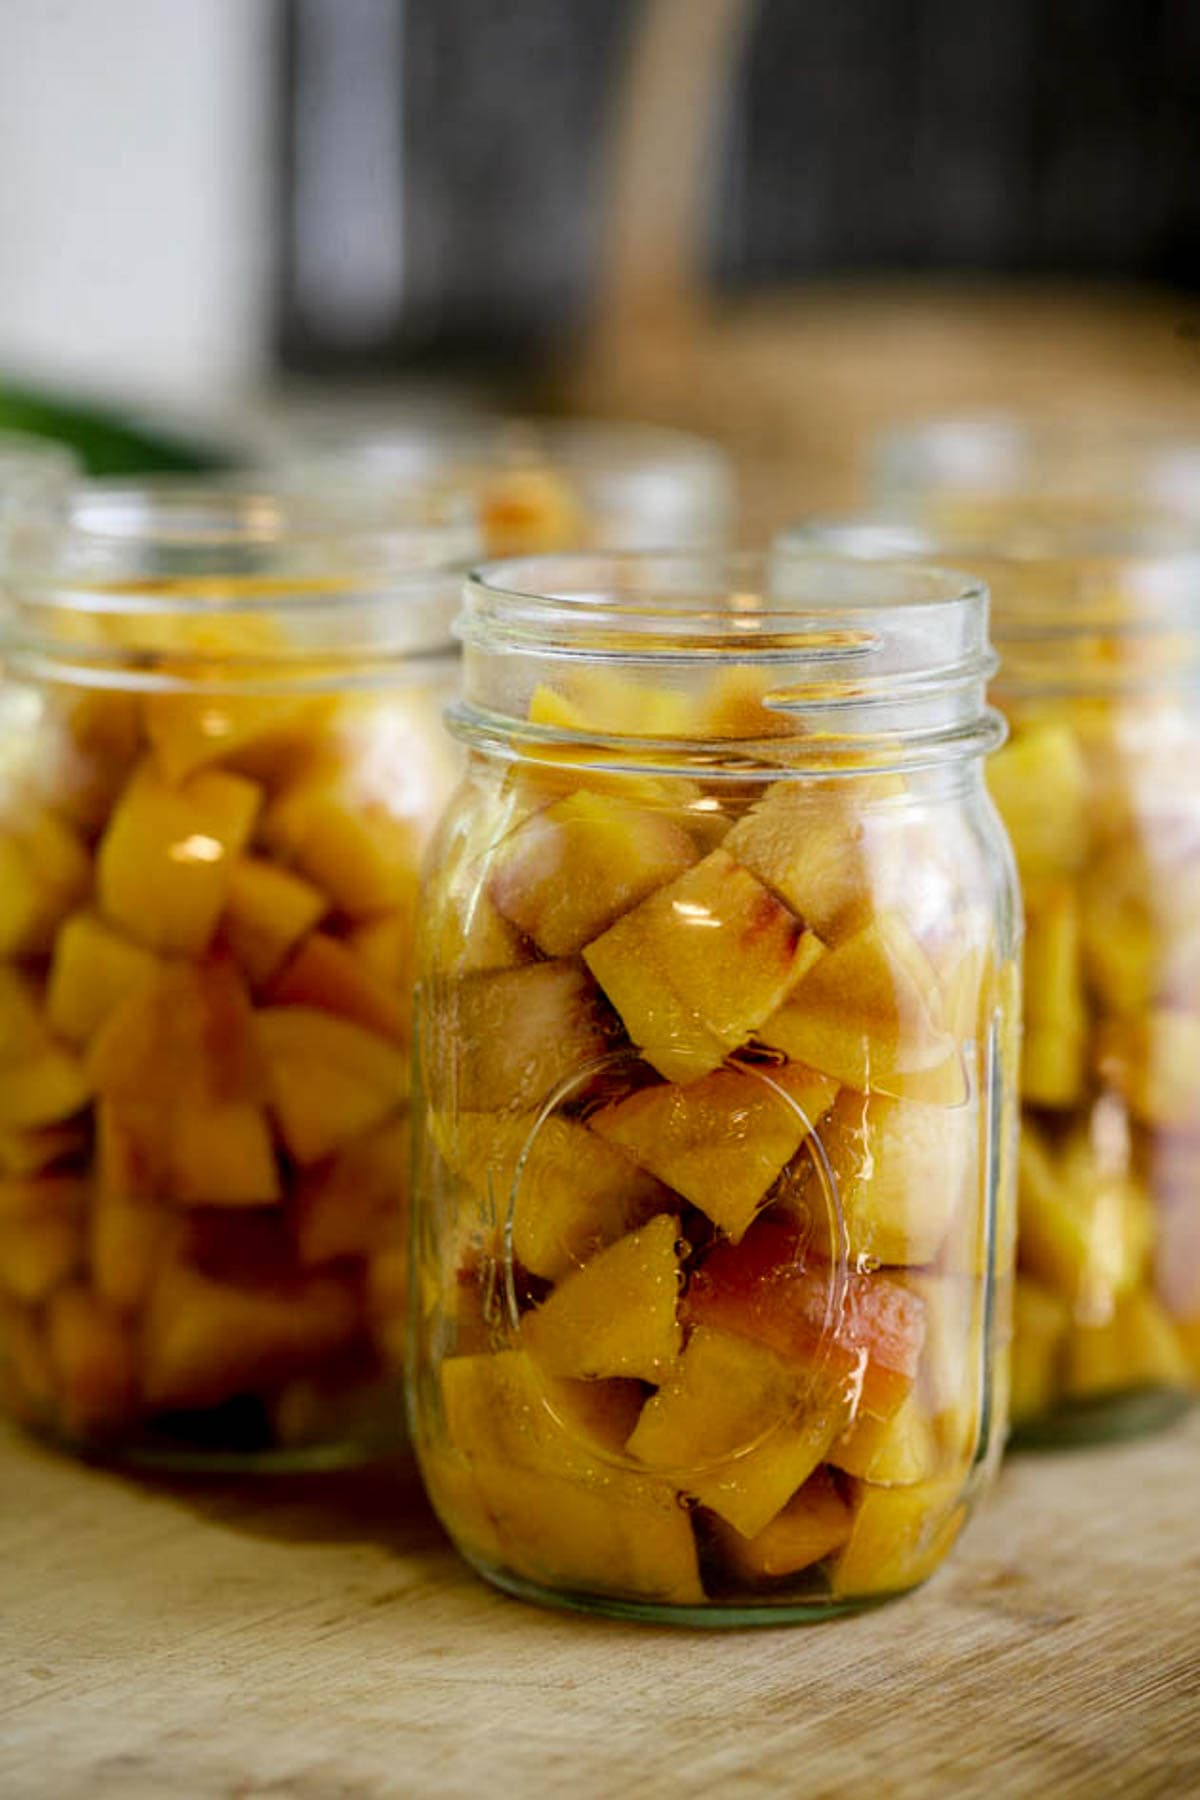
Step three – pack the jars. Add the peaches into the jars making sure to leave about an inch of headspace. If you’d like to season your peaches, go ahead and add the seasonings now.
** If you choose to hot pack your peaches, skip this step and move on to the next one…
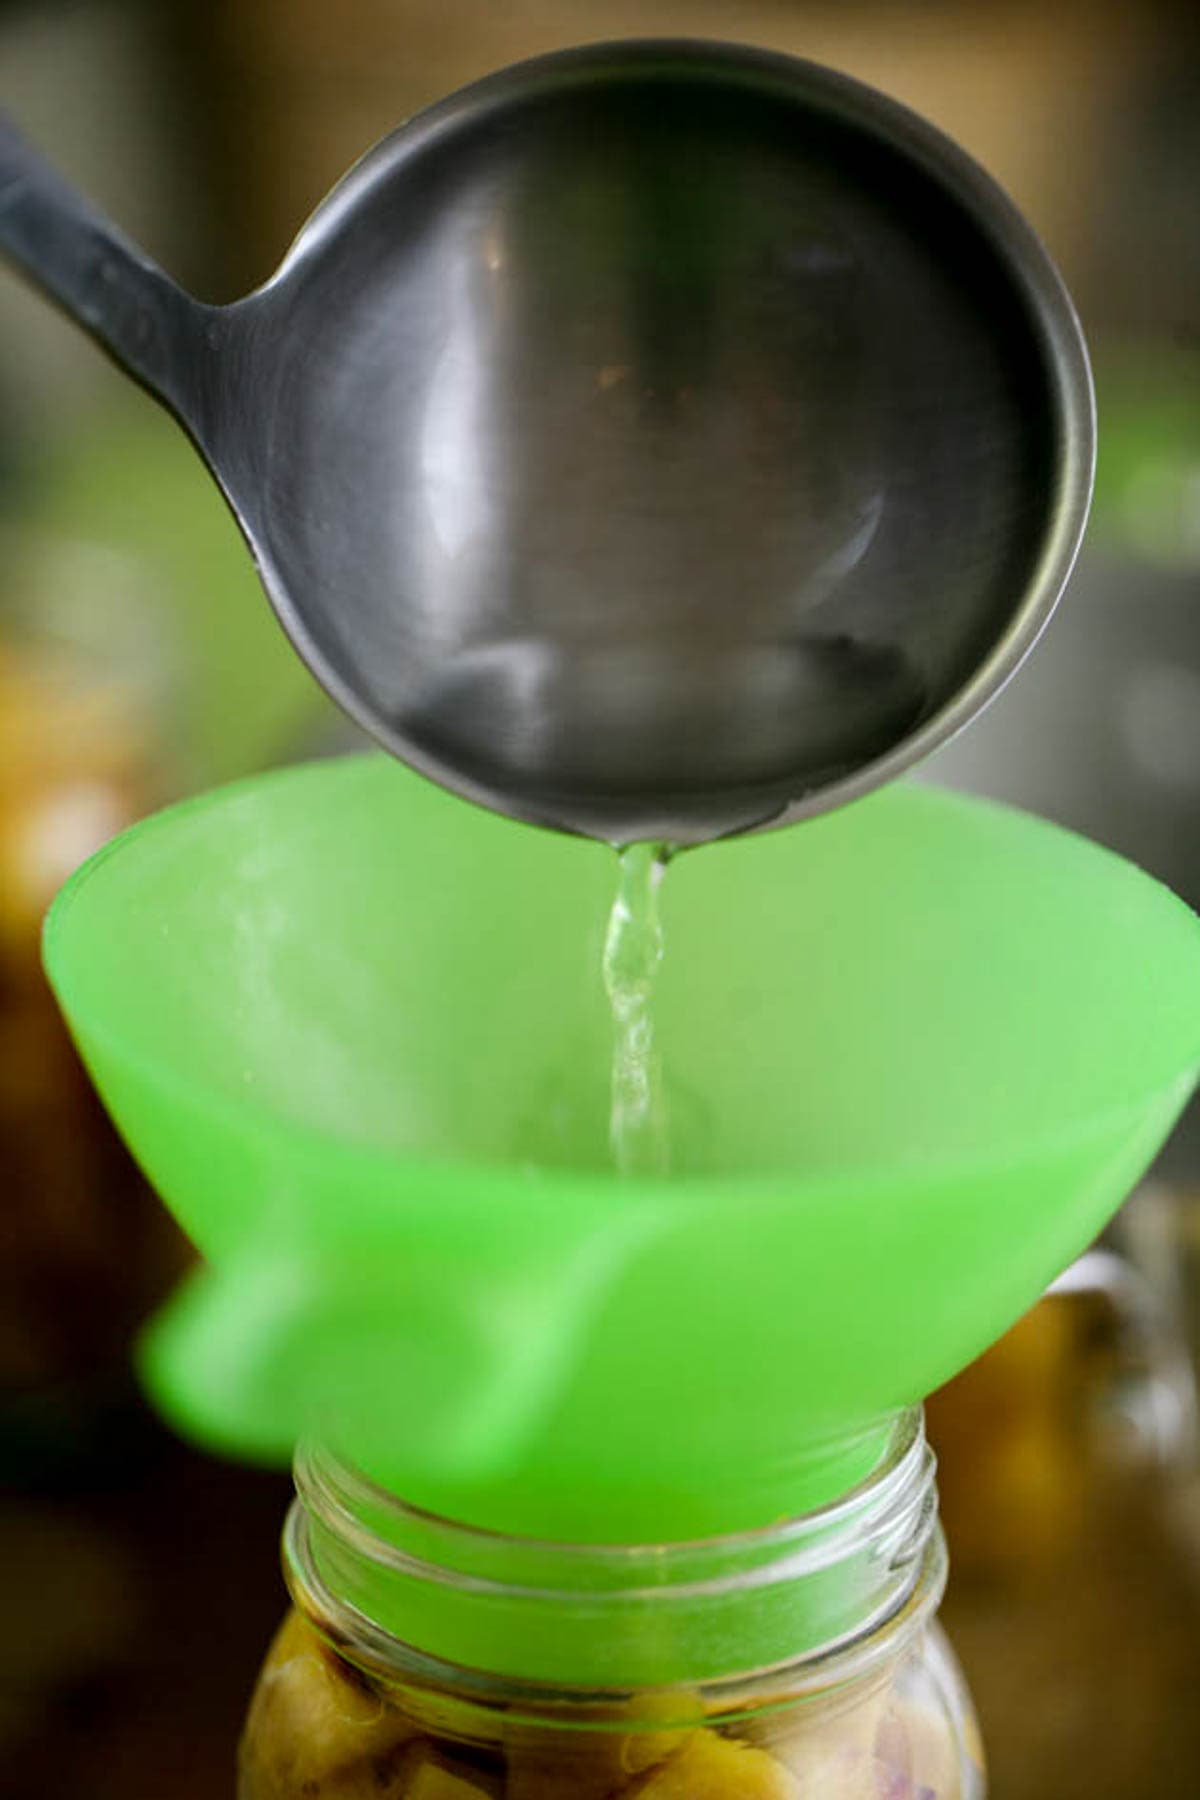

Step four – make and add the syrup. Add the water and either a cup of honey or a cup of sugar to a saucepan and set on the stovetop. Turn the heat to medium-high and cook, stirring constantly, until the sugar or honey dissolves and the mixture comes to a boil. Remove from the heat and ladle into the packed jars, make sure to leave 1/2 – 1 inch of headspace.
** If you choose to hot pack your peaches, bring the syrup to a boil, add the peaches and cook them for a few minutes. Then, use a ladle and a funnel to pack the jars, leaving 1/2 – 1 inch of headspace.

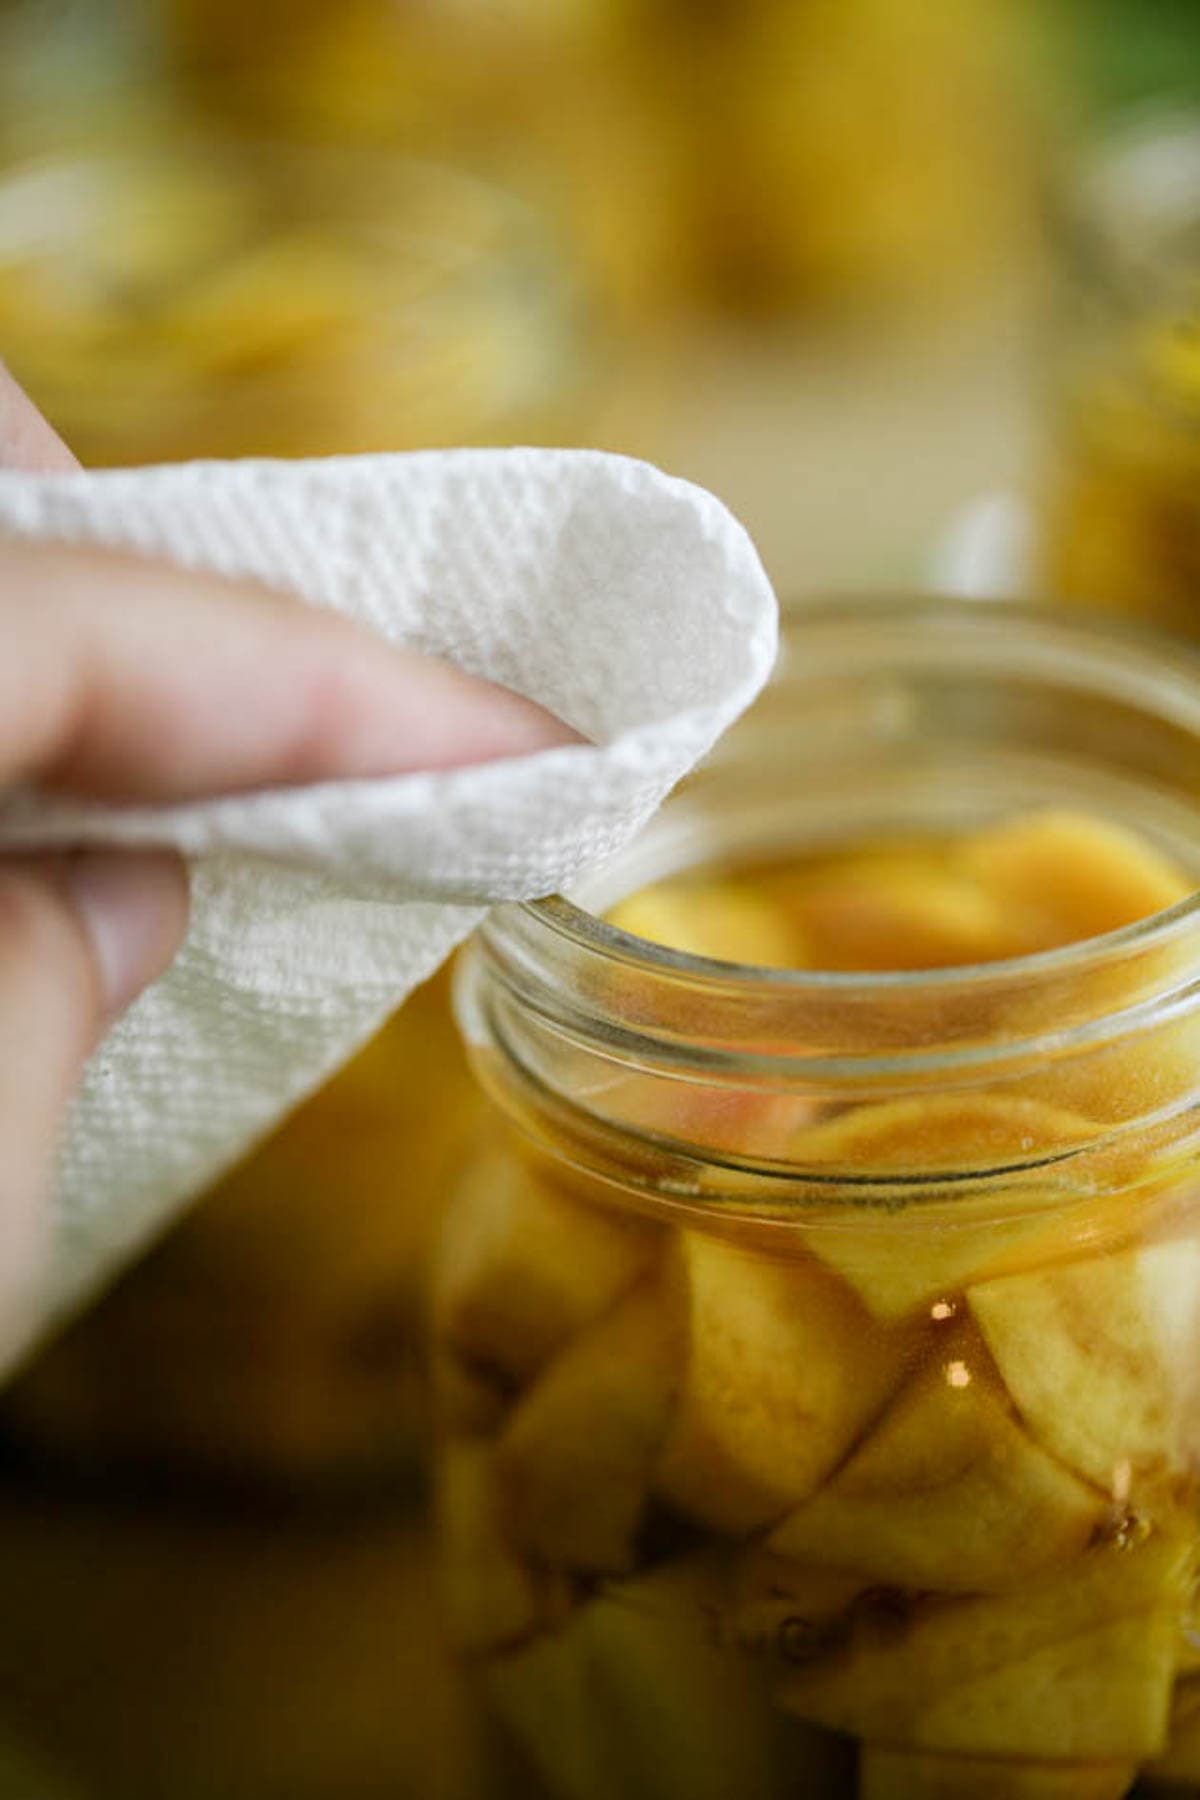
Step five – get the jars ready for processing. Use the bubble remover to remove any air bubbles by scraping it along the inside of the jar. Use a clean, damp paper towel to wipe the rim of the jar, then center the lid and close the jar with the band fingertight.
Step six – process the jars. Set the jars on the rack of the water bath canner and lower them into the boiling water. Cover the canner and process pint jars for 20 minutes and quart jars for 25 minutes. Remember to adjust processing time according to the table below if you live above 1000 feet in elevation.

Once processing time is up, remove the jars from the canner and set them on a kitchen towel on the kitchen counter to cool completely overnight.

Storing Canned Peaches…
When your jars are cool, check them to make sure they are all sealed simply by pressing on the top of the lid. If there is no movement there, your jar has sealed successfully and is ready for storage. If you find a jar that didn’t seal, you can process it again (change the lid) or you can store it in the fridge to use first.
Wipe the jars and remove the band before storing the jars. The bands sometimes rust and make it hard to open the jar down the road. You can also reuse bands when canning something else. Store your jars at room temperature in the pantry, a kitchen cabinet, or on the self. Canned peaches should last 12-18 months.
How to Use Canned Peaches…
If you are here reading this tutorial, I’m sure that you already have a million ideas on how you’re going to use your canned peaches but I’ll share a few of my favorite ways with you anyway. I just want to note here that when you open your jars to use the peaches you should know that you can also use the syrup! It’s delicious and is a great way to sweeten smoothies or use instead of water in baked goods.
- Smothies – if we are on the subject of smoothies, let’s note that no smoothie is going to complain if you throw a few peaches in it!
- Baked goods – from cobblers, to crumble, to tarts, upside down cakes, peachy cheesecake, crumble bars, and on and on. The list of delicious, peachy baked goods is a never ending one!
- Ice cream – either make a peach ice cream or a homemade peach sorbet, or simply add some canned peaches over vanilla ice cream.
- With yogurt – my breakfast of choice! Homemade granola with canned peahces over my own raw milk yogurt or store-bought milk yogurt!
- Peach sauce – make a quick peach sauce by adding the peaches and their juice to a saucepan. Add a bit more sugar (if you want), and mash the peaches as they cook until the sauce reaches your desired consistancy. Then, add over pancakes, French toast, French crapes, ice cream and so on.
Frequently Asked Questions…
Two cups of diced peaches fit in a pint jar. In a quart jar, you can fit a little less than four cups of diced peaches.
Yes! You can can sliced peaches, quartered peaches, halved peaches… Just don’t can whole peaches. Make sure that you remove the pit.
You sure can. Some people like to add a cinnamon stick, some like to add a bit of nutmeg, some like to add a couple of whole cloves. You can even add chili flakes if you want to add spiciness to your peaches. Just think about what are you planning to do with your peaches later.
Yes, it is if you are using the raw pack method. Sometimes, a few weeks after canning, peaches turn a shade browner. Personally, it doesn’t bother me. They are still good to eat and are perfectly fine. Some people like to add a little bit of lemon juice to the jars to prevent that. If you decide to do that, use bottled lemon juice and not fresh lemon juice since its acidity is uniform and known. I’ve never done it so I can’t tell you for certain that it works. If the change in color bothers you, you should hot pack your peaches. Cooking them before packing the jars prevents them from turning brown.
I hope that this tutorial on canning peaches was helpful! Peaches are a fruit that can always be enjoyed in so many different ways but one that is not available for us in the grocery store year-round. So canning peaches during their season is a great way to ensure that you always have this amazing fruit on hand!
More Water Bath Canning Tutorials…
Canning Peaches
Learn how to can peaches. I'll walk you through the raw pack method with side notes for the hot pack method. If you need to learn more about the difference between the two options, please refer to the tutorial above.
Ingredients
- 10 lb of yellow flash peaches (approximately)
- 9 cups of water
- 1 cup of sugar or honey
- Seasoning - (optional) cinnamon, whole cloves, nutmeg...
Instructions
- Step one - First, let’s peel the peaches. Bring a pot of water to a boil. Close to it, on the counter, set a large bowl of water and add ice to create an ice bath.
Cut an X in the skin, at the bottom of each peach, and once the water is boiling in the pot, add a few peaches at a time and let them cook in the boiling water for two to three minutes.
Use a slotted spoon to scoop the peaches out of the boiling water and right into the bowl of ice-cold water. Let the peaches float around in the ice-cold water for a couple of minutes.
Take the peaches out and peel them with just your hands or with the help of a knife.
Then half each peach, remove the pit, and slice or dice it. - Step two - Fill the water bath canner with enough water to cover the jars by about an inch. Set it on the stovetop, cover the canner, and turn the heat to high. Bring the water in the canner to a boil. Also, make sure to wash your jars, lids, and bands with hot water and dish soap.
- Step three - Add the peaches into the jars making sure to leave about an inch of headspace. If you’d like to season your peaches, go ahead and add the seasonings now.
** If you choose to hot pack your peaches, skip this step and move on to the next one… - Step four - Add the water and either a cup of honey or a cup of sugar to a saucepan and set it on the stovetop. Turn the heat to medium-high and cook, stirring constantly, until the sugar or honey dissolves and the mixture comes to a boil. Remove from the heat and ladle into the packed jars, make sure to leave 1/2 – 1 inch of headspace.
** If you choose to hot pack your peaches, bring the syrup to a boil, add the peaches and cook them for a few minutes. Then, use a ladle and a funnel to pack the jars, leaving 1/2 – 1 inch of headspace. - Step five - Use the bubble remover to remove any air bubbles by scraping it along the inside of the jar. Use a clean, damp paper towel to wipe the rim of the jar, then center the lid and close the jar with the band fingertight.
- Step six - Set the jars on the rack of the water bath canner and lower them into the boiling water. Cover the canner and process pint jars for 20 minutes and quart jars for 25 minutes. Remember to adjust processing time according to the table in the notes if you live above 1000 feet in elevation.
Once processing time is up, remove the jars from the canner and set them on a kitchen towel on the kitchen counter to cool completely overnight. - Step seven - Wipe the jars and check that they all have sealed. Remove the band and store the jars at room temperature in the pantry or on the shelf. Canned peaches should last up to 18 months.
Notes
Adjust processing time according to the table below...
Frequently Asked Questions...
- How many cups of diced peaches fit in a jar?
Two cups of diced peaches fit in a pint jar. In a quart jar, you can fit a little less than four cups of diced peaches. - Can I can halved or quartered peaches?
Yes! You can can sliced peaches, quartered peaches, halved peaches... Just don't can whole peaches. Make sure that you remove the pit. - Can I add seasonings to each jar?
You sure can. Some people like to add a cinnamon stick, some like to add a bit of nutmeg, some like to add a couple of whole cloves. You can even add chili flakes if you want to add spiciness to your peaches. Just think about what are you planning to do with your peaches later. - My peaches turned brown a little, is this normal?
Yes, it is if you are using the raw pack method. Sometimes, a few weeks after canning, peaches turn a shade browner. Personally, it doesn't bother me. They are still good to eat and are perfectly fine. Some people like to add a little bit of lemon juice to the jars to prevent that. If you decide to do that, use bottled lemon juice and not fresh lemon juice since its acidity is uniform and known. I've never done it so I can't tell you for certain that it works.
If the change in color bothers you, you should hot pack your peaches. Cooking them before packing the jars prevents them from turning brown.
Nutrition Information:
Yield: 20 Serving Size: 1 cupAmount Per Serving: Calories: 127Total Fat: 1gSaturated Fat: 0gTrans Fat: 0gUnsaturated Fat: 0gCholesterol: 0mgSodium: 4mgCarbohydrates: 32gFiber: 3gSugar: 29gProtein: 2g

Hi! I’m Lady Lee. I help homesteaders simplify their homesteading journey while still producing a ton of food! I am a single mother of four, I was born in Israel and raised in an agricultural commune called a Kibbutz. Now I homestead in central NC.