This post may contain affiliate links, view our disclosure policy for details.
Transplanting tomato seedlings to the garden is not complicated, however, there is a certain way to do it to ensure a healthy tomato plant that produces a ton of beautiful tomatoes. We’ll go over everything that you need to know about transplanting tomatoes.
There is nothing like the taste of a fresh garden tomato. An organic, homegrown tomato tastes nothing like the one you get at the store. I think most people know this and in fact, I think that tomatoes bring more people to gardening than any other fruit or vegetable.
Even though tomatoes are not the easiest to grow, the effort is totally worth it.
We always start tomato seeds indoors. You can do this yourself or you can purchase tomato plants, but you do not want to plant tomato seeds directly in the garden.
Transplanting Tomato Seedlings…
They need some babying and they need us to help them develop a strong and deep root system so they can handle the weight of the delicious fruit and the height of the massive plant. We can’t do this if we direct seed (plant the seeds directly in the garden).
I’m going to devote another post to how to start tomato seeds indoors. For now, let’s concentrate on how to move the tomato plant into the garden or in other words; how to transplant tomato seedlings.
Here is what we are going to go over…
- When are tomato seedlings ready for transplanting?
- When to plant tomatoes outside.
- Where to plant tomatoes.
- Soil requirements.
- Do my tomatoes need support?
- How to transplant tomato seedlings.
When Are Tomato Seedlings Ready for Transplanting?
I start my tomato seeds indoors under lights about six weeks before the last frost which is April 15 here in central NC. You can learn more about starting seeds indoors here.
If you grow your tomato plants yourself, or if you purchase tomato plants from a local nursery, you want to make sure the plants have a few true leaves that are big and strong and green and that the stem is at least a pencil size in diameter at the bottom before you transplant the tomato plant into the garden.
Just a note here… You don’t have to transplant your tomato plant to the garden. Tomatoes do great in pots too but they will need a large pot in order for them to produce tomatoes.
So if you live in an apartment with a balcony, you can totally place a tomato plant out there but you will have to provide a large pot for it. You will transplant it into the larger pot in the same way we will transplant it into the garden here.
When to Plant Tomatoes Outside?
Tomatoes are very sensitive to cold. Even the lightest frost will damage the plant, it might not kill it but it will definitely set it back considerably. They are a hot weather crop and need the heat to grow and produce so never plant tomatoes before the last frost date.
If you don’t know your last frost date simply Google it. Where I live, the last frost date is April 15, so I never set my tomatoes outside before this date.
But you have to follow the weather because conditions will probably change from one year to another. For example, we had a night of 33 degrees F on April 19 this year… This is too cold for tomatoes, so I decided to wait a bit longer.
I’d say, you want your day temperature to be somewhere in the mid-seventies and night temperature to be in the mid-fifties pretty consistently before you transplant your tomatoes to the garden.
I know some gardeners check their soil temperature before transplanting. This is a good method too. You simply stick a kitchen thermometer into the soil and read the temperature. Soil temperature should be 60 degrees F or warmer before you transplant your tomato plants.
Lastly, it’s best to choose an overcast day for transplanting when the sun is hidden by the clouds a bit and is not too strong.
Where to Plant Tomato Plants?
In large containers or in the garden, whichever you choose, you have to make sure your plant is in full sun, at least 8 hours but preferably 10.
If you grow tall varieties of tomatoes (indeterminate tomatoes) make sure they are not going to shade other plants.
You will also need a tomato cage or trellis if you choose to grow indeterminate tomatoes (the viny kind) so make sure you choose a spot that will allow you to build or place whatever support system you choose for your tomato plants. More on this below.
Soil Requirements…
Tomatoes are considered heavy feeders. They love well-drained soil with a pH of about 6.5 like most other garden vegetables and fruit.
The more organic matter your soil has the better your tomatoes will look and taste, but even if you prepare your soil well before you transplant your plants into the garden, I would still recommend feeding the plants at least twice during the growing season.
To do this organically, I use worm castings and fish emulsion fertilizer.
Tomatoes also suck a lot of calcium from the soil. Even if you planted your tomatoes in soil that you know for sure is a good soil with a pH of 6.5 – 6.8 I still recommend that you add more calcium at the time of planting to avoid any problems with blossom end rot.
Blossom end rot is when your tomato is rotting at its bottom while still on the vine. It’s devastating, really! You see a beautiful tomato and go to pick it only to find that it’s all rotten.
From my experience, it’s hard to correct this after the plant started producing tomatoes. It’s easier to prevent it by adding calcium at the time of planting. You will see in a minute how simple it is to do this.
So let’s recap…
- Well-drained soil.
- Rich in organic matter.
- pH of 6.5.
- At the time of planting, add calcium to the soil as well as organic plant food.
- Feed twice more during the growing season.
Do my Tomatoes Need Support?
I say yes every time. I have yet to meet a tomato plant that didn’t benefit from support.
Tomatoes are divided into two groups: Determinate and Indeterminate.
Determinate tomatoes form a bush. A cluster of flowers form at the top of the plant and stops its growth upward. Most of the tomatoes on this bush will ripe at approximately the same time. After a couple of picking the plant will stop producing and can be pulled out of the garden.
Determinate tomatoes are great for processing (here is how to can tomato sauce, how to can crushed tomatoes, and how to can stewed tomatoes). You get most of the fruit you need for canning at once, can it, and you are done.
You don’t need to collect tomatoes over a period of time until you have enough (but, if you find that you do, or if you simply don’t have time to process them during the growing season you can always freeze tomatoes).
Since the plants are rather short (wider than tall. In other words, bushy) they don’t need a tall cage or a trellis system. They can do just fine with a short cage or even tied to a stake.
Indeterminate tomatoes set fruit clusters along the vining stem all through the growing season until the plants are killed by the first frost.
Those tomatoes can be used for canning and cooking but they are mostly grown for slicing (for sandwiches and such) and for salads. As far as preserving them, they are great for fermenting tomatoes.
The plant of an indeterminate tomato grows very tall and will need the support of a tall cage or a trellis system.
I am sure that there are gardeners who let their tomatoes crawl on the ground and it might work, especially if you have a good layer of straw mulch under them but I still think that even though it is an investment it’s worth the effort and the cost to set up a good support system for your plants.
Doesn’t matter what you use… cages or stakes or a trellis system, make sure it’s strong enough. You won’t believe how heavy those plants get! And they have a very shallow root system so they fall over easily and this can damage the plant, put unnecessary stress on it, and affect production.
How to Transplant Tomato Seedlings…
Ok, so you got your tomato seedlings from the store or you started seeds indoors and the seedlings are now large enough to be transplanted.
Step 1: Harden Your Tomato Seedlings…
Hardening seedlings means making sure that the seedlings are used to spending time outside and can handle the outside weather which is very different from the protected environment that they are used to.
I explain in more detail about the hardening process in my post about transplanting seedlings, but in short, we want to take the plants outside and place them in partial shade for a few hours on the first couple of days.
Then, we gradually increase the time the plants spend outside until after about a week it can be left outside the whole time. It’s important to make sure that you water the plants because the small containers that they are planted in can get dry very quickly.
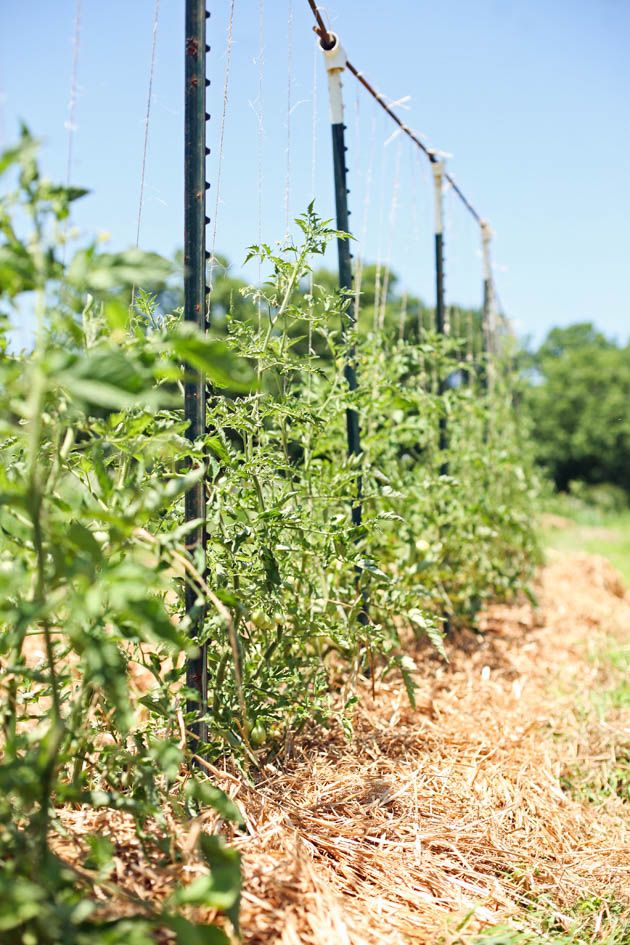
Step 2: Build Your Trellis…
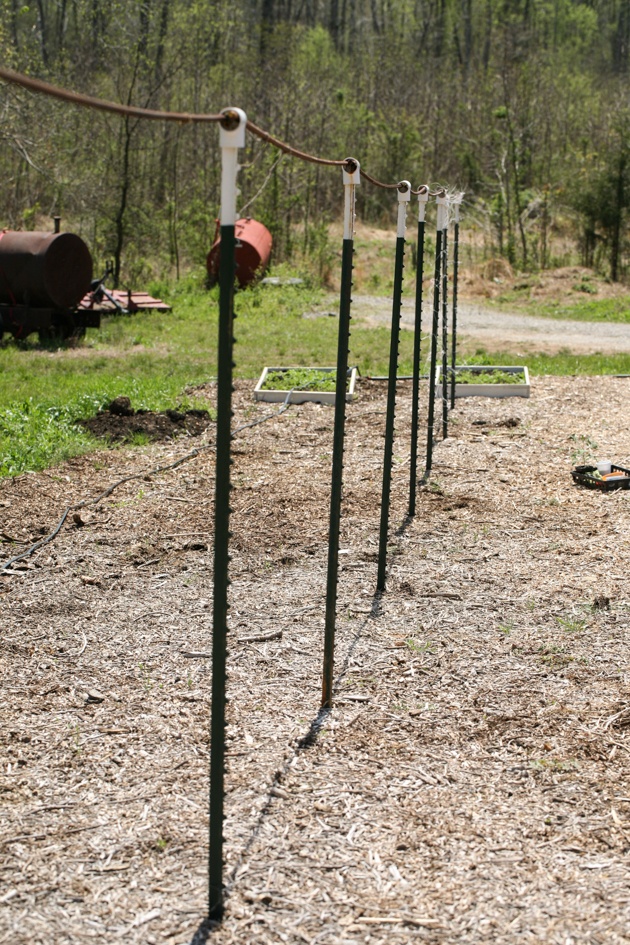
If you choose to grow indeterminate tomatoes, build your trellis before you transplant your tomato plants. It’s much harder to do when the plants are in your way.
I use t-posts, PVC Ts, and rebars to build my tomato trellis. I then plant the tomatoes under the trellis. I tie a string to the rebar and then to the base of each tomato plant (or I tie it to a stake that I place next to each plant), and as the plant grows, I prune it and wrap the string around the vine.
You can read all the information about this DIY trellis in my post on how to support tomato plants and you can see how it works in this video.
If you choose to use tomato cages instead of a trellis, or if you are planting determinate tomatoes that only need a stake for support you can plant the tomato plants first and then place the cage or the stake.
Step 3: Gather Everything That You Need…
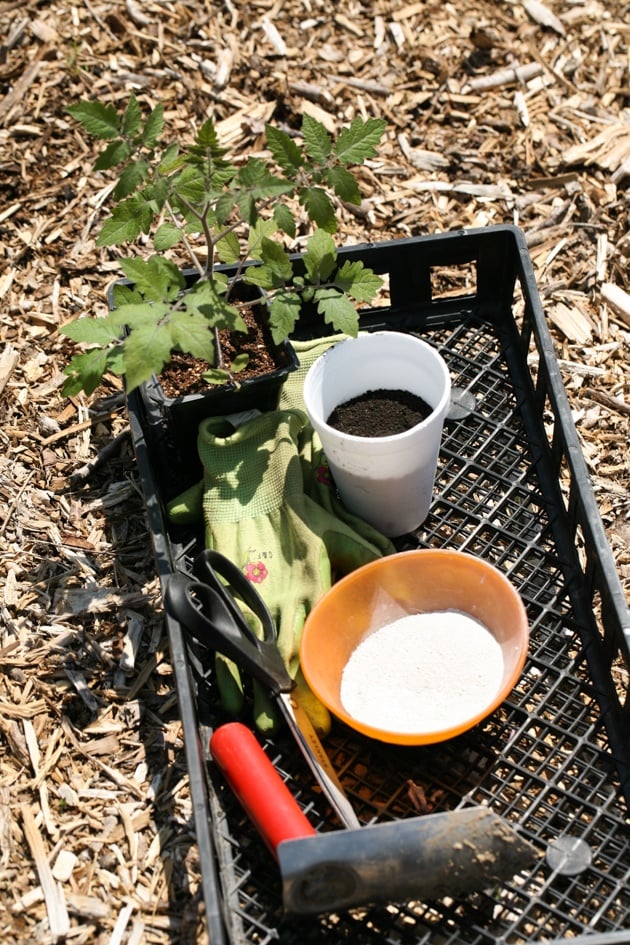
Next, gather everything you need. Obviously, you are going to need your tomato plants. Then, make sure that you have some worm castings to feed the plant organically (remember tomatoes are heavy feeder), and lime (to add calcium to prevent blossom end rot).
Also, get your gloves, scissors or clippers to clip the lower leaves, and a tool to dig the hole with (you can use a trowel, a shovel, or even a post hole digger. We need to dig a deep hole so make sure you grab something that is comfortable for you to work with.)
Step 4: Clip the Plant’s Lower Leaves…
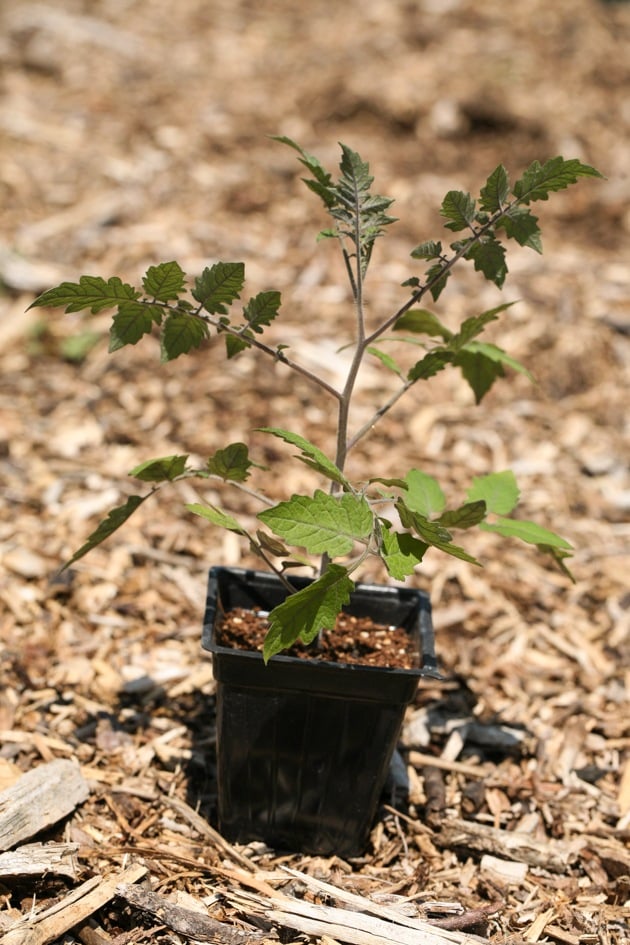
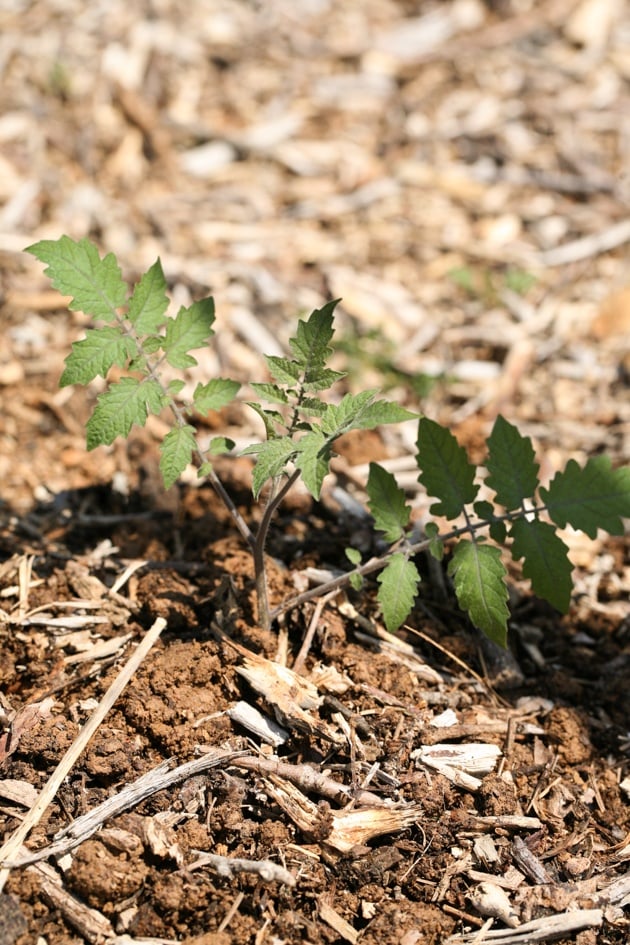
Here is my little tomato plant that I started indoors, it’s now large enough and it has been going through hardening for about a week.
This is a variety called Matt’s Wild. It’s an indeterminate tomato plant that produces a whole lot of clusters of tiny tomatoes. They are smaller than cherry tomatoes, just a little bigger than a large blueberry. We use them as a snack, my kids eat them right off the vine or I pick them and throw them in a salad.
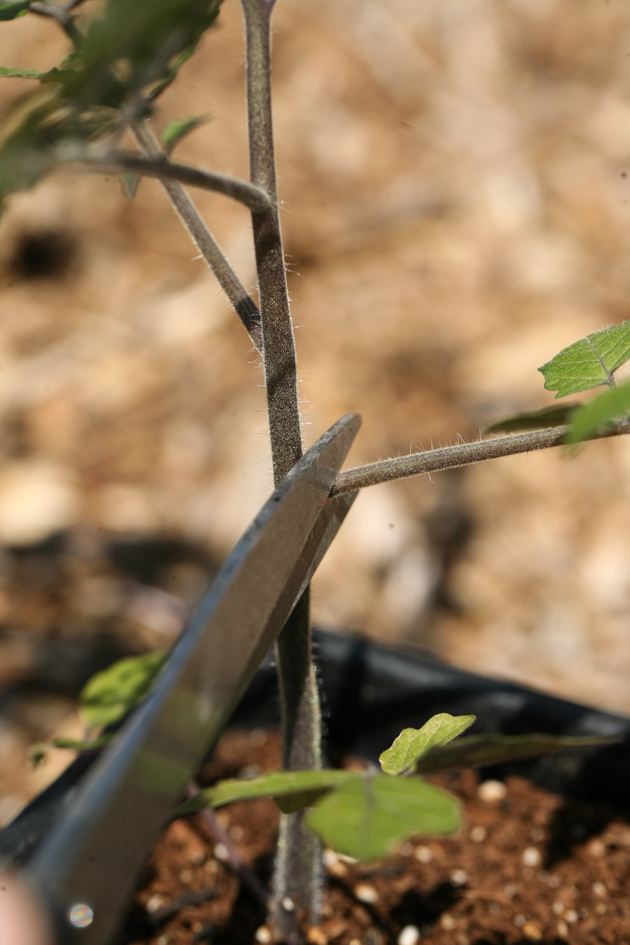
In order to help the plant develop a strong root system, we are going to clip the lower leaves and plant it deep in the ground. The deeper the better. What will happen is that more roots will grow out of the fuzzy tomato stem that is under the soil and this will help hold the heavy plant as it grows.
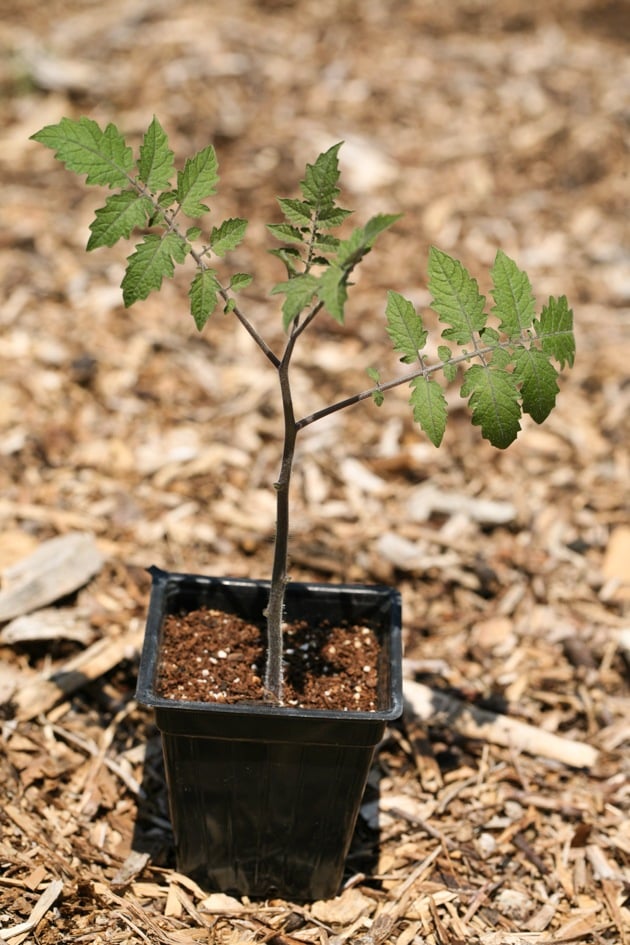
Here is my tomato seedling after I clipped the lower leaves. You want to leave just the top leaves on the stem.
Step 5: Dig a Deep Planting Hole…

Once the plant is ready, dig a deep hole…
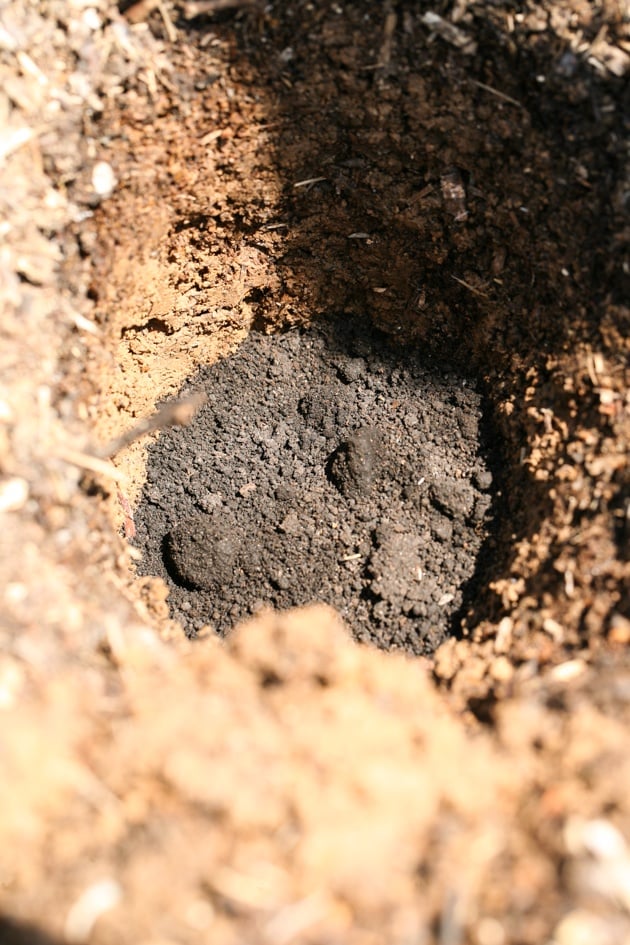
Add half a 3/4 of a cup of worm castings to the bottom of the hole…
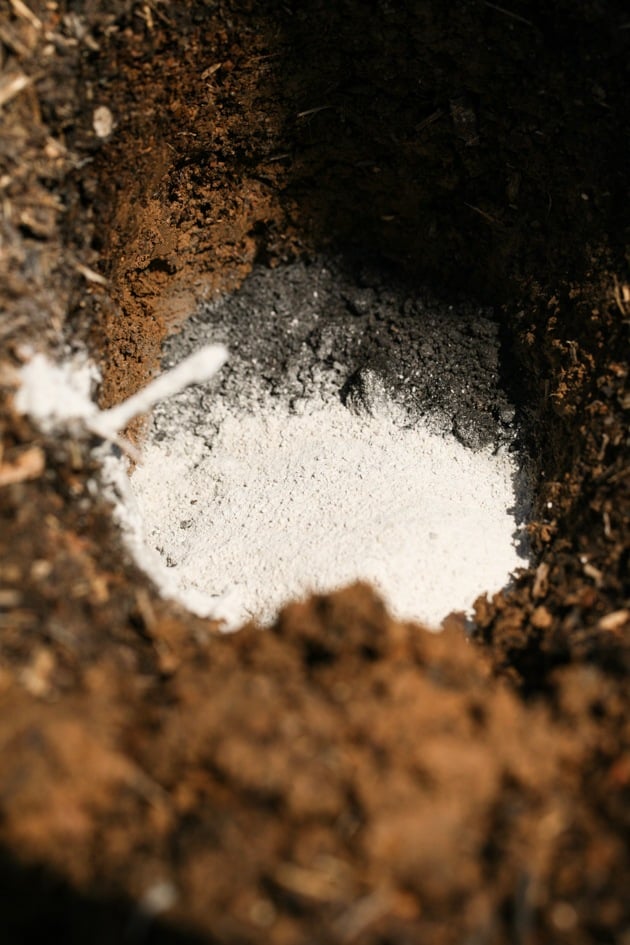
Next, add about 3/4 of a cup of lime to the hole. Remember that tomatoes suck a lot of calcium from the soil? Lime is ground seashells. Adding lime will add calcium to your soil and prevent your tomatoes from developing blossom end rot.
Ground lime (the powder you see above) cost $4 for a 50 lb bag. Well worth it in my opinion. It’s not a fast-acting lime but rather will break down over time which is fine here because it will take a few weeks before my tomato plants will start producing tomatoes.
Instead of lime, you can also use gypsum or Tums, the tablets people take for heartburn. You can simply throw three or four of them at the bottom of the hole. Lime is cheaper, so I use lime.
It’s a good idea to collect your eggshells through the year, crumble them and add them to your garden soil. They are full of calcium but don’t break down fast, rather over a long period of time.
I’ve also heard about people throwing a whole egg into the planting hole and crushing it with the trowel before planting the tomato seedling. Many people report great success with this trick.
A side note here… Tomatoes are not the only fruit that suffers from blossom end rot. We see this same problem with peppers, eggplants, and melons so I do the same for all of those.
Step 6: Plant Your Tomato Seedling…
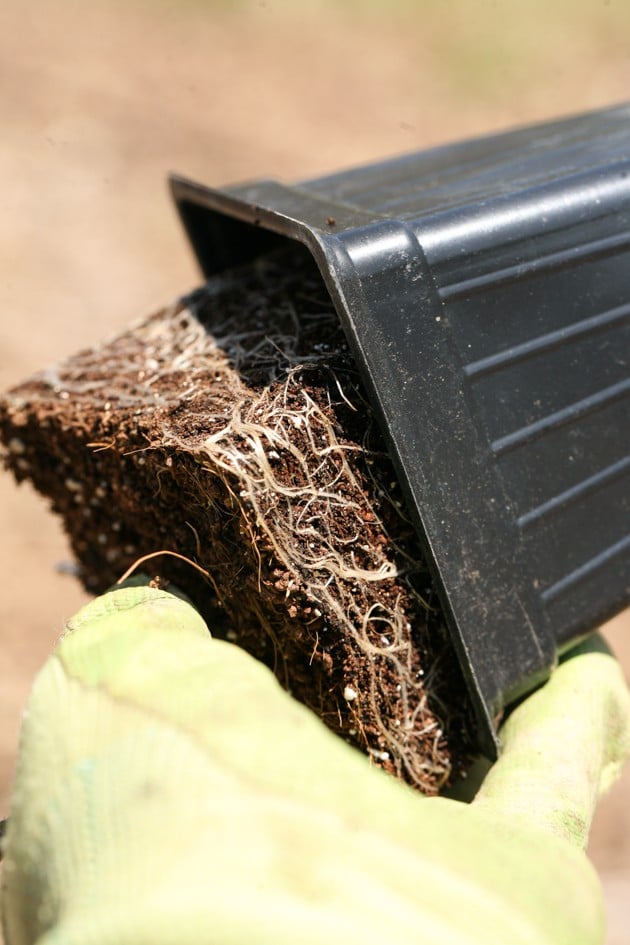
When your hole is ready, hold your plant at its neck and tip the container to release it.
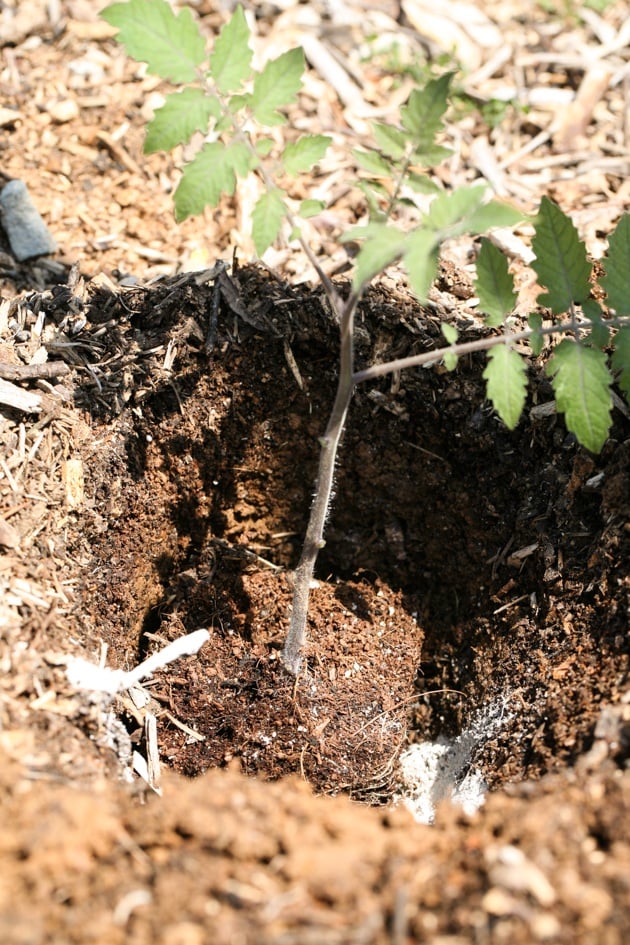
Set the plant in the hole…
And cover it all the way to its top leaves.
Next, make sure you water well. I use drip irrigation in my field but I usually plant right before a rainy day. This way I know that the ground will be soaked well all around the plant and also that it won’t be too hot right after I plant.
Tomatoes need space. Make sure to plant them 18” to 24” apart within the row and space the rows at least two feet apart.
Step 7: Mulch Your Plants…

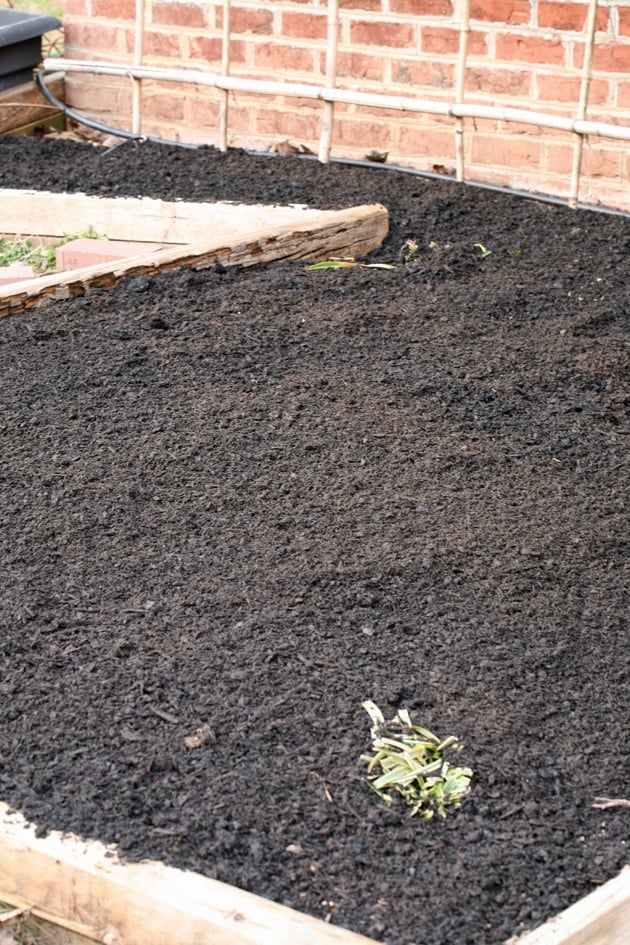
Now, this is the most important part… Cover your plants with straw. This here is the difference between dead plants and live plants, in my experience. You can see that my garden is covered with wood chips but I still use straw when I transplant young plants into my garden.
Even though your plants have been hardened, they still go through a shock when you plant them in the garden. It is called transplanting shock and it’s a very real thing.
This is hard work, my friends. I spent a good amount of time building the trellis and on my hands and knees in the field planting all of my seedlings, and don’t forget the weeks of growing them indoors, there is nothing more devastating than losing them just a couple of days after transplanting them into the garden!
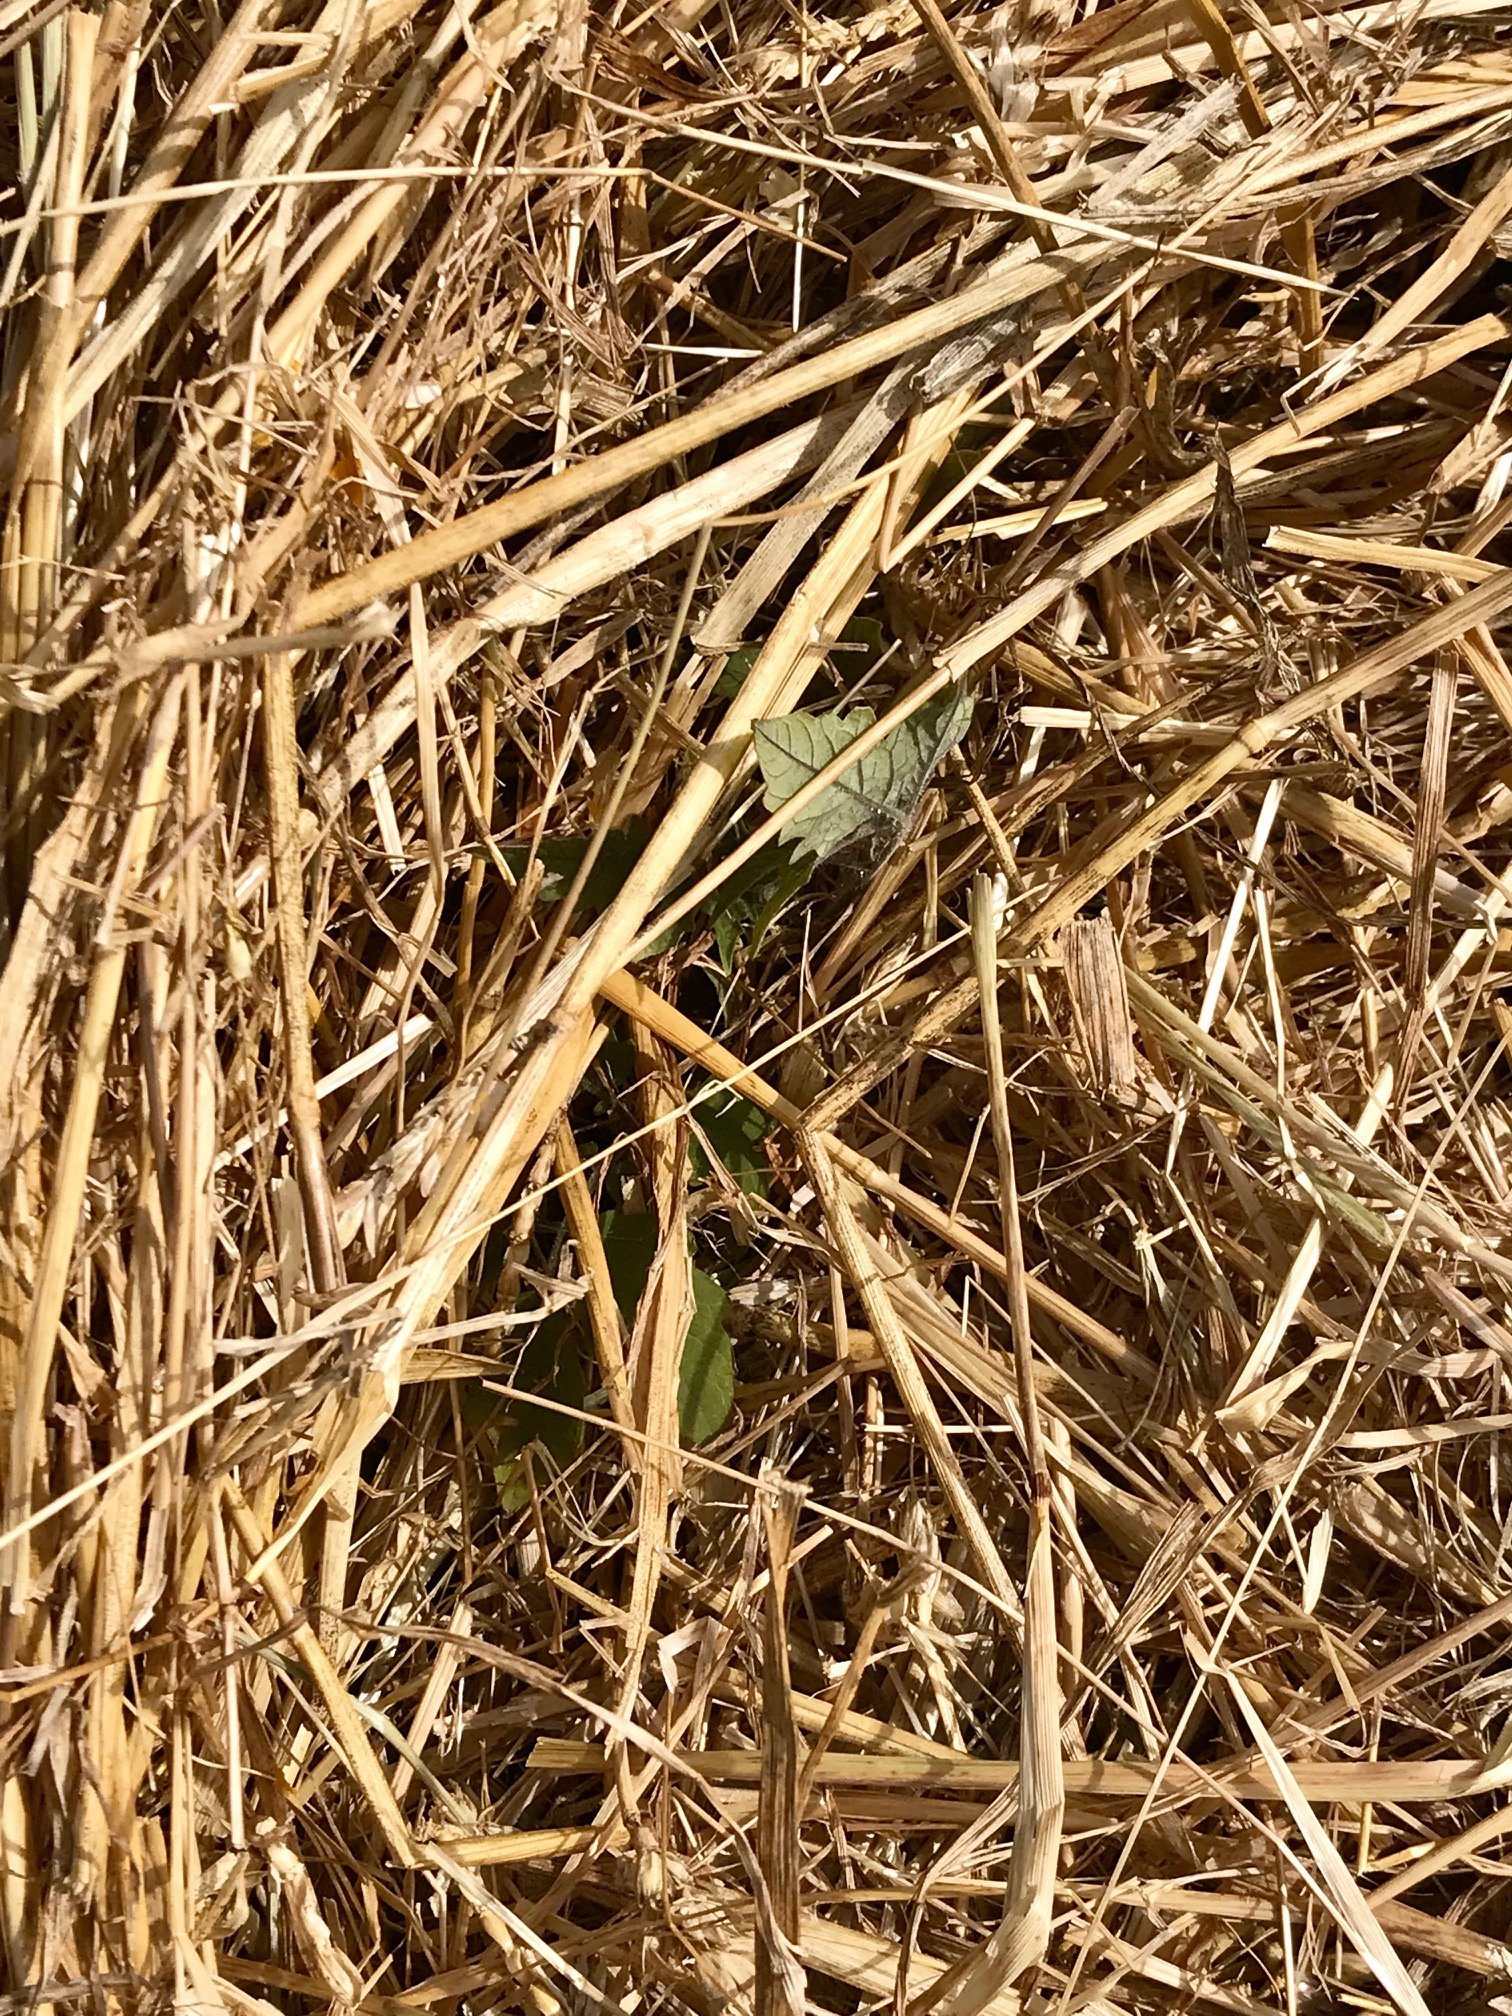
I pretty much cover the whole plant… I leave the top leaves poking out just a bit. If the sun is too strong, the straw shades the plant and helps it deal with the harsh sun.
If it’s not warm enough the straw insulates and helps protect the plant from the cold (especially at night). It also keeps the ground moist around the new roots that are still not strong enough to find water on their own.
I think that for the home gardener, using straw is pretty much a must when transplanting any plant.
That’s it, we are done. Now, all we have to do is watch the tomato plants grow. As they grow, I prune them and help them climb the string that I will tie from the top rebar of the trellis. I’ll feed them twice with fish emulation before they set fruit and make sure to keep the caterpillars away.
Then, before you know it, it will be time to pick tomatoes!
I hope you get some tomato plants in your garden this year. It might take some work but I don’t think there is any other garden plant that is more worth it!!
Take the time and transplant your tomatoes the right way to the garden, this will make the rest of tomato season much easier!


I went to the link on worm castings and thought I would share Uncle Jim’s Worm Farm with you. I believe you may find economical pricing. Thank you for your articles. I also live in NC and these have been very helpful.
I used to have worms but I decided to just buy the castings for right now. Too much to do around here so I had to cut something out. They are fun to raise though! My kids loved them.
Study “Auxins”. Auxins encourage root growth found in seaweed extracts.
Auxins promote stem elongation, inhibit growth of lateral buds (maintains apical dominance). They are produced in the stem, buds, and root tips. Example: Indole Acetic Acid (IA). Auxin is a plant hormone produced in the stem tip that promotes cell elongation. Auxin moves to the darker side of the plant, causing the cells there to grow larger than corresponding cells on the lighter side of the plant. This produces a curving of the plant stem tip toward the light, a plant movement known as phototropism.
Auxin also plays a role in maintaining apical dominance. Most plants have lateral (sometimes called axillary) buds located at nodes (where leaves attach to the stem). Buds are embryonic meristems maintained in a dormant state. Auxin maintains this dormancy. As long as sufficient auxin is produced by the apical meristem, the lateral buds remain dormant. If the apex of the shoot is removed (by a browsing animal or a scientist), the auxin is no longer produced. This will cause the lateral buds to break their dormancy and begin to grow. In effect, the plant becomes bushier. When a gardener trims a hedge, they are applying apical dominance.
I’ll have to learn more about this, Sheri. I never saw it sold anywhere. Where do you buy it? How do you use it in the garden? Do you add it at planting for all plants?
Auxins are in seaweed extracts. I can harvest seaweed directly from my beach and make it into a fertilizer by chopping and direct compost, composting it or by making it into a tea like a comfrey tea by soaking it, but it is also sold as bottled extract.