This post may contain affiliate links, view our disclosure policy for details.
Balsamic onion jam is easy to make! With only five ingredients you can turn your onions into a delicious jam that you can use in many ways. This is also a great way to preserve onions.
This past year, we planted 900 onions for market. It wasn’t planned… I bought 180 onion plants from Johnny’s Selected Seeds to plant in my home garden but ended up without room for them, cause, you know, I’ve overplanted everything else. No surprise there!
So I turned to my friend, who is a flower farmer and has a whole field set for planting right outside her door, not a mile down the road. She assigned the onions a row… I planted the 180 onion plants and then looked at the rest of the empty bed and frowned… There can not be an empty bed where I’m concerned…
Balsamic Onion Jam Recipe…
So I headed to our small town and picked up all the onion sets and plants I could find (from Walmart and other random places). I had no clue what variety they were or how good the plants were, I just had to fill the bed. The thing is… A quality harvest starts with quality seed (I learned this a long time ago in my gardening journey), so many of those plants didn’t develop into full-grown, large, good-for-long-term storage onions.
I ended up with a large crate of smaller onions that I couldn’t really sell at the market and I couldn’t really store for the long term. Something had to be done with those onions and balsamic onion jam was it! It’s delicious and easy to make. Let me show you how…
Ingredients…
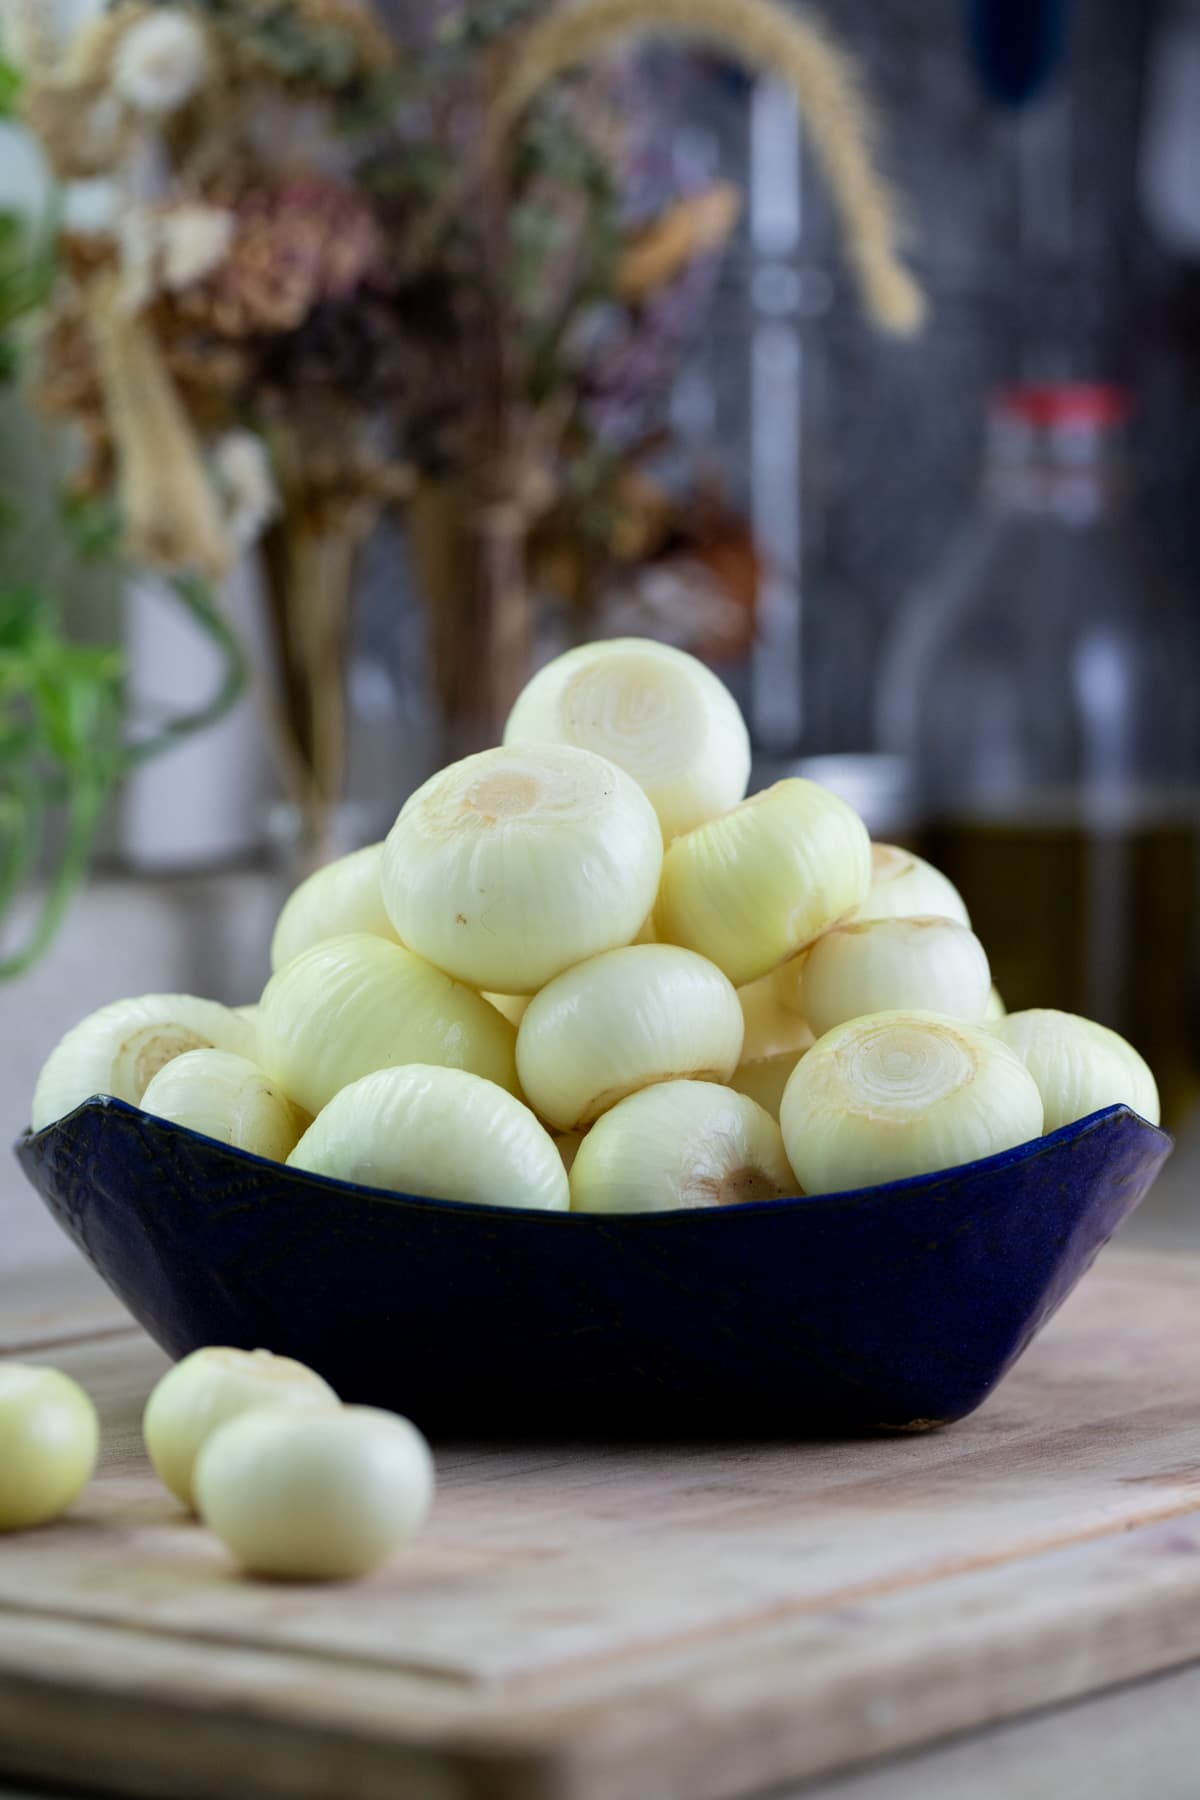
- White, yellow, or red onions
- Sugar
- Balsamic vinegar
- White vinegar
- Whole cloves
Kitchen Tools…
- Cutting board
- Kitchen mandolin
- Knife
- Deep pan
- Mesh tea ball
- Spatula or wooden spoon
- Half-pint jars with lids – this is my favorite size jars to use when canning jam but you can also use a pint.
- Canning utensils
- Ladle or a spoon works too.
- Paper towel
- Water bath canner
How to Make Balsamic Onion Jam Step By Step…
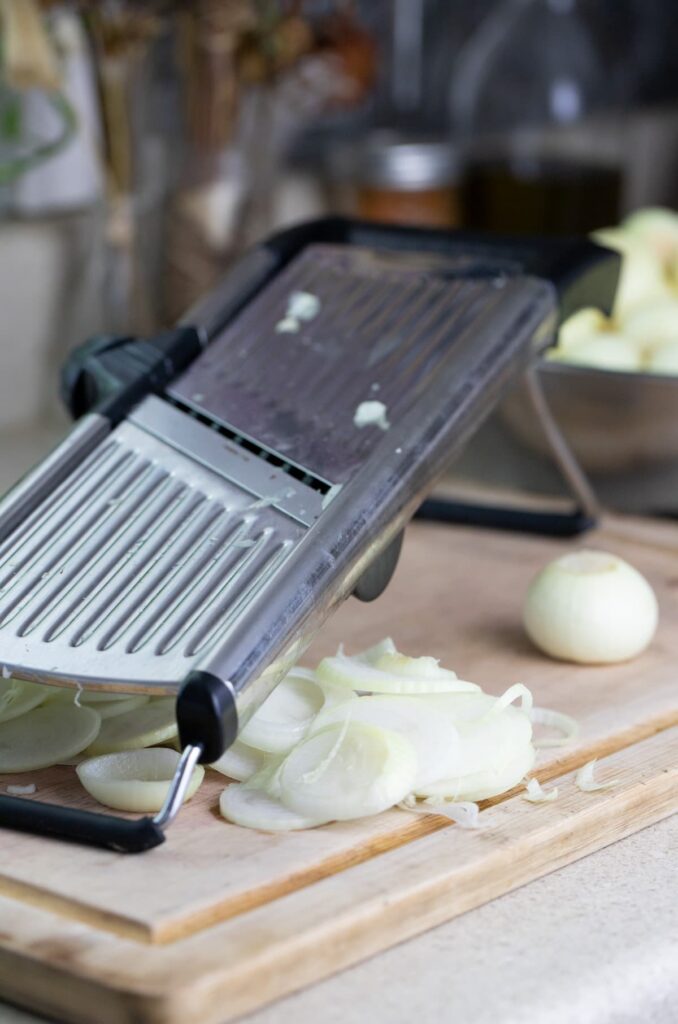


Step one – prep the onions. You can definitely do this with a knife and a cutting board and you can also do this in the food processor, however, I found that a kitchen mandolin works best. I set my mandolin to 3mm thickness and sliced all the onions. Sometimes I needed to cut the ends with a knife but for the most part, the mandolin does most of the work. Separate the sliced rings and place them in a large mixing bowl.


Step two – boil the vinegar and sugar. Set a deep and wide pot on the stovetop, add the balsamic vinegar and the white vinegar, add the sugar, stir, turn the heat to medium-high, and bring to a boil. Lower the heat a bit and let the mixture gently boil for five minutes.


Step three – add the onions. While the vinegar is boiling, add a teaspoon of whole cloves to a tea mesh ball. I find that it’s easy to use the tea ball but you might find another way to do this. We just want to be able to fish the whole cloves out at the end of cooking, when the jam is ready.
Add the onions to the pot and mix to cover them with the vinegar. Add the ball with the whole cloves. Raise the heat again to medium-high and bring the pot to a boil. Let it boil for a couple of minutes before lowering the heat to medium-low for the rest of the cooking of the jam. Mix the onions every fifteen minutes or so throughout the cooking to make sure that they caramelize evenly.


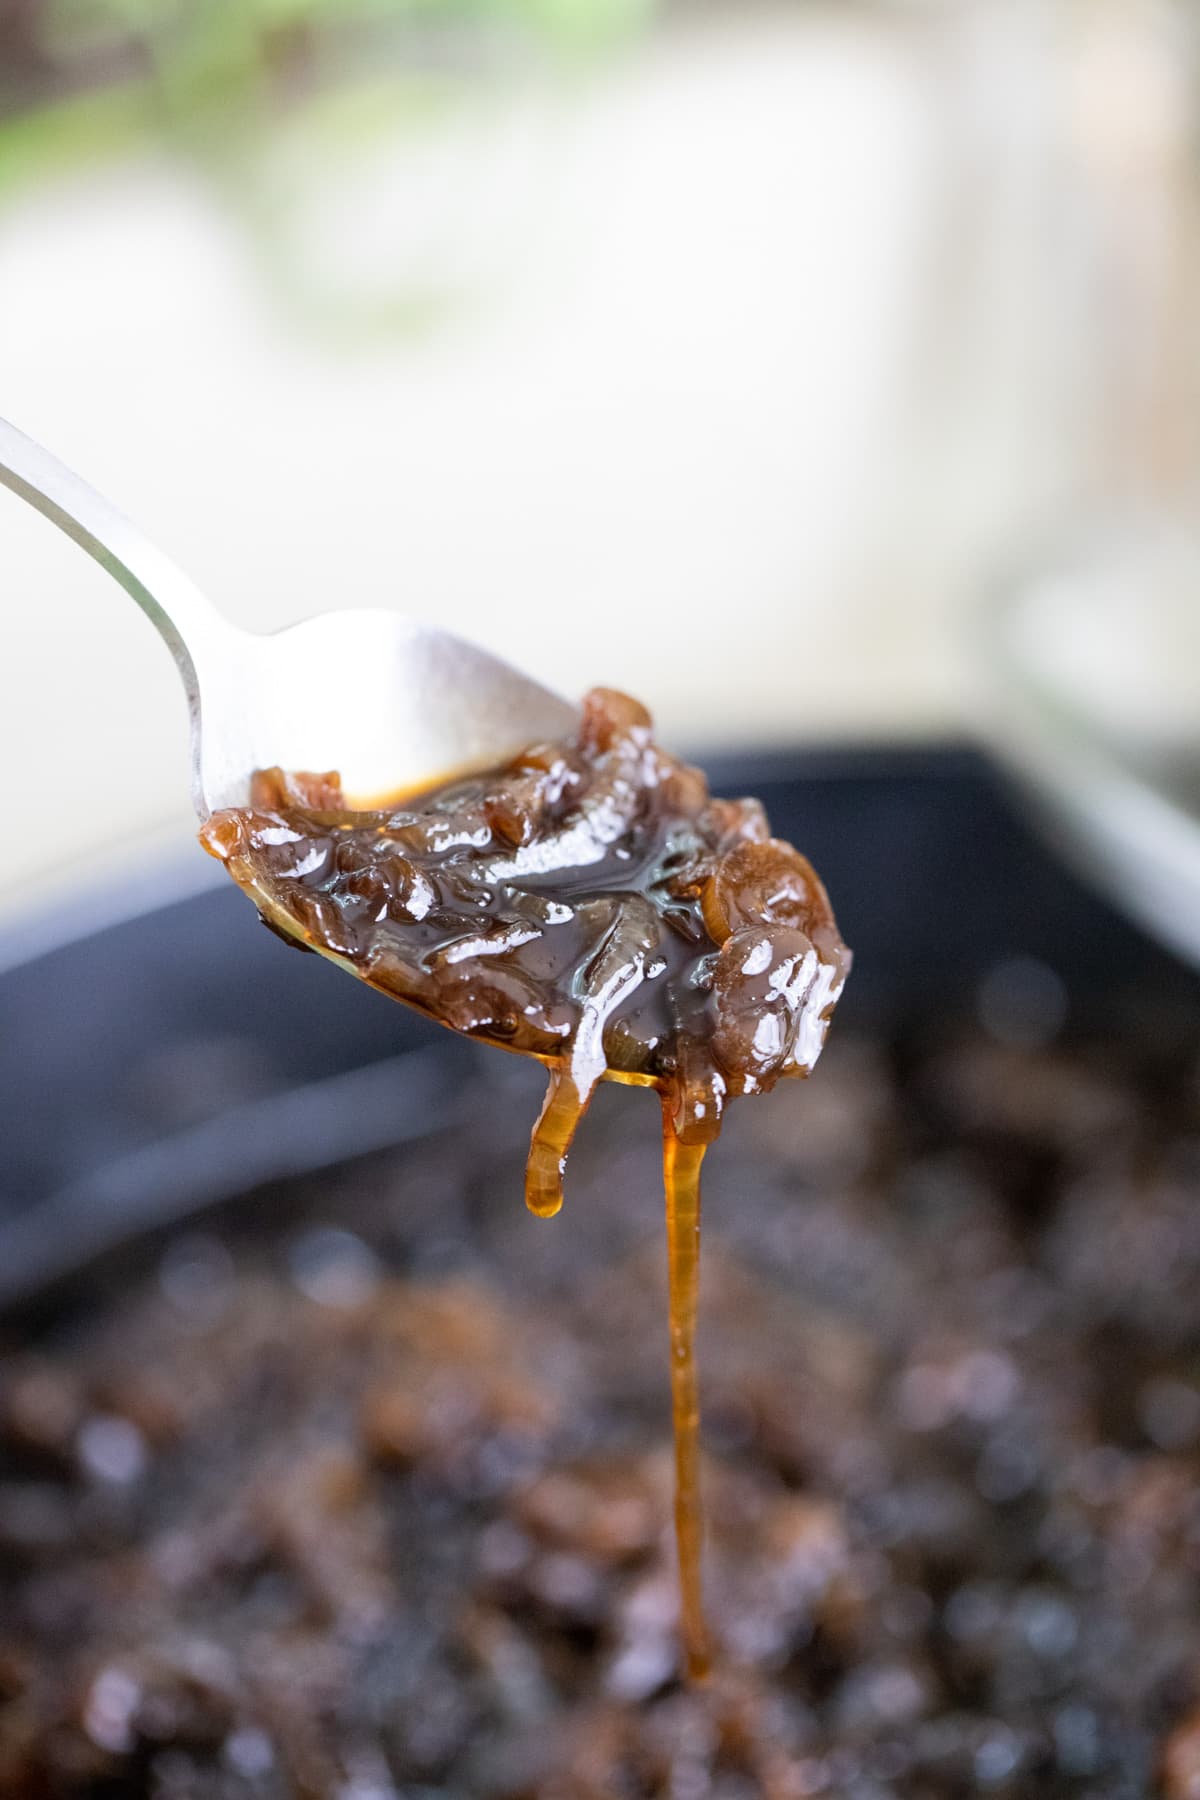
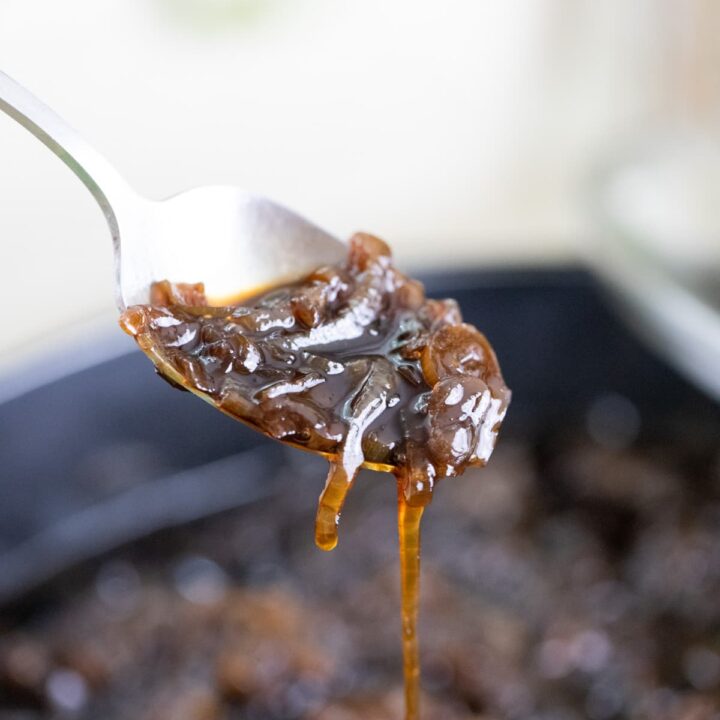
Step four – cook the jam. Keep mixing the onions, bringing the onions from the edges of the pot to its center, every fifteen minutes or so for 2.5 – 3 hours. When the jam is ready the onions will be dark and the liquid reduced almost entirely and turned into a thicker syrup. Leave a little bit of syrup though, especially if you want to can the jam.
Storing Balsamic Onion Jam in the Fridge…
Balsamic onion jam will keep for a few months (probably 6-8 months) in the fridge. So if you have refrigerator space and you want to skip the canning, feel free to let the jam cool, then transfer it to containers (either plastic or jars), and store it in the fridge. Make sure that you use a clean fork every time you grab some jam from the container.
Canning Balsamic Onion Jam…


Step six – prep the jam for processing. Fill the water bath canner with enough water to cover the jars by about an inch. Set it on the stovetop, turn the heat to high and bring the water to a boil. Wash your jars, lids, and bands well with hot water and soap (since we will be processing the jars for 15 minutes, there is no need to sterilize them first).
Use a spoon and the canning funnel to fill the jars, make sure to leave 1/2 inch of headspace. Use the bubble remover to scrape the inside of the jar and remove air bubbles. Then use a damp paper towel to clean the rim of the jar before centering the lid and closing the jar with the band.
Step seven – process the jars. Place the jars on the rack of the water bath canner and lower the jars into the boiling water. Cover the canner and process the jars for 15 minutes. After 15 minutes, turn off the heat, uncover the canner and let the jars rest in the hot water for five minutes or so. Then, use the jar lifter to remove the jars from the canner and place them on a kitchen towel to cool completely overnight.

Always remember to adjust the processing time if you live over 1000 feet in elevation. Follow the table above to make any adjustments.
How to Store This Jam…
When the jars are completely cool, check that they are all sealed by pressing the center of each lid. If there is no movement there it means that your jars are sealed and ready for storage. If you find that one of the jars didn’t seal, just store it in the fridge and use it first (or you can also try to process it again. Usually I recommend changing the lid if you are going to do that).
Wipe the jars and remove the band. It sometimes rusts in storage and makes it hard to open the jar down the road. And, you can also reuse it for canning something else. Store your balsamic onion jam in a cool place like a pantry or a kitchen cabinet. It should last for 18 months or so.
How to Serve Homemade Balsamic Onion Jam…
- With any meat dish – balsamic onion jam works great with any red meat dish. Add it to your hamburger, add it in a meat wrap, on top of roast, with these Israeli meatballs…
- With potatoes – there is something about onions and potatoes together. Add it as a topping to a baked potato, beside mashed potatoes, or add it on top of scalloped potatoes.
- With crackers – cheddar cheese (or any other cheese), crackers, and balsamic onion jam… Call it a snack, call it breakfast, or whatever else you want. It’s simply delicious!
- With bread – a good slice of bread, some butter, and balsamic onion jam. Also delicious!
Frequently Asked Questions…
No, the variety of the onions doesn’t matter. You can use storage varieties or anything else you grow or can find.
Yes, in fact the original recipe calls for red onions. You can also use white onions.
Yes, I wouldn’t process any more than 5 pounds of onions but you can certainly cut the recipe in half if you want to process fewer onions. Cooking time will change too.
Yes! You can try to add powdered clove instead of whole cloves, you can try adding cayenne pepper, or you can try cardamom or anything else you can think of. I would suggest that if you use powdered seasonings, add them towards the end of the cooking, maybe 30 minutes or so before the jam is ready.
This balsamic onion jam is delicious! It takes a bit of time to make, which is why I like doing a large batch but it’s completely worth it. If you grow onions or need to process many onions for some reason I sure hope that you’ll give this jam a try!
More Jam Recipes…
- Simple Orange Jam
- Persimmon Jam Recipe
- Cranberry Apple Jam Recipe
- Candied Jalapeno Recipe for Canning
- Grape Jam Recipe
- Find all my jam recipes here
Balsamic Onion Jam
Delicious balsamic onion jam recipe with only five ingredients.
Ingredients
- 5 pounds of onions (red, white or yellow or a combination)
- 2 1/2 pounds of white sugar
- 1 tablespoon of whole cloves
- 500 ml (~2 1/4 cups) balsamic vinegar
- 250 ml (~1 1/8 cups) white vinegar
Instructions
- Slice the onions into rings that are 3mm in thickness. You can do this with a knife and a cutting board and you can also sometimes do this in the food processor, however, I found that a kitchen mandolin works best. I set my mandolin to 3mm thickness and slice all the onions. Sometimes I need to cut the ends with a knife but for the most part, the mandolin does most of the work. Separate the sliced rings and place them in a large mixing bowl.
- Set a deep and wide pot on the stovetop, add the balsamic vinegar and the white vinegar, add the sugar, stir, turn the heat to medium-high, and bring to a boil. Lower the heat a bit and let the mixture gently boil for five minutes.
- While the vinegar is boiling, add a teaspoon of whole cloves to a tea mesh ball. Add the onions to the pot and mix to cover them with the vinegar. Add the ball with the whole cloves. Raise the heat again to medium-high and bring the pot to a boil. Let it boil for a couple of minutes before lowering the heat to medium-low for the rest of the cooking of the jam. Mix the onions every fifteen minutes or so throughout the cooking to make sure that they caramelize evenly.
- Keep mixing the onions, bringing the onions from the edges of the pot to its center, every fifteen minutes or so for 2.5 – 3 hours. When the jam is ready the onions will be dark and the liquid reduced almost entirely and turned into a thicker syrup. Leave a little bit of syrup though, especially if you want to can the jam.
- This jam can easily be stored in the fridge for months (6-8 months probably). However, you can also can it. To do that... Fill the water bath canner with enough water to cover the jars by about an inch. Set it on the stovetop, turn the heat to high and bring the water to a boil. Wash your jars, lids, and bands well with hot water and soap.
Use a spoon and the canning funnel to fill the jars, make sure to leave 1/2 inch of headspace. Use the bubble remover to scrape the inside of the jar and remove air bubbles. Then use a damp paper towel to clean the rim of the jar before centering the lid and closing the jar with the band. - Place the jars on the rack of the water bath canner and lower the jars into the boiling water. Cover the canner and process the jars for 15 minutes. After 15 minutes, turn off the heat, uncover the canner and let the jars rest in the hot water for five minutes or so. Then, use the jar lifter to remove the jars from the canner and place them on a kitchen towel to cool completely overnight. Always remember to adjust the processing time if you live over 1000 feet in elevation. Follow the table in the post above to make any adjustments.
- When the jars are completely cool, check that they are all sealed by pressing the center of each lid. If there is no movement there it means that your jars are sealed and ready for storage. If you find that one of the jars didn’t seal, just store it in the fridge and use it first (or you can also try to process it again. Usually I recommend changing the lid if you are going to do that).
Wipe the jars and remove the band. It sometimes rusts in storage and makes it hard to open the jar down the road. And, you can also reuse it for canning something else. Store your balsamic onion jam in a cool place like a pantry or a kitchen cabinet. It should last for 18 months or so.
Notes
Frequently Asked Questions...
- Does it matter what variety of onions I use?
No, the variety of the onions doesn’t matter. You can use storage varieties or anything else you grow or can find. - Can I use red onions instead of yellow?
Yes, in fact the original recipe calls for red onions. You can also use white onions. - Can I adjust the quantities of the ingredients?
Yes, I wouldn’t process any more than 5 pounds of onions but you can certainly cut the recipe in half if you want to process fewer onions. Cooking time will change too. - Can I season this jam differently?
Yes! You can try to add powdered clove instead of whole cloves, you can try adding cayenne pepper, or you can try cardamom or anything else you can think of. I would suggest that if you use powdered seasonings, add them towards the end of the cooking, maybe 30 minutes or so before the jam is ready.
Nutrition Information:
Yield: 8 Serving Size: 1 half pint jarAmount Per Serving: Calories: 743Total Fat: 1gSaturated Fat: 0gTrans Fat: 0gUnsaturated Fat: 0gCholesterol: 0mgSodium: 31mgCarbohydrates: 183gFiber: 5gSugar: 165gProtein: 4g