This post may contain affiliate links, view our disclosure policy for details.

This chia blueberry jam is easy to make and can be canned. It’s made with half of the amount of sugar you’ll find in traditional jam and without any added pectin. It’s a perfect summer jam to make and have on the shelf year-round.
Blueberries are the perfect fruit if you ask me. They grow on bushes that often start producing in their second year. The bushes are low so you don’t have to climb anything to take care of them and you can even send your kids to do the harvesting.
You can freeze, can, or dehydrate blueberries; you can eat them fresh, add them to fruit shakes, bake with them (check out this strawberry bread recipe, you can easily switch the strawberries with blueberries!), and you can make and can blueberry jam. They are the perfect fruit!
Chia Blueberry Jam Recipe…
This year, instead of making just the basic blueberry jam that I usually make, I decided to make it a chia jam. I usually don’t use pectin in any of my jams. I use lemon seeds instead because they have natural pectin in them (my peach jam post has more information on that). However, when you add chia seeds into your jam there is no need to use the lemon seeds or store-bought pectin, the seeds do the thickening for you.

What are Chia Seeds?
Chia seeds are the seeds of the plant Salvia Hispanica (also known simply as the Chia plant) which is a flowering plant from the mint family and is native to Central America. These tiny black seeds can absorb up to 12 times their body weight in liquid when soaked and when they get wet they form a layer of gel around their coat. If you add them to food, they will absorb some of the liquid and give the food a gel texture. Chia seeds are very rich and healthy…
“Dried chia seeds contain 6% water, 42% carbohydrates, 16% protein, and 31% fat. In a 100-gram amount, chia seeds are a rich source (20% or more of the Daily Value, DV) of the B vitamins, thiamin and niacin (54% and 59% DV, respectively), and a moderate source of riboflavin (14% DV) and folate (12% DV). Several dietary minerals are in rich content, including calcium, iron, magnesium, manganese, phosphorus, and zinc (all more than 20% DV; see table).
The fatty acids of chia seed oil are mainly unsaturated, with linoleic acid (17–26% of total fat) and linolenic acid (50–57%) as the major fats.”
Read more HERE.
Like with all other plants and seeds, if we want to get the most out of the health benefits of chia seeds we better use them raw or as close to raw as we can. In order to do that we are going to add the chia seeds to our jam at the very end, just a couple of minutes before we are done cooking the jam.
You might think that they won’t get the chance to gel the jam if we do that but you’d be surprised at how quickly they work (and they will keep working even after the jam is done cooking)! In fact, we want to make sure that your jam is relatively thin before you add the chia seed or you’ll end up with a jam that is too thick.

Ingredients…
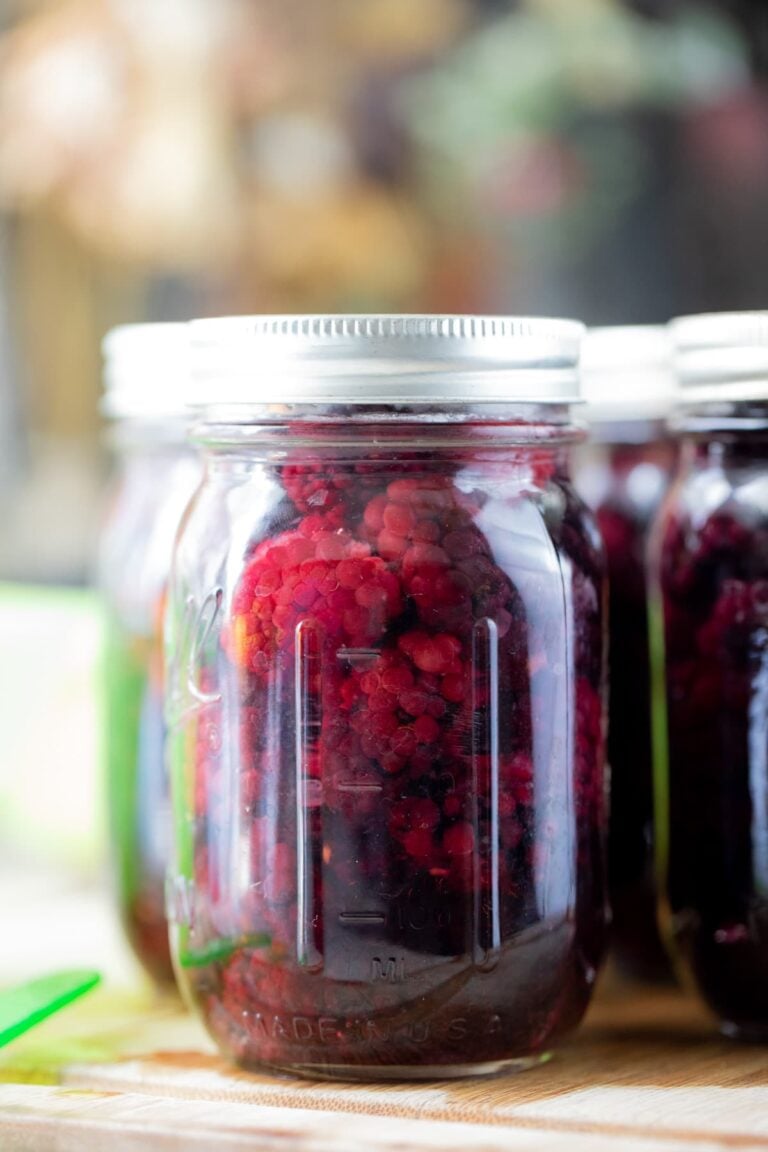
- Blueberries – I used 3 pounds of blueberries in this batch. Make sure that you use fresh, ripe berries.
- Sugar – I always keep a ratio of one part fruit to 1/2 part sugar in my jams. So for 3 pounds of blueberries we’ll use 1.5 pounds of sugar. It’s plenty sweet enough!
- Lemon zest and juice – of one lemon to break the sweetness a bit.
- Chia seeds – just a couple of tablespoons are enough to give the jam a great texture and to thicken it.
Kitchen Tools…
- Spatula or wooden spoon
- Immersion blender – or you can use a potato masher if you like large chunks of fruit in your jam.
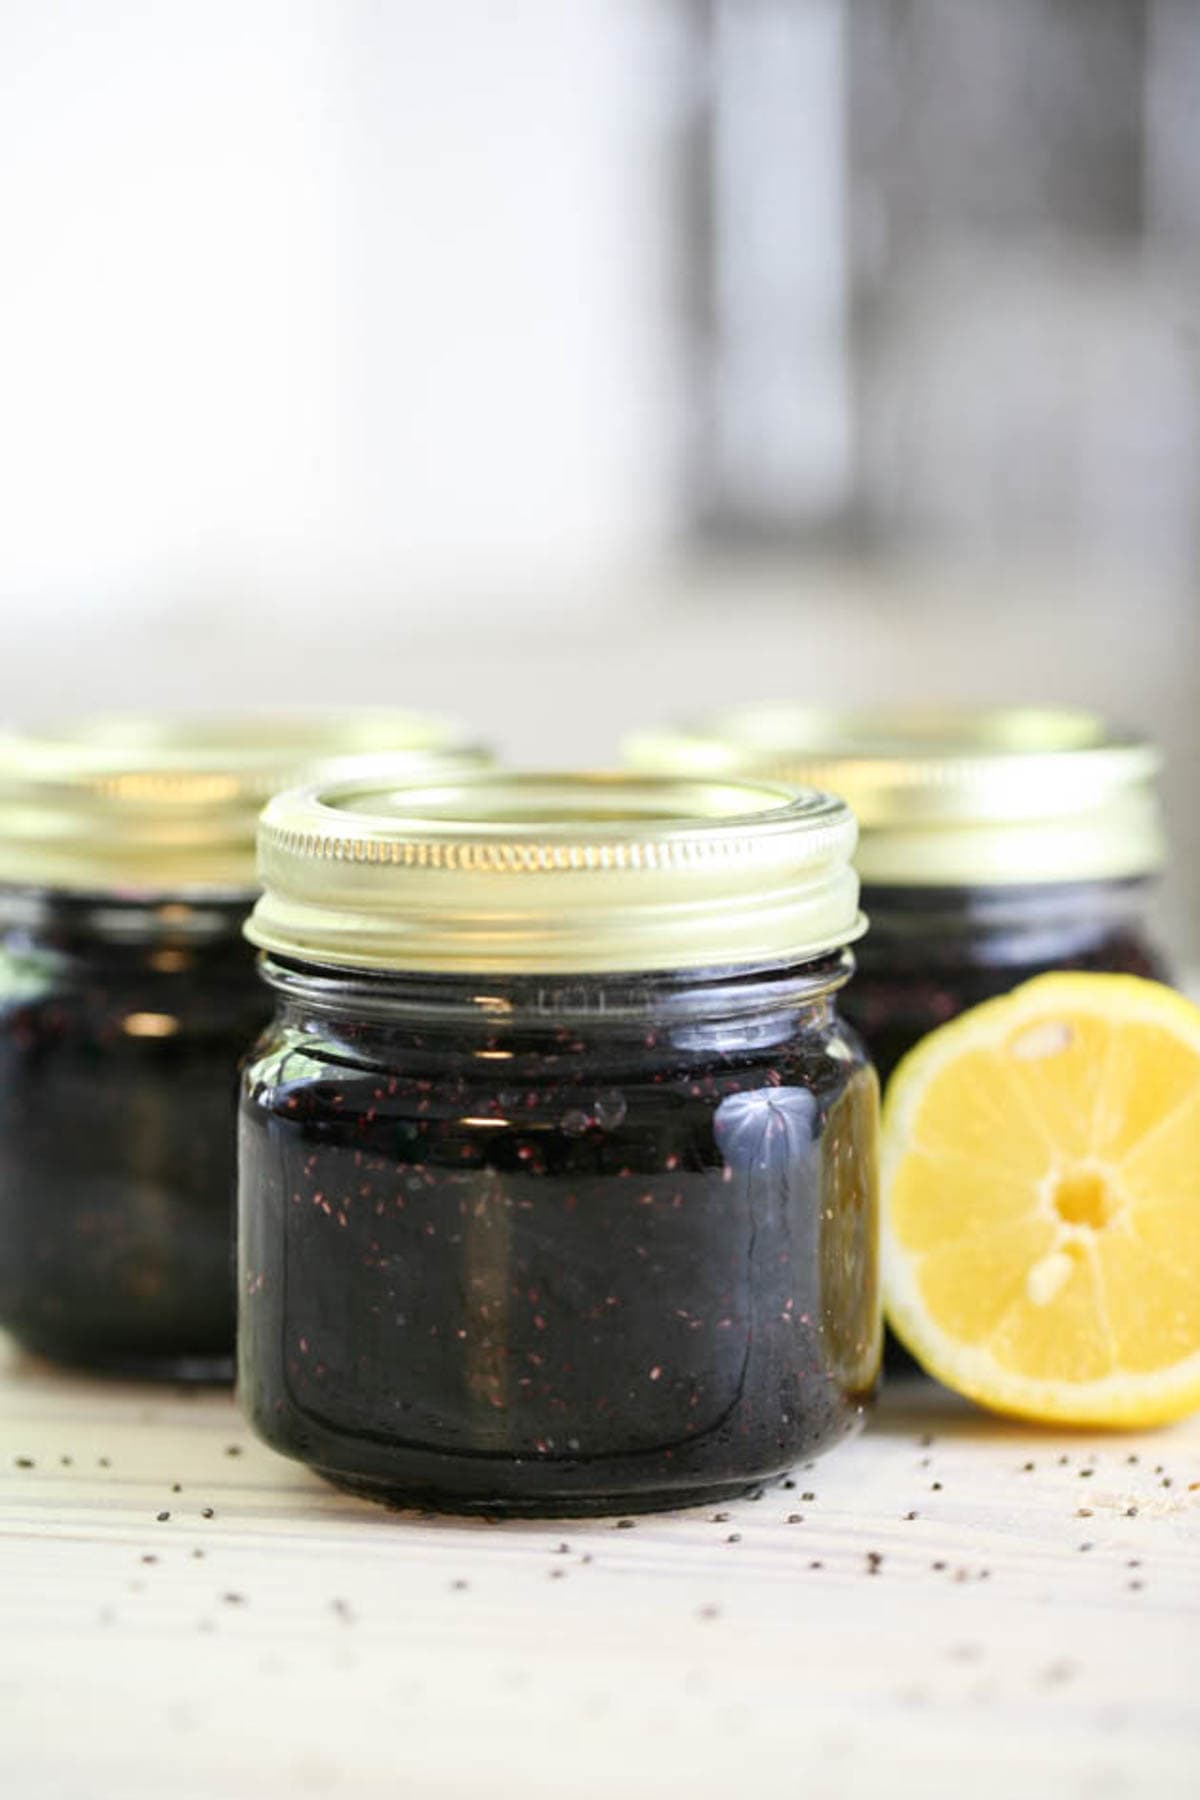
- Half-pint jars with lids – this is my favorite size jar to use when canning jam but you can also use a pint.
- Canning utensils
- Ladle
- Paper towel
- Water bath canner
How to Make Chia Blueberry Jam…


Step one – bring blueberries and sugar to a boil. Add the blueberries and sugar to a wide, deep pan and set on the stovetop. Turn the heat to medium-high and bring the mixture to a boil (stirring frequently). Let it boil for five minutes, then lower the heat to medium-low for the rest of the cooking.

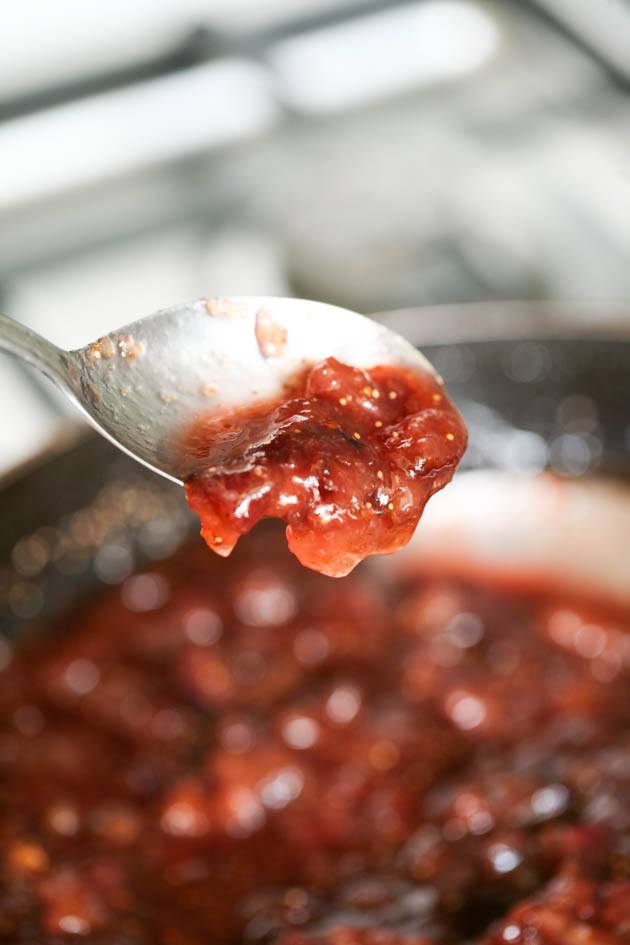
Step two – mash the fruit. Let the fruit cook for an additional ten minutes, then use a potato masher or an immersion blender to mash or blend the fruit. You can leave it in large chunks or blend it all the way, it’s up to you.

Step three – add lemon zest and juice. After 10 additional minutes of cooking add the zest of one lemon and its juice. Make sure you stir those in…

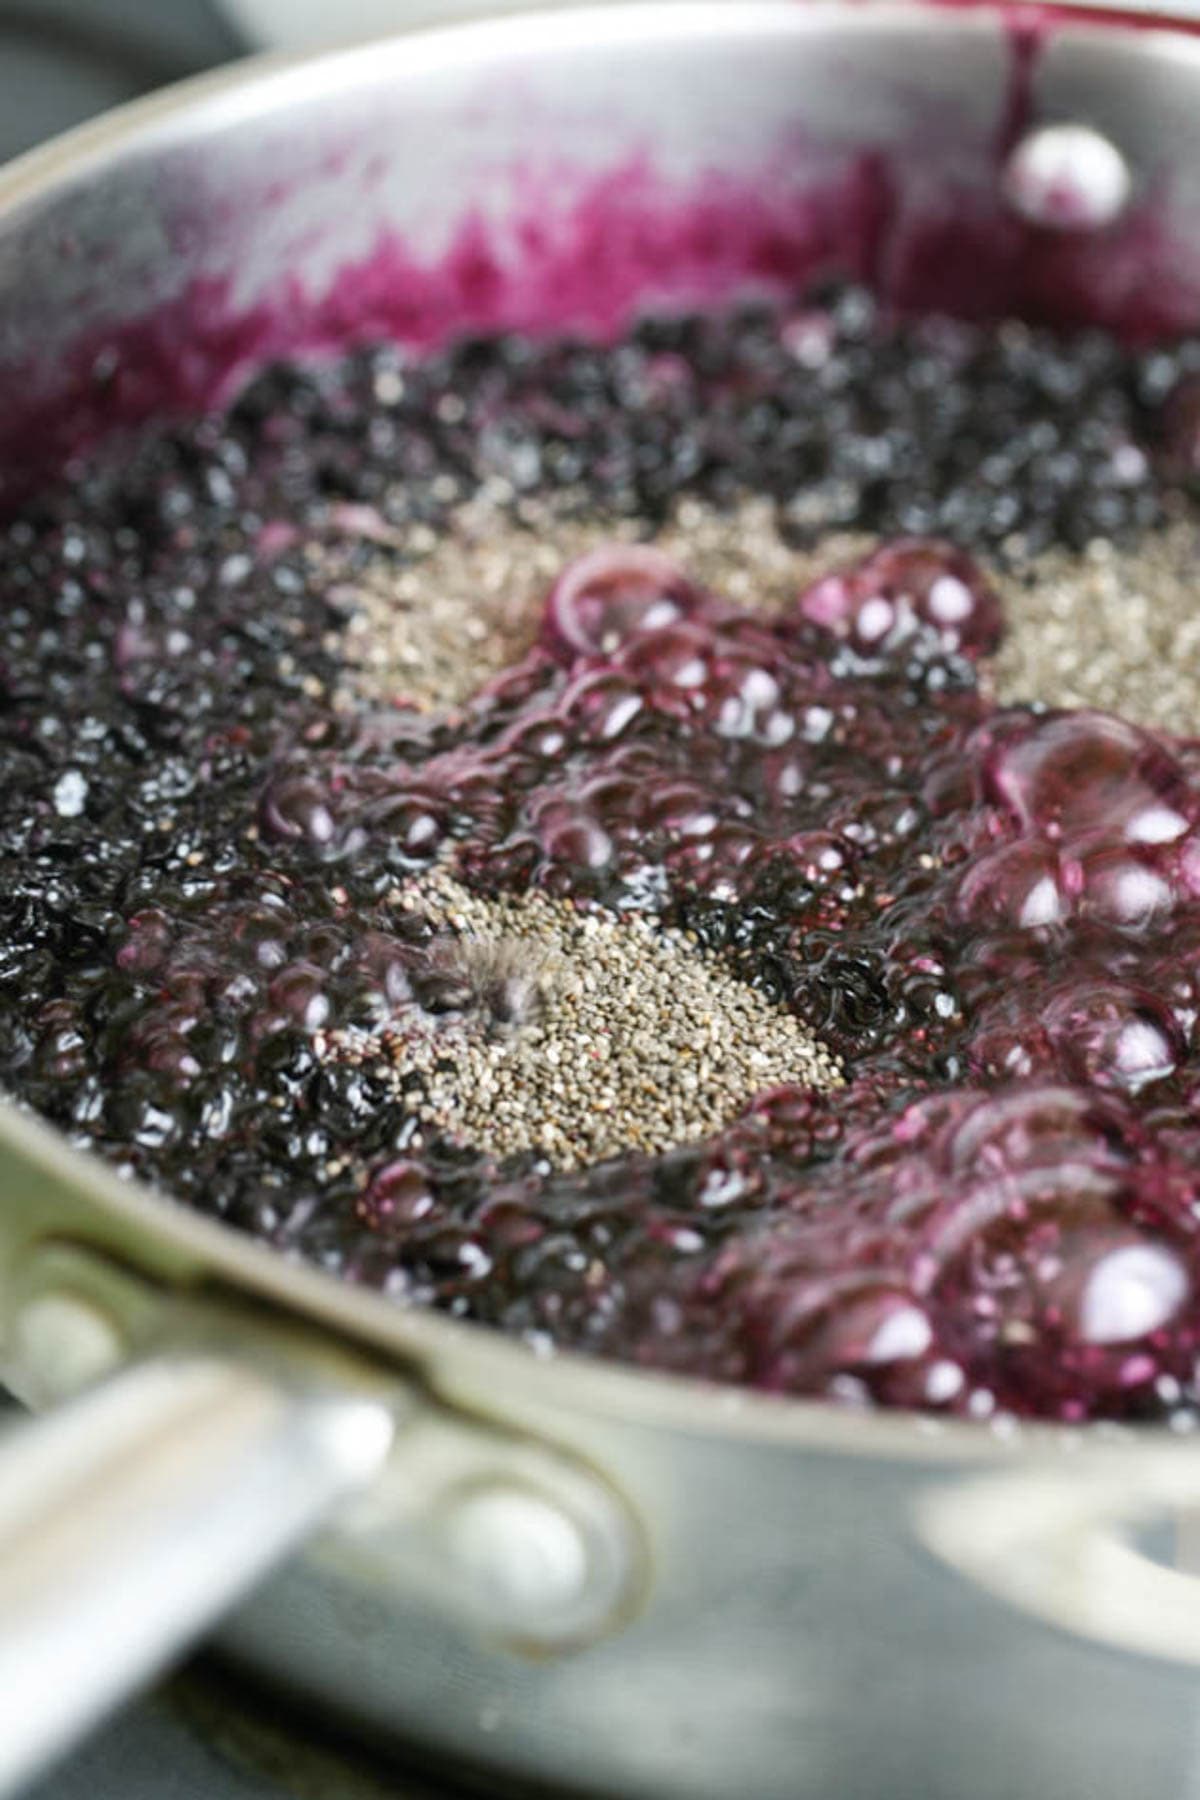
Step four – add the chia seeds. Now, here is the tricky part with chia jams… When you make jam without chia and just add pectin or lemon seeds as I do, you can keep cooking the jam until you see that it has thickened to your liking.
With chia jam, the process is not as clear. You want to still have quite a lot of juice in the pot before you add the chia seeds, and once we add them, we are only going to cook the jam for a couple more minutes before we turn the heat off. The seeds will keep absorbing the liquid and thicken the jam even after you turn the heat off and you don’t want to end up with a jam that is too thick.
So you might have to experiment with this a little bit and it’s a bit hard for me to direct you to the exact time you should add the chia seeds because each batch of fruit is going to have a different amount of juice in it… To give you an idea, to this 3 lb of fruit, I added 2 tablespoons of chia seeds about 30 minutes after I started cooking this jam.
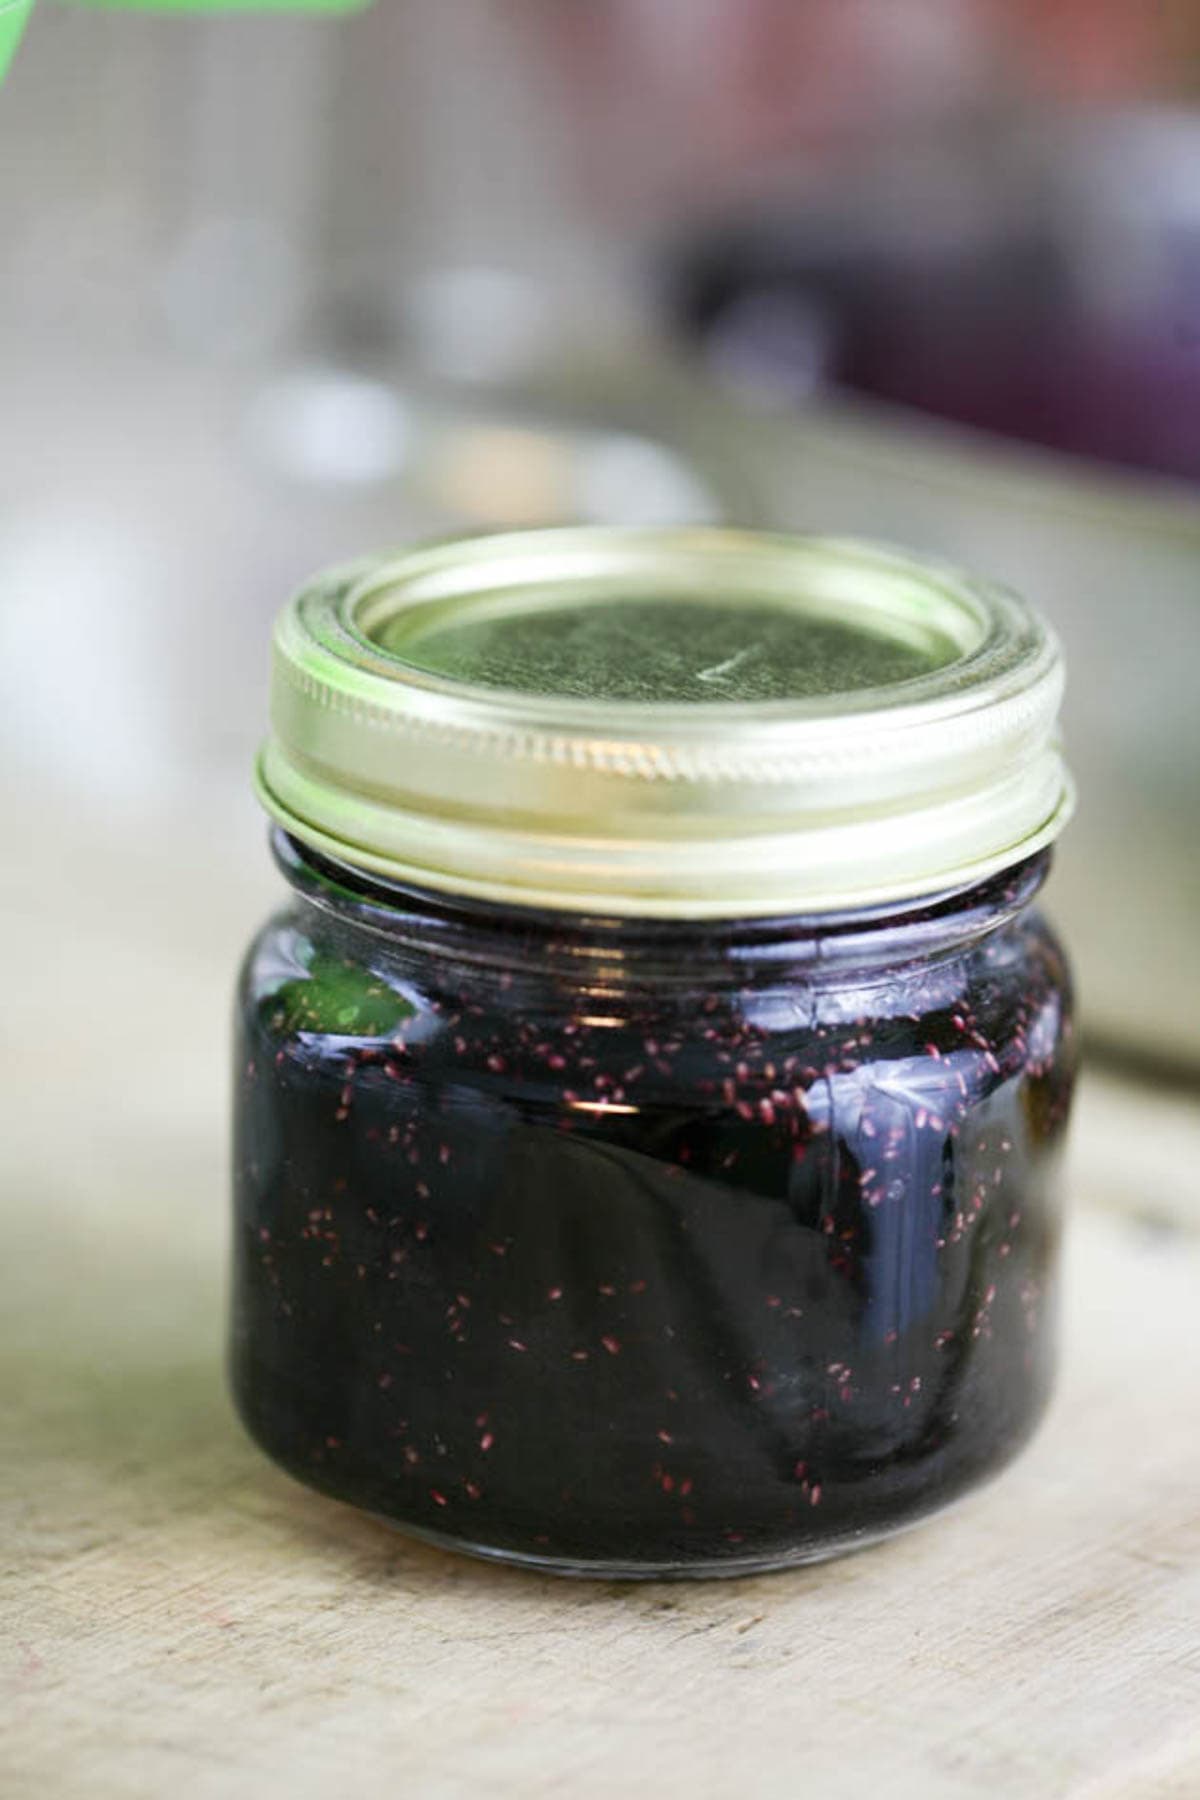
Once your jam is ready, you can let it cool a bit, add it to jars, and store it in the fridge to enjoy right away. If you’d like to preserve it, or if you want to save some fridge space you can follow the instructions below and can it.
How to Can Chia Blueberry Jam…


- Fill the waterbath canner with enough water to cover your jars by about an inch. Set it on the stovetop, turn the heat to high, and bring the water to a boil.
- Wash your jars, lids, and bands well with hot water and dish soap. There is no need to sanitize them since we are going to process them for 10 minutes.
- Use the canning funnel and a large spoon to fill the jars with the hot jam. Make sure to leave 1/2 inch of headspace.
- Use the bubble remover to remove air bubbles by scraping it along the inside of the jar.
- Use a damp paper towel to clean the rim of the jar.
- Center the lid and close the jar with the band, finger tight.
- Set the jars on the rack of the canner and lower them into the boiling water. Cover the canner and process the jars for 10 minutes (remember to adjust processing time if you live above 1000 feet in elevation. You can find an adjustment table in the recipe card below).
- After ten minutes of processing, use the jar lifter to remove the jars from the canner. Set them on a kitchen towel on the kitchen counter to cool overnight.
How to Store This Jam…
Remember that you don’t have to can this jam, it’s actually a great refrigerator jam. If you did process it in the water bath canner make sure to check that your jars are sealed before storing them in the pantry. You can do that by pressing the center of each lid, if there is no movement there it means that the jar is sealed and ready for storage.
Wipe the jars and remove the band. It sometimes rusts and makes it hard to open the jar down the road. And, you can also reuse it when canning something else. Store your chia blueberry jam in the pantry or a kitchen cabinet, it should last up to 18 months. Once you open a jar, make sure to store it in the fridge.

Using Chia Blueberry Jam…
- As a snack – we love spreading cream cheese on crackers (or a bagel) and adding some jam on top. It’s an awesome mid day snack for the whole family.
- On a toast – I always drink coffee in the morning and a toast with some jam on it is the perfect companion.
- In cookies – I make these thumbprint cookies and add jam in the center. They melt in your mouth and are absolutely addictive!
- On yogurt – homemade yogurt (made with either raw milk or store-bought) with homemade granola and a tablespoon or so of jam is my go-to meal when I have no energy to cook a “real” one.
- Add it to baked goods – if it’s a baked puff pastry (use jam instead of the sliced pears), a turnover, jam filled bars, or any other baked good, this jam will work great!
Frequently Asked Questions…
Yes, you can. Also, check my mixed berry jam recipe. I didn’t add chia to it but you can do that just as we did here.
If you opened a jar and noticed that your jam is too thick, you can add it to a small pot, add some water and cook it for a few minutes. I recommend that you store it in the fridge, don’t process it in the water bath canner again.
Yes, vanilla extract works best here. You can add just a couple of teaspoons when you add the chia seeds.
Usually, I’d say that you can replace the lid and process the jam in the water bath canner again, however, with this chia blueberry jam, because of the chia seeds, I think it will be better if you just store it in the fridge and not process it in the water bath canner again.
We love blueberries around here and this chia blueberry jam is a favorite summer jam for us. It’s not too sweet and the chia seeds add a little crunch and a different texture that we really like. I hope that you’ll give it a try!
More Jam Recipes…
- Easy Pineapple Jam Recipe
- Mango Jalapeno Jam Recipe
- Peach Jalapeno Jam Recipe
- Pear and Ginger Jam Recipe
- Grape Jam Recipe
Chia Blueberry Jam Recipe
Delicious chia blueberry jam with less sugar and no store-bought pectin.
Ingredients
- 3 lb blueberries
- 1.5 lb sugar
- Zest of one lemon
- Juice of one lemon
- 2 tablespoons chia seeds
Instructions
- Step one - add the blueberries and sugar to a wide, deep pan and set on the stovetop. Turn the heat to medium-high and bring the mixture to a boil (stirring frequently). Let it boil for five minutes, then lower the heat to medium-low for the rest of the cooking.
- Step two - let the fruit cook for an additional ten minutes, then use a potato masher or an immersion blender to mash or blend the fruit. You can leave it in large chunks or blend it all the way, it’s up to you.
- Step three - after 10 additional minutes of cooking add the zest of one lemon and its juice. Make sure you stir those in.
- Step four - cook for a few more minutes before adding the chia seeds. You want to still have quite a lot of juice in the pot before adding the chia seeds or you'll end up with a jam that is too thick. Stir the chia seeds in, cook for an additional two minutes, and turn the heat off. Remember that the chia seeds are going to keep absorbing more liquid even after you finish cooking the jam.
- Storing - once your jam is ready, you can let it cool a bit, add it to jars, and store it in the fridge to enjoy right away. If you’d like to preserve it, or if you want to save some fridge space you can follow the instructions below and can it...
- Fill the water bath canner with enough water to cover your jars by about an inch. Set it on the stovetop, turn the heat to high, and bring the water to a boil.
- Wash your jars, lids, and bands well with hot water and dish soap. There is no need to sanitize them since we are going to process them for 10 minutes.
- Use the canning funnel and a large spoon to fill the jars with the hot jam. Make sure to leave 1/2 inch of headspace.
- Use the bubble remover to remove air bubbles by scraping it along the inside of the jar.
- Use a damp paper towel to clean the rim of the jar.
- Center the lid and close the jar with the band, finger tight.
- Set the jars on the rack of the canner and lower them into the boiling water. Cover the canner and process the jars for 10 minutes (remember to adjust processing time if you live above 1000 feet in elevation. You can find an adjustment table in the notes below).
- After ten minutes of processing, use the jar lifters to remove the jars from the canner. Set them on a kitchen towel on the kitchen counter to cool overnight.
- Wipe the jars and remove the band. It sometimes rusts and makes it hard to open the jar down the road. And, you can also reuse it when canning something else. Store your chia blueberry jam in the pantry or a kitchen cabinet, it should last up to 18 months. Once you open a jar, make sure to store it in the fridge.
Notes
Canning Adjustment Table...

Frequently Asked Questions...
- Can I add other berries to this jam?
Yes, you can. Also, check my mixed berry jam recipe. I didn’t add chia to it but you can do that just as we did here. - My jam turned out too thick, what can I do?
If you opened a jar and noticed that your jam is too thick, you can add it to a small pot, add some water and cook it for a few minutes. I recommend that you store it in the fridge, don’t process it in the water bath canner again. - Can I season this jam?
Yes, vanilla extract works best here. You can add just a couple of teaspoons when you add the chia seeds. - One of my jars didn’t seal, what should I do?
Usually, I’d say that you can replace the lid and process the jam in the water bath canner again, however, with this chia blueberry jam, because of the chia seeds, I think it will be better if you just store it in the fridge and not process it in the water bath canner again.
Nutrition Information:
Yield: 4 Serving Size: 1 half-pint jarAmount Per Serving: Calories: 922Total Fat: 3gSaturated Fat: 0gTrans Fat: 0gUnsaturated Fat: 2gCholesterol: 0mgSodium: 43mgCarbohydrates: 233gFiber: 11gSugar: 212gProtein: 4g


Can I do this Chia jam with no sugar and still can it?
Yes, you can use a little bit of honey. Look for my sugar-free strawberry jam recipe. Just follow that recipe but replace the strawberries with blueberries. That post also has the canning instructions.