Beekeeping for Beginners: Langstroth Vs. Top-Bar Hives
This post may contain affiliate links, view our disclosure policy for details.
In this How to Beekeeping For Beginners post we are going to compare the traditional Langstroth hive to the less common top-bar hive. It’s been a big dream of mine to keep bees. As I started researching the topic, I discovered that there are two main ways of keeping bees; in the common Langstroth hive or in a Top-Bar hive. Being me, of course, I chose the less common way and chose to build my own top-bar hive. Either way, you choose to keep bees, many practices will be the same, but there is a significant difference between the two hives and the way you’ll manage them.
This is the first post in a series of a few that will follow my journey into top bar hive beekeeping. I have no clue if this is going to work or not… I might pay $130 for a package of bees just to lose them all because they don’t like my hive. Hopefully, that won’t happen and both the bees and the beekeeper are going to fall in love and live happily ever after. You’ll have to stick around to find out.
I used a few resources for my research:
- Top-Bar Beekeeping, Organic Practices for Honeybee Health by Les Crowder and Heather Harrell.
- Top-Bar Hive Beekeeping: Wisdom & Pleasure Combined by Wyatt A. Mangum, PhD.
- First Lessons in Beekeeping by Keiths Delaplane.
- I am taking a 10-week beekeeping course offered by our local beekeeper’s association.
- And of course the internet and yes… YouTube. I personally believe that there is a ton of great information there.
I combine everything I learn from those resources into this post and the next ones I’ll put in front of you, however, there is nothing like hands-on experience so I am looking forward to actually get to know the bees up close and personal.
Ok, here we go…
Beekeeping for Beginners: Langstroth Vs. Top-Bar Hives
Wild bees will live in any hollow space they can find. You can find them in trees, inside walls, in wooden spools, attics, roofs, and many other structures.
Even though those structures work great for the bees, they’re often not as comfortable for us humans. It will be hard to manage a bee colony that lives high in a tree, and extracting the honey might not be possible.
So over the years, like with most other things, man created a system of keeping bees that is more comfortable for him, forgetting along the way to stop and ask the bees their preference.
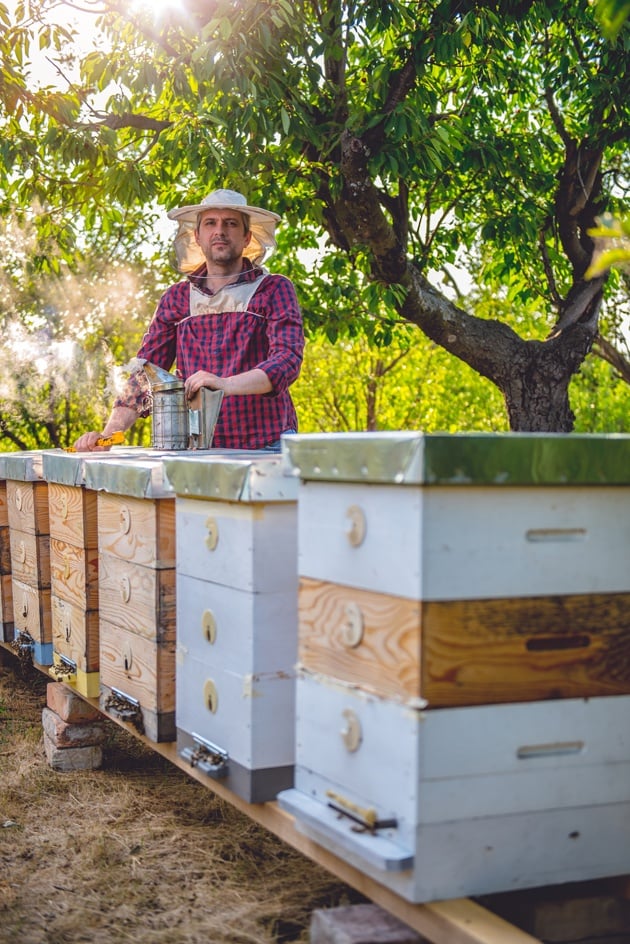
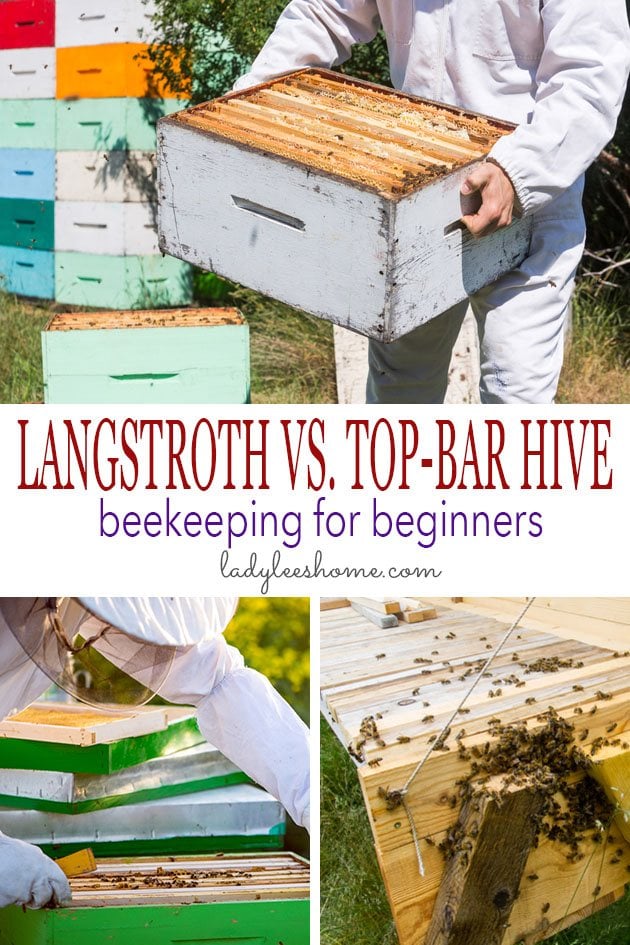
The common beehive used in America today is called the Langstroth hive and was invented in the middle of the nineteenth century by Dr. Lorenzo Langstroth.
Before the Langstroth hive was invented, bees were kept mostly in hollow logs. This required the beekeeper to destroy the hive in order to extract the honey. The Langstroth hive changed that and therefore contributed immensely to the production of honey commercially.
The Langstroth hive is fairly complex, containing frames and stacked boxes, but it allows for a revolutionary capacity of bees and honey, the frames and boxes are movable and can be managed fairly easily.
The top bar hive, on the other hand, has a simpler design. This beekeeping method aims to bridge the distance between the bees preferred way of living and the human need for comfortable interaction.
As you probably know, the further we distance ourselves from nature the more problems arise, and over time the Langstroth system becomes associated with the use of antibiotics, comb fumigants, bee repellents, miticides, and corn sugar and soy-based feed. It is also, not exactly affordable to set up this kind of system (more on the cost below).
The main reasons for using the top bar system instead of the Langstroth system is its affordability and the desire to grow bees organically and in a way that is more beneficial to the bees themselves. In this way, we are not only concentrating on a maximum production of honey but rather the well being of the bees.
Strong bee colonies = happy, healthy bees = delicious honey, amazing wax, and long-lasting, naturally multiplying hives.
Design difference between the Langstroth hive and top-bar hive…
Here are the parts of the Langstroth hive from bottom to top (they stack on each other):
A bottom board – the entrance to the hive is here. Some beekeepers use a screened bottom board to allow dead mites and bees to fall away from the hive and to increase ventilation.
Hive bodies (also called deep supers or brood nest) – on top of the bottom board goes one or two (preferably two) deep hive bodies. Those are boxes that house the bees, in other words, their brooder. This is where the colony lives and reproduces.
Brood frames – inside the hive bodies are frames lined with beeswax or plastic foundation to direct the bees in building their comb.
Queen excluder – a screen that is placed on top of the brood nest boxes to prevent the queen from traveling into the honey storage area and laying her eggs there.
Honey supers – those are the boxes that are placed above the brood supers and the queen excluder and are meant to provide the bees with room to store their food, their honey.
Take into consideration that in order for the bees to survive through the winter the colony needs between 40 to 60 lb of honey. This means that you probably going to have to have more than one honey super if you want to be able to harvest honey for yourself.
Honey frames – inside of the honey supers are frames lined with beeswax or plastic foundation to direct the bees in their comb building. The beeswax or plastic foundation is imprinted with a designated cell size that is designed for maximum honey production.
Inner cover – fit on top of the top super to maintain bee space and provide insulation.
Outer cover – fits over the inner cover to provide weather protection.
Feeder – you gotta feed your bees. There are many kinds of feeders, some are installed on the outside of the hive with the bees accessing the feed from inside the hive and some are installed inside the hive.
This is just the equipment for setting up the hive. Remember you still need beekeeper equipment and honey extracting equipment for Langstroth frames for when you are ready to harvest your honey (some local clubs will have a honey extractor for the local beekeepers to use since this piece of equipment is very expensive).
You can see how the dollars can stack up here… Especially since it is recommended you start with two hives.
At the first class of the beekeeping school that I am taking, the instructor went over all the equipment we will need to set up two Langstroth hives (take into consideration that you don’t need honey supers or queen excluder in the first year since you are not going to harvest any honey). By the time he was done listing all the equipment necessary the amount was around $780.
Now, you might think that a great way around this is jumping on Craigslist and looking for second-hand hives and equipment. However, when it comes to beekeeping, using second-hand equipment is a great way to introduce disease that will kill your colony quickly.
Obviously, if someone is selling their equipment that means their bees died somehow. It doesn’t mean they died because of a disease, but you can never know.
If you still consider getting second-hand hives make sure to contact your local beekeeper’s club and ask if there is a way to sterilize equipment in your area. Here in NC, we are lucky to have a huge agriculture department at NC State University in Raleigh. They have a fumigation chamber there which is used by NASA. The thing will kill anything and we can get second-hand beekeeping equipment sterilized there for a small fee.
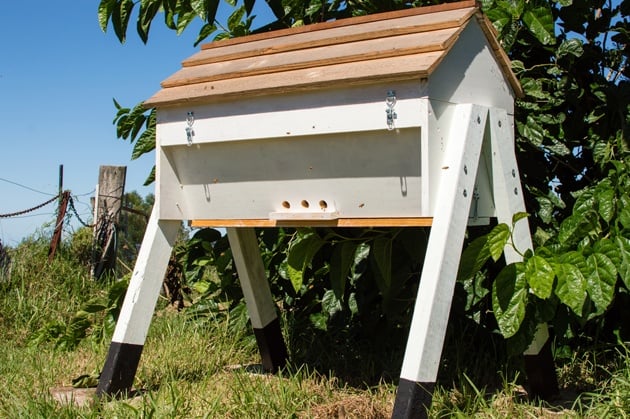
Now let’s take a look at the parts of a top-bar hive…
Like I said before, the top bar hive aims to imitate nature, so basically, this hive provides the bees with a hollow space to go about their business.
The thing is… We still want to benefit from the hive (harvest honey) and be able to manage it even if with minimum interference.
Therefore, the top-bar hive is set in a way that wooden bars are set as the top of a hollow box. Bees will naturally climb to the top of their hive and build their comb from the top down, so in the center of each of those bars, we install a strip of foundation to direct the bees in drawing their comb from.
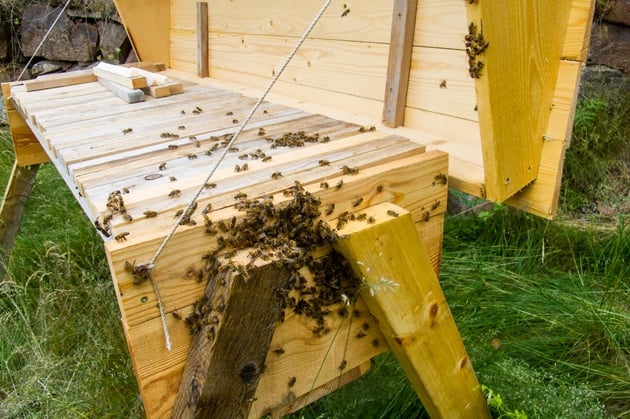
The bars are set in a way that encourages the bees to create one straight comb in the center of each bar. This allows us to manipulate the combs if necessary while still letting the bees build the comb as they want it (there are no foundations with imprinted cell sizes).
The feeder is placed inside of the hive and the top of the hive (the bars) are covered with a roof (which can be as simple as a piece of tin).
So basically we have:
A hollow box with a feeder inside of it that has bars with foundation strip in their center as the top and a roof over those bars.
This simple design is easy to build and allows you some room for creativity. There are measurements you have to follow when making the bars in order to maintain correct bee space between the bars. I go over this information and more in my post, DIY Top-Bar Hive From a Barrel where I show you how I built my hive very cheaply from a barrel.
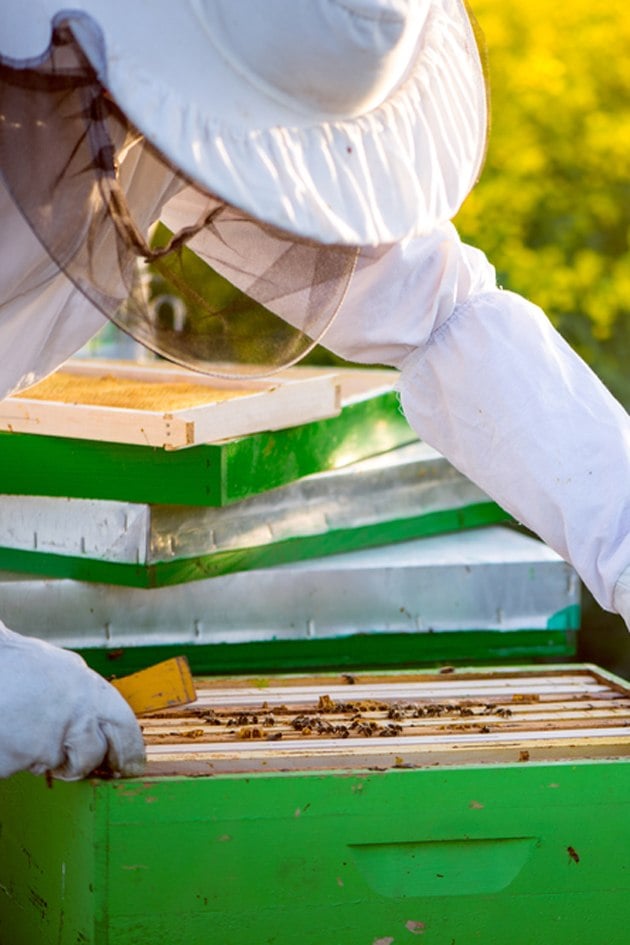
Advantages and Disadvantages of Top-Bar and Langstroth hives:
Here are a few points to consider when deciding which beekeeping method to use…
Growing organically – one of the main reasons one will look into the top-bar hive beekeeping method is the desire to keep bees organically.
The general recommendation for beekeepers who want to keep bees organically are:
- Use hives made from natural materials that are not treated with chemicals.
- Let the bees build their own comb.
- Let the bees forage in an unsprayed environment.
- Don’t feed sugar syrup or pollen substitutes.
- Do not treat the hive with chemicals of any kind.
All those things are easy to achieve with a top bar hive (this is not to say that it can’t be achieved in a Langstroth hive). It seems (from what I read) as if because there is less human interference with the bees natural ways in the top bar hive, it is a bit easier to keep the bees healthy and happy therefore it is more likely that you will be able to eliminate the need for chemical treatments.
Cost – top bar hives can be as affordable as free to build if you use salvaged wood which is fairly easy to find. Even if you buy all the materials from the store, a top bar hive will still probably cost you under $50 to make.
On the other hand, it will cost a few hundreds to set up a Langstroth hive.
Take into consideration that you can build a Langstroth hive yourself, however, it will be a more complicated job and probably more expensive. On the other hand, you can buy a ready-made top-bar hive but it will probably cost you almost as much as a Langstroth hive.
So if cost is the main factor in your decision, you will be better building your own top-bar hive. Not all of us are DIYers so it’s something to take into consideration.
Uniformity – the Langstroth hive equipment has uniform, universal sizes. So if for example, you wanted to split your hive before your colony swarms it will be easy to do because the frames from one hive will fit in another hive.
If you build your own top-bar hives it will be smart to make all of them the same, in other words, follow a template so you can move combs from one hive to another.
Simplicity – the top bar hive has less moving parts than the Langstroth hive and there is no need to store supers or frames away from the hive over the winter.
Environmentally friendly – in a top bar hive, everything is environmentally friendly and biodegradable if you use only wood. There are no plastic foundations like in many Langstroth hives (if you want, you can use beeswax foundation in Langstroth hives but from what I’ve learned they don’t hold as well in the honey extractor machine).
Interference with the nature of bees – in nature, bees will draw different sizes of cells in one comb depending on the role that cell plays in the comb and the time of the season. For example, brood cell size will change over the season, therefore, the size of the bees to hatch from those cells will be different.
In the top bar hive, the bees are free to draw their comb and cells however they need it to be. There are no plastic foundations with imprinted cell size to force them to a certain size.
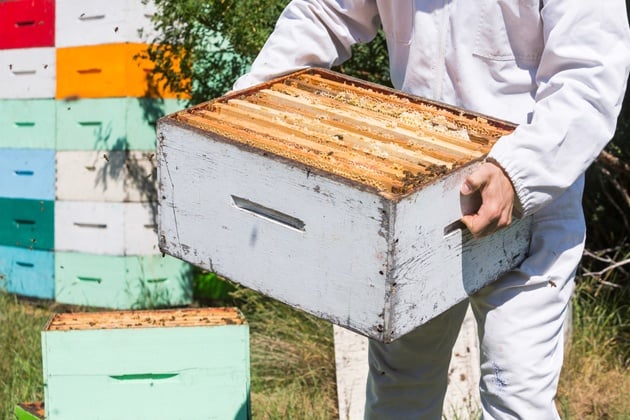
Mobility – Langstroth hives stack and are easy to move around. If you are planning to rent your hives to farmers for crop pollination you should take this into consideration. There are commercial beekeepers who use top-bar hives for crop pollination but moving them might be a little bit more difficult.
Availability and help – It is a great idea to find a local mentor and a bee buddy to bounce ideas off of. I bet you have a local beekeeper’s club where you live and I bet your local beekeepers are as nice as the beekeepers I found where I live.
Beekeepers love bees and they are usually very happy to help beginners.
A mentor will be someone with more experience than you. Someone who knows what they are looking at when they open a hive. A bee buddy will be a friend at the same level of knowledge as you that would walk the trail by your side. They are both very important!
We have a very active beekeepers club in our county, yet there isn’t one beekeeper who keeps bees in top-bar hives. I ended up reaching out (through someone in our club) to the neighboring beekeepers club (a couple of counties over) where I found one lady who uses top-bar hives. I didn’t visit her yet but I hope I’ll get to soon.
Langstroth hives are more common, therefore, it’s easier to find equipment and help.
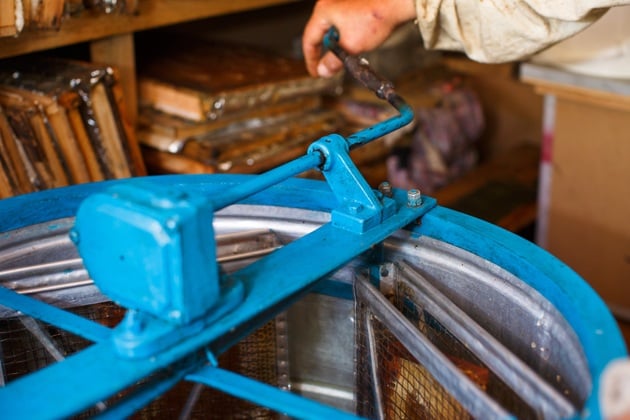
Honey extraction – to extract honey from a Langstroth frame you have to use an extractor. You slide the frame in there, it spins and extracts the honey without damaging the comb.
If you wanted to use the wax, you will have to go through an additional process of getting the wax off the frame.
With the top bar hive, when the honey is ready for harvest in the comb you will cut the comb off into a bucket making sure to leave about an inch of comb on the bar, the bees will build a new comb from this strip of comb that you left hanging on the bar.
You’ll put the comb with honey in a strainer and crush it. The honey will drip down and the wax will stay in the strainer. You can then transfer the honey into a jar and melt the wax for use in cosmetics, candles and so on…
Few things to consider here…
With the top-bar hive, you can go out to your yard, cut a comb into a bucket and you have honey for breakfast.
With the Langstroth hive, you’ll have to set up the extractor. If you don’t have your own (it costs a lot of money…) you will have to find one you can use.
I bet you have a bucket and a strainer somewhere around your homestead… But since setting up the extractor and cleaning it takes a good amount of work, Langstroth beekeepers usually wait until they have a good amount of honey to harvest (please note that there might be another way to extract honey from Langstroth frames… I didn’t research that. The extractor is what most Langstroth beekeepers use).
Another thing to consider is that with an extractor you can keep the comb whole. Most beekeepers will place this comb right back into the hive. The bees than can get back to work filling it with honey, they don’t need to spend energy on building a new comb.
It sounds great…
However, beeswax absorbs and holds oil and fat-soluble toxins which are abundant in our environment these days. By using the same comb over and over again those toxins will build up inside of the hive and it can eventually become a not very healthy place for the bees to live.
By harvesting the comb every time we ensure that the bees start with a clean wax that is free of disease, this keeps the hive healthier and we get to harvest wax which is no less important than the honey.
Hands-on management – In the Langstroth hive, the bees have frames with a foundation which is imprinted with a certain cell size. There is no confusion, the bees build their comb right there where you want them to build it and how you want them to build it.
In the top-bar hive, the bees are freer to build their comb how they want to build it for the most part. Sometimes they’ll decide to cross-comb. This means they build their combs at odd angles which can cause the comb to break and collapse. A big part of top-bar management is making sure to space the bars correctly so the bees won’t cross comb. It requires a bit more hands-on management than the Langstroth hive.
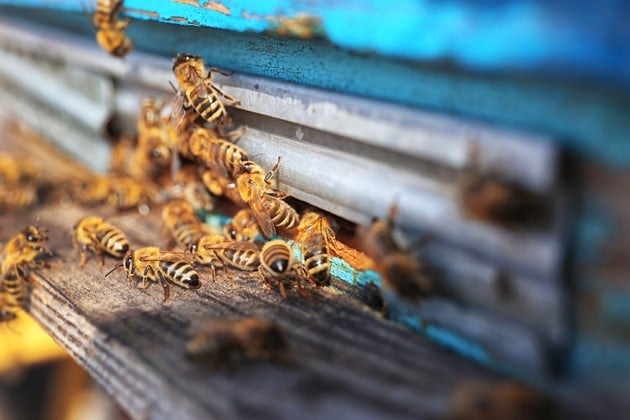
Honey production – lastly, let’s talk about the amount of honey you get…
Since you can reuse frames and since there is a set foundation in the Langstroth hives, you will get more honey with this hive. The bees don’t need to draw a new comb each time…
You do get less wax, though.
In his book, Top-Bar Beekeeping, Les Crowder shares his experience with five Langstroth hives and five top-bar hives. He states that he found the top-bars to produce 20 percent less honey than the Langstroth hives but six times as much wax.
Take into consideration that wax is just as valuable as honey and can be used in salves, candles, blams and other products and can be sold as just wax for a good price.
With the top-bar bee hive, it is also easier to sell cut-comb honey (which is a piece of comb with honey in it), a very upscale and expensive product.
But if your main goal is producing as much honey as possible from each hive than you might choose the Langstroth hive instead of the top bar hive (read: 61 Plants that Attract Honeybees).
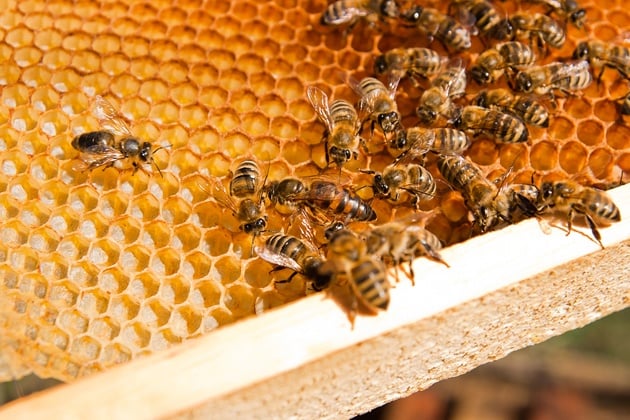
Ok, I think that this is enough for this post. I hope you are not confused!
There is so much to learn about beekeeping. It can be a hobby or flourish into a business… You can keep two hives or two hundred hives. I try to keep things simple but this is a huge topic.
I hope this post helped you get a better idea of the two systems and made it easier to make a decision on which to choose.
I chose the top-bar method because it gives me room for creativity and because it seems to me as if it is more centered around the well being of the bees. And because I want beeswax just as much as I want honey.
I love that I can easily build my own hive, that I can use recycled materials, and that it cost me very little to start keeping bees. I love that I can easily access my honey and that I don’t need to depend on expensive equipment.
Since this is the method I chose, I will concentrate on top-bar hive beekeeping on the blog from now on. In the next beekeeping post, I will share with you how I used an old barrel to build my hive.
I hope to be successful in this, I hope the bees will love the hive I made for them and that I’ll be able to keep them healthy and happy (read: How to Set Up a Trap Hive).
I am looking forward to sharing this journey with you! And I hope I’ll find it a fun and rewarding one.
Please share your thoughts in the comments below. Which hive do you think will be better for you? Why?

Beekeeper of 25 years here. A couple of comments:
– You can use strips of wood to allow bees to build their own wax cells in a Langstroth hive exactly as you describe for your top bar hive.
– If you choose to use traditional foundation and frames, you do not have to use plastic. Long before plastic foundation, beekeepers used wired wax foundation, although installation was time consuming and fussy until you got the knack of it. That kind of foundation is still available as many beekeepers prefer it.
– Bees do indeed build natural hives in old logs. They very much like to build them in old hollow trees too, because it is the nature of bees to expand their colonies upwards, much like a Langstroth hive.
– You do not need an extractor to get honey from the frames of a Langstroth hive, you can easily scrape the wax and honey from the frames directly into your strainer, just as you describe for the top bar hive. In fact, many small-time beekeepers do just that.
Thank you!
Hello, there! You are my KIND OF WOMAN!
I started reading your posts when I saw that you like pruning, and I believe, air-layering, and grafting, trees. I was glad to read about you buying a farm, because I, too, love farming. I can hardly wait to move, again, to the country. I have kept bees before, until I got stung and almost died. I want to go back to bee-keeping. In fact, just a week ago, my friend told me about a man who will sell me a hive, but now that I have read your post, I think I want to build my own Top-Bar Hive! Thanks for your information! Please, keep writing.
Berta Barrett
The top bar hive was a fun project! I didn’t get to use it as much as I planned to but hopefully that will change soon…
Saved as a favorite, I like y?ur ?ebb site!
Just getting started. No hives yet.
Bert, did you see my latest post on how I built my top-bar hive? It’s the newest post on the blog. You will find it on the home page.