In this step by step tutorial on how to butcher a deer I’ll share with you how we do it on the homestead. There are many ways to butcher a deer but the basics always stay the same. I hope that you’ll have a much better understanding of how to butcher a deer at home after this tutorial!
Hunting seems to shed a different light on your relationship with the land.
A deeper, much more meaningful connection. Sitting at the edge of the field or in the woods for hours in complete silence, watching, listening, waiting that the universe will give you an opportunity to feed yourself and your family is magical.
It’s a blessing to be able to do it and it’s empowering. But if you butcher your own deer at home, you also know that it’s hard work.
Many hunters prefer to only do the hunting part.
Once they shoot the deer, they load it and drive it to the closest deer processing center. They tell the butcher how they want the meat prepared (cubed meat for stew, sausage, hamburgers…), they leave their deer with the butcher and off they go.
How to Butcher a Deer…
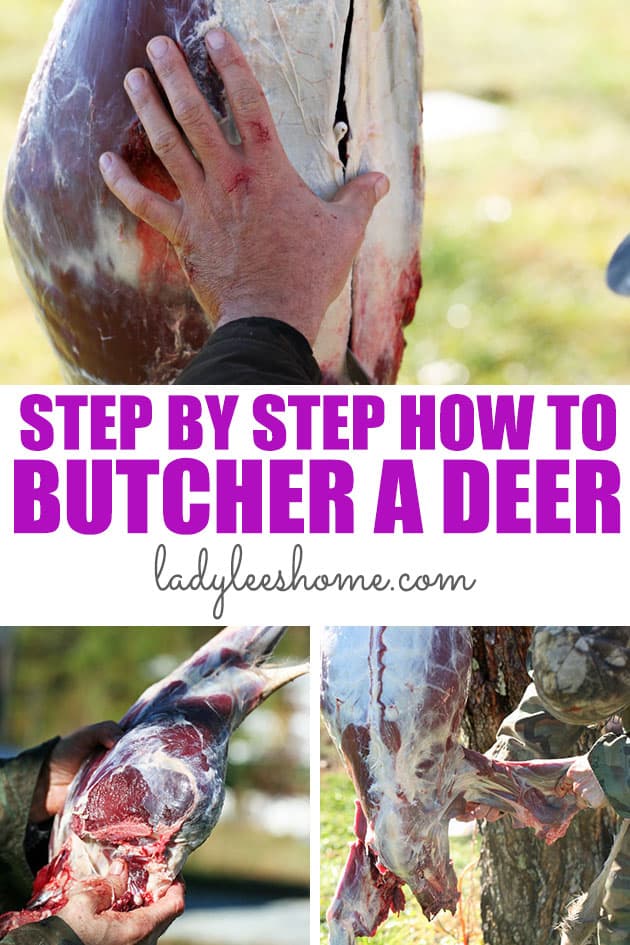
A few days later they come back to pick up their prepared meat packaged just as you’d find meat in the grocery store.
When we started hunting I honestly didn’t know that there was such an option…
I wasn’t born and raised in the U.S.. I was born in Israel where the only thing you hunt is other people who want to kill you. That sort of hunting is a bit different.
Anyway, when we moved to the country to live a more “homesteady” kinda lifestyle, hunting was one of the first things we started doing because there is really no cleaner meat than wild meat.
We had some friends help us understand the whole hunting process, the rules and how to do it, and then how to butcher the deer and get it in the freezer.
The hunting part was always my ex-husband’s responsibility, although I really really really want to learn how to hunt (hopefully this will happen soon), but when it comes to butchering and processing an animal, you can count me in!
I love taking apart bodies.
I realize that this might not sound so good but it’s simply the truth. I’ve always said that if I didn’t have to sit in school for an additional 10 years AFTER the 12 that I barely survived I would have been some sort of a surgeon.
Since opening people is out of the question I am left with animals.
It does help considering that I love eating meat and I try to raise most of it like ducks and chickens.
I butcher my own ducks and I butcher the chickens that I raise (and I also help my neighbors with turkey butchering and rabbit butchering), so when the guys dropped a dead deer in the back yard you can be sure that I was right there, ready for the action.
The pictures that I share in this post with you are from our first year of deer processing. It was a great year! The guys took down 4 deer and we all had plenty of meat to share.
The second year of hunting didn’t go so well. Still, we had enough deer meat but I was looking for deer hides because I started learning how to tan deer hides.
Someone suggested that I look for a local deer processing center and ask them if I can pick up hides since they usually do nothing with them.
A deer processing center!? I had no clue that there was such a place!
I asked around and found out that there was a butcher shop about an hour from where I live that is processing deer during the hunting season. I called and the guy said that I can come and pick up as many hides as I want.
I found myself a week later standing at the foot of a mountain of deer hides, heads, and legs.
It was the middle of hunting season here in the South and that deer processing center was as busy as a Jason Aldeen concert in July.
Of course, I ended up sneaking to the back of the shop and talking the ears off of a nice young butcher who shares the love of butchering with me.
I also loaded my trailer with hides, legs for my dog to chew on, and deer heads to extract the brain from for brain tanning.
AND I’ve also seen the nice packaged sausage and hamburgers.
I am telling you this just in case you didn’t know that there are deer processing centers.
Butchering your deer is not complicated but it is work. And making sausage and so on… It takes time and a lot of effort.
If you prefer paying someone else to do it it’s completely fine. Just ask other hunters in your area or Google deer processing centers close to you (or just look for the closest butcher shop).
I still prefer to do it myself.
First, because I love the process and I don’t mind the work, and second, because the butcher is an hour away.
By the time I drove there and back and then there and back again to pick up the meat that I have to now pay for them to package for me I’ve spent a lot of money and time.
If you are like me and prefer to butcher your deer at home or if there isn’t an option for you to have someone else do this for you and you want to learn how to butcher a deer, read on!
How to Butcher a Deer at Home…
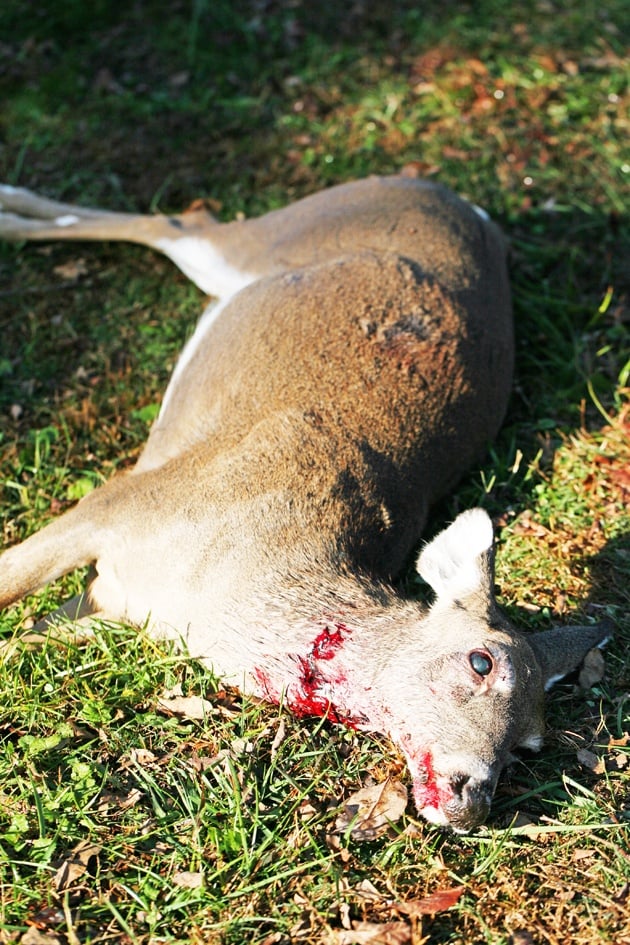
Before we start with the tutorial, the pictures, and all the great information, let me just remind you that this was our first year of processing deer on the homestead.
We went with the easy way to butcher a deer, which means that we chose to not gut the animal.
We were just beginning our journey of hunting and butchering large animals back then and it was a good place to start to eliminate some of the overwhelm.
These days I know a bit more on the subject and I am much more comfortable processing a large animal so I do try to use as much as I can, but looking back I still think that this was the best way for us to start and it might be the best way for you too.
In fact, I know many experienced hunters that still process a deer the way I’ll show you because most people don’t like to eat the organs and are willing to give up a little bit of meat (the ribs mainly. There is not much meat on them) to avoid the mess of gutting the animal.
Like I said at the very beginning of this post, there is more than one way to do this so I’ll try to present a few ways to you and you make the decision of how you want to do this.
You can always change your way later if you find that you are getting more comfortable with deer butchering.
Here is what we are going to go over:
- Deer butchering equipment.
- To field dress or not to field dress?
- Hanging a deer.
- Skinning a deer.
- Removing the deer’s head.
- Removing the deer’s tail.
- Removing the deer’s front legs.
- Removing the deer’s backstraps.
- Removing the deer’s neck.
- Removing the deer’s abdomen.
- Removing the deer’s hind legs.
- Setting deer meat in ice.
- Packing deer meat for the freezer.
- Using deer meat and bones.
Let’s do this, shall we?
Deer Butchering Equipment…
If you’re going hunting and you plan on butchering your deer yourself, make sure that you’re prepared with all the equipment that you’ll need because once you killed that deer you want to process it as fast as you can.
You are going to need…
A butchering knife – this is a nice set to have on hand!
It includes not only a few knives with different size blades but also a blade sharpener and a bone saw.
You are definitely going to need both. You want to make sure that your knives are very sharp to make the job a bit easier.
Saw with a metal blade – if you only have a butchering knife make sure you have a regular saw with a metal blade to cut the bones.
Some people also use a reciprocating saw for this but a simple hand saw is just fine.
A gambrel – we are going to hang the deer for easy processing so make sure you have a gambrel and…
A lift system – some gambrels come with a simple lift system like this one, but life is much much easier if you have a chain hoist thingy!
You connect the gambrel to it and it lifts the deer like the Hulk lifts a tank. Easy peasy.
Cooler – we are going to leave the meat in the cooler covered in ice for 24 to 48 hours. Make sure you have a big enough cooler.
Ice – you’ll probably need two or three bags of ice. Most hunters just drive to the nearest gas station to grab ice after killing the deer.
Apron – in case you want to cover up with an apron, this is a great one.
Latex gloves – in case you happen to visit the nail salon just before you shot a deer and you don’t want to damage your nail polish, you might want to use latex gloves.
A hose – every time that I butcher something outside I make sure that I work somewhere that my garden hose can reach.
I always need to wash something, clean my hands or tools and so on. So just make sure that wherever you work, you have easy access to water.
Ok, we are set up and ready for deer processing!
To Field Dress or Not to Field Dress?
You shot a deer… Now what?
You have two options: to field dress the deer (remove the guts in the field while the deer is on the ground) or to carry it to the homestead whole.
You’ll see below, that you don’t have to remove the guts.
If you choose not to remove the guts you give up the two small pieces of tenderloins (however there is a way to get them out without gutting the deer. I’ll link to a video about that below), the ribs that don’t have much meat on them (I usually save them for my dog), and the organs.
If you like organ meat, you can eat the deer’s liver, heart, and kidneys (although the reports are that they taste like urine).
So, if you’d like to get those parts you’ll have to gut the deer.
If you choose to gut the deer I strongly recommend that you do it in the field. Take whatever organs you want and leave the rest in the field for nature to take care of.
You can certainly gut the deer in your backyard but disposing of the guts is just a messy business.
If you choose to field dress, this video will show you how to get it done right.
I love that he also shows how to get the organs in case you want to try to cook them.
Just remember that after you field dress a deer you want to try and wash the blood off as soon as you can so it doesn’t dry on the meat.
Hanging the Deer…
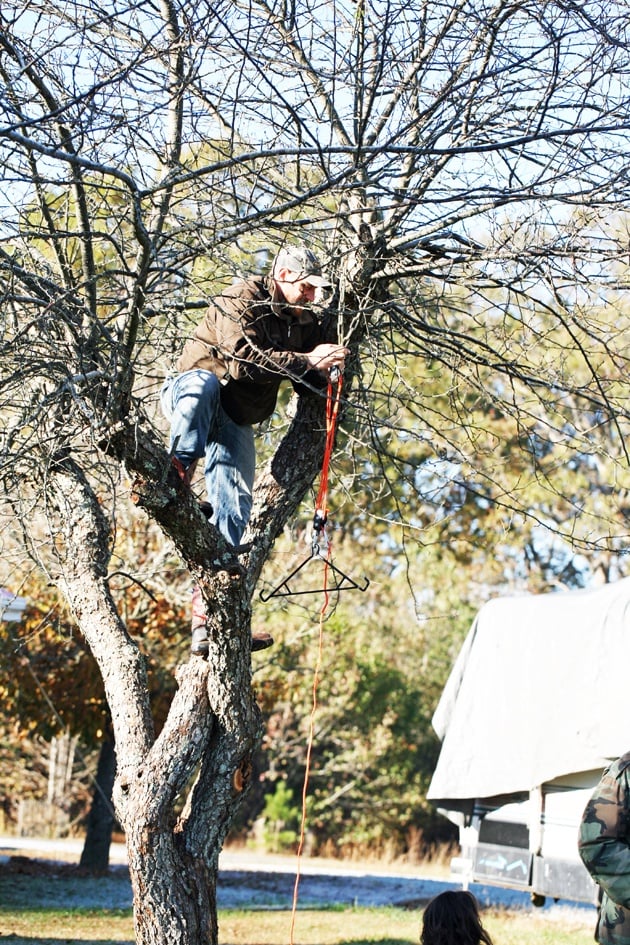
Once you get back to the homestead, find a nice spot to hang your deer.
It can be a tree or a beam or something like that. Just make sure that it’s close to a water source and that you have plenty of room to work.
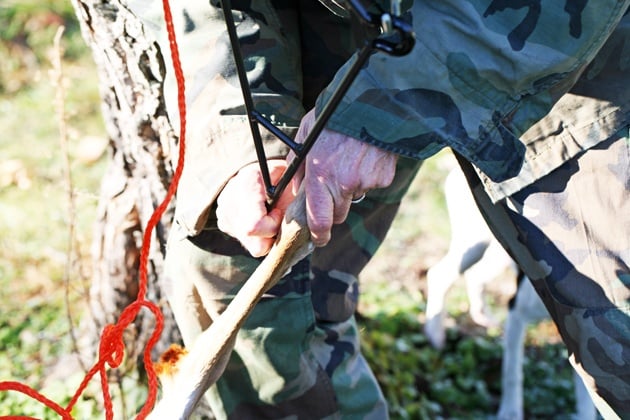
Right behind the joint that is above the hind hooves of the deer, there is a very thick tendon, you want to make a cut in the skin between that tendon and the bone…
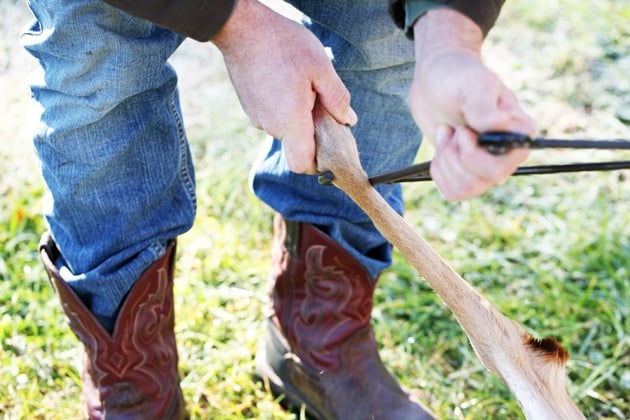
Bring your gambrel all the way to the ground and hook both ends of it through the cuts you made…
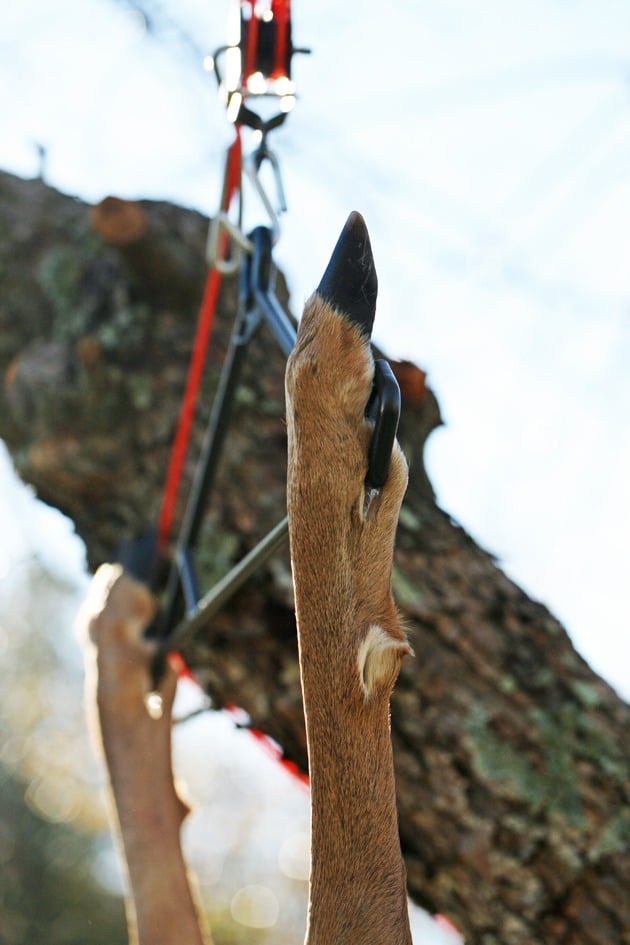
Then carefully pull the gambrel up.
This is where the chain hoist becomes really handy, especially for us ladies!
There is no way that I can lift the deer up from the ground with the simple lift system that comes with some gambrels but it’s super easy with the chain hoist.
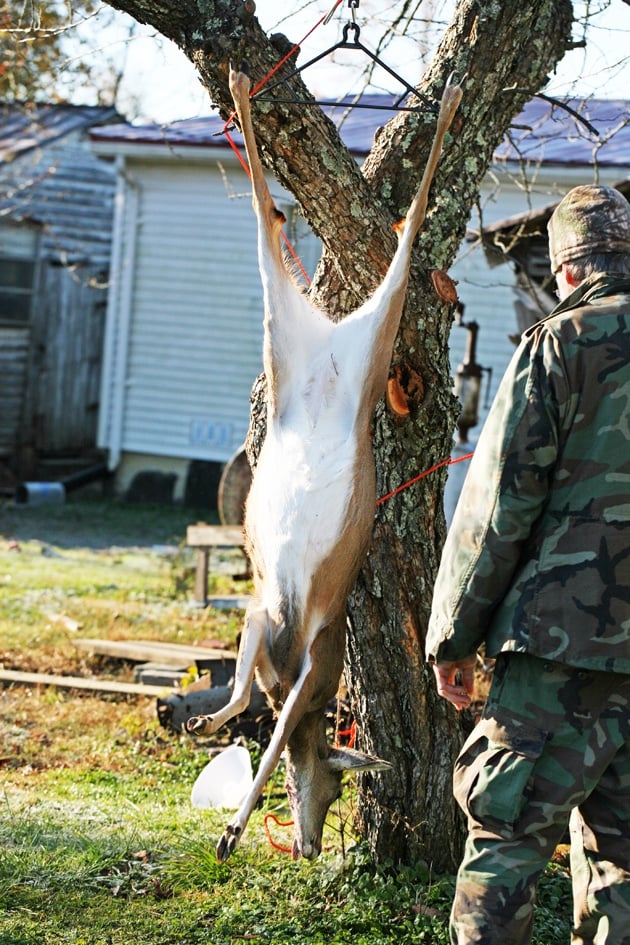
All right, the deer is in the air, we are ready for the next step…
Skinning the Deer…
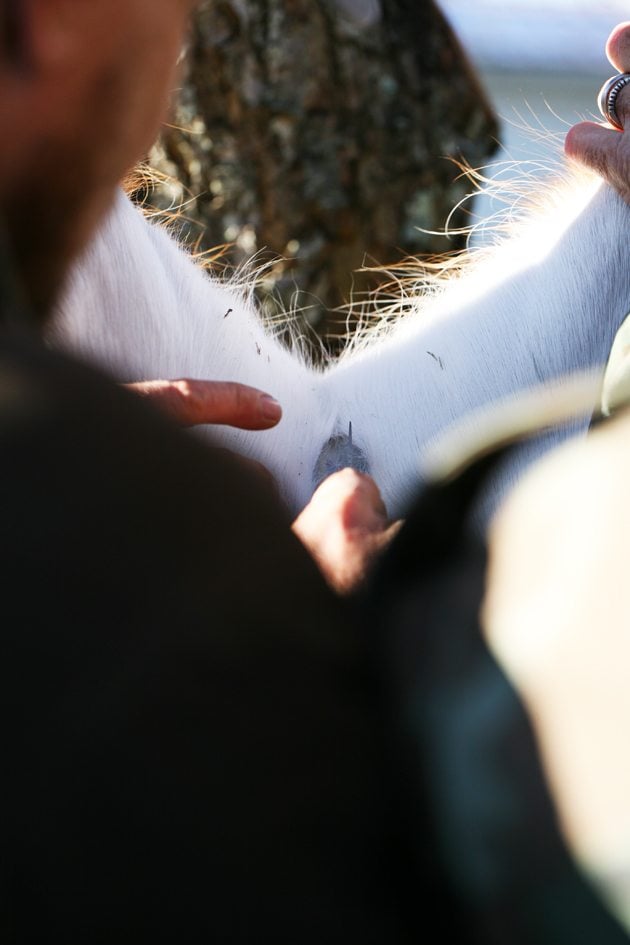
There are 17 different ways to skin a deer. The way that we do it here is my preferred way to do it because I get one large, beautiful piece of deer hide that I can tan.
We start by making a small cut right in between the hind legs. We don’t want to cut the meat, only the skin…
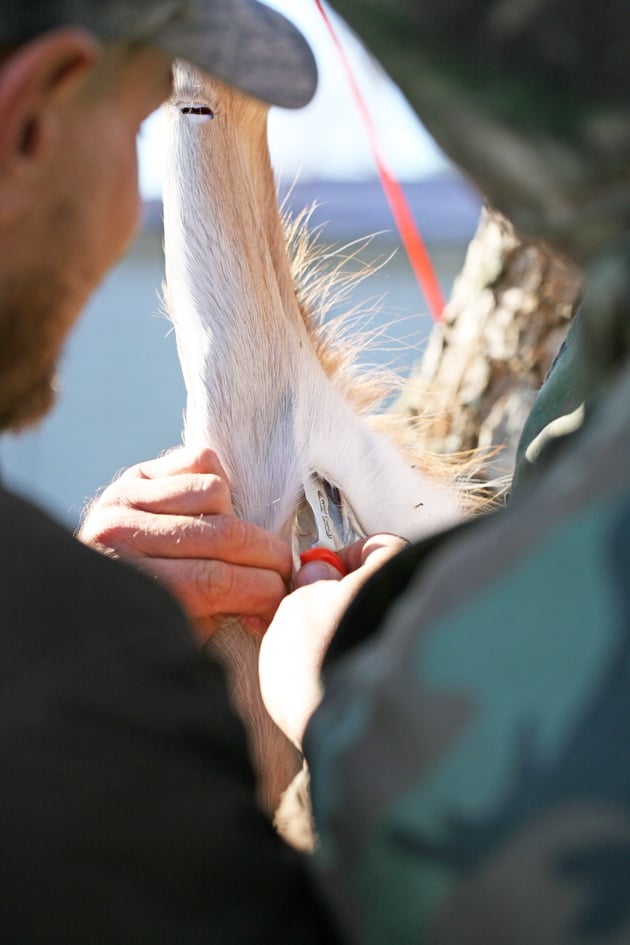
Then, we insert a knife under the skin and cut from the inside out in two diagonals toward the hind hooves…
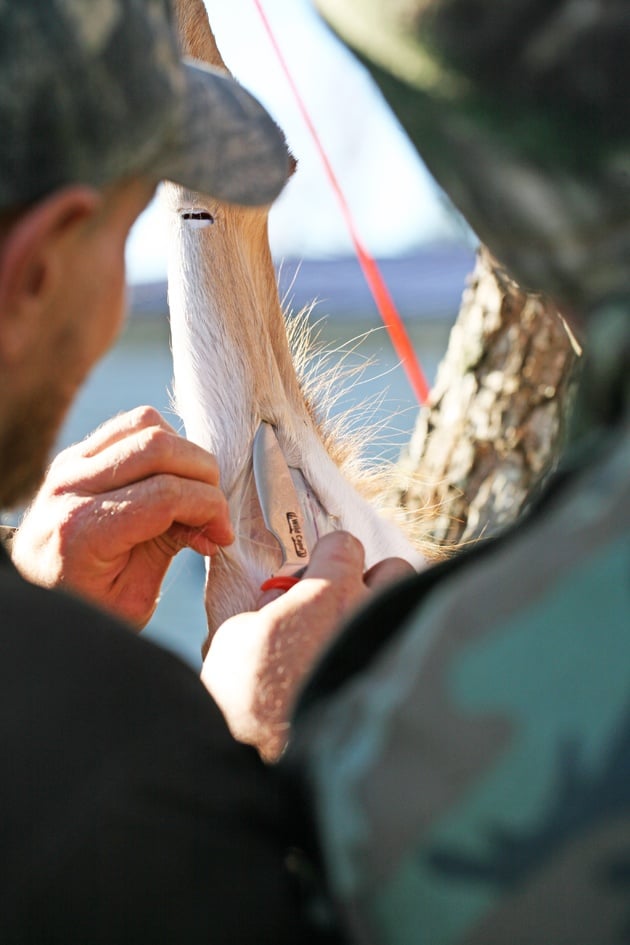
Until we get to the joint…
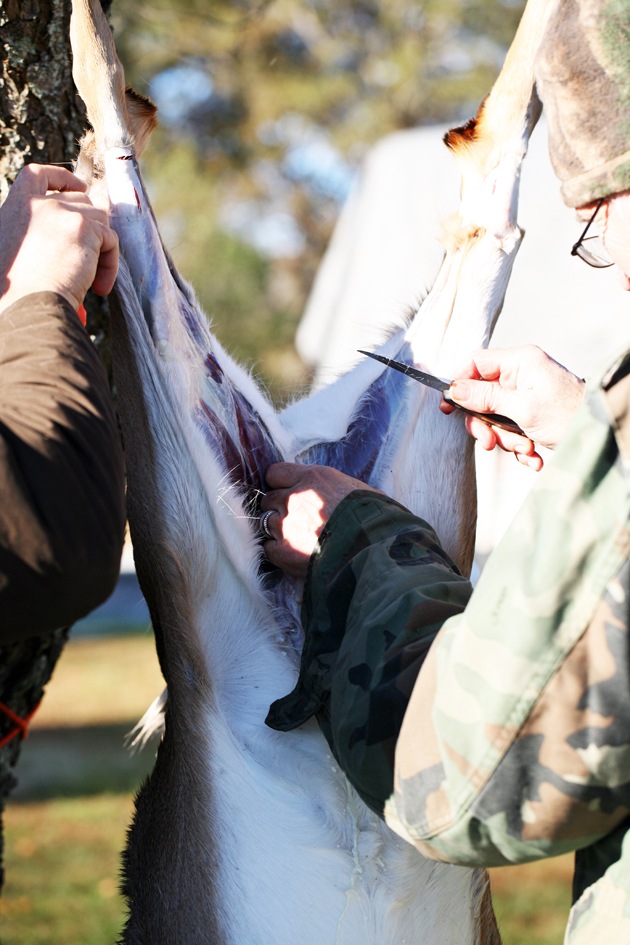
When we get to the joint, we cut the skin all the way around it.
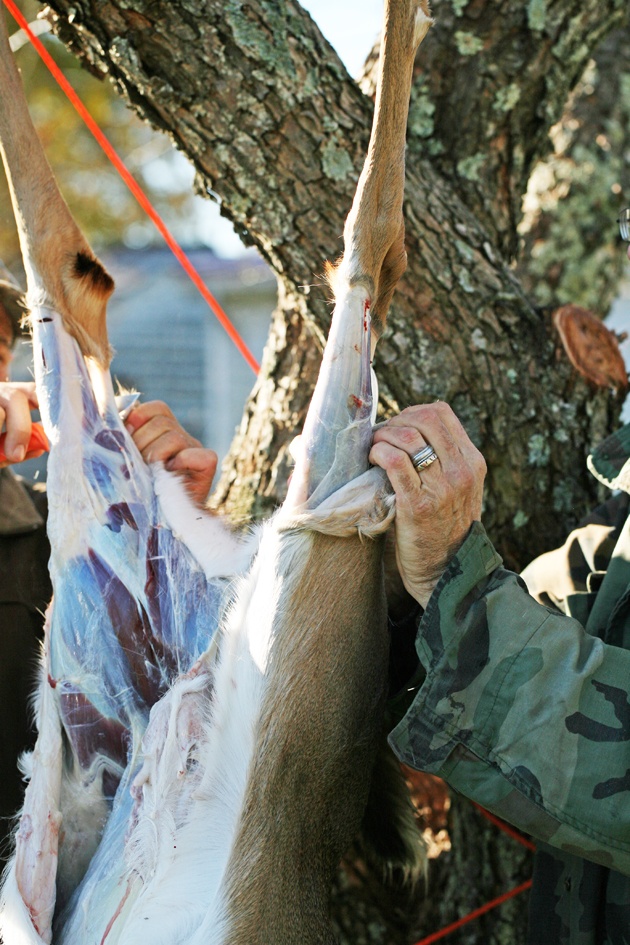
We keep working from front to back, around the tail, separating the skin from the meat…
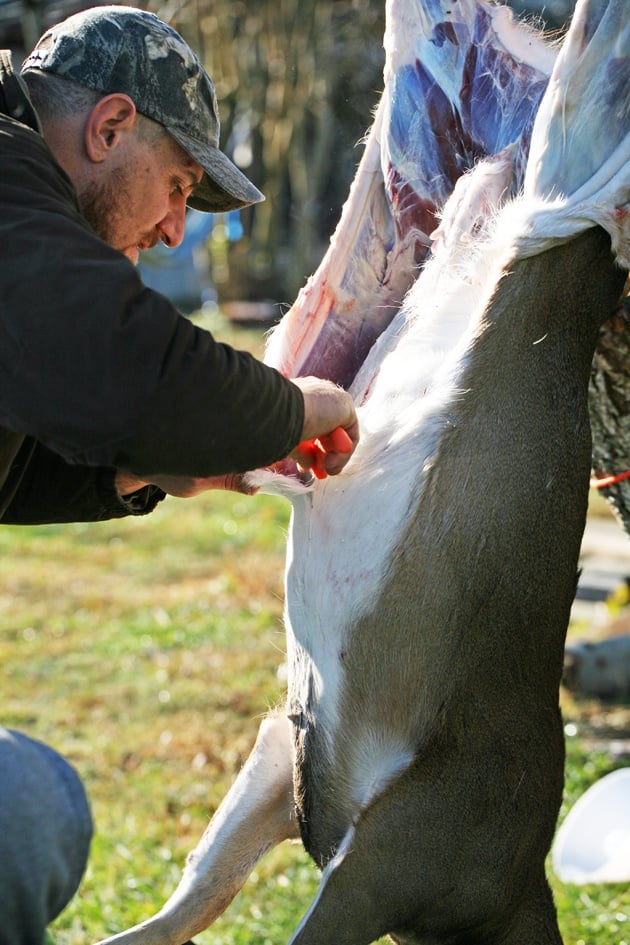
From the front, we keep going down the belly…
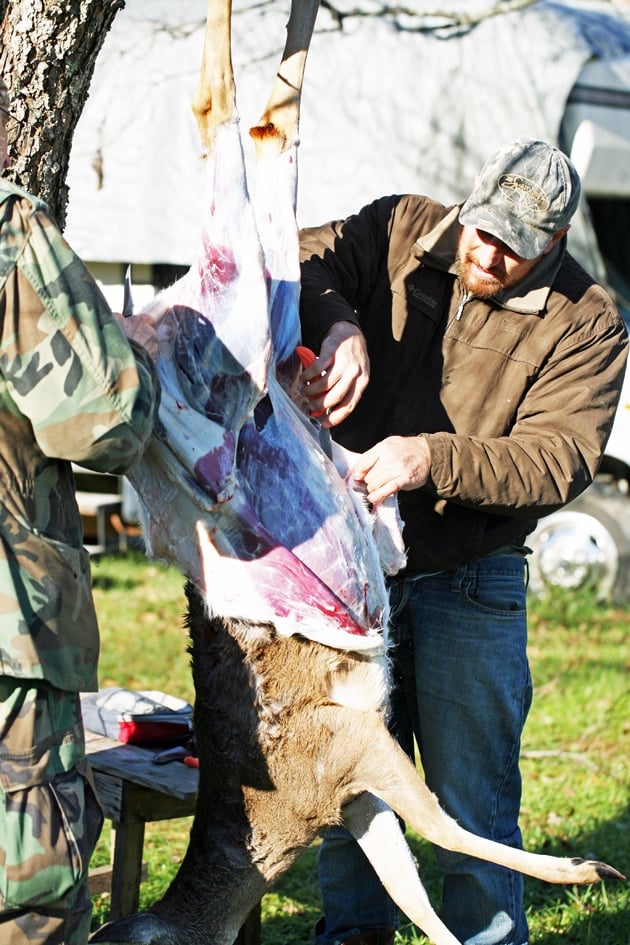
And around the sides…
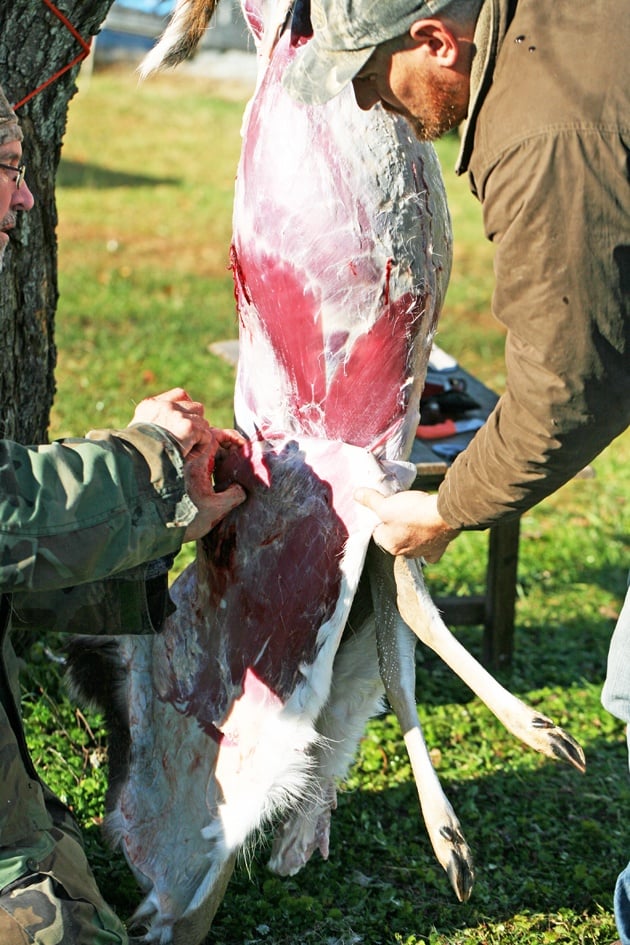
And down towards the back…
It’s a combination of pulling the skin down and using the knife here and there. For the most part, the skin separates from the meat pretty easily but you’ll notice that sometimes you need some help from the knife to cut some connective tissue.
Whenever you use the knife just do it carefully so you don’t cut the meat or make holes in the hide if you’re going to use it to make buckskin.
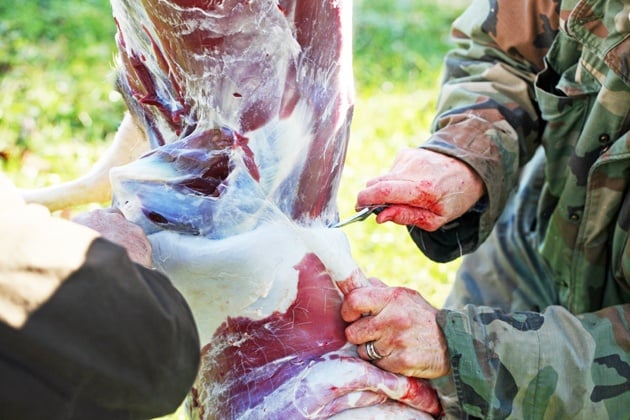
As we get closer to the neck, we often need a bit more help from the knife to separate the skin from the meat…
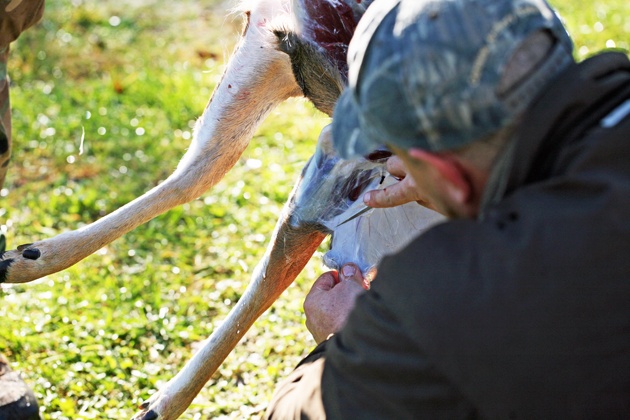
This is the tricky part.
I hope you’re not in a hurry… Just take your time and go down the neck and around the shoulder joint down to the front legs.
There is really not much meat on the front legs so we don’t bother going all the way to the joint, just a couple of inched down before we cut the skin around the legs.
Removing the Deer Head…
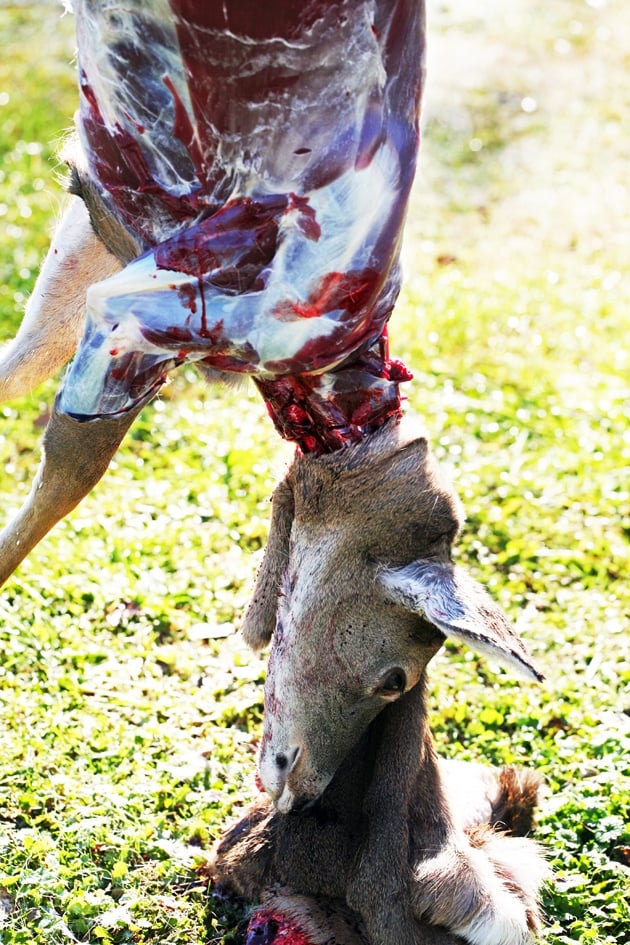
So now the deer is skinned and it’s time to remove the head…
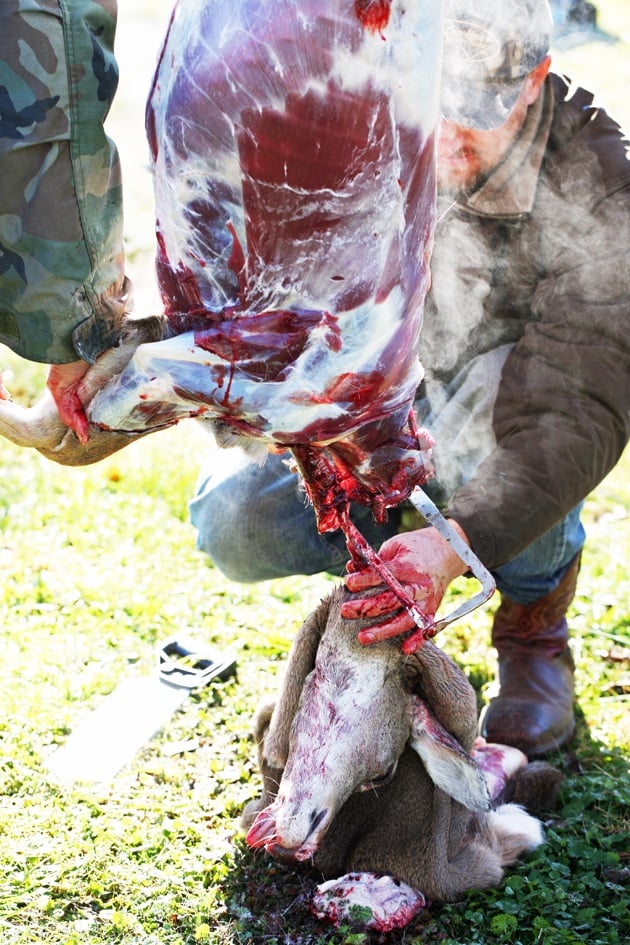
This is where we need to use the saw. Just cut the head right off.
I separate the hide from the head, fold the hide and send it to the freezer to tan later.
If you don’t use it and no one else wants it, you can simply throw it in the woods for nature to take care of.
I then remove the brain from the skull so I can use it for brain tanning. I also remove the antlers using the metal saw.
My kids love playing with them and they can be used for decorating or to make hooks and buttons when sewing buckskin into clothes or handbags.
There is a lot of meat in the head. You can cook and eat the brains if you don’t use them for tanning and you can remove the tongue and cook it.
I could not find a good video to show how to do that so I’m hoping to write another post about that soon but basically, you flip the skull and access the tongue from the underside of the bottom jaw.
If you are not interested in eating the tongue, consider harvesting it for your dog if you have one. It’s great meat.
Some people also skin the skull and cook it, there is some meat on the head. I think it’s tough and not worth the time (you have to cook it very long) so I give the skull to my dog. She messes with it for days and absolutely loves it.
Removing the Deer Tail…
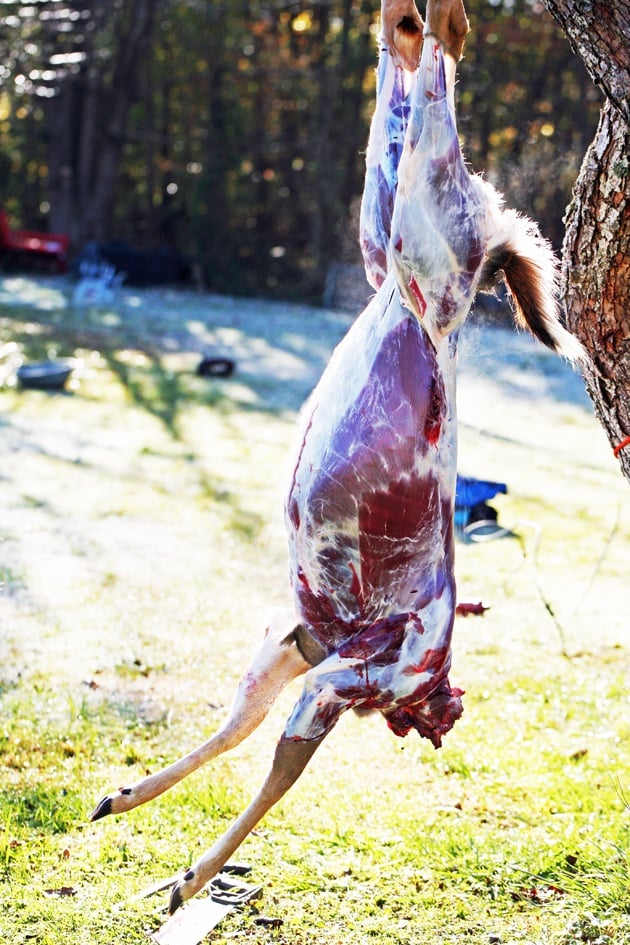
Next, after the head, comes the tail…
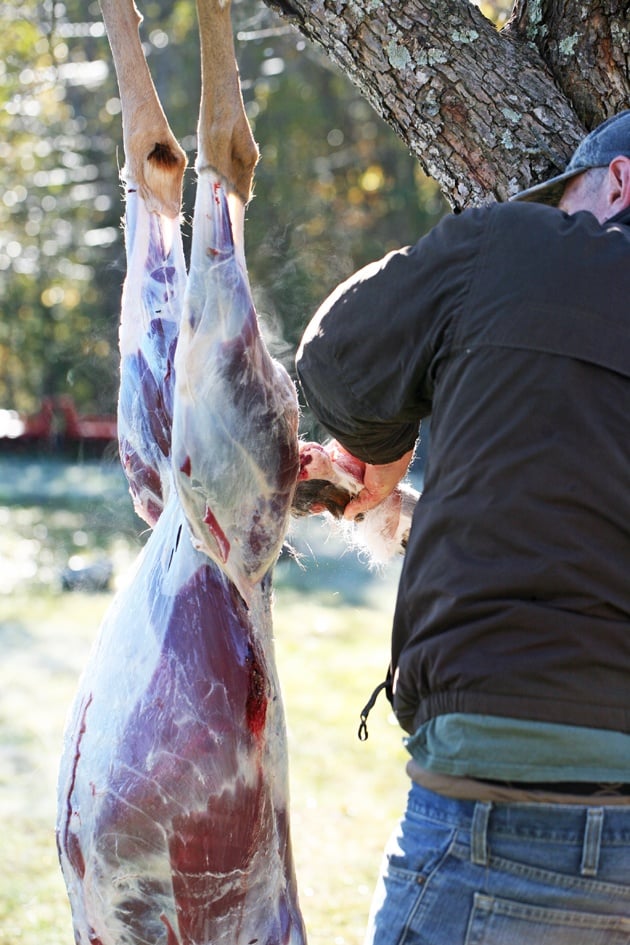
We work around the tail with the knife…
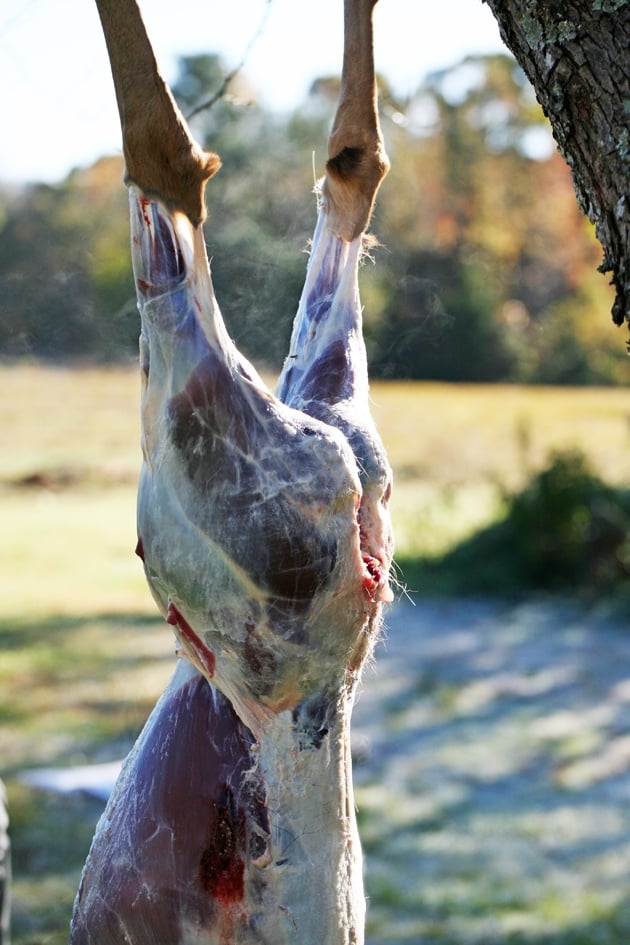
And remove it. It’s really pretty simple.
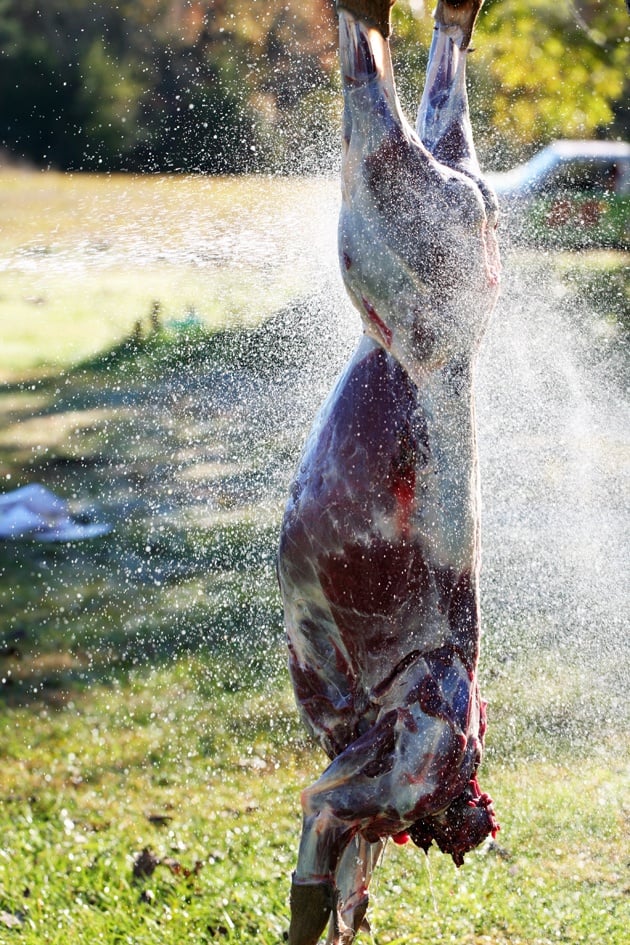
All right, we are now ready to process the body. We give the deer a good rinse with cold water and wash our hands and tools to remove the hair and blood.
Removing the Deer’s Front Legs…
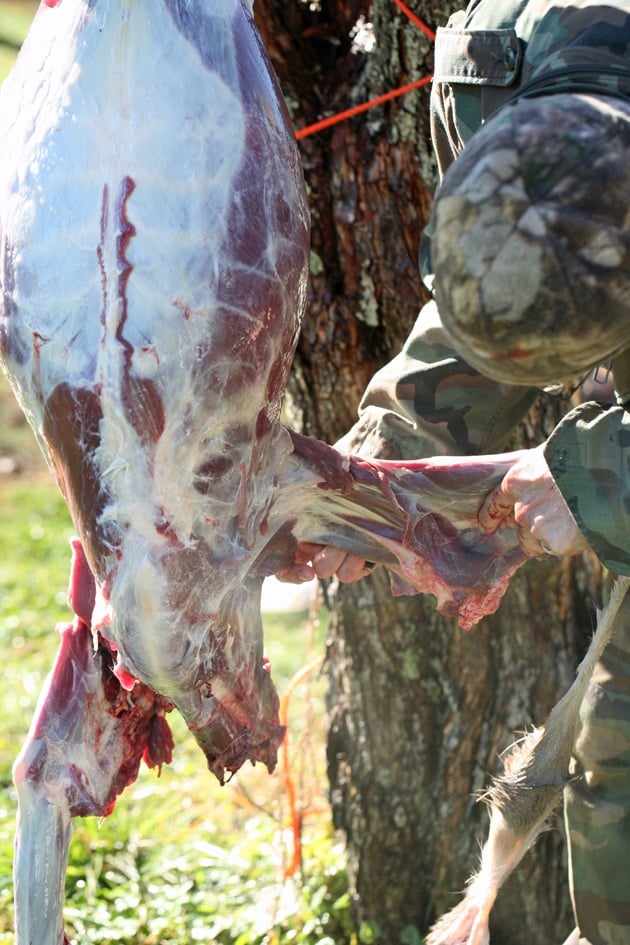
To remove the front legs, we pull the shoulder away from the torso and cut parallel to the rib cage…
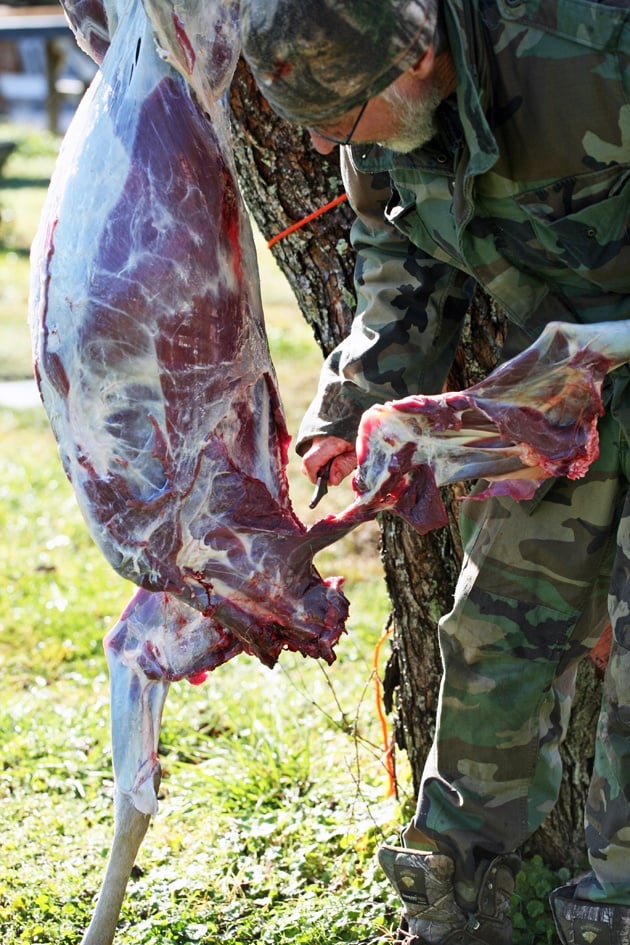
Until it comes off…
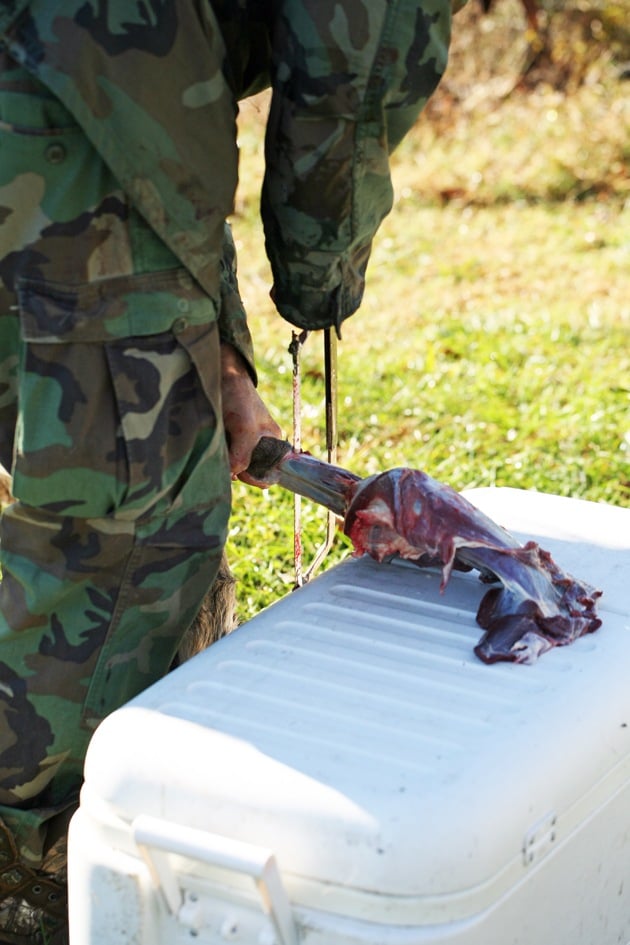
We use the saw to get rid of the lower part of the leg which is a great dog treat…
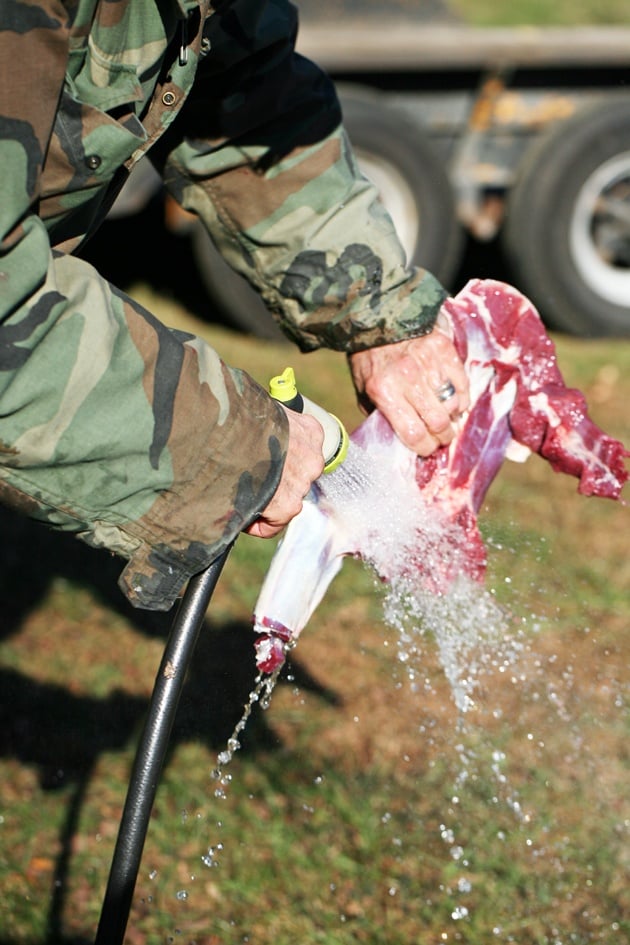
Then wash the front leg/shoulder…
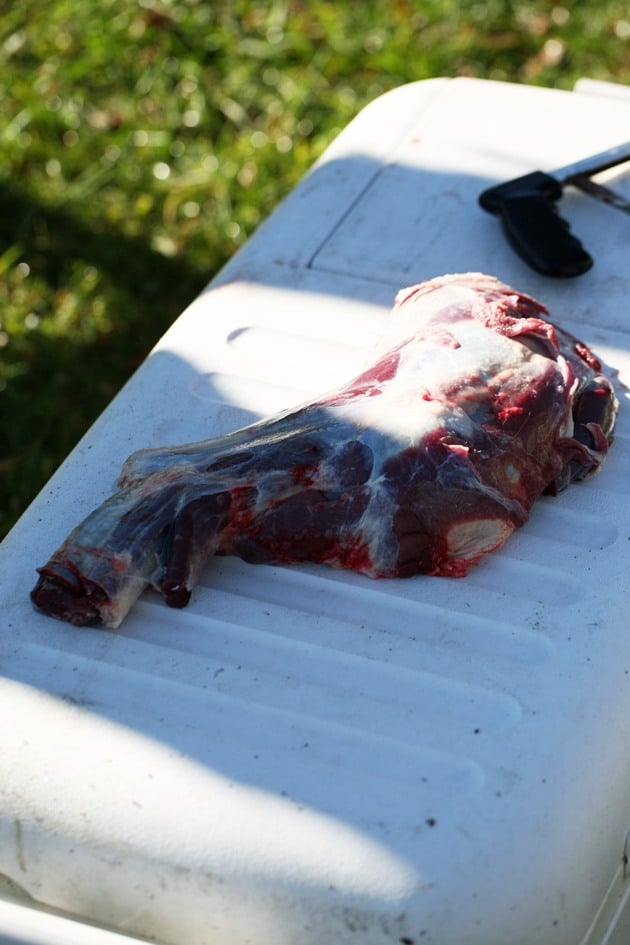
And we have our first piece of meat!
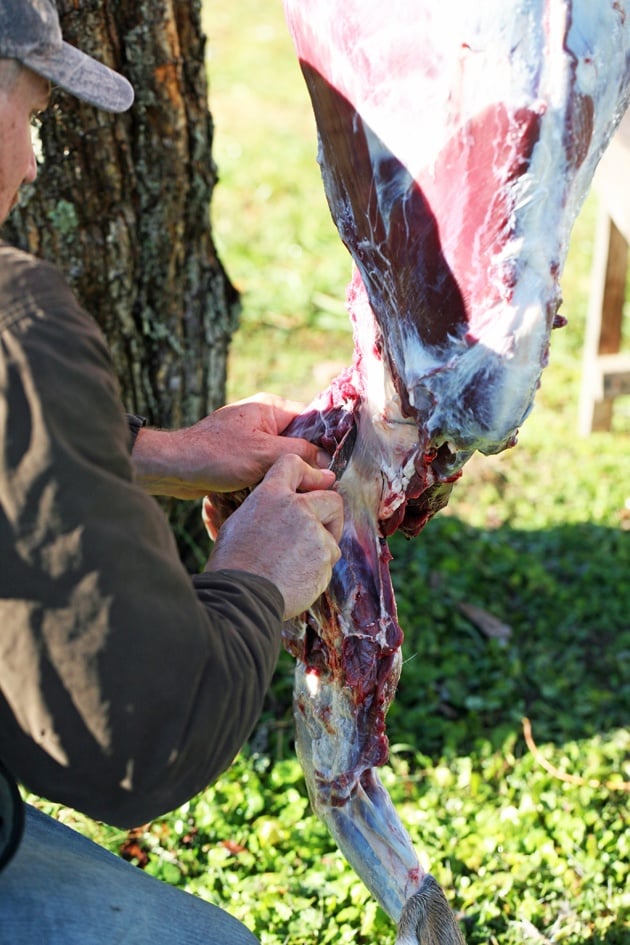
We do the same with the second shoulder and place both cuts of meat in the cooler.
Removing the Deer’s Backstraps…
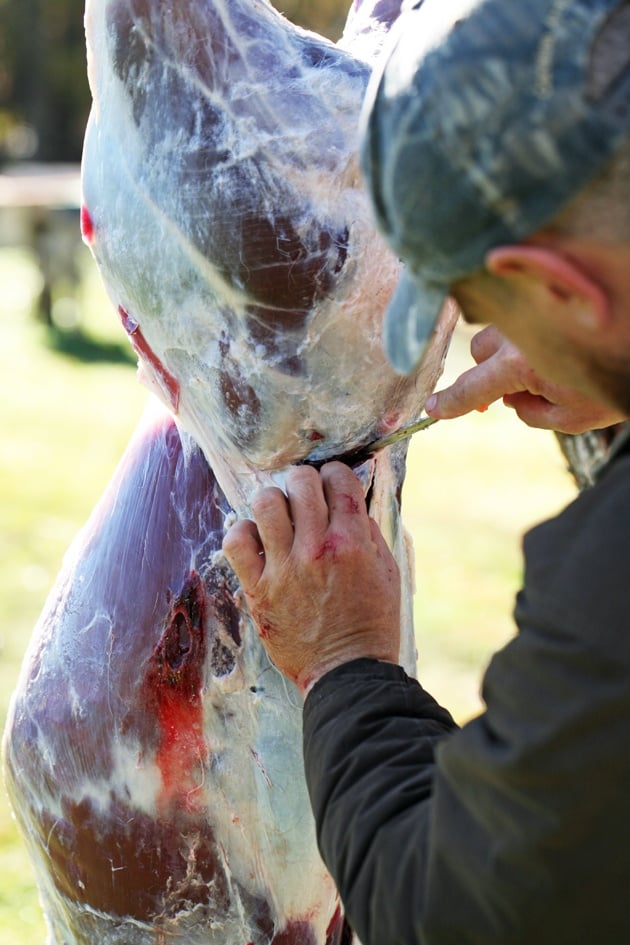
Next, we remove the back straps. We find the spot right where the back connects with the rump, the hip, and make a cut from the side towards the backbone.
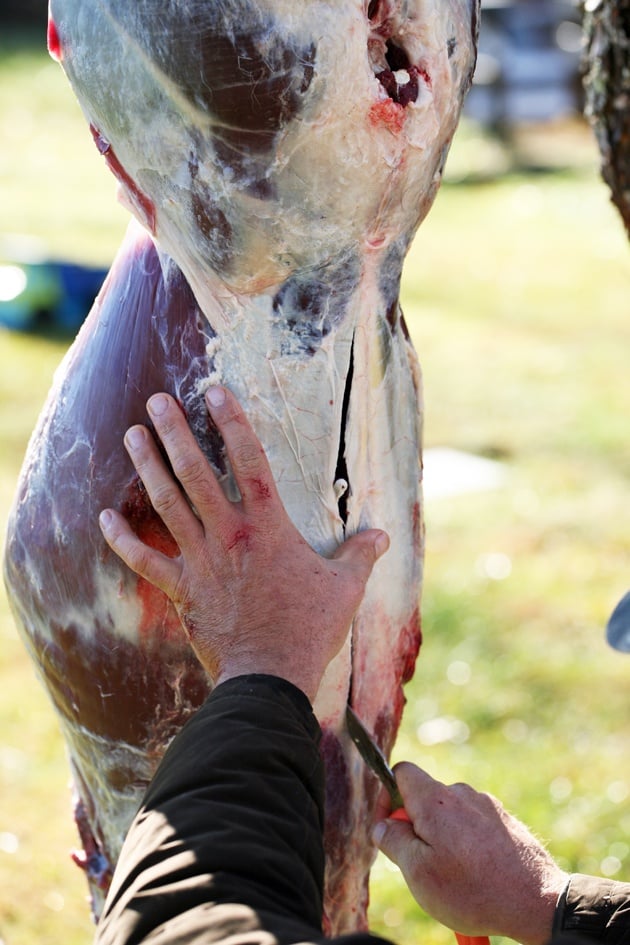
Next, we run the knife down right next to the backbone…
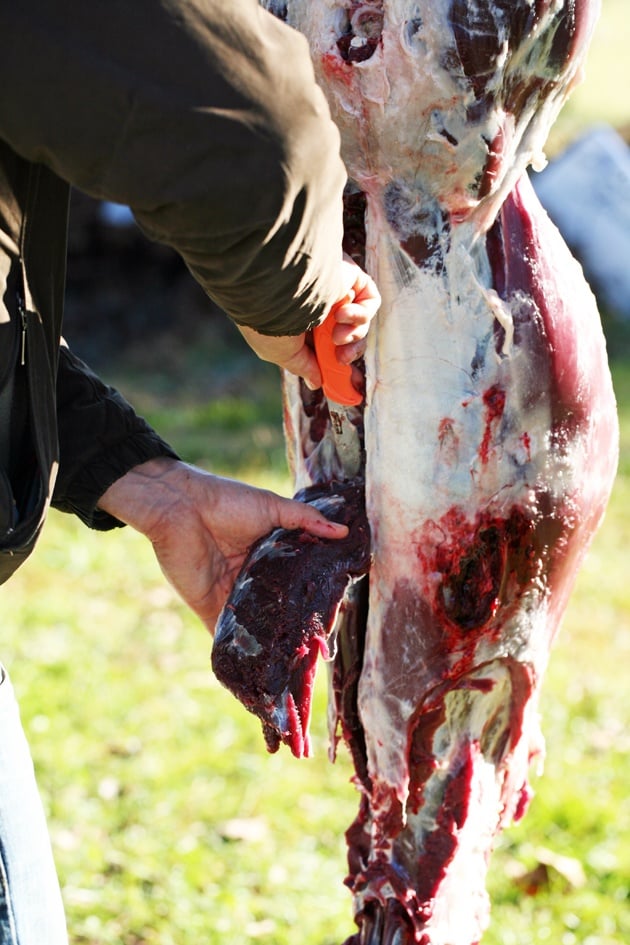
And start removing the backstrap from the top…
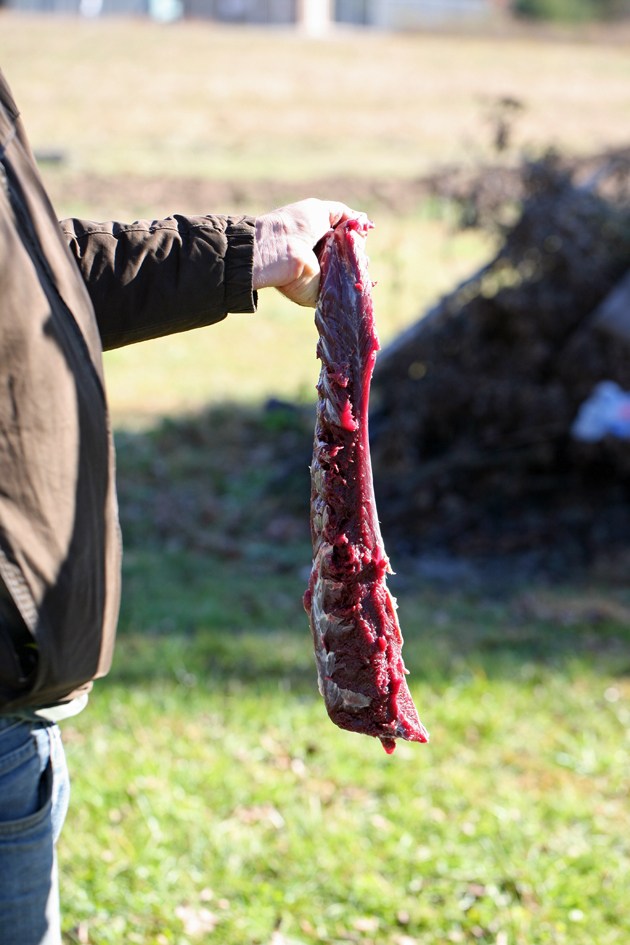
Here it is! This might be the best cut of meat on a deer.
There is another piece just like this one on the other side of the backbone so we are going to have to do this one more time.
We rinse the two pieces of meat and set them in the cooler.
Removing the Deer’s Neck…
This is a little hard to do if you didn’t field dress the animal but it’s possible.
We didn’t remove the neck when we butchered that deer so I don’t have a photo of the process for you but you are going to have to use the metal saw to do that (or, you can just not harvest it).
Give the neck a rinse and set it in the cooler.
Removing the Deer’s Abdomen…
When we processed this deer on our first year of hunting, we choose not to field dress it. Again, what you give up when doing that are the organs, the tenderloins, and the ribs.
Most people don’t really want to mess with the organs and the ribs don’t have much meat on them, however, the tenderloins are considered a prime cut of meat that many hunters don’t want to pass on.
I found this video that shows how to get to the tenderloins without gutting the deer. It’s definitely something to try (I’ve never tried it but it looks relatively easy).
Also, notice how he cuts off the front legs before he starts the deer butchering. I will certainly do this next time because the front legs do tend to get in the way when skinning.
I won’t skin the same way that he does because a lot of the hide is wasted. Since I like tanning the hide, I prefer the way I showed you above but if you don’t care about the hide this might be a faster way to do it.
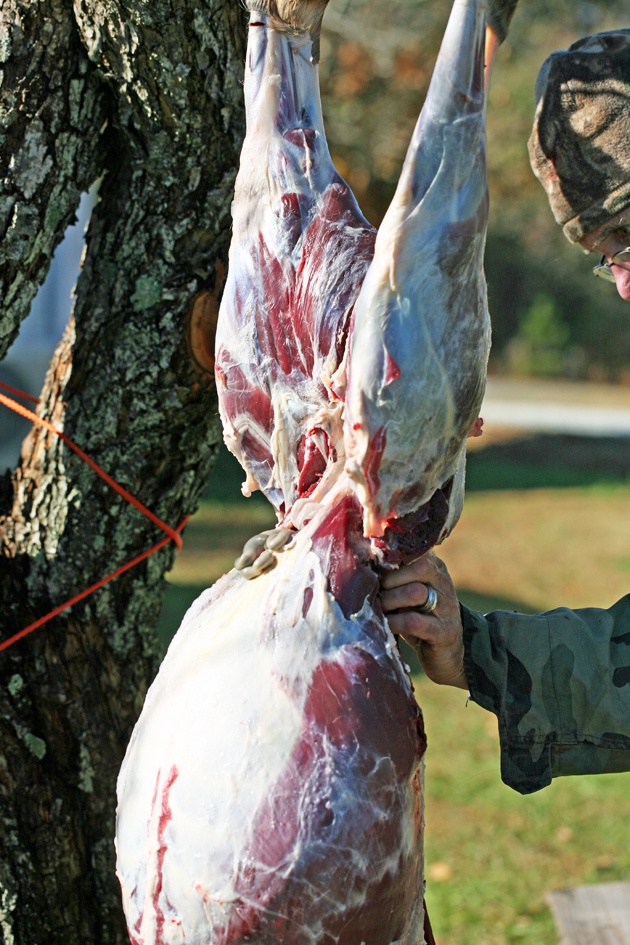
That year, we didn’t mess with the abdomen at all. All we did was cut the meat around the backbone…
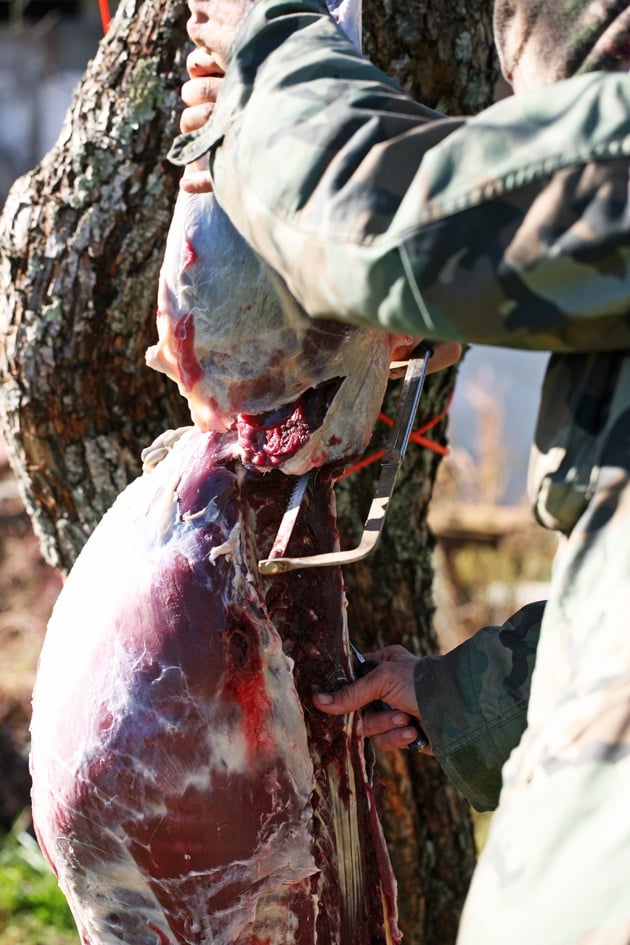
And we used the metal saw to cut through the bone…
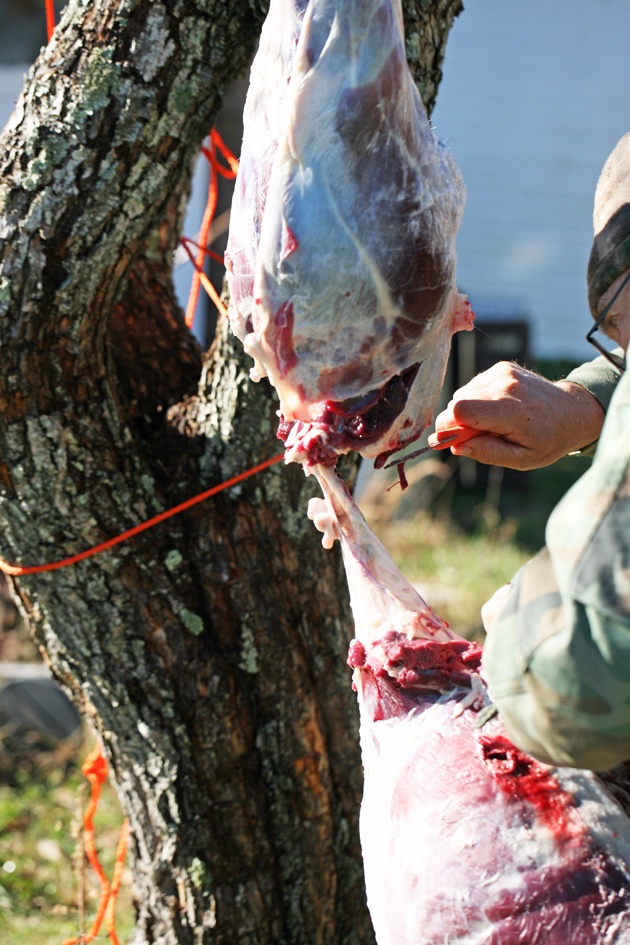
Until the whole belly part disconnected from the hind legs.
If you do this, I think that the best thing is to dump the whole thing in the woods for the other animals to enjoy. I know some people think it’s a waste, but if you are just beginning, this is fine to do in my opinion.
In fact, many experienced hunters will do it simply because it’s so much easier.
Nothing is really wasted if you throw it in the woods. Other animals will enjoy it so you can look at it as sharing.
In the years after that first one, we did gut our deer. Honestly, we did it more for the dog than for us.
There is just a whole lot of dog food and dog treats in the carcass and I have the best farm dog in the world. She keeps all the other animals safe around here so she definitely deserves it.
I am on a mission to learn how to cook the organs, though. I hope to have some organ recipes for you soon.
Removing the Deer’s Hind Legs…
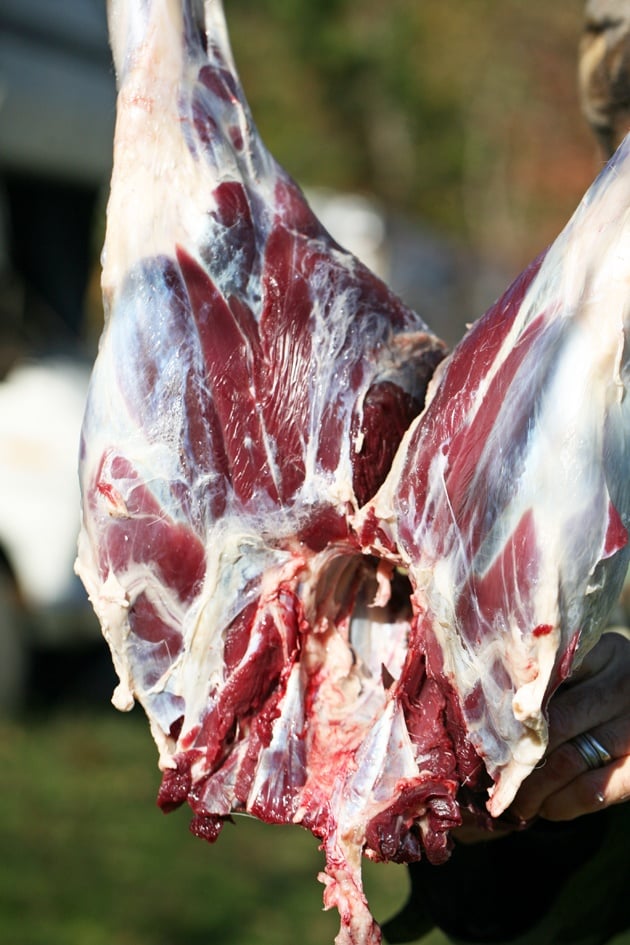
All that we have left to deal with are the hind legs and really, this is where most of the meat is…
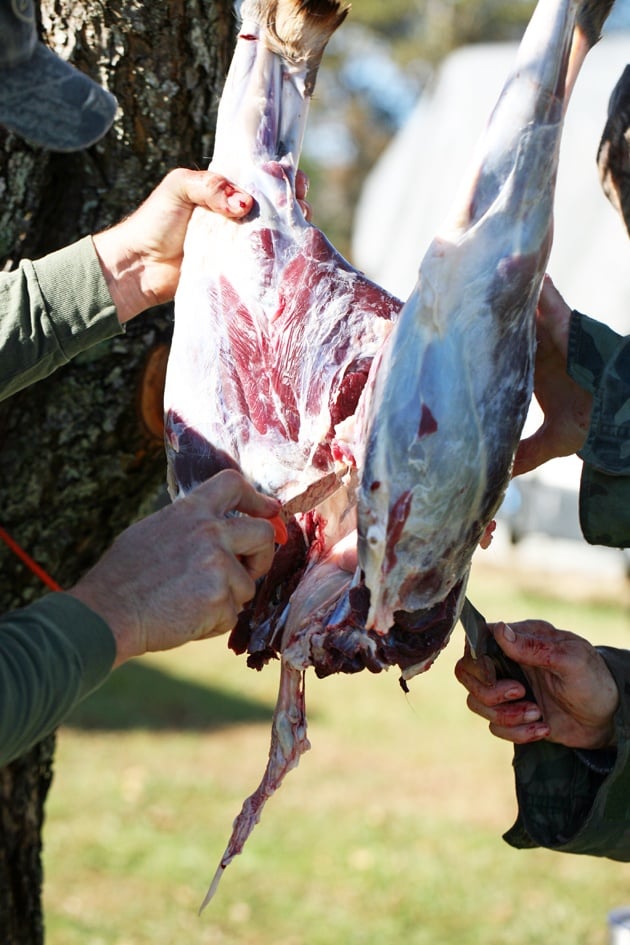
To separate the legs, we cut the meat in between the legs…
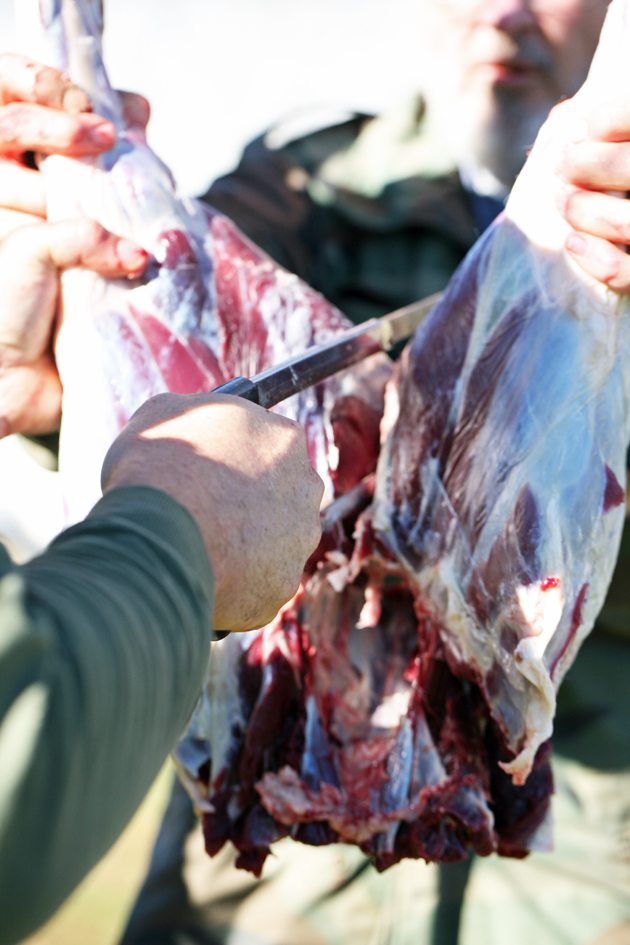
And use the saw to cut the bone…
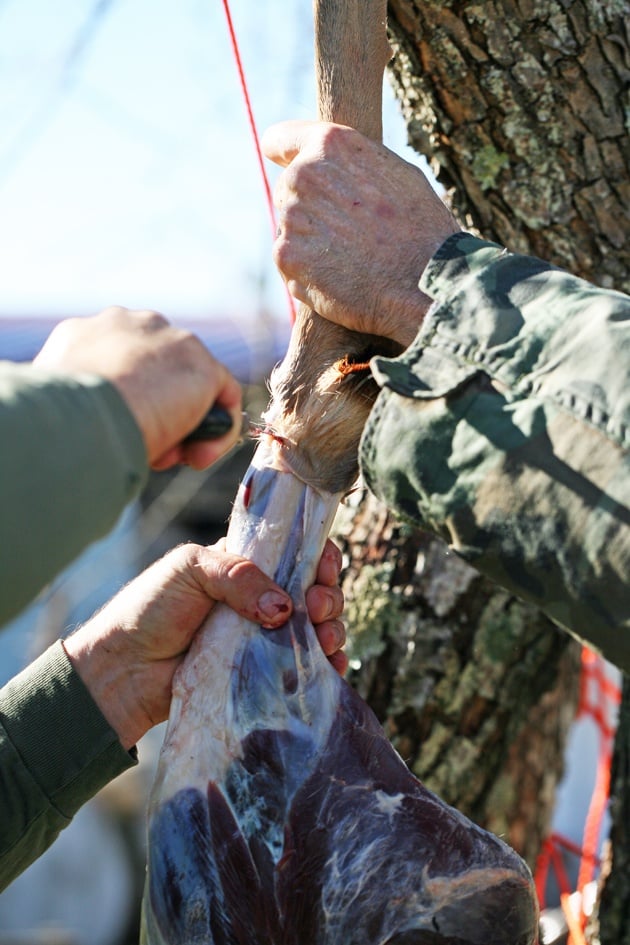
Once the legs are separated, we use the saw again to cut off the lower part of the leg…
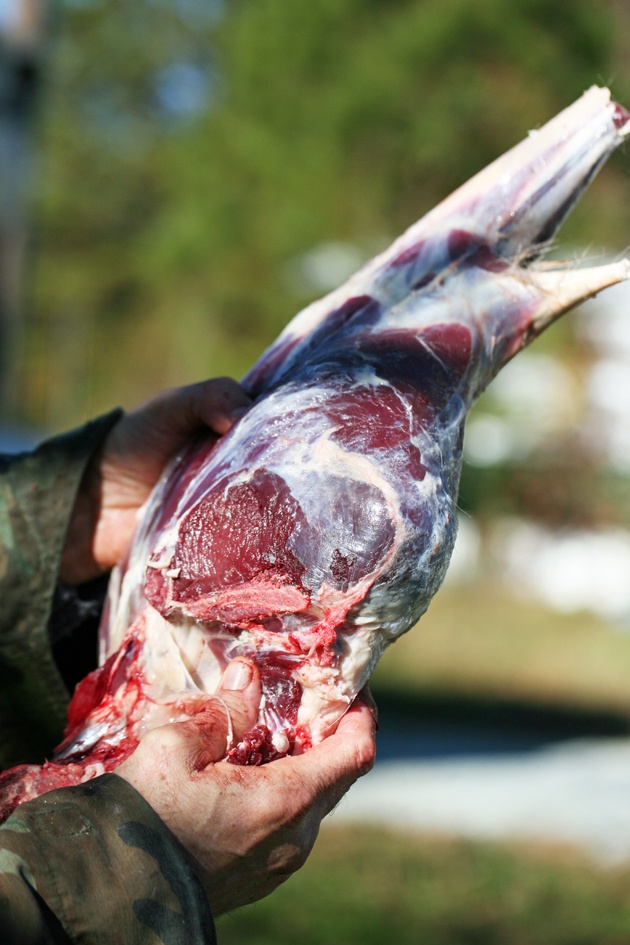
That’s it for now. We make sure to wash the meat well before we put it in the cooler. Later we are going to break the hind legs into a few different cuts of meat.
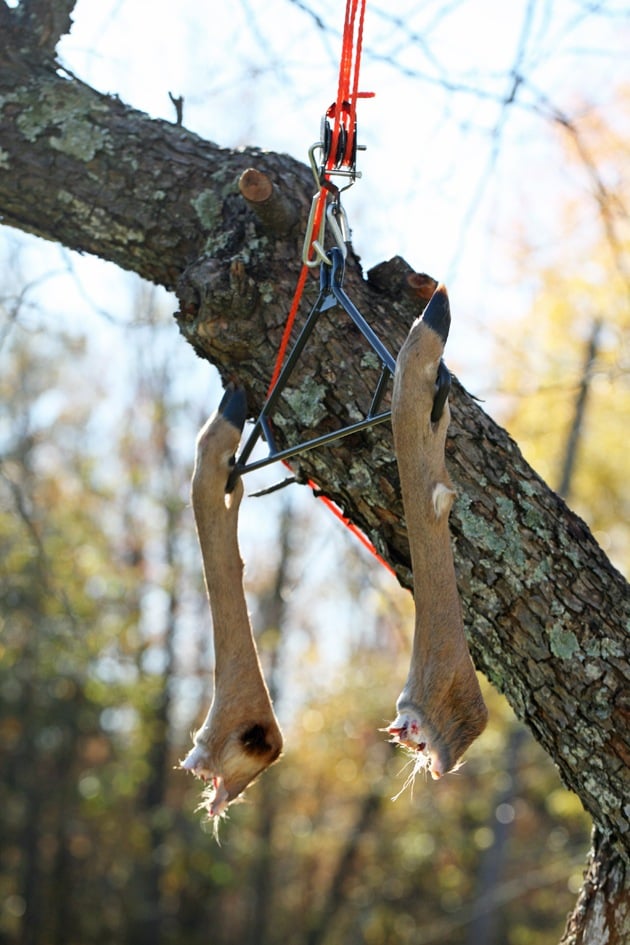
The lower part of the hind legs also goes to the dog (you can package and freeze all the parts that you are going to feed to your dog, you don’t have to give it all at once, of course) and we are done breaking this deer apart!
However, deer butchering is nowhere near done…
Setting Deer Meat in Ice…
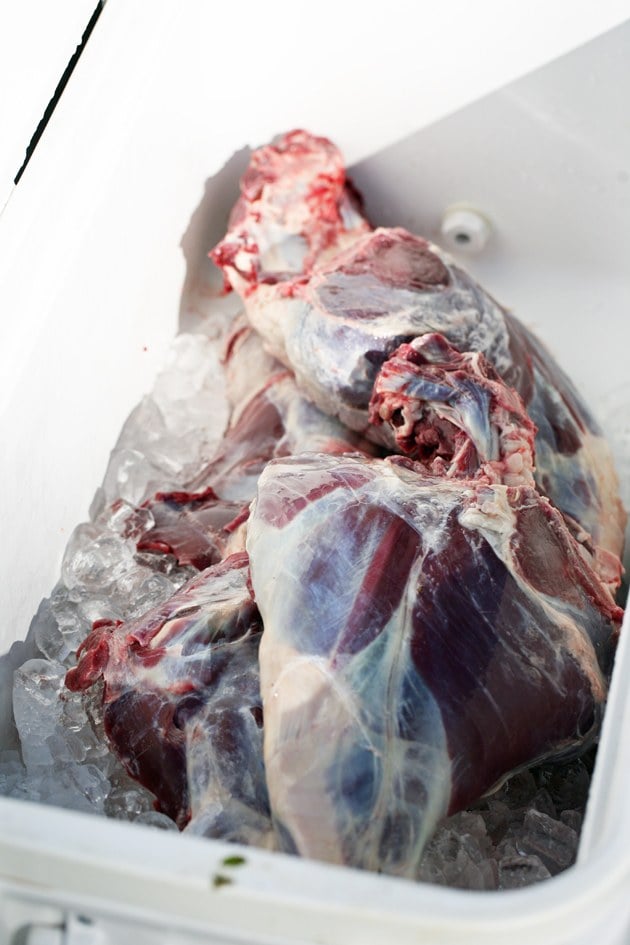
All of our meat is in the cooler after it has been washed…
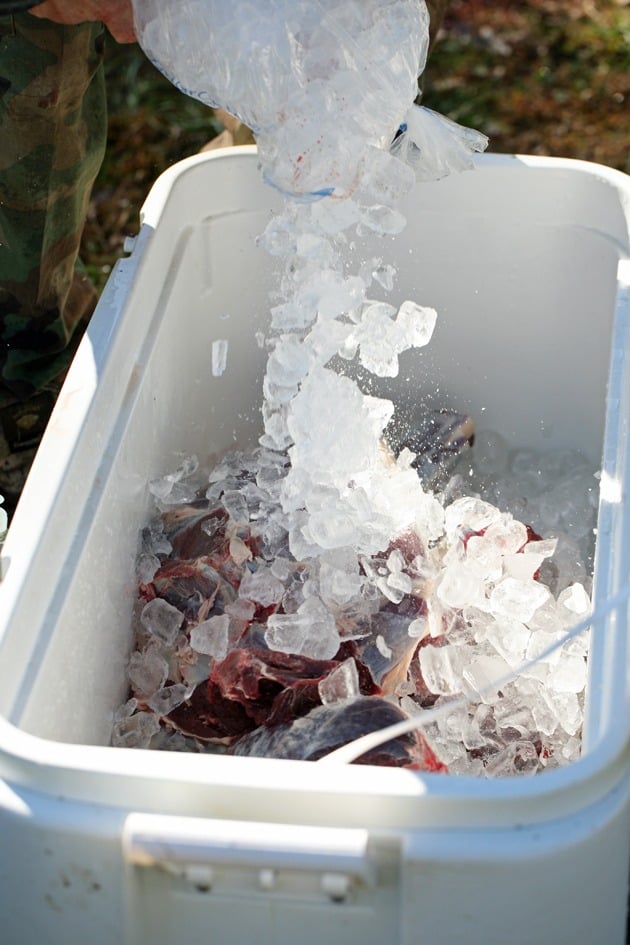
We have to cover the meat with enough ice and tilt the cooler a bit. Make sure the little drainage opening at the bottom of the cooler is open to allow water from the melted ice to flow out so your meat is not sitting in a pool of water.
The meat is going to stay in the cooler for 24 to 48 hours.
You should check it every few hours. If there is too much water, lift the cooler and help it drain, if there is not enough ice, add some ice.
Packaging Deer Meat…
The backstraps, the neck, the tenderloins, and the organs are ready to go in the freezer. Make sure to wrap them well with plastic food wrap and then with freezer paper (or use a food vacuum sealer).
What we really have left to deal with are the front and hind legs.
I found this great video that shows how to separate the cuts of meat. You can do this on the front leg too…
Don’t forget to label your meat after wrapping it!
Using Deer Meat and Bones…
With the bones, I make a bone broth that is so healthy and can it.
If you’d like to save some space in the freezer it’s very easy to can some of your meat. Here is a how to can meat tutorial.
You can go ahead and make some delicious BBQ venison neck recipe, deer jerky in the oven, or ground some of your meat and make venison burgers. And you can make delicious pulled venison for wraps or sandwiches.
There are soooo many ways to use your venison. I pretty much use it just like I use beef.
You should really be proud of yourself for going hunting and processing your deer! This is the cleanest meat you can provide for your family and it’s something to be proud of.
I’d love to hear your suggestions and tips. Tell me how you go about deer processing and what you do differently. Just remember that there is no one right way. Everyone is doing it a little different and it’s all good!
I hope that you enjoyed this how to butcher a deer post. Have a wonderful hunting season, friend!

Hi! I’m Lady Lee. I help homesteaders simplify their homesteading journey while still producing a ton of food! I am a single mother of four, I was born in Israel and raised in an agricultural commune called a Kibbutz. Now I homestead in central NC.

Hello I am a vegetarian but this looks very professional I’m doing it tomorrow so thank you for showing pics
Defo not my thing but this is so fascinating !
Did you kill this deer or did you find it dead ?
We killed it.
Working hard for your food. Its satisfaction. Visit any hunting site, u tube video on butchering deer. Keith Warren has a bunch if how to do things video.
You wasted a lot of good meat still. All shred get ground up for sausage and burger.
The neck makes a great slow cooker roast. Im glad you are hunting but keep learning how one deer can provide for your family.
Yes, we are using more now. We learned a few things since I put this post together. Hunting season is right around the corner! I’m excited to see how it will be this year.
Thanks for all the information. We hunt caribou in Alaska. My wife is Israeli. She loves caribou meat. We hunt and fish for most of our meat. It’s really a great way to live. Going to try canning meat this fall. Need options in case the power goes out
Oh wow! An Israeli in Alaska! I’d love to “meet” her. It has always been my dream to live in Alaska, one day, I’ll have a place up there. I know that I’ll fit right in! What part of Alaska are you guys in?
I have a “how to Can Meat” post here on the blog. I hope you found it.
I found the post on canning and ordered the canning pressure cooker you linked to. Tami (Tamar) is actually in Durham at Duke university for a month. We live in Anchorage. I’ll email you or contact info. Tami would love to have a visit and we have plenty of extra room
I am 45 minutes from Duke! Would love to meet her. Please send me her contact info.
my Question is I did not see you say or show where and what it looks like when you cut the secant gland out of the rear legs been hunting and shot my share but never get to see that part of it always got done before I got to the deer or was busy get other stuff ready to dress it
You don’t have to remove them unless you want to use them for hunting (to attract other bucks). We don’t touch them. They just come off with the skin when we skin the deer.
I have been hunting since 1965. Deer, squirrel, rabbit, raccoon, muskrat, bear, deer (whitetail and Mule), and Moose. Whatever I hunt, I eat, that is why I hunt. I also grew up on a dairy farm. Every Cow and every calf had a name. We cared for them, knew their preferences in how we handled them and as young kids we napped them. That was our family. We came to learn the reality of why we farmed. On sale day, the young stock was shipped and we knew why. But celebrated in the ones that stayed home. We also did our own butchering. Chicken, pigs, cows and sheep.
Our rules of butchering were as follows: 1. The animal shall be kept quiet and content and dispatched quickly and cleanly. 2. To keep the meat from spoiling, it must be immediately bleed and hung. The blood in the meat causes the meat to spoil. 3. Hiding cuts are made a rolled back at least 6 inches from the cut (Down the belly, up the inside of each leg, then around the leg. around the anus, up the underside of the tail and around the head). 4. place a clean receptacle under the animal, reach in, locate the esophagus, depending on the animal, either tie a twine around it tightly or cut it and fish it out and tie it in a knot. (This step prevents and digestive material or liquid from coming in contact with the meat. 5. Cut the tissue around the anus, and tie it off. 6. slice open the cavity starting at the pelvic bone and slowly open the cavity. As the cavity opens, reach inside and disconnect any tissue holding the organs. these cuts should always be with the blade toward the meat of the animal and NOT toward any organ. When the carcass is still warm, much of the connective tissue can be pulled away,. When you get half way down, you can start to roll the insides into the receptcal carefully. the inedible organs will be the first in the container and as you continue to open the cavity, you will come to the liver, heart, kidneys, etc., they can be harvested as you come to them, or you can position them on the top of the container. the quiker you do this the better. 7. Finish skinning: When still warm the hide will pull off with a little effort. If you pull from the front of the animal to the back, you will have less meat on the hide because of the way the muscels attach. We used a come-a-long and stripped the hide with little effort. If the animal is cooler, you will have to use a knife. The rest is up to you. but I do recommend eating the tongue. We would cut it out whole, wash it with soapy water, rinse thoroughly and soak it over night in milk. Then we would pressure cook it for 1 hour. let it cool slightly, and peel off the outer skin. With a cleaned pressure cooker, add spices similar to pastrami or corned beef. and cook for another hour. Great snack or lunch meat. The last rule was that everything had to be used and it was. the only thing that did not was the rumens (stomachs), but even those were cut open and plowed into the garden. I hope this helped to hear how us old folks did it.
This is so great! Thanks for taking the time to write this!
This fall, I want to try to gut the animal before skinning. Usually, we skin first, but I think it will be beneficial to get used to gut first, then skin. I also want to try doing it in the field.
And the tongue… My dad, loves tongue. My mother always buys cow’s tongue for him and cooks it and he loves it but I never tried. I think that’s another thing I’ll try this year. The only thing is that I am not a 100% sure how you cut it out but I’ll figure it out.
Thanks for stopping by and taking the time to write this!
Cool the meat asap, this is the biggest error, and why overworked butchers turn out bad products often. This is why bleeding and gutting promptly are so important, which reduces your load, also. Do use the guts, the liver is fabulous I hear! Now, use an old fridge and keep the met at 40, I think,,,,soak in brine as above, or milk……wild animals mostly eat the organ meats first and we the opposite but what if they are right> Eyes have lots of vit. a, fe…….
Thanks, Michael!
When you kill a deer here in Texas, you better fill out your tag first and tag it. When Game Wardens hear a shot off in the distance, they can sneak up on you. So much for that. I always skin my deer first and then gut it out. It skins easier when it’s full bodied. Another thing is that you don’t get a lot of hair on the carcass. Also if you leave the meat flap on the ribs, you can BBQ those ribs with bacon lined over them. Also good for chili meat.
Thanks, Ron. We usually share the ribs with the dogs. I try to get as much fresh meat for them as I can as well since I have no clue what’s in the store-bought dog food and their health is important to me.
We actually have permission from our wildlife department to hunt anywhere in the county whenever we want (year round). We have lots of older farmers around here and the deer population is huge. A couple of those farmers know we hunt. The deer cause serious damage to their crop and they are not able to deal with it themselves. They contacted the wildlife department asking them to allow us to hunt on their fields. We didn’t know they did that but then one day the officer came knocking on my door. At first I thought we were in trouble for something, LOL… But he just came by to let us know that we have permission to hunt anywhere in the county whenever we want. We are very lucky! We don’t need to mess with tags.
Lee, I appreciate your responses to Donna. You make valid points. I grew up eating deer, rabbit and squirrel. And I agree – even being a vegetarian rather than vegan, means using animals (milk, butter, yogurt, etc) and the process for getting those things to the store is much more grotesque, involves so much more suffering and animal cruelty.
Even if you are a vegan but still go to the store to buy your food you still support commercial unhuman meat production. This is where the store gets its stuff. I am not saying that you shouldn’t go to the store, I’m certainly (unfortunately) there every week, I am just saying that in my opinion, raising your own meat and doing the hard work yourself means that you don’t need to get this particular food at the store and in my mind, by doing that I actually help the animals.
I know you get it but some people just don’t understand the business of food production. I tell everyone, if you ever have the chance, go visit a commercial chicken operation. We’ll see what you think about store-bought meat then.
Thank you so much for stopping by and taking the time to voice your opinion, Teresa!
Here here good on you Lee
Thanks, Ken.
In response to your reply above my being a vegetarian: I cannot stand them being killed. I would rather be put through a meat grinder alive than to have to eat one. I can’t be that cold hearted. People are really the problem when it comes to overpopulation because animals have no where to go, due to habitat destruction. I see chickens on their way to the slaughterhouse and I wish I could make everyone from driver, workers, owners suffer for what they do to all these animals, including cows and turkeys. It’s all cruel inhumane and gruesome. I can’t stand animals brutally killing others as well. Hunters just like killing, including trophy hunters. I had to click on this pin to block it and others like it Its extremely disturbing, upsetting and makes me cry. This will be my last reply back as I do not want to harass anyone. I hope never to see this again.
I appreciate your love for animals very much and I hope that one day you will be able to accept that love and respect for animals is why we hunt. We consciously decide to include meat in our diet and therefore wish to take on the responsibility of making sure the animals we eat had the best life that they deserve to have before we use them as our food. In my eyes (and in yours too, I am sure) the best place for them to be is free in nature.
Please remember that by purchasing anything in a grocery store, meat or not meat, you still support the meat industry since this is where the grocery store gets its meat. I will be very happy if one day I’ll be able to not step in a grocery store at all and only sustain my life from nature and the things I grow in an ethical way.
YOU are so stupid. Animals don’t give their lives up. YOU KILLED IT!!!!!!! They want to live just as much as we do. Your sickning post unfortunately came up when I got on Pinterest. It won’t happen anymore. This is completely offensive. By the way, I not a meat eater, so its not hypocritical.
I am sorry this post is so upsetting to you, I am not really sure why you clicked on it.
It is funny to me how so many people these days are uncomfortable with hunting. It shows how far away from nature so many people are these days. I think you should take a moment to research hunting. You will find that hunting is a very important activity that helps preserve nature and it’s actually very important to the animals themselves. Among other things, hunters help control a healthy population of deer (for example), therefore prevent disease and other problems that will occur if too many animals occupy the same area.
Men have been eating meat harvested from nature since creation. There is no activity older or more natural than hunting and I can promise you that if you chose a lifestyle that is closer to the land and that is mainly supported by the land you would not be a vegetarian. Hunters care and love the land more than anyone because this is our source of food. We understand how important it is to care for it so we can eat and continue our lives.
Telling a man not to hunt is like telling a wolf not to hunt. This is the food chain, we don’t hunt for pleasure we hunt for food. The reason this might not look right or normal to some people is because our sociaty is so far removed from nature these days unfortunately.
If you think that you help animals by being a vegetarian you are wrong. You help animals by doing what is natural in their world, by behaving the way you supposed to behave as a human, not by raising 10,000 of them in a commercial chicken house and not by avoiding them.
Anyway, we can agree to disagree. I appreciate you taking the time to write a comment.