How to Butcher a Deer
This post may contain affiliate links, view our disclosure policy for details.
In this step by step tutorial on how to butcher a deer I’ll share with you how we do it on the homestead. There are many ways to butcher a deer but the basics always stay the same. I hope that you’ll have a much better understanding of how to butcher a deer at home after this tutorial!
Hunting seems to shed a different light on your relationship with the land.
A deeper, much more meaningful connection. Sitting at the edge of the field or in the woods for hours in complete silence, watching, listening, waiting that the universe will give you an opportunity to feed yourself and your family is magical.
It’s a blessing to be able to do it and it’s empowering. But if you butcher your own deer at home, you also know that it’s hard work.
Many hunters prefer to only do the hunting part.
Once they shoot the deer, they load it and drive it to the closest deer processing center. They tell the butcher how they want the meat prepared (cubed meat for stew, sausage, hamburgers…), they leave their deer with the butcher and off they go.
How to Butcher a Deer…
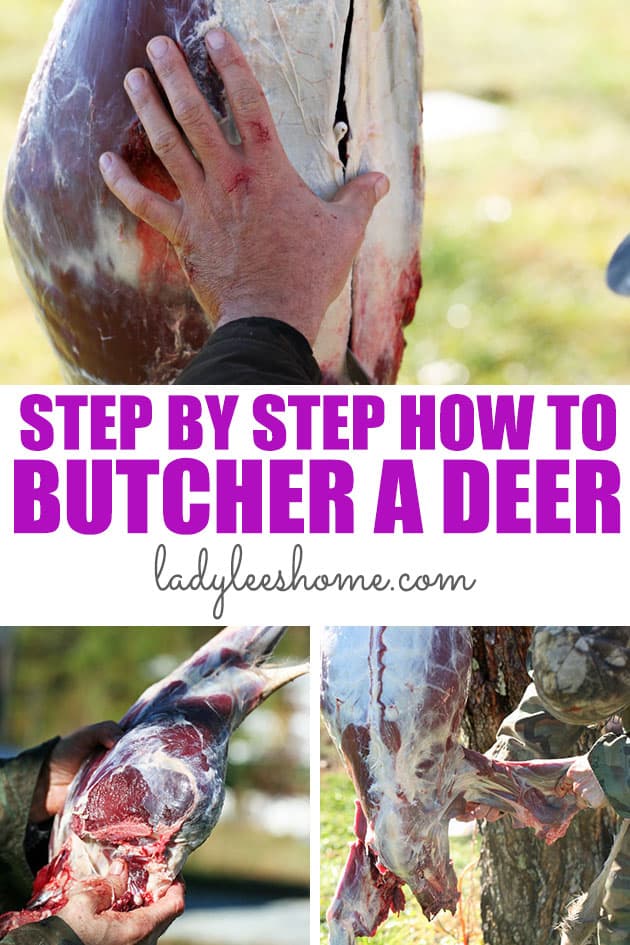
A few days later they come back to pick up their prepared meat packaged just as you’d find meat in the grocery store.
When we started hunting I honestly didn’t know that there was such an option…
I wasn’t born and raised in the U.S.. I was born in Israel where the only thing you hunt is other people who want to kill you. That sort of hunting is a bit different.
Anyway, when we moved to the country to live a more “homesteady” kinda lifestyle, hunting was one of the first things we started doing because there is really no cleaner meat than wild meat.
We had some friends help us understand the whole hunting process, the rules and how to do it, and then how to butcher the deer and get it in the freezer.
The hunting part was always my ex-husband’s responsibility, although I really really really want to learn how to hunt (hopefully this will happen soon), but when it comes to butchering and processing an animal, you can count me in!
I love taking apart bodies.
I realize that this might not sound so good but it’s simply the truth. I’ve always said that if I didn’t have to sit in school for an additional 10 years AFTER the 12 that I barely survived I would have been some sort of a surgeon.
Since opening people is out of the question I am left with animals.
It does help considering that I love eating meat and I try to raise most of it like ducks and chickens.
I butcher my own ducks and I butcher the chickens that I raise (and I also help my neighbors with turkey butchering and rabbit butchering), so when the guys dropped a dead deer in the back yard you can be sure that I was right there, ready for the action.
The pictures that I share in this post with you are from our first year of deer processing. It was a great year! The guys took down 4 deer and we all had plenty of meat to share.
The second year of hunting didn’t go so well. Still, we had enough deer meat but I was looking for deer hides because I started learning how to tan deer hides.
Someone suggested that I look for a local deer processing center and ask them if I can pick up hides since they usually do nothing with them.
A deer processing center!? I had no clue that there was such a place!
I asked around and found out that there was a butcher shop about an hour from where I live that is processing deer during the hunting season. I called and the guy said that I can come and pick up as many hides as I want.
I found myself a week later standing at the foot of a mountain of deer hides, heads, and legs.
It was the middle of hunting season here in the South and that deer processing center was as busy as a Jason Aldeen concert in July.
Of course, I ended up sneaking to the back of the shop and talking the ears off of a nice young butcher who shares the love of butchering with me.
I also loaded my trailer with hides, legs for my dog to chew on, and deer heads to extract the brain from for brain tanning.
AND I’ve also seen the nice packaged sausage and hamburgers.
I am telling you this just in case you didn’t know that there are deer processing centers.
Butchering your deer is not complicated but it is work. And making sausage and so on… It takes time and a lot of effort.
If you prefer paying someone else to do it it’s completely fine. Just ask other hunters in your area or Google deer processing centers close to you (or just look for the closest butcher shop).
I still prefer to do it myself.
First, because I love the process and I don’t mind the work, and second, because the butcher is an hour away.
By the time I drove there and back and then there and back again to pick up the meat that I have to now pay for them to package for me I’ve spent a lot of money and time.
If you are like me and prefer to butcher your deer at home or if there isn’t an option for you to have someone else do this for you and you want to learn how to butcher a deer, read on!
How to Butcher a Deer at Home…
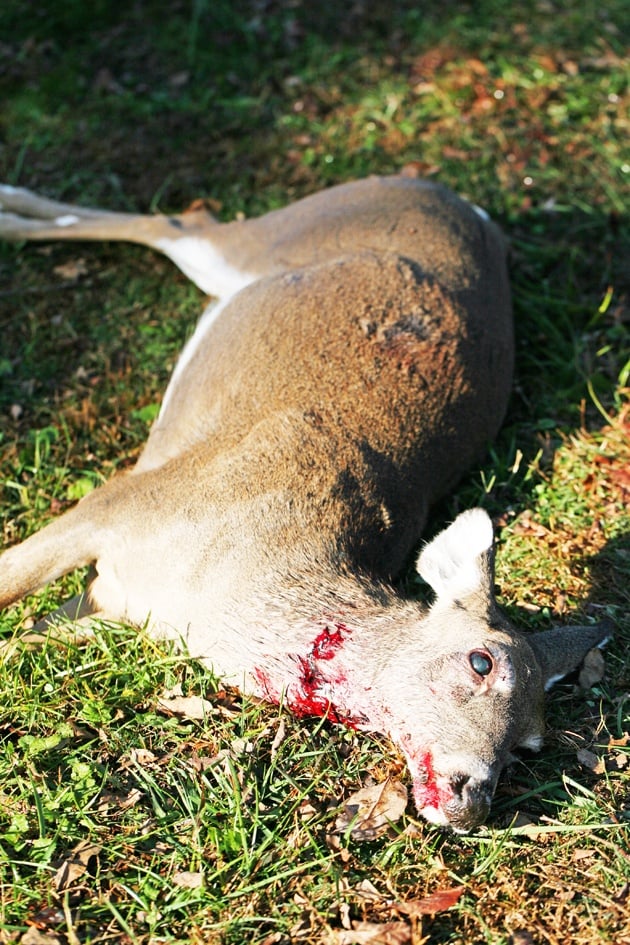
Before we start with the tutorial, the pictures, and all the great information, let me just remind you that this was our first year of processing deer on the homestead.
We went with the easy way to butcher a deer, which means that we chose to not gut the animal.
We were just beginning our journey of hunting and butchering large animals back then and it was a good place to start to eliminate some of the overwhelm.
These days I know a bit more on the subject and I am much more comfortable processing a large animal so I do try to use as much as I can, but looking back I still think that this was the best way for us to start and it might be the best way for you too.
In fact, I know many experienced hunters that still process a deer the way I’ll show you because most people don’t like to eat the organs and are willing to give up a little bit of meat (the ribs mainly. There is not much meat on them) to avoid the mess of gutting the animal.
Like I said at the very beginning of this post, there is more than one way to do this so I’ll try to present a few ways to you and you make the decision of how you want to do this.
You can always change your way later if you find that you are getting more comfortable with deer butchering.
Deer Butchering Equipment…
If you’re going hunting and you plan on butchering your deer yourself, make sure that you’re prepared with all the equipment that you’ll need because once you killed that deer you want to process it as fast as you can. You are going to need…
- A butchering knife – this is a nice set to have on hand! It includes not only a few knives with different size blades but also a blade sharpener and a bone saw. You are definitely going to need both. You want to make sure that your knives are very sharp to make the job a bit easier.
- Saw with a metal blade – if you only have a butchering knife make sure you have a regular saw with a metal blade to cut the bones. Some people also use a reciprocating saw for this but a simple hand saw is just fine.
- A gambrel – we are going to hang the deer for easy processing so make sure you have a gambrel and…
- A lift system – some gambrels come with a simple lift system like this one, but life is much much easier if you have a chain hoist thingy! You connect the gambrel to it and it lifts the deer like the Hulk lifts a tank. Easy peasy.
- Cooler – we are going to leave the meat in the cooler covered in ice for 24 to 48 hours. Make sure you have a big enough cooler.
- Ice – you’ll probably need two or three bags of ice. Most hunters just drive to the nearest gas station to grab ice after killing the deer.
- Apron – in case you want to cover up with an apron, this is a great one.
- Latex gloves – in case you happen to visit the nail salon just before you shot a deer and you don’t want to damage your nail polish, you might want to use latex gloves.
- A hose – every time that I butcher something outside I make sure that I work somewhere that my garden hose can reach. I always need to wash something, clean my hands or tools and so on. So just make sure that wherever you work, you have easy access to water.
To Field Dress or Not to Field Dress?
You shot a deer… Now what?
You have two options: to field dress the deer (remove the guts in the field while the deer is on the ground) or to carry it to the homestead whole.
You’ll see below, that you don’t have to remove the guts.
If you choose not to remove the guts you give up the two small pieces of tenderloins (however there is a way to get them out without gutting the deer. I’ll link to a video about that below), the ribs that don’t have much meat on them (I usually save them for my dog), and the organs.
If you like organ meat, you can eat the deer’s liver, heart, and kidneys (although the reports are that they taste like urine).
So, if you’d like to get those parts you’ll have to gut the deer.
If you choose to gut the deer I strongly recommend that you do it in the field. Take whatever organs you want and leave the rest in the field for nature to take care of.
You can certainly gut the deer in your backyard but disposing of the guts is just a messy business.
If you choose to field dress, this video will show you how to get it done right.
I love that he also shows how to get the organs in case you want to try to cook them.
Just remember that after you field dress a deer you want to try and wash the blood off as soon as you can so it doesn’t dry on the meat.
Hanging the Deer…
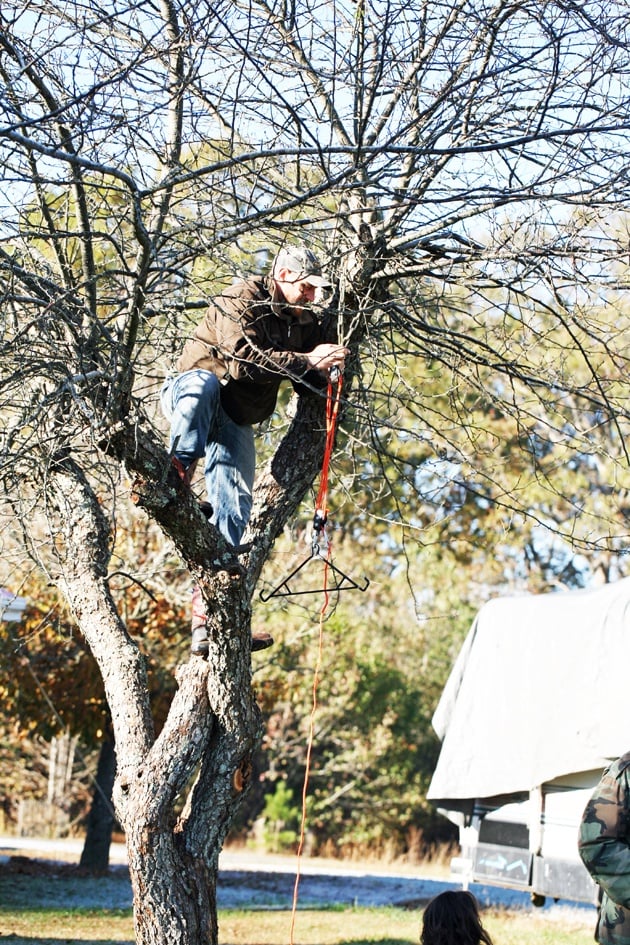
Once you get back to the homestead, find a nice spot to hang your deer.
It can be a tree or a beam or something like that. Just make sure that it’s close to a water source and that you have plenty of room to work.
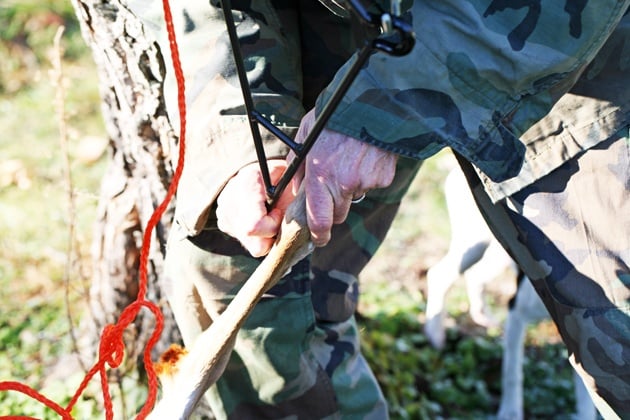
Right behind the joint that is above the hind hooves of the deer, there is a very thick tendon, you want to make a cut in the skin between that tendon and the bone…
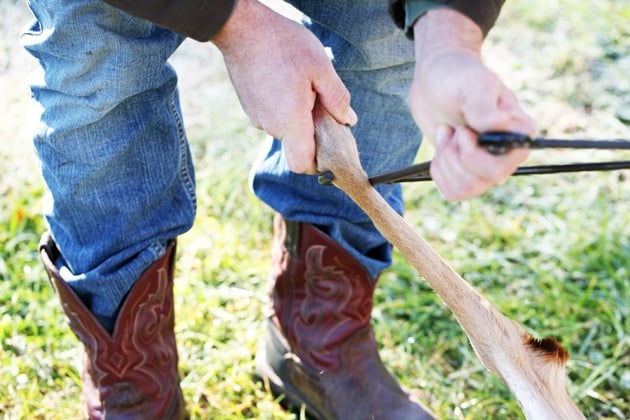
Bring your gambrel all the way to the ground and hook both ends of it through the cuts you made…
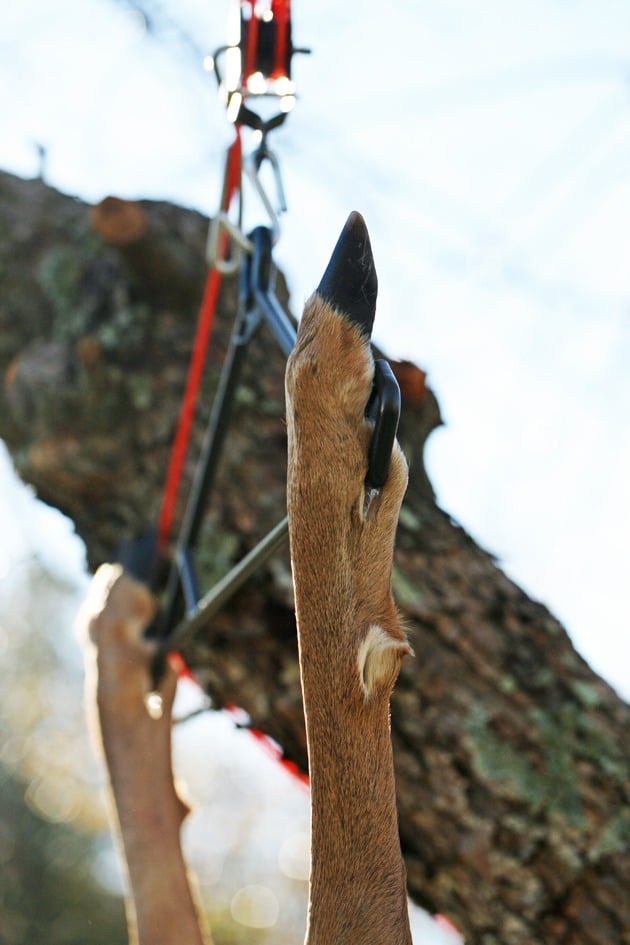
Then carefully pull the gambrel up.
This is where the chain hoist becomes really handy, especially for us ladies!
There is no way that I can lift the deer up from the ground with the simple lift system that comes with some gambrels but it’s super easy with the chain hoist.
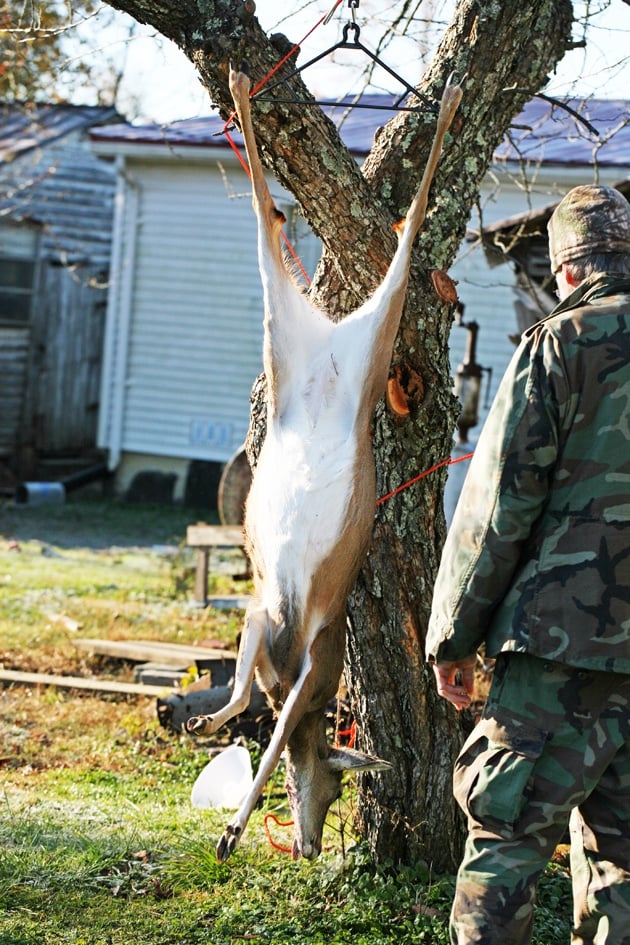
All right, the deer is in the air, we are ready for the next step…
Skinning the Deer…
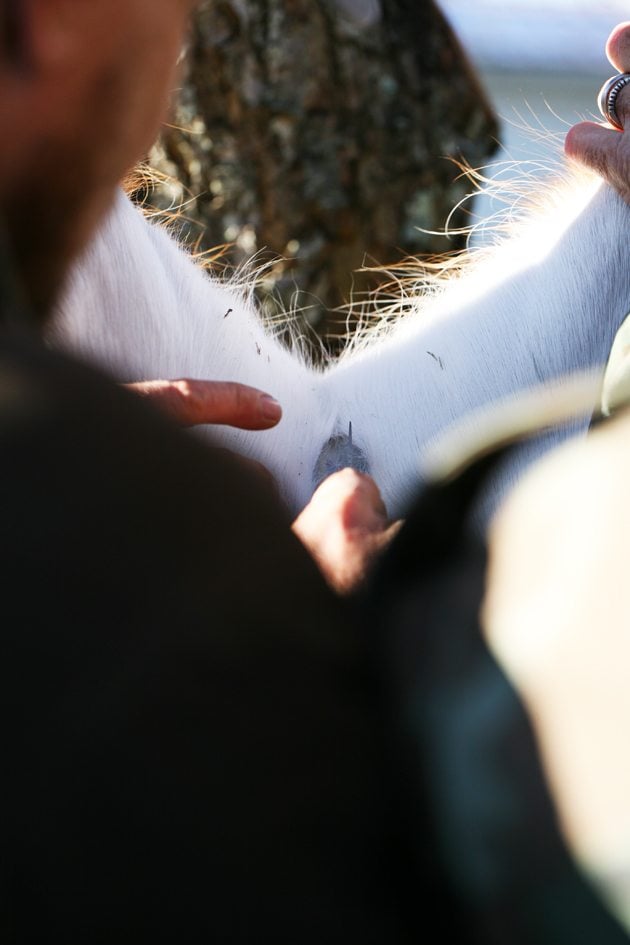
There are 17 different ways to skin a deer. The way that we do it here is my preferred way to do it because I get one large, beautiful piece of deer hide that I can tan.
We start by making a small cut right in between the hind legs. We don’t want to cut the meat, only the skin…
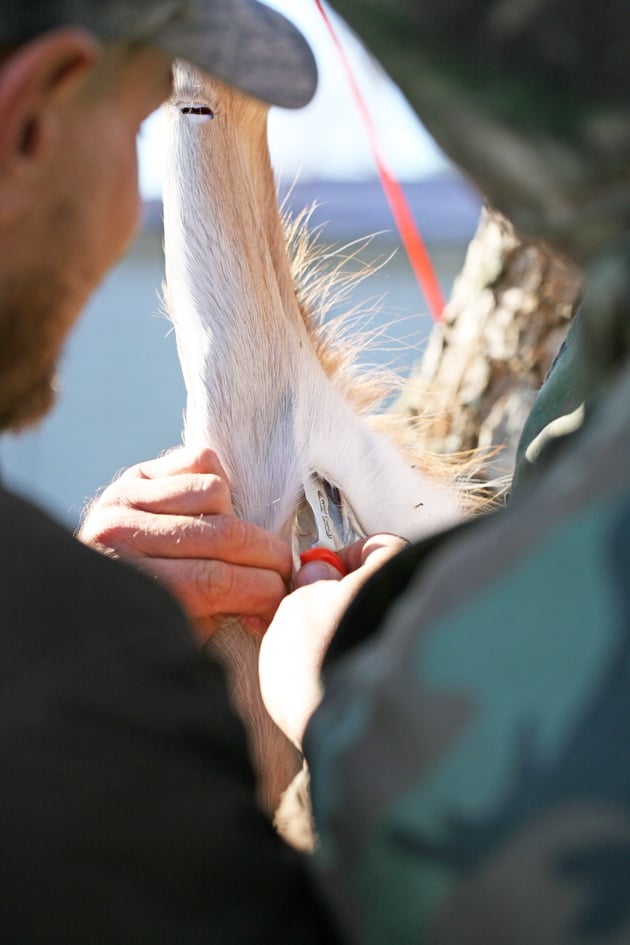
Then, we insert a knife under the skin and cut from the inside out in two diagonals toward the hind hooves…
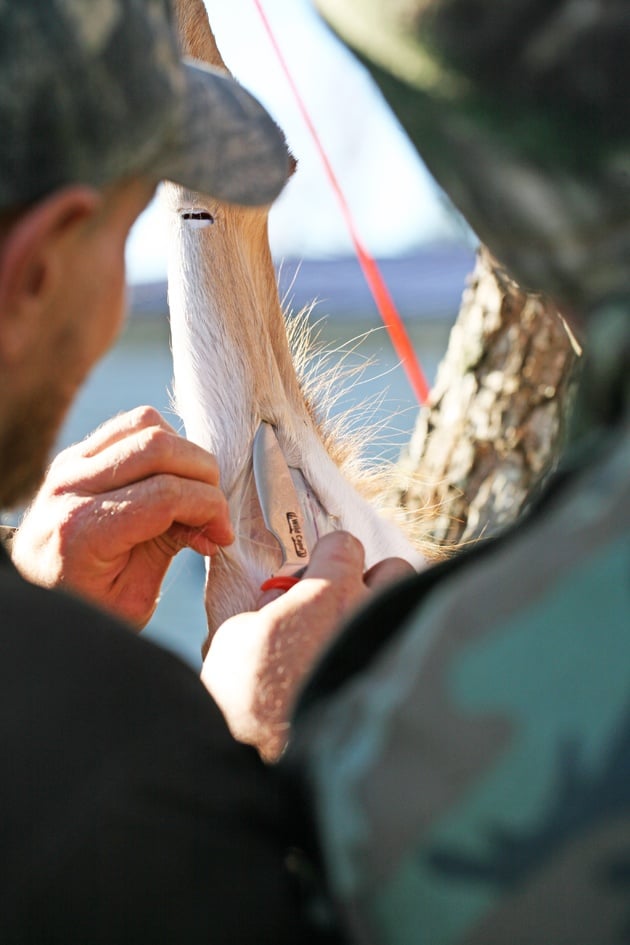
Until we get to the joint…
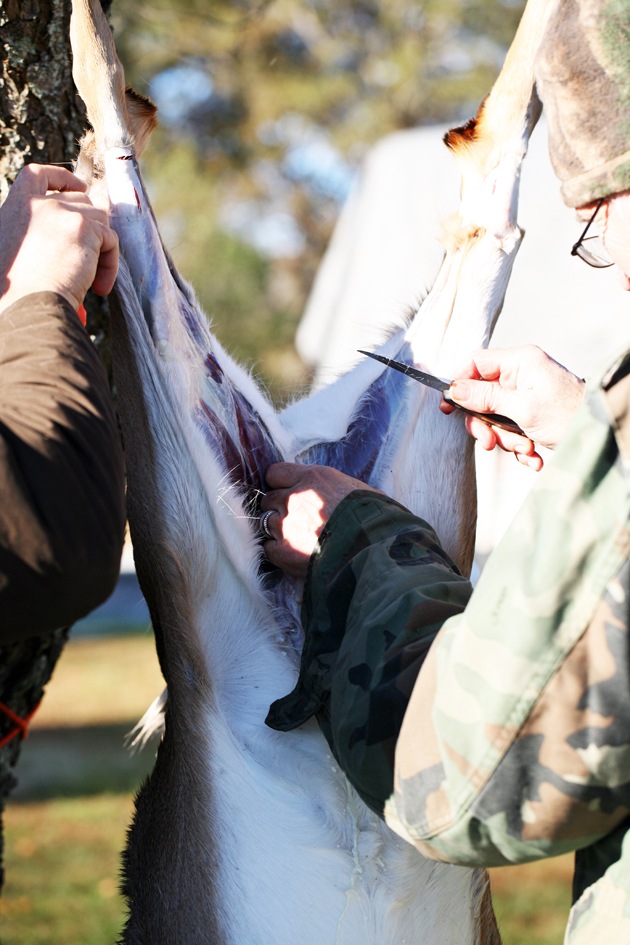
When we get to the joint, we cut the skin all the way around it.
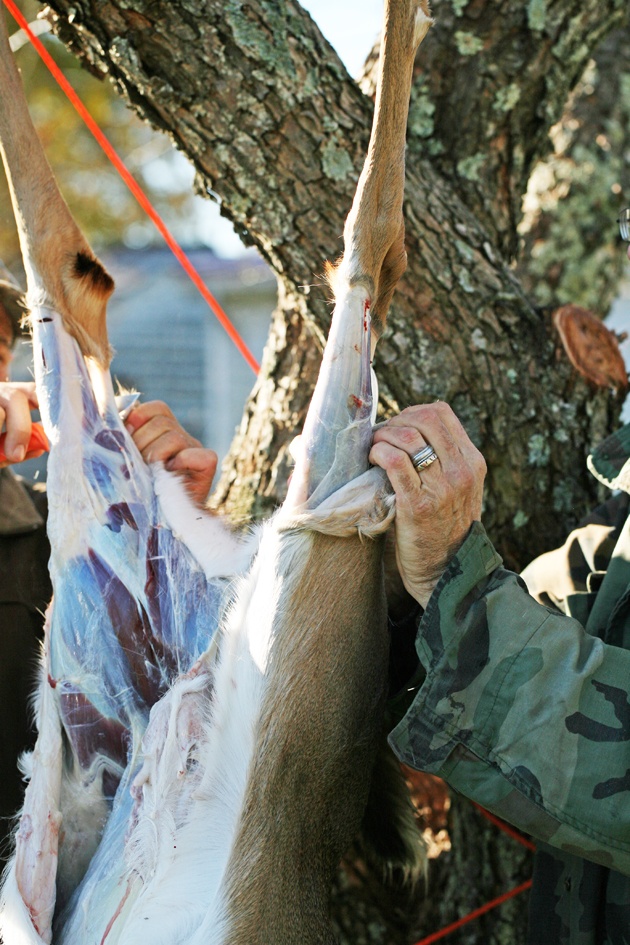
We keep working from front to back, around the tail, separating the skin from the meat…
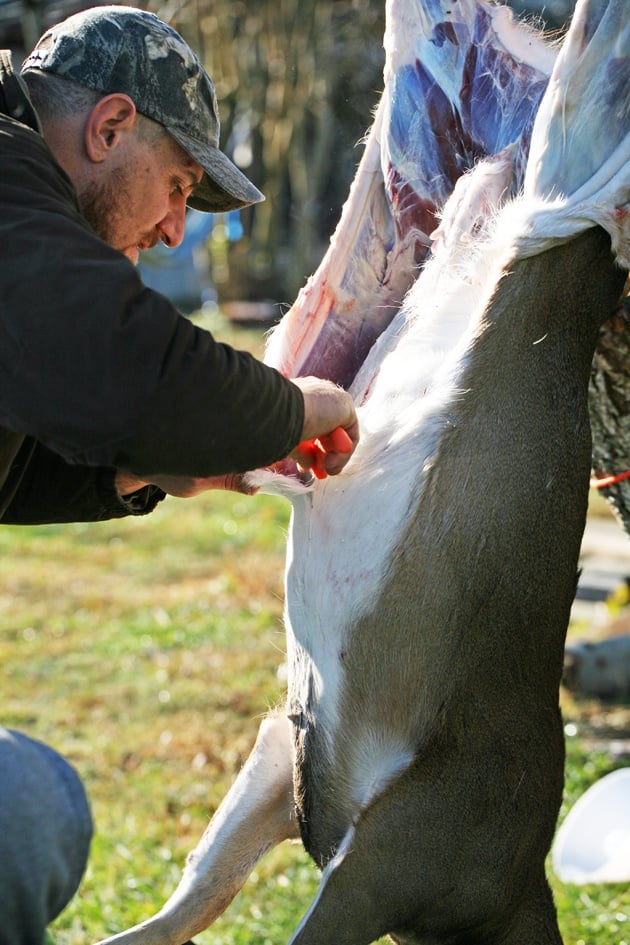
From the front, we keep going down the belly…
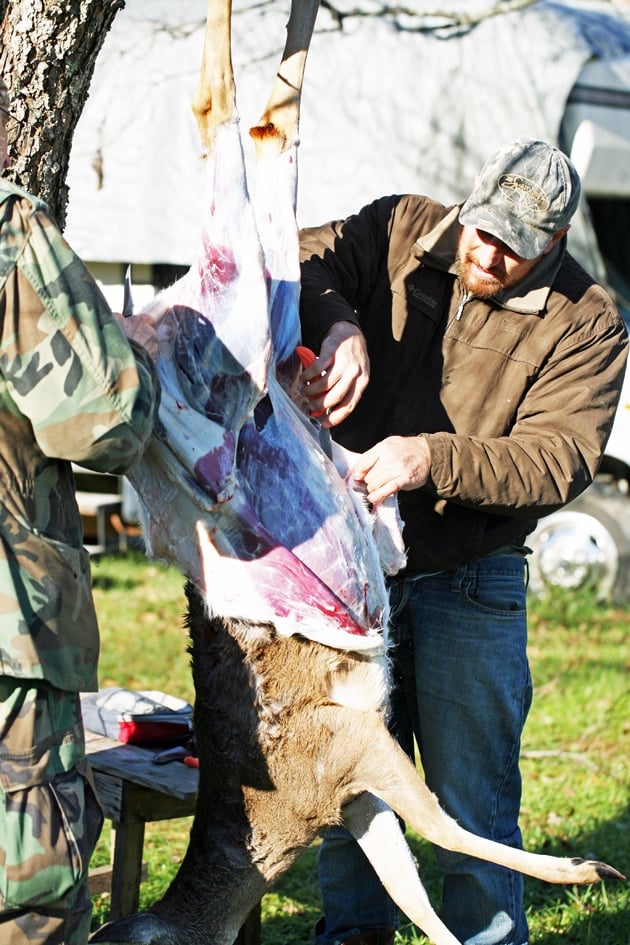
And around the sides…
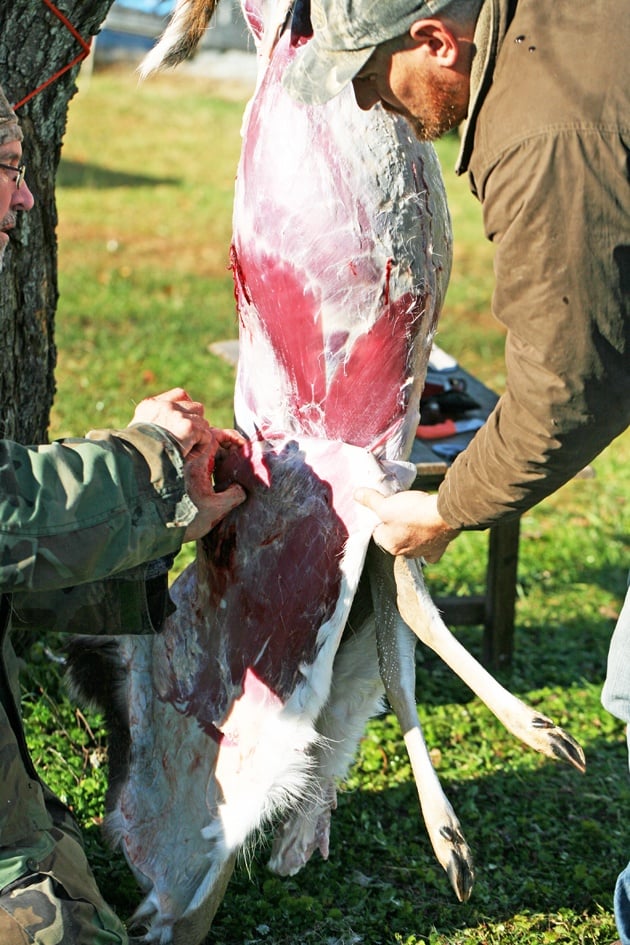
And down towards the back…
It’s a combination of pulling the skin down and using the knife here and there. For the most part, the skin separates from the meat pretty easily but you’ll notice that sometimes you need some help from the knife to cut some connective tissue.
Whenever you use the knife just do it carefully so you don’t cut the meat or make holes in the hide if you’re going to use it to make buckskin.
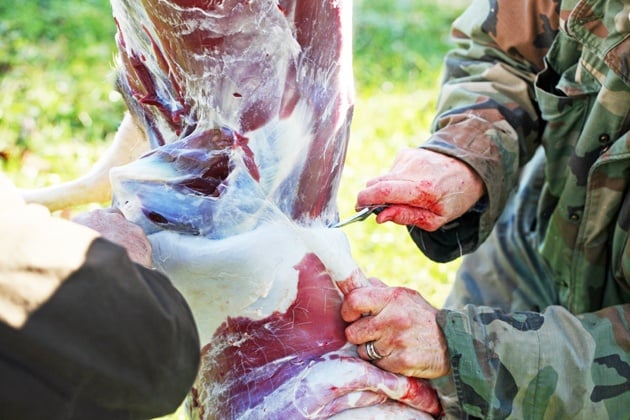
As we get closer to the neck, we often need a bit more help from the knife to separate the skin from the meat…
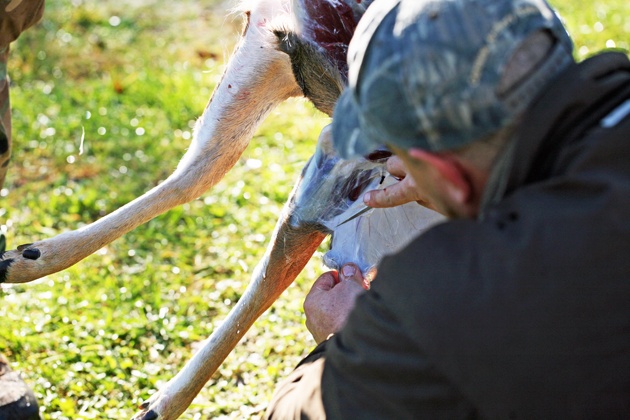
This is the tricky part.
I hope you’re not in a hurry… Just take your time and go down the neck and around the shoulder joint down to the front legs.
There is really not much meat on the front legs so we don’t bother going all the way to the joint, just a couple of inched down before we cut the skin around the legs.
Removing the Deer Head…
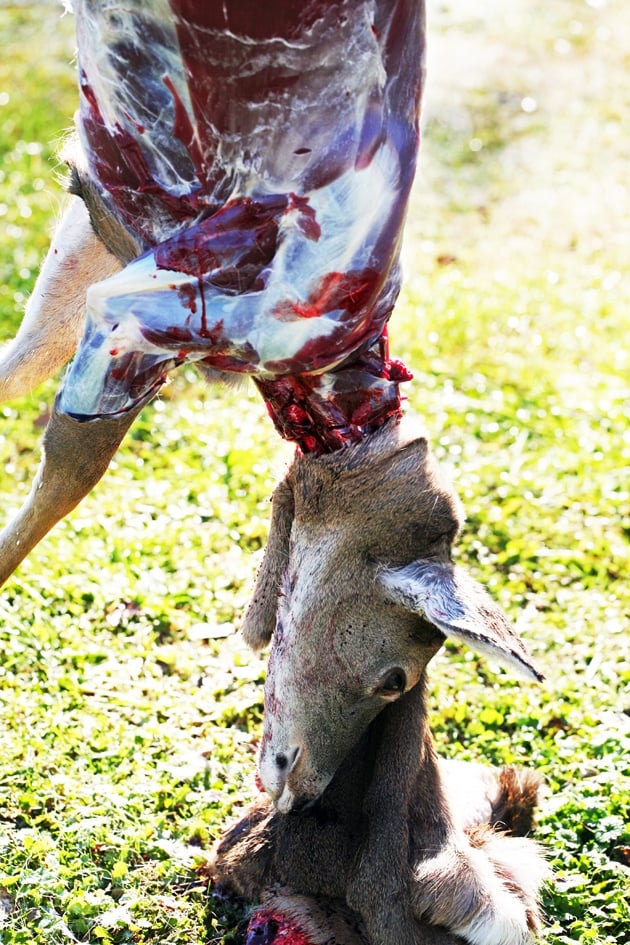
So now the deer is skinned and it’s time to remove the head…
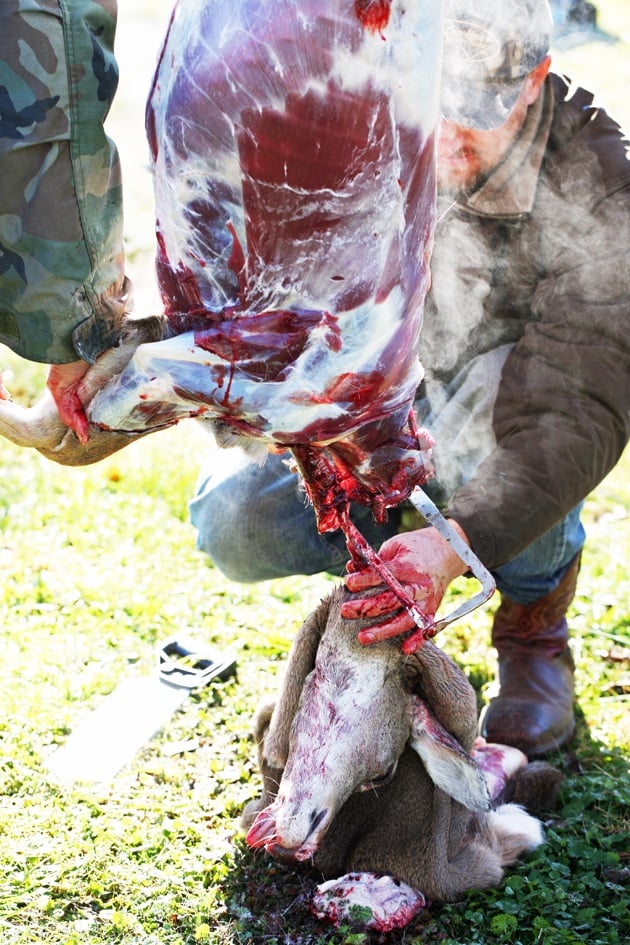
This is where we need to use the saw. Just cut the head right off.
I separate the hide from the head, fold the hide and send it to the freezer to tan later.
If you don’t use it and no one else wants it, you can simply throw it in the woods for nature to take care of.
I then remove the brain from the skull so I can use it for brain tanning. I also remove the antlers using the metal saw.
My kids love playing with them and they can be used for decorating or to make hooks and buttons when sewing buckskin into clothes or handbags.
There is a lot of meat in the head. You can cook and eat the brains if you don’t use them for tanning and you can remove the tongue and cook it.
I could not find a good video to show how to do that so I’m hoping to write another post about that soon but basically, you flip the skull and access the tongue from the underside of the bottom jaw.
If you are not interested in eating the tongue, consider harvesting it for your dog if you have one. It’s great meat.
Some people also skin the skull and cook it, there is some meat on the head. I think it’s tough and not worth the time (you have to cook it very long) so I give the skull to my dog. She messes with it for days and absolutely loves it.
Removing the Deer Tail…
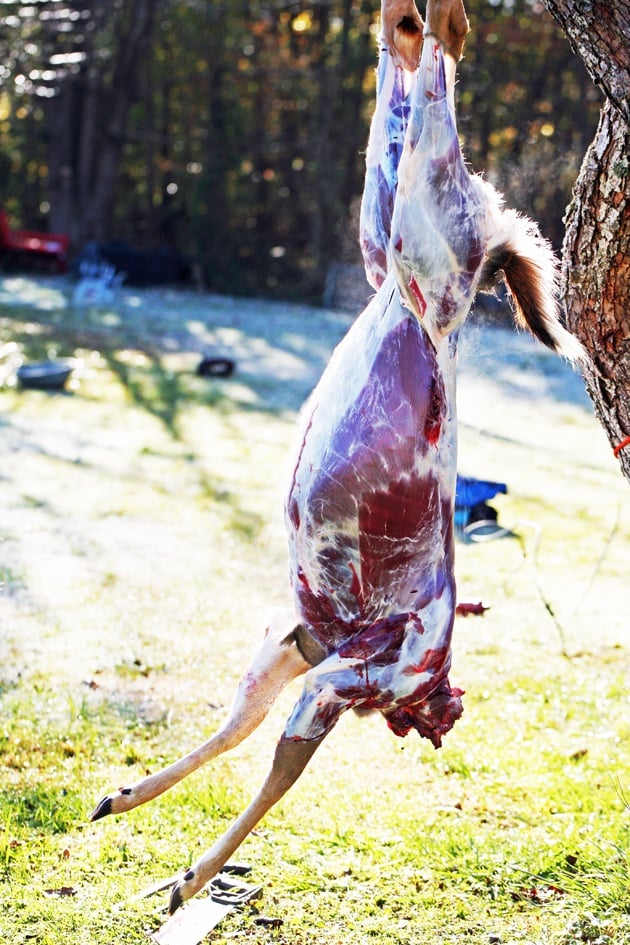
Next, after the head, comes the tail…
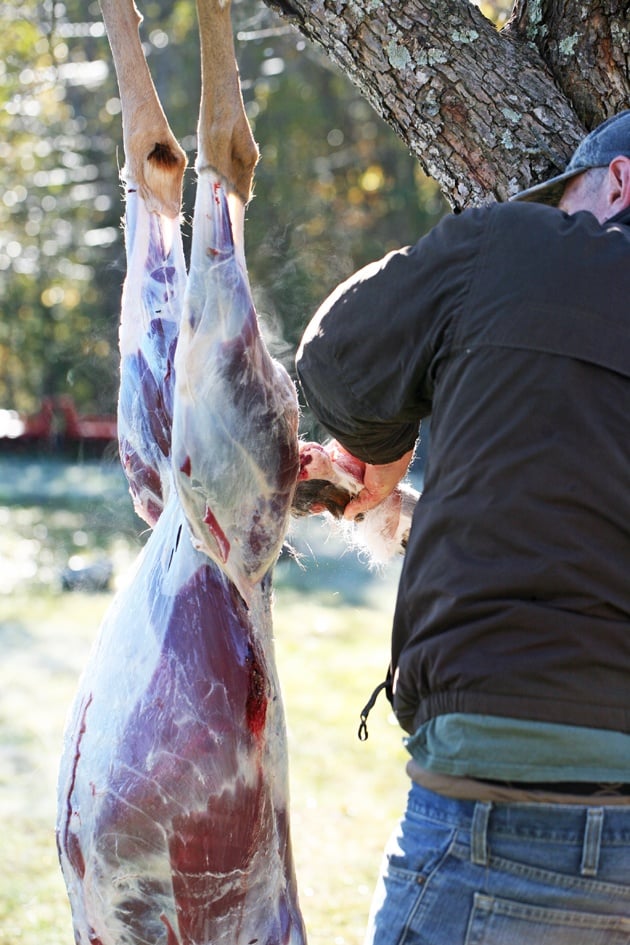
We work around the tail with the knife…
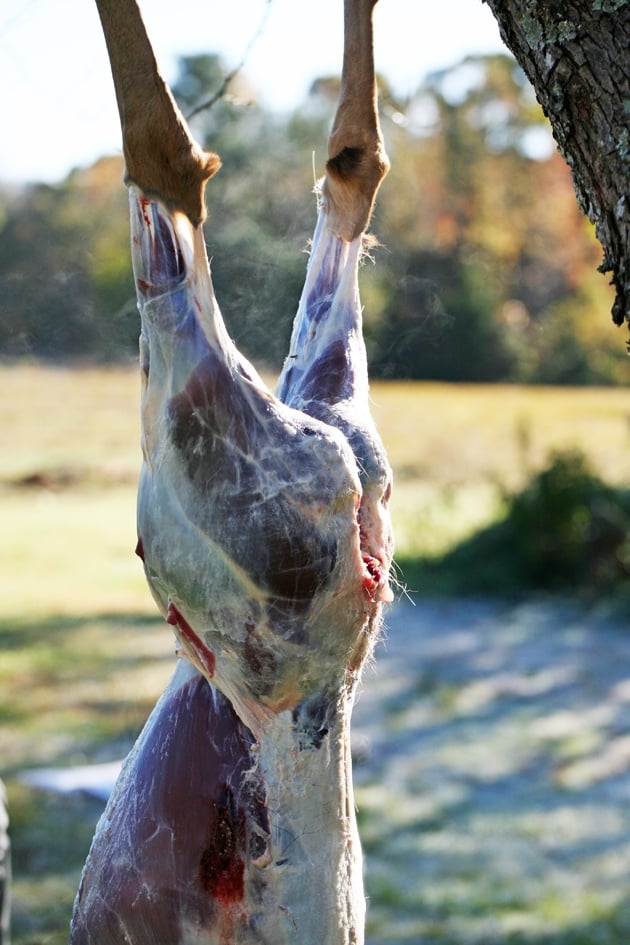
And remove it. It’s really pretty simple.
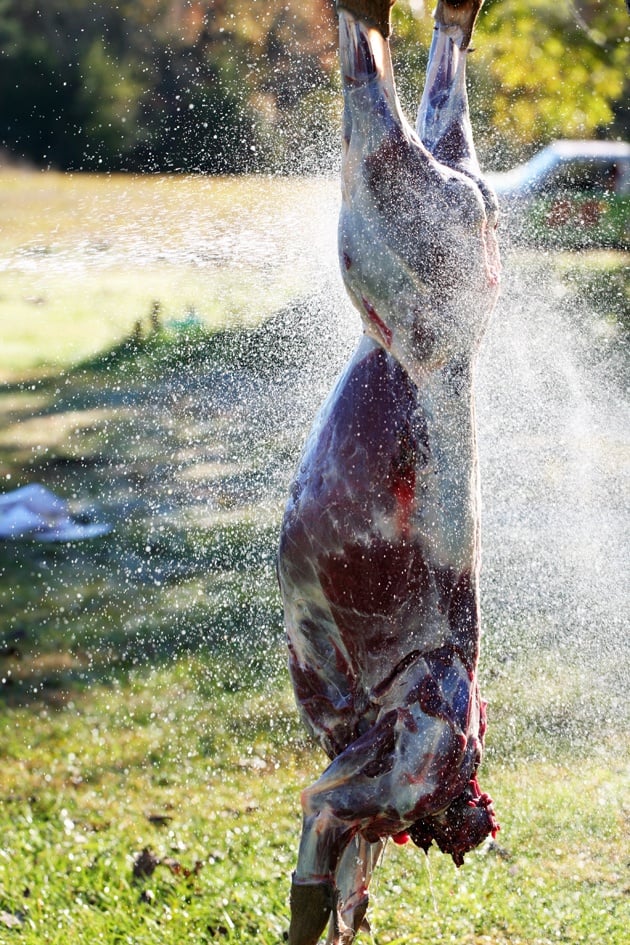
All right, we are now ready to process the body. We give the deer a good rinse with cold water and wash our hands and tools to remove the hair and blood.
Removing the Deer’s Front Legs…
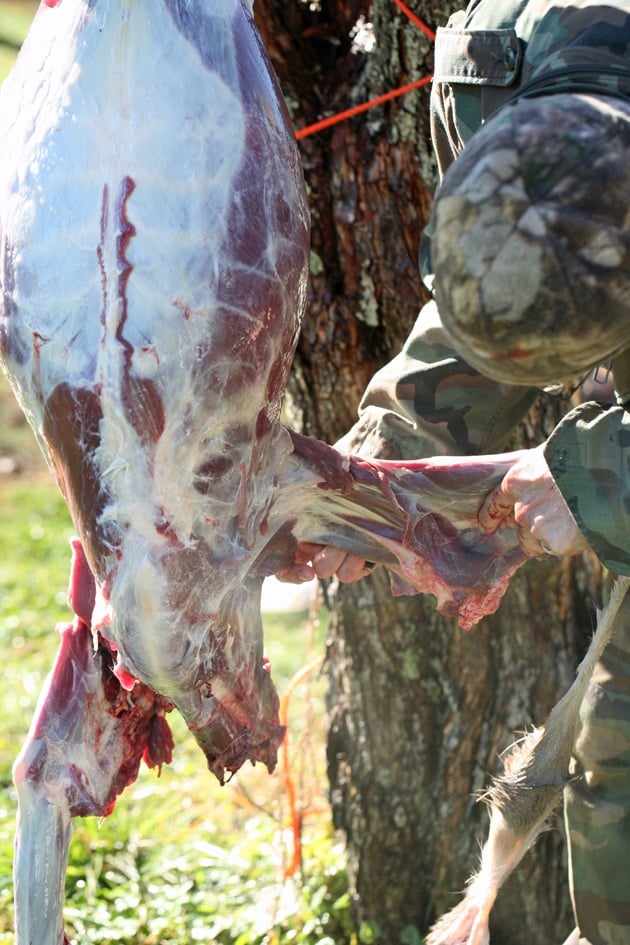
To remove the front legs, we pull the shoulder away from the torso and cut parallel to the rib cage…
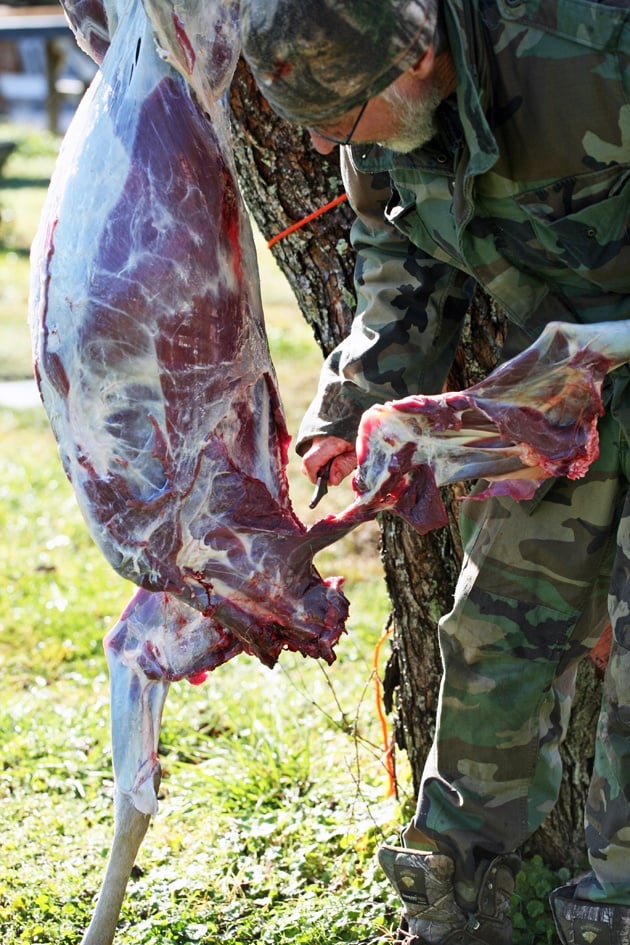
Until it comes off…
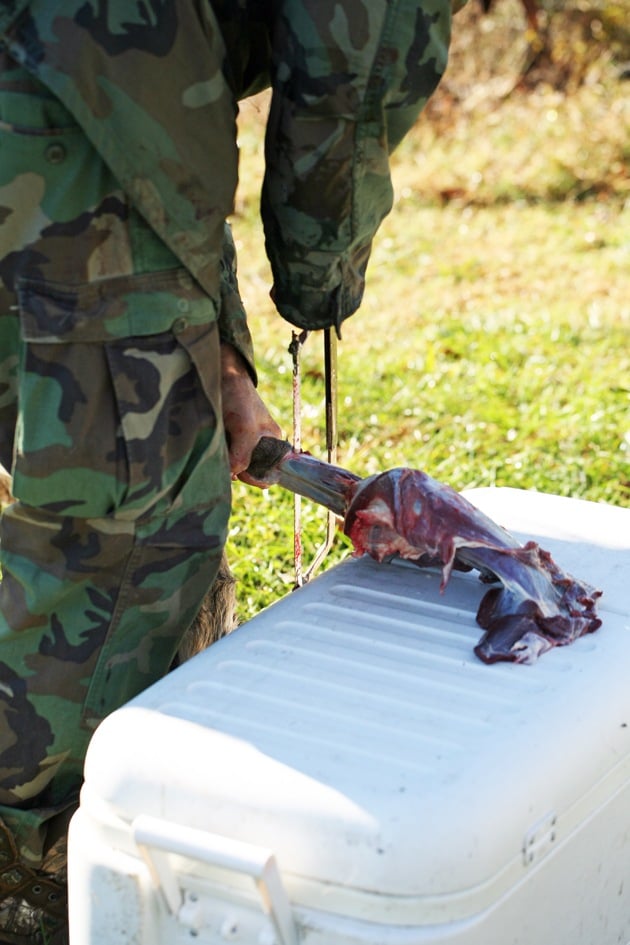
We use the saw to get rid of the lower part of the leg which is a great dog treat…
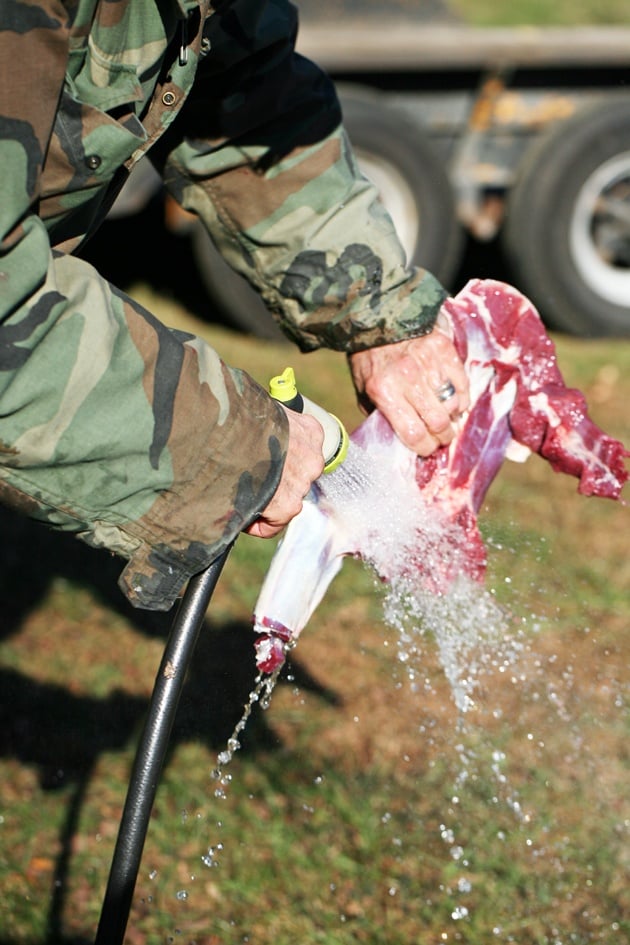
Then wash the front leg/shoulder…
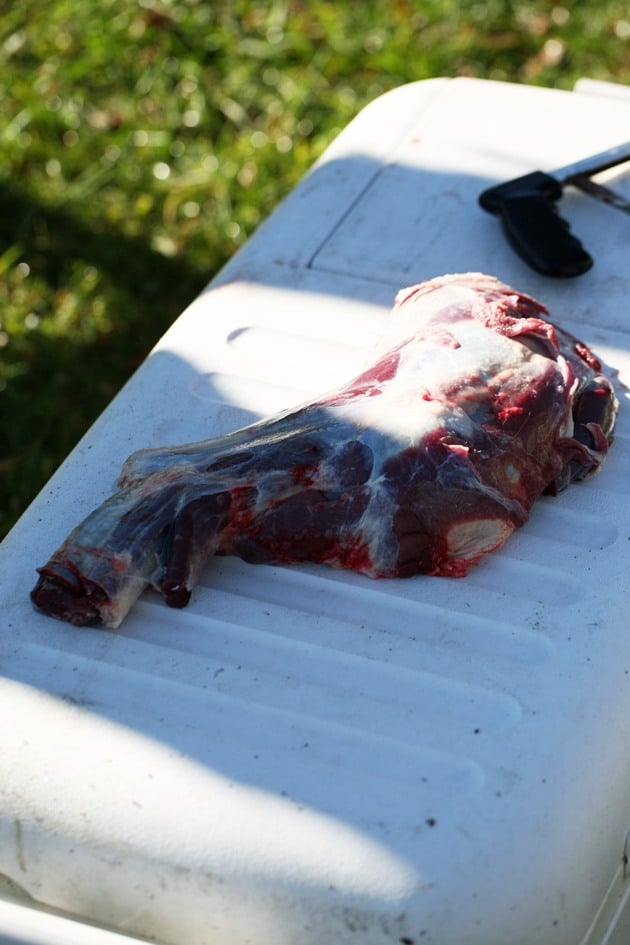
And we have our first piece of meat!
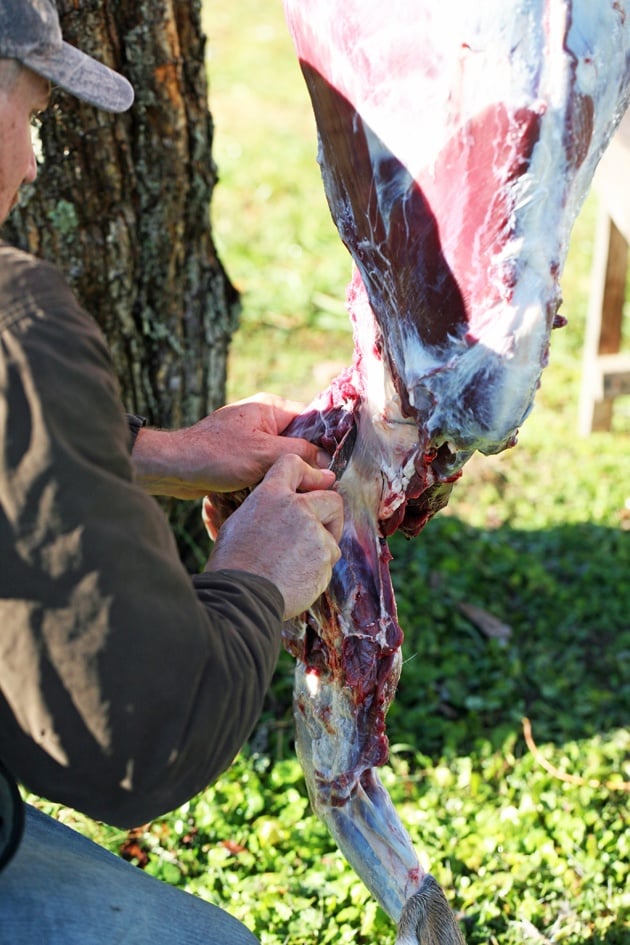
We do the same with the second shoulder and place both cuts of meat in the cooler.
Removing the Deer’s Backstraps…
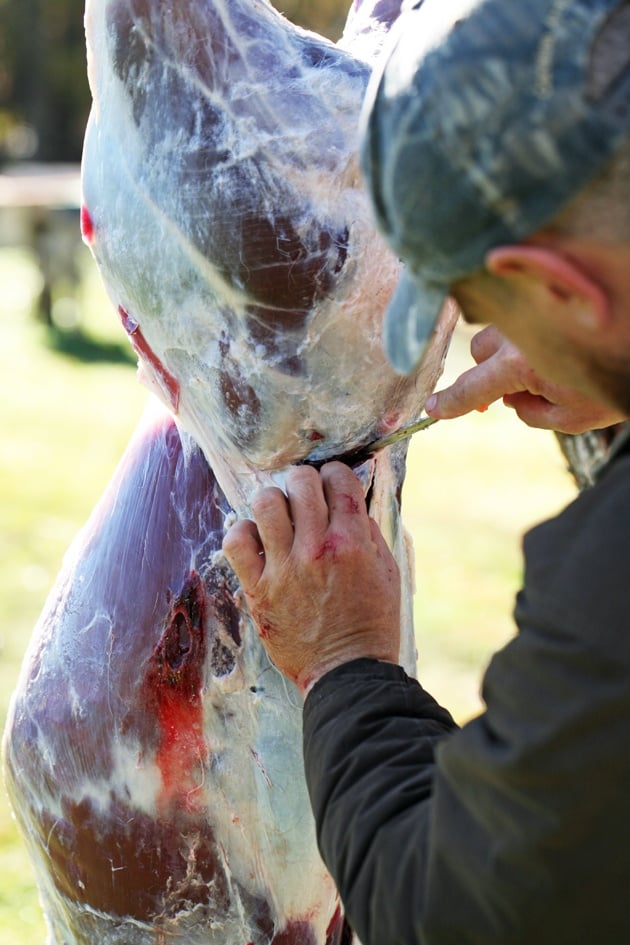
Next, we remove the back straps. We find the spot right where the back connects with the rump, the hip, and make a cut from the side towards the backbone.
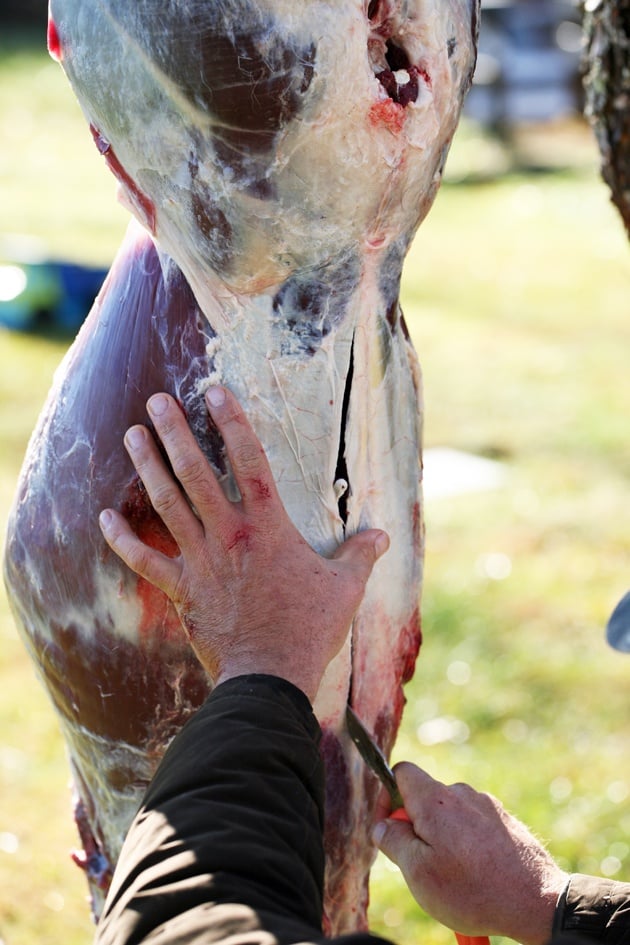
Next, we run the knife down right next to the backbone…
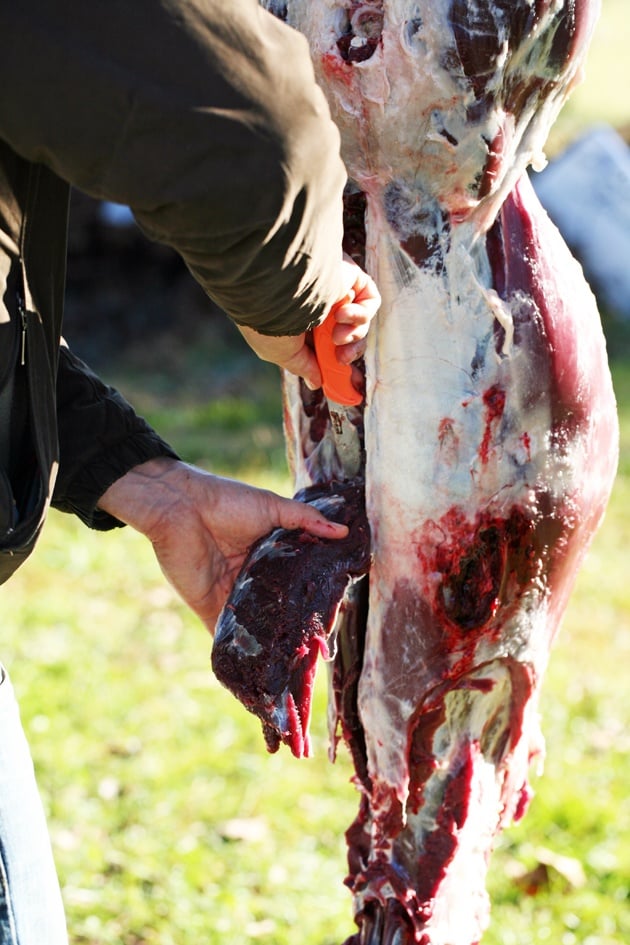
And start removing the backstrap from the top…
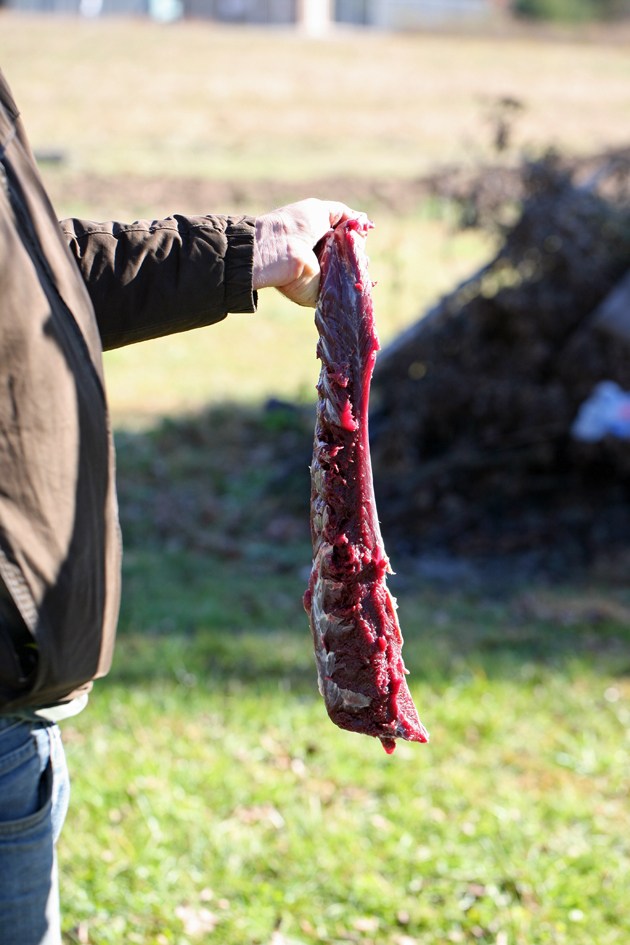
Here it is! This might be the best cut of meat on a deer.
There is another piece just like this one on the other side of the backbone so we are going to have to do this one more time.
We rinse the two pieces of meat and set them in the cooler.
Removing the Deer’s Neck…
This is a little hard to do if you didn’t field dress the animal but it’s possible.
We didn’t remove the neck when we butchered that deer so I don’t have a photo of the process for you but you are going to have to use the metal saw to do that (or, you can just not harvest it).
Give the neck a rinse and set it in the cooler.
Removing the Deer’s Abdomen…
When we processed this deer on our first year of hunting, we choose not to field dress it. Again, what you give up when doing that are the organs, the tenderloins, and the ribs.
Most people don’t really want to mess with the organs and the ribs don’t have much meat on them, however, the tenderloins are considered a prime cut of meat that many hunters don’t want to pass on.
I found this video that shows how to get to the tenderloins without gutting the deer. It’s definitely something to try (I’ve never tried it but it looks relatively easy).
Also, notice how he cuts off the front legs before he starts the deer butchering. I will certainly do this next time because the front legs do tend to get in the way when skinning.
I won’t skin the same way that he does because a lot of the hide is wasted. Since I like tanning the hide, I prefer the way I showed you above but if you don’t care about the hide this might be a faster way to do it.
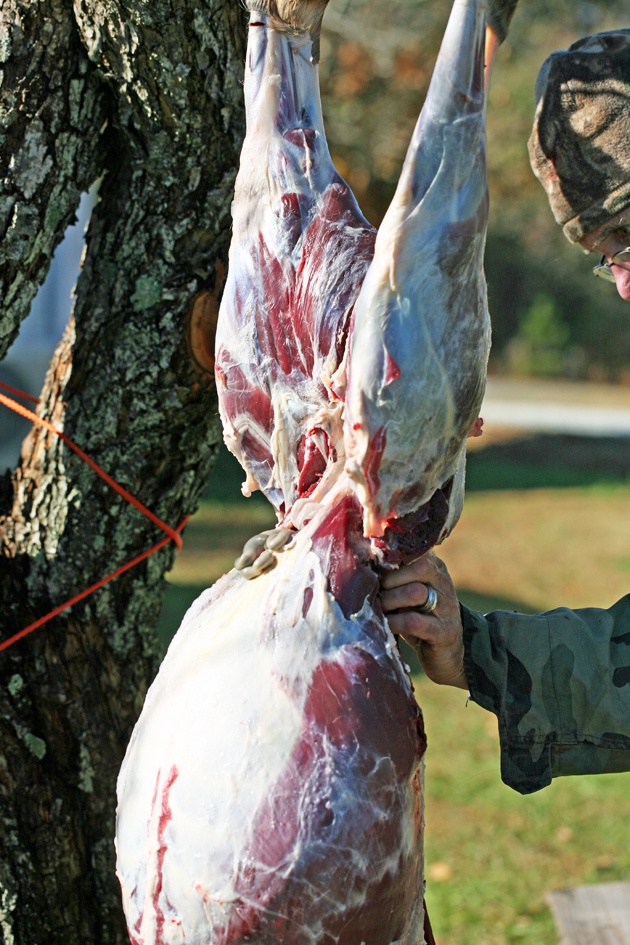
That year, we didn’t mess with the abdomen at all. All we did was cut the meat around the backbone…
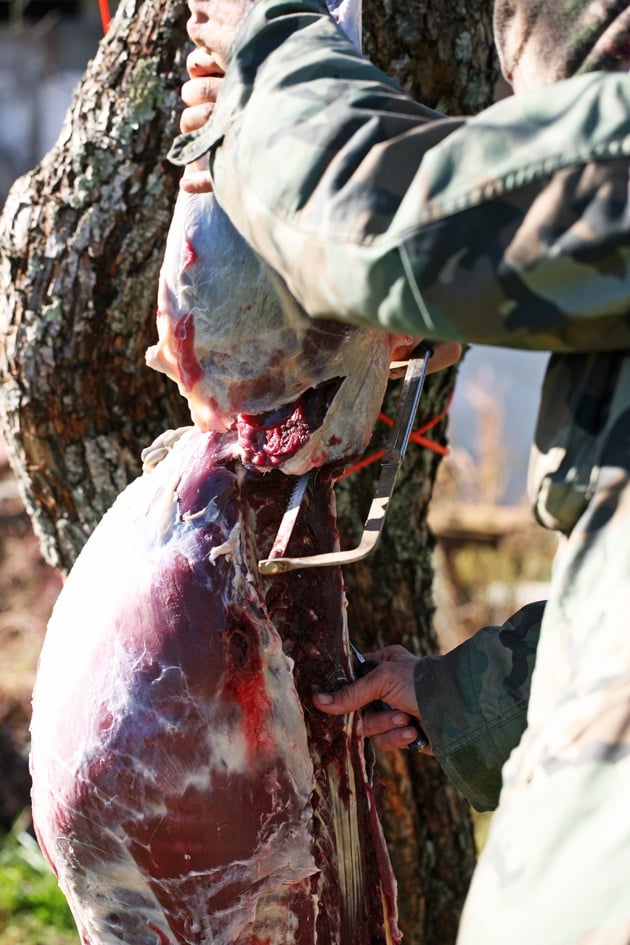
And we used the metal saw to cut through the bone…
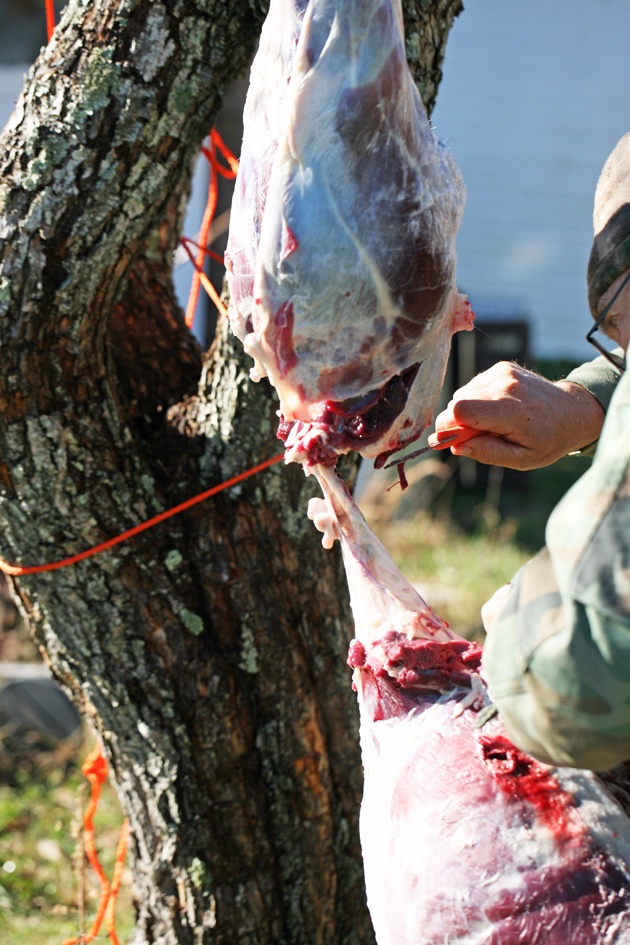
Until the whole belly part disconnected from the hind legs.
If you do this, I think that the best thing is to dump the whole thing in the woods for the other animals to enjoy. I know some people think it’s a waste, but if you are just beginning, this is fine to do in my opinion.
In fact, many experienced hunters will do it simply because it’s so much easier.
Nothing is really wasted if you throw it in the woods. Other animals will enjoy it so you can look at it as sharing.
In the years after that first one, we did gut our deer. Honestly, we did it more for the dog than for us.
There is just a whole lot of dog food and dog treats in the carcass and I have the best farm dog in the world. She keeps all the other animals safe around here so she definitely deserves it.
I am on a mission to learn how to cook the organs, though. I hope to have some organ recipes for you soon.
Removing the Deer’s Hind Legs…
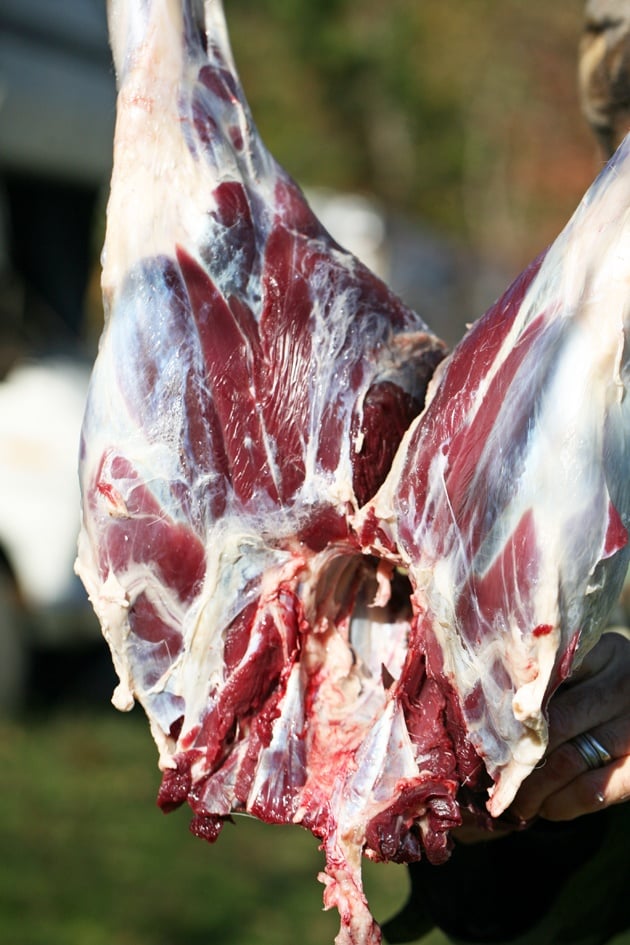
All that we have left to deal with are the hind legs and really, this is where most of the meat is…
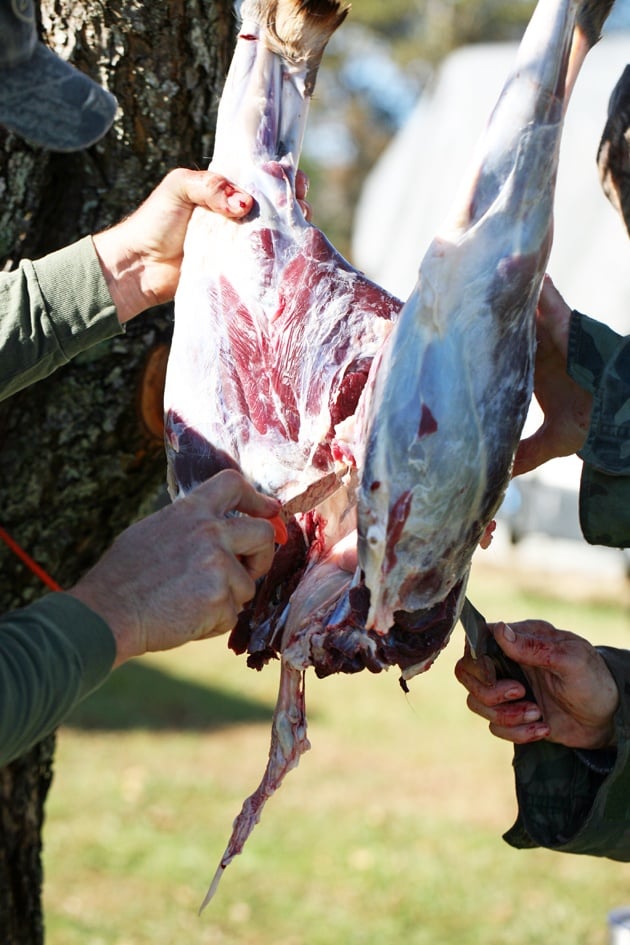
To separate the legs, we cut the meat in between the legs…
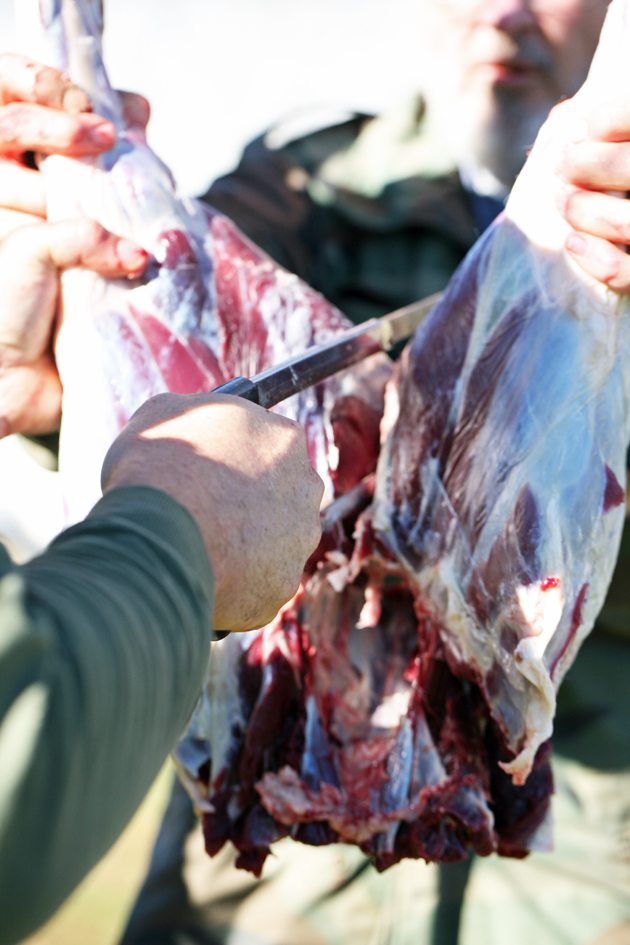
And use the saw to cut the bone…
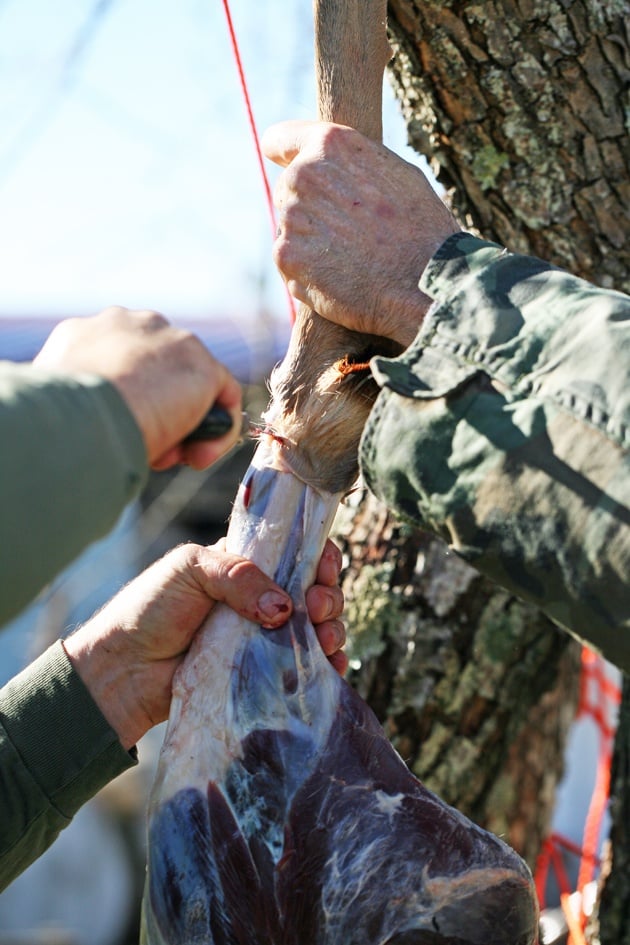
Once the legs are separated, we use the saw again to cut off the lower part of the leg…
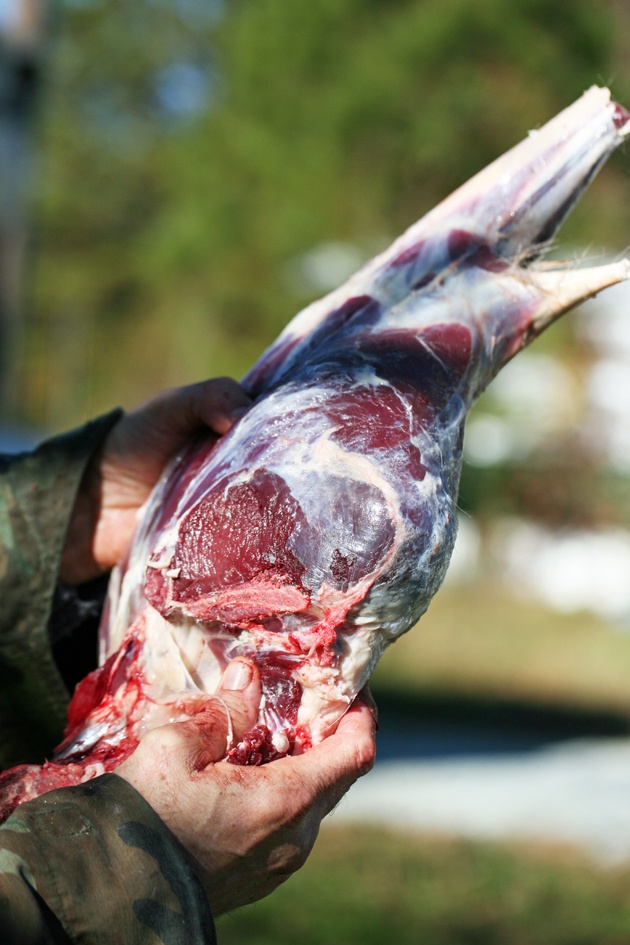
That’s it for now. We make sure to wash the meat well before we put it in the cooler. Later we are going to break the hind legs into a few different cuts of meat.
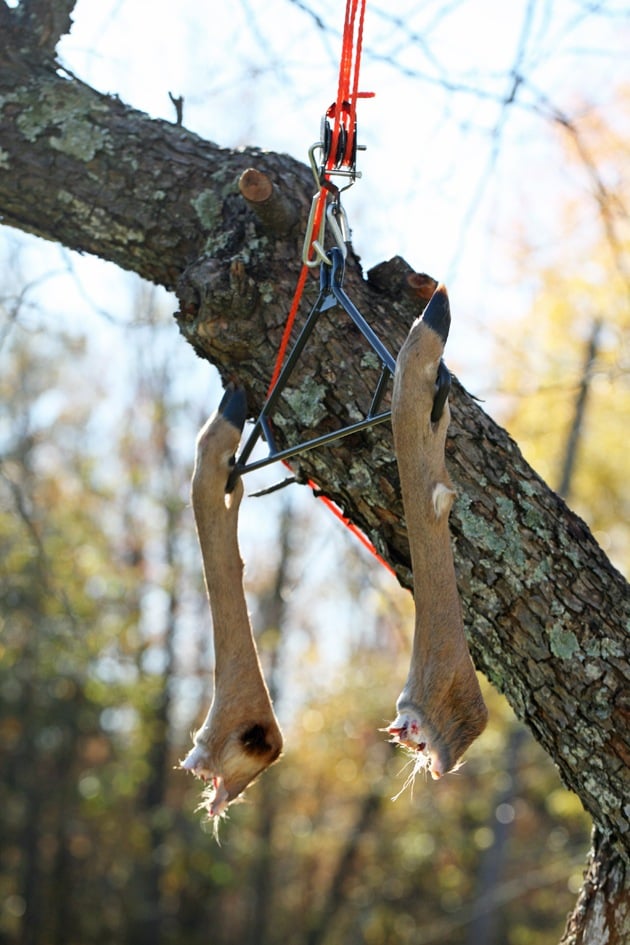
The lower part of the hind legs also goes to the dog (you can package and freeze all the parts that you are going to feed to your dog, you don’t have to give it all at once, of course) and we are done breaking this deer apart!
However, deer butchering is nowhere near done…
Setting Deer Meat in Ice…
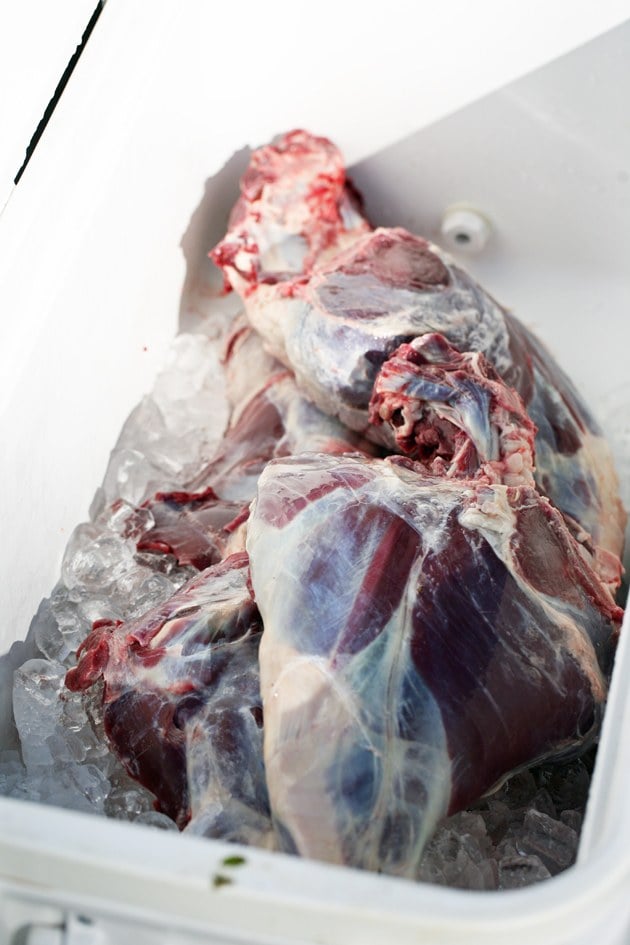
All of our meat is in the cooler after it has been washed…
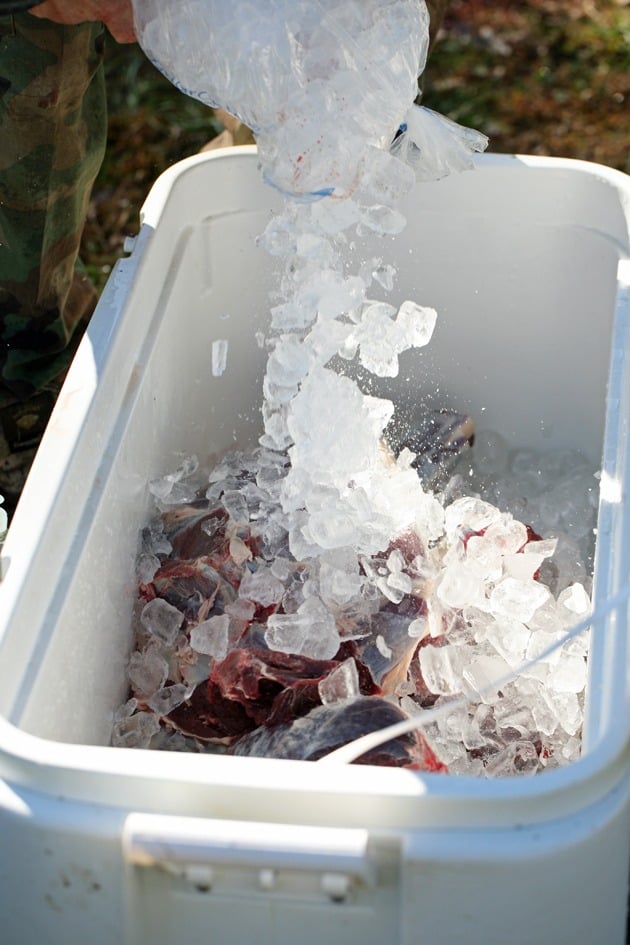
We have to cover the meat with enough ice and tilt the cooler a bit. Make sure the little drainage opening at the bottom of the cooler is open to allow water from the melted ice to flow out so your meat is not sitting in a pool of water.
The meat is going to stay in the cooler for 24 to 48 hours.
You should check it every few hours. If there is too much water, lift the cooler and help it drain, if there is not enough ice, add some ice.
Packaging Deer Meat…
The backstraps, the neck, the tenderloins, and the organs are ready to go in the freezer. Make sure to wrap them well with plastic food wrap and then with freezer paper (or use a food vacuum sealer).
What we really have left to deal with are the front and hind legs.
I found this great video that shows how to separate the cuts of meat. You can do this on the front leg too…
Don’t forget to label your meat after wrapping it!
Using Deer Meat and Bones…
With the bones, I make a bone broth that is so healthy and can it.
If you’d like to save some space in the freezer it’s very easy to can some of your meat. Here is a how to can meat tutorial.
You can go ahead and make some delicious BBQ venison neck recipe, deer jerky in the oven, or grind some of your meat and make venison burgers. And you can make delicious pulled venison for wraps or sandwiches.
There are soooo many ways to use your venison. I pretty much use it just like I use beef.
You should really be proud of yourself for going hunting and processing your deer! This is the cleanest meat you can provide for your family and it’s something to be proud of.
I’d love to hear your suggestions and tips. Tell me how you go about deer processing and what you do differently. Just remember that there is no one right way. Everyone is doing it a little differently and it’s all good!
I hope that you enjoyed this how to butcher a deer post. Have a wonderful hunting season, friend!

Hi! I’m Lady Lee. I help homesteaders simplify their homesteading journey while still producing a ton of food! I am a single mother of four, I was born in Israel and raised in an agricultural commune called a Kibbutz. Now I homestead in central NC.

You will need the brain , rock salt woolight liquid soap and sawdust !
#1 scrape with sawdust N salt to remove anything meat N sinue and as much as close to skin “flesh side of fur ”
#2 mix brain N liquid woolight into goop and rub onto now cleaned pelt ,rub ,rub good rub again
#3 wash with water use a scrub brush “easy dont tear ”
#4 rub with salt ,let dry ,,,inabout 2 to 5 days you might want to do woolight again because your brain will be used #5 redo salt
Why do you guys throw way the tenderloins? If you actually gut the deer, you will find the most tender meat under the backstrap at the forefront of the pelvic area, just under and behind the backstrap.
These are the filet mignon of deer meat. In addition, that rib meat makes good jerky or ground meat.
Yes, this is how we did it the first year. We now get the tenderloin too and I also use the skin to turn into buckskin. Although I have to admit that I don’t feel much difference between the different cuts of meat. We share the ribs with the dogs. They get to eat and play with them.
I grew up in Western Michigan and in a family that hunts. My husband hunts also, I learned to gut deer and process in 4th grade. I wrote a paper about it. My family had a pole barn to hang the deer in and we would have family gatherings to process deer. We would gut two deer when my dad and his buddy would hunt, 2 days later we would do the processing. I really appreciate you posting this. May have to convince my husband to try to process. Love from Michigan.
Hi Britney!
Our freezer is now empty and you have no idea how I miss the meat. It’s such good meat! You were lucky to have someone to teach you the value of it at such a young age! I am trying to do the same for my kids.
This fall I am planning two new adventures, first is to learn to hunt on my own and the second is to learn how to tan the hide. I am very excited!!
Thanks for stopping by and taking the time to comment!
Boil all bones, use celery, onions, garlic, makes great broth and you won’t believe how much meat you get off the bones. Great stews and soups. When I say all bones I mean big pot and all bones, even the neck and ribs. I only use the leg bones for the dogs after boiling.
I usually bake the bones in the oven. We get all the meat off of them (you are right, there is a lot of meat) and then I give the bones to the dogs.
I wonder if boiling them will make something like a beef stock… Could be good to freeze and use throughout the year in recipes that call for beef broth… I’ll need to try this.
Thanks!
To make great bone both it’s best to roast the bones in the oven 1st. (Color equals flavor) Next pour ACV (Apple cider vinegar) over roasted bones & allow to set for 30 to 90 min. (This will soften bones & allow more collagen, calcium etc to be extracted.) Then place in large pot(s) with celery, carrots, onions, garlic + any herbs & spices you like. Bring to simmer & cook for hours & hours!! (12-24hrs) Can also be done in crock pot on low (not high as it will destroy many of the nutrients, same reason not to cook at rolling boil). Bone broth can also be made with beef, chicken or other bones.
Bone broth is said to give more of an energy boost than coffee, fill you up & keep you from getting hungry along with boosting the immune system. Collagen is beneficial to skin, joints….
Can be frozen. Last freezer bags on their side to utilize space & make it easier to thaw.
We gut prior to skinning. We also keep in coolers with ice & salt for 2-4 days, draining water while adding ice & salt until water runs clear.
As for recipes, love breakfast sausage! It’s so tender! Mixing the spices in before packaging. Adding butter while cooking along with Worcestershire (which we use with all breakfast sausage, any kind & store bought.) Love ground venison for chili! Uncle Wick’s 2 alarm knock off recipes easily found on Pinterest. Spaghetti, meatballs & lasagna are wonderful also!
As for other recipes, RealTree has recipes for burgers, appetizers & foodie types like a roast baked in a salt shell.
https://www.realtree.com/timber-2-table-wild-game-recipes
Lot’s of great information! Thanks, Shan.
You should always take the tenderloin out that’s the 2nd best piece of meat on a deer . My friends and family really like the heart. We trim it up, remove the tendons from the chambers and the silver skin from the outside. Next we slice them into strips,soak in salt water for about 1/2 hour roll in seasoned flour and fry delicious. You do owe it to the animal to use everything that can be used you took its life to nourish yours
That’s true. We never ate the heart before. We’ll try it this fall. Thanks!
I skin and butcher the exact same way. Great job
Thanks, Steve.
I’m a bleeding heart liberal California city dweller who has never shot an animal, but I really respect what you’re doing here.
I really, REALLY, respect that you are open to accepting other people’s choices and way of life!
We might be very different, but the simple fact that we know that each one of us has his/her’s own way of life and respect that it’s what it is all about. I’ve lost many friends in the past few months because our political opinions are different and because the way we choose to live and it is sad. I don’t know how you can be a liberal and tell someone that you can’t be their friend because they have a different opinion than yours, isn’t that what liberalism is all about?
If more people demonstrate the kind of behavior you do we will all live a much more peaceful life.
I appreciate you, Ron! Thanks for taking a moment to wite this.
Wrigley, in Ohio we don’t have tags we check our deer in via internet or phone . Maybe they have the same system
skin the deer and quarter it , then stack the quarterd deer in commercial food grade totes and let the deer age for 2-4 days inside a spare refrigerator out in your garage or shop . Make sure that your meet is not setting in excess moisture in the bottom of your tote , if you can make a grate to set the meat on to raise it of the bottom that works re best . This is what I do in early bow season when it is still warm out , but when it gets cold out I skin it , hang it and let it age in the shop.
I have hunted for many years and a few tricks that work for me are to gut the animal as soon as possible and wash out the blood from the gut cavity. Then skin the animal as soon as you get home. I usually put my Gimbal through the joint just above the knee. Also I let the animal hang for 24 to 48 hours after the kill. Then i cut all the meat from the bone and soak it in a sink full of water with a big handfull of salt diluted in it. I never cut through the bones if it is not absolutely necessary. The wild gamey taste comes from the blood and bone marrow. Soaking the meat in salt water draws the blood out of the meat. This trick was taught to me by a friend of mine who happens to be a butcher by trade. Many of my friends will never eat venison but always comment how lean my beef is. One of these days I will have to tell them they are eating meat that they claim they do not like.
LOL! Will be interesting to see their response.
I am a bit scared of leaving the meat out hanging. I’ve heard people are doing that but we don’t have an indoor place to do it and leaving it outside might invite the coyotes, also what about bugs? I know it’s cold outside but still, I think here in NC there still are a few bugs even in November. We thought about salting the meat to keep the bugs away.
I cut off the legs below the knees before hanging to prevent tainting the meat with the glands on the legs. You can hang it on the gimbal by piercing it above the joint. Also I gut it before skinning, and spray the exposed flesh inside and out with a 2.5 ph solution of citric acid and water to keep the flies off. Food grade citric acid and spray bottles are cheap and a pound would last a lifetime. I never throw away the backstrap, which is the tastiest part of the whole deer. It lies along the backbone and you just tossed it in the woodpile. If I kill a wild hog, I would do it much like you did, because any ailments the hog carries would be inside the body cavity, and taking only the quarters assures safe meet. But I would never just take the quarters of the deer. I would eat the tenderloins first. And keep the liver and heart.
Oh no, we didn’t throw away the backstraps, they are the best! We removed them first. We now also gut and take the tenderloin and I turn the skin to buckskin.
I never heard of anyone that gut before skinning unless it’s in the field. Sounds like a good way to do it so the meat is not exposed while you take care of the gutting.
What a WASTE!!! inside “Backstraps”, outside “Shell Meat” for grinding into burger.
One more thing, I don’t see a Tag anywhere on that deer.
Why not cut out the inside tender loins? You waisted some good meat the way you process your deer.
I like to consider myself an avid hunter. In the past, I have hunted Bear, and Deer. I just wanted to Thank-you for your time to show people how to skin and butcher a deer. I never butcher a deer myself, But after reading your blog, I would like to, Thx.
You are welcome, Tim! The first time might be a bit hard, but you get better at it real fast.
I have always made chops out of the ribs and inside straps. Its easier to do if you have access to a meat band saw. They are ten times better than lamb chops. If you’re harvesting four or more deer each year, that is a small feast of incredibly tender and succulent meat. No barbeque required, just salt, pepper, fresh thyme, brown them in butter and a quick finish to safe temperature in the oven.
Last year we harvested the ribs too. But we barely had anything to eat on them so we ended up giving them to the dogs as a chew toy. Maybe it was a small deer? Or maybe a thin one? I can’t remember. We will probably try to do it again this year. That morning, when took those photos we had two deer to process so the guys wanted to move things along quickly before it got too warm.
Harvested a Black Bear this past summer. Some folks said they’d never ever eat bear meat (“I just visualize one with a diaper in it’s mouth”). The one we got was great – no wild game taste – more high quality red meat beef like. I’m told that removing all fat and silverskin is important. Looking forward to taking Bear, Deer and Moose next year.
Never tried bear, but I’ll love to try it one day. We don’t have too much here other than deer. Up North you got caribou,bear, moose, deer… So much you can harvest off the land!
Couldn’t you have salvaged the center rib cage for dog food?
Not unless there is a way to ground the bones. There is almost no meat at all on the rigs. Last year we thought we will bbq the bones but it didn’t work, there was no meat on them at all. We ended up giving the dogs the bones one at a time as a toy.
Ground the rib meat into hamburger,cut around ribs. Not wasted then.
Hi, go on youtube and you will find how to pull the skin off with a car or winch….much easier….boil all bones for 20 hrs. on low with some vinegar to leach more calcium…that is great…..a sharp kitchen knife is good, look at the cow butchering on youtube……soak meat in the fridge for three days in yogurt or milk, cook with it later….it breaks down the meat…..how much time is it to tan a hide? From my perspective a lot! See the handbook for north american indian footwear, you may love it, and look into building soles onto them with urethanes in rubber molds, you might have a winner!….In Chile they make the best bbq, with all of th organ meats, blood sausage, etc.It is GREAT!……