This post may contain affiliate links, view our disclosure policy for details.

Learn how to butcher a duck at home so you can process your own meat ducks. We will work through the process step-by-step and by the end of this post, you’ll know everything that you need to know about butchering ducks.
If you landed here, you probably are already raising meat ducks and the time to butcher them is getting closer. Learning how to butcher your ducks is an important skill.
I know that it can be a bit intimidating at times but I want to tell you that after you do it a couple of times you’ll see that it’s really not that hard.
If you have ever butchered a chicken or butchered a turkey before, the process is exactly the same. Let’s jump right in…
How to Butcher a Duck At Home…

I raise Muscovy ducks for both meat and eggs. I love them mainly because they are very friendly and because they are great mothers.
They can sit on nests of up to 17 eggs and so it’s very easy to go from 3 ducks to 50 in one season. Butchering ducks is something that I have to do on a regular basis to keep the duck population under control.
When Is a Duck Ready For Butchering?
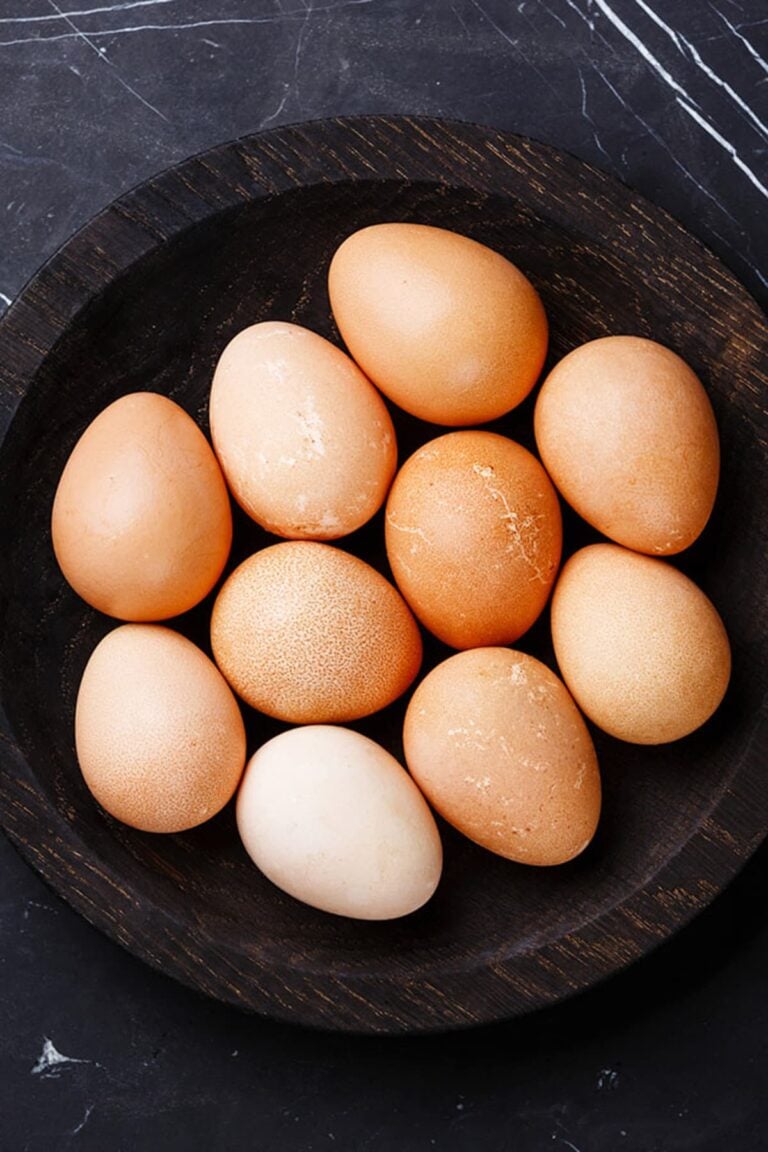
A duck can be ready for butchering anywhere from 7 weeks to 6 months. This will vary and will depend on the breed of duck that you raise.
Muscovy ducks are ready for butchering at around 3 to 4 months and will dress at around 4 to 6 pounds. If you let them grow a little older the males might dress out ever heavier.
Khaki Campbell ducks are a dual purpose duck that can be ready for butchering at 8-10 weeks and will dress around 4 pounds at this stage (most likely).
Pekin ducks can be ready for butchering around 7 weeks and weigh as much as 10 pounds at butchering time (depending on what you feed them, of course).
Again, this information is specific to each breed but you can always know by just looking at your ducks. If it seems that they’ve reached their full size, they are ready for butchering.
How to Prepare a Duck For Butchering…
Butchering is much easier if the duck’s digestive system is empty. So 12 to 18 hours before butchering, remove feed. You can let your ducks have access to water.
Also, try to plan your butchering day for a cool day. If it’s a warm day and the flies are a concern, just make sure that there is a cooler with ice close by to store the bird and prepare to move quickly between the steps.
Plucking a Duck vs. Skinning a Duck…
Before you begin gathering everything that you need to butcher a duck, you are going to have to decide if you’re going to pluck your duck or skin your duck.
Ducks are much harder to pluck than chickens. You have to take into consideration that the older the duck gets the harder it is going to be to pluck it. If you want the skin, then plucking is much easier if the duck is between 7 to 10 weeks old.
If you don’t need the skin or if your duck is older and you choose to skin it, you’ll see below how to skin a duck (since this is what I choose to do).
What You’ll Need to Butcher a Duck…
Please note, the links below are my Amazon affiliate links. I may earn a small commission if you purchase anything through these links. There is NO additional cost to you and Amazon product prices stay the same. Thank you for supporting Lady Lee’s Home!
Before we butcher a duck, it’s important to make sure that we have everything that we need. When preparing for butchering day, I like thinking about my set up in stations.
We are going to move between four stations…
- Killing
- Plucking or skinning
- Butchering
- Packing and storing
Killing station – there are a few different ways to kill a duck. Often, they are larger than a chicken and don’t fit in the chicken killing cone.
You’ll see below that I butchered my ducks at my friend’s homestead. They happened to have a large enough killing cone and the ducks did fit in there. If you can make or find a large killing cone, it really makes the job much easier.
Some homesteaders make a hole at the bottom corner of a feed bag, put the duck in the bag with the head sticking out from the hole, and cut the head with a hatchet.
When I butcher my ducks at home, I hang the duck by the legs with twine from a branch of my plum tree. Hanging upside down relaxes the duck and I kill it just like I kill a chicken (we’ll go over this in a minute).
You have to decide how you want to do this and make sure that you have everything that you need on hand. If you are going to use a butchering knife, make sure that you sharpen it before you use it. If you are going to use a hatchet and a feed bag, make sure that these are ready to go.
Plucking or Skinning Station – if you chose to skin your duck, all that you are going to need is a table to work on (that is easy to clean like a plastic folding table, for example) and your sharp butchering knife.
If you chose to pluck your duck then you’ll need a large pot to heat water in so you can scald the duck. Since ducks are usually large, I think that a turkey fryer will work best. Make sure that you also have a propane tank ready to go and a thermometer to check the temperature of the water.
Some homesteaders say that it’s easier to pluck a duck if you add some paraffin wax to the water. If you want to try it, make sure to purchase it before butchering day.
Butchering station – here we are going to need the sharp butchering knife again and the table to work on.
Also, make sure that you have a five-gallon bucket or two for the guts, head, feet and so on (find it at Lowe’s or Walmart for a couple of dollars).
Make sure to set your butchering station close to a water source. I set it close to my garden hose for easy clean up.
Packing and storing station – the best way to handle the meat after butchering is to let it sit on ice or in the fridge for 24 hours before placing it in the freezer. If you don’t have enough room in your fridge, you will need a large cooler (assuming that you are butchering a few ducks) and a couple of bags of ice.
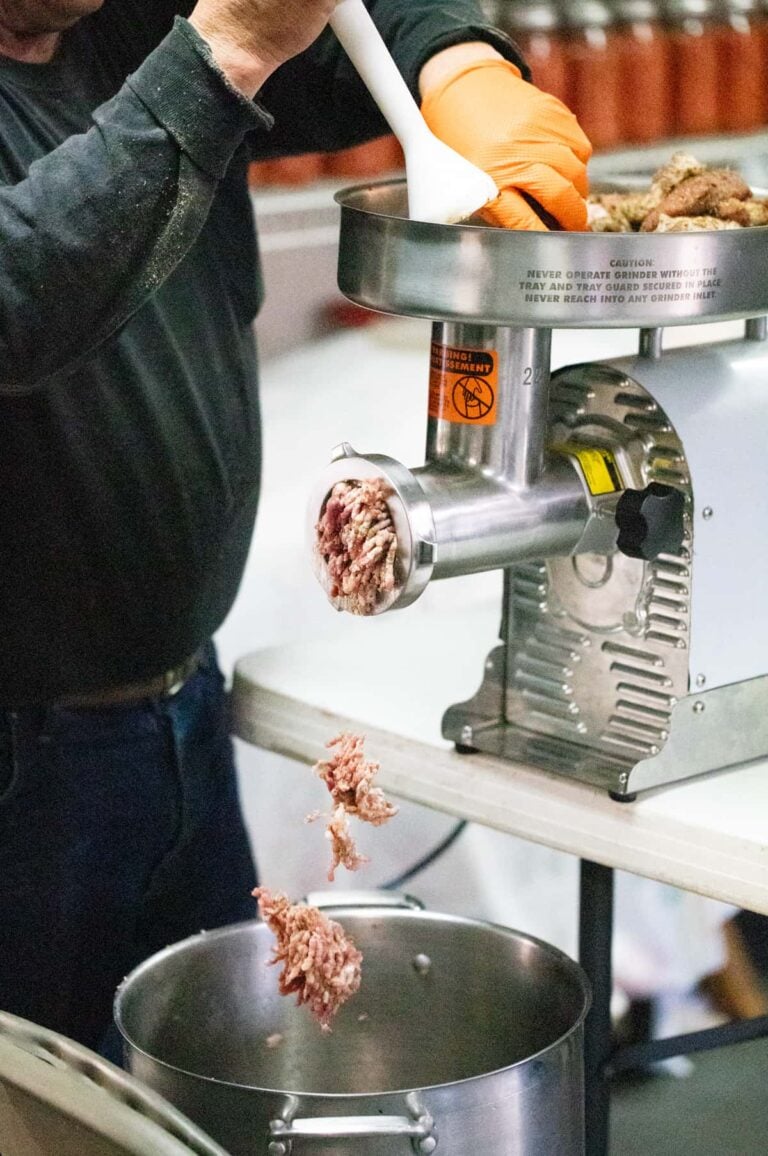
If you’d like, you can break apart your duck. I prefer doing this at the time of butchering and freeze the different cuts of meat in one-gallon Ziplock bags.
If you want to leave your duck whole, you can wrap it with freezer paper and then plastic food wrap.
Another option is to use shrink bags. These bags shrink around the duck when dipped into hot water and protect it in the freezer. If you are using these, you’ll also have to use your turkey fryer again to heat the water.
And yet another option and the one that you’ll see me use at the end of this post is packing the duck in a vacuum bag and sealing the bag with a food vacuum sealer.
Once you have everything together, you are ready for duck butchering…
Step 1 – Humanly Killing a Duck…

Pick up your duck by its legs with its head pointing down. Place your duck in the killing cone and extend its neck down. Being upside-down relaxes the duck and I find that this is the most human way to kill it.

Hold the head of the duck…

And make an incision right above the jawline. This will cut the main artery. The bird will bleed to death without feeling a thing and the convulsing of the body will push most of the blood out.

Let the blood run out for a couple of minutes. you can place a bucket on the ground to collect it if you want to keep things clean. I do this under my plum tree and I let the blood flow to the ground. It’s a great natural fertilizer for the tree.
The body of the duck will keep flapping for a few minutes. This throws people off sometimes because they think that the animal is suffering. The flapping is normal, the duck is not conscious at this point and doesn’t feel a thing.

After the flapping stops, remove the duck from the cone and use an ax or your butchering knife to remove the head.
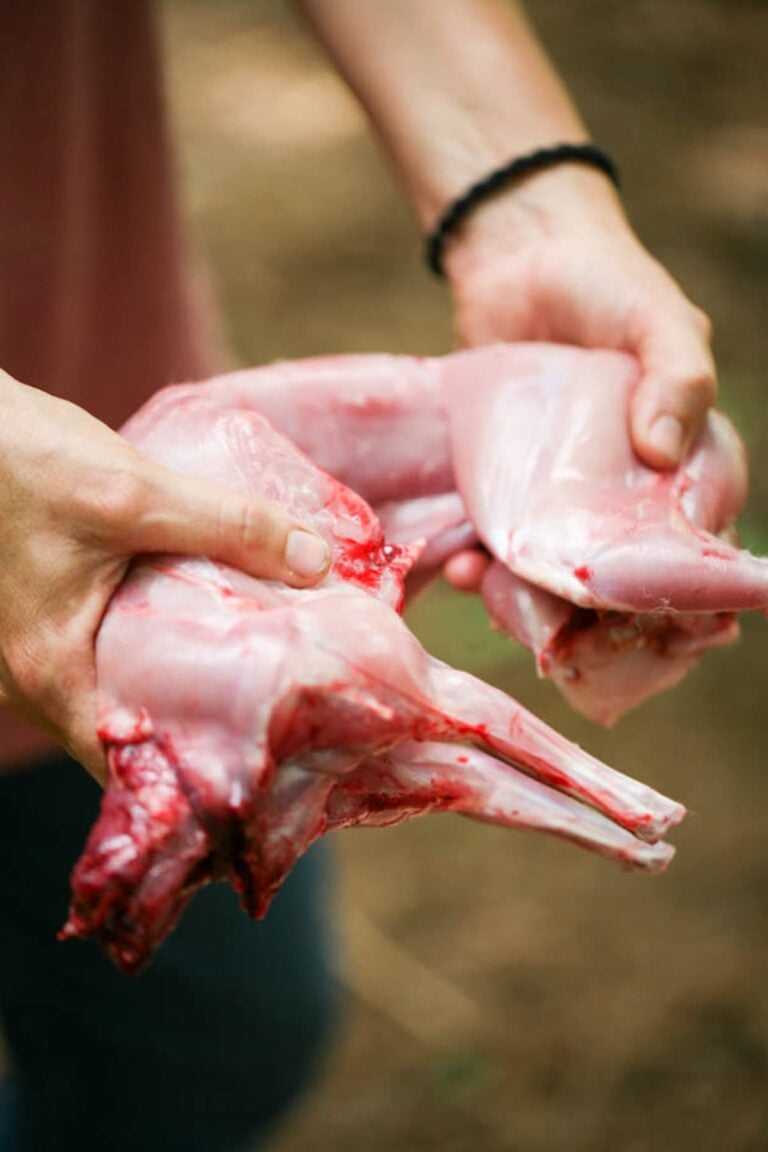
Step 2 – How to Skin a Duck…

If you chose to pluck your duck, now is the time to dip it into the hot water. Bring the water in the turkey fryer to anywhere between 145 and 160 degrees Fahrenheit and add some paraffin wax if you like. Then dip your duck into the hot water and move it around for a minute.
Pull it out and try to pluck the feathers. If they come out relatively easily then keep plucking. If it’s hard to pluck them, you can try to dip the duck in the hot water for a few more seconds.
We decided to skin the duck instead of plucking it. It’s much easier to work if the feathers are wet so they don’t fly everywhere. So before you start skinning, make sure to wash your duck well.

Lay your duck on the table with its breast up…

Find the valley between the bones in the leg joint and make a small cut…

Then bend the leg and twist it to remove it.

Turn the duck so its tail is towards you…

Lift the skin around the neck and make a cut to split it…

From here, try to use your hands to tear the skin and just get a little bit of help from the knife if tearing the skin is too hard. The reason for that is that we don’t want to cut into the meat by accident.

Stick your thumb between the neck and the esophagus and windpipe and pull them apart.

Keep separating the skin from the meat down the chest and belly…

Pull it with your hands and use the knife gently if you need to…

Gently, start working around the legs and wings.

It’s very hard to skin the lower part of the wing and there is no meat there anyway so it’s better to just remove it. To do that, find the elbow joint…

Locate the valley between the bones, make your cut and twist and turn…

Until you remove the lower part of the wing.

Go back to the neck and start removing the skin around it and towards the back of the duck…

Flip the duck on its belly and keep working down the back, separating the skin from the meat…

If the skin and the feathers dry up, use your hose to wet them again…

Keep working all the way to the tail…

The skin clings pretty hard to the lower back of the duck so pulling it off might not work. You’ll probably need to use your knife more in this area…

We chose not to keep the tail, so we made a cut at its top…

To separate it. We then cut around the vent carefully so as to not puncture the intestines. Move the skin aside but keep it connected to the tail and vent…
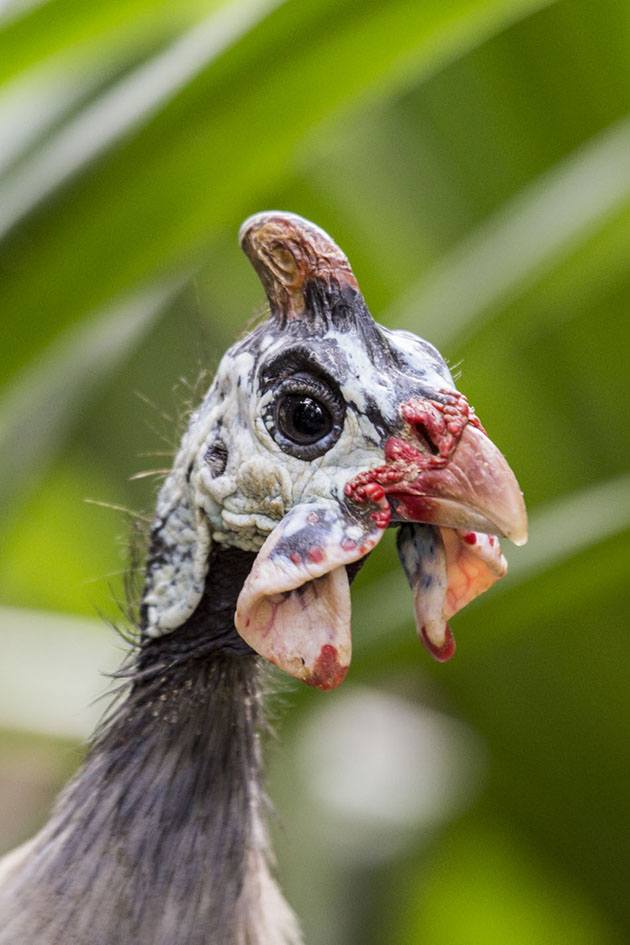
Step 3 – How to Disembowel a Duck…

Now that your duck is skinned (or plucked), you are ready to remove the innards. I am including the above image here to make it easier for you to understand what you are looking at.
It is an image of a chicken, but duck anatomy, especially the guts, look pretty much the same as of a chicken.
From here on out, place all the parts that you are not going to use in the five-gallon bucket. You can either bury them in the garden (they are a great natural fertilizer) or dump them in the woods for the other animals to enjoy once you are done.

If you cut around the vent, your bird will look like in the image above. There will be a large opening that will allow you to see the innards…

Stick your hand in…

And gently tear the tissue between the innards and the rib cage…

Try to hook your fingers around the esophagus and windpipe and pull the whole mass of innards out in one motion.
I keep the liver and the heart for my favorite liver and onions dish and throw the rest in a bucket.
You will notice a dark green sack right next to the liver. This is the gallbladder. If you are keeping the liver, separate it from the gallbladder without damaging the bladder so bile doesn’t get on the liver (you might need to use your knife to gently cut around it).
If you like, you can also keep the gizzard but it needs to be cut open and cleaned before cooking. We usually keep the lungs and the kidneys in the duck, there is no need to remove them. If you want to remove them, you’ll have to get your fingers in between the ribs to clean them out.

All right, the work is almost over…
Step 4 – Packing and Storing the Duck…

The best way to handle the meat is to pack it and give it 24 hours of chilling in the fridge or in a cooler with ice. This will help the meat “relax” and be a bit more tender. To do that, first give your duck a good rinse…

Place it in a bag and place in the fridge or the cooler (with ice).

After 24 hours, take it out of the fridge or cooler and out of the bag. You can go ahead and cook and serve it at this point. You can also cook it and can the meat as you would can chicken meat if you want to save room in the freezer.
If you want to freeze your duck for later…

Remove the neck. You can also do this at the time of butchering if you like. It doesn’t really matter. I keep the neck for soup.

Wash the duck again and then pat it dry with a paper towel…

Then place it in a large vacuum bag…

Even though we dried the duck with a paper towel there is still moisture there that will prevent the bag from sealing right. So place a folded paper towel across the opening of the bag.
Once you start vacuuming the moisture that the machine will pull will be absorbed by the paper towel and the bag will be able to seal correctly. It’s a neat trick that will help you save your food for longer. You can do this with fruit or vegetables or anything else you vacuum seal.

Your duck is now ready to be stored in the freezer. It will last 12-18 months but I generally try to use my meat within a year after butchering.
When you are ready to cook your duck, take it out of the freezer and let it thaw. You can use duck meat the same way as you’d use chicken meat.
Our favorite dish is this Southwest chili recipe but there are a million different ways to serve a duck.
I hope this picture tutorial was helpful and that it made it a bit less intimidating for you to butcher a duck.
If you like this post, you might like these as well…
Great step by step instructions to process ducks! You made it look easy, going to test my new found knowledge tomorrow, thanks Rod
Glad this was helpful!
very helpful. also for roadkill. thank you
Yes, I picked up a couple of geese in the past!
A big thank you for this step-by-step tutorial with great photos. About two years agos I used it as my guide to butcher my first duck and it worked very well. I always get a little confused about cutting away the oil sack on the tail, but manage. I am back to review for another butchering session today. I found the cone unmanageable, so I wrap a towel around the body, like swaddling a baby to keep the wings in, then I lay him on my chopping block with a little sock or towel over the eyes so he can’t see what is coming. They usually lay still after a moment or two. Then chop. (Usually a couple chops as I’m not that strong). The towel comes off and I hold him upside down for a bit to hopefully get a clean and thorough bleeding out. I found that skinning in July was really easy, May wasn’t as easy and April was difficult because of how much their skin released from the body. Today I hope to pluck, if my patience keeps up. I also found that it doesn’t matter if they have eaten or not, I have never had a mess. Thanks again!
Ohhh I’m so glad that this was helpful.
My cone is too small too so I tie a twine around their legs and hang them upside down.
Duck meat is so good!
Thanks for coming back!
what size butcher cone did you use? I want to buy one since I have a few males who need to go but then don’t want to buy the wrong size. my biggest ducks are muscovy and smallest are runners
Ohhh, I really can’t remember. You’ll need a large size most likely. They don’t fit in the chicken size cone.
Thank you, Lady Lee for this amazing tutorial. Do you have recommendations for a good culling and skinning knife?
I am using an old one that my ex-husband got off of Amazon I think. Nothing special but it works.
where can I buy the metal cone?
You can find it on Amazon. Just search for “butchering cone”.
Hi, do you vacc seal the paper towel in the bag? Or remove it just beforehand? Thanks and God bless!
It stays in the bag.
Thanks for the tutorial! My friends duck got hit by a car and I didn’t want it to go to waste. I’ve only ever cleaned fish before and was a little intimidated but it was quick and easy!
It was an Indian runner duck, not a lot of meat on it but I’ll cook it up in the instant pot tomorrow!
So glad it was helpful. I’m sure it will taste amazing even if it’s not a whole lot of meat.
I went from 5 Muskovy Ducks to 40 in one season. I tried to sell them but no one has called after a month on Craigslist. I guess I’m butchering them:) Do you know what it costs to raise ducks, and what I should sell them for at 4 – 6 months?
It depends on so many things… Like are they free rage or do you fully feed them? What kind of feed do you use? How much does it cost?
I think that the best thing is to find a farm in your area that sells duck meat or chicken and see how much they charge. Then, charge the same until yu have a better idea of your cost and how much you want to profit.
Great information. I’m the Administrator to Erath Homesteading Network on Facebook. It’s in Texas. We have many members that are new to homesteading & want to learn how to butcher their small livestock. Is there a way to post your articles on the group? I’m getting ready to butcher some Pekins & thought it would be a good workshop for them.
Of course!
You are welcome to post a link to any article.
I would love to read and learn from you, but your website setup makes it a constant scroll related to
your overly large header and the wall-to-wall constant ad below. I do not mean to be disrespectful,
Thank you Lady Lee for this tutorial!!
I understand the progression of the steps fairly well, not at all looking forward to the killing of the ducks.
These ducks are feral around our neighborhood but one of the mommies has chosen to settle herself and her 11 babies in with our chickens. I am concerned about the catching part of this because these ducks are not even a little used to being handled and mom is extremely protective.
I don’t want to traumatize or provoke her or the babies. Any ideas on the best way to proceed here?
Thank you!
Try to get them used to feeding at a certain time each day. Once they are used to coming close to you for food it might be easier to catch them.