This post may contain affiliate links, view our disclosure policy for details.
Keeping bees has always been my dream! After a lot of research, I decided to go with a top bar hive instead of the more common Langstroth hive. One of the reasons what that the design of a top bar hive is simple and I knew that I’ll be aboe to build one very cheaply from things that I already had around the homestead. In this DIY Top Bar Hive From a Barrel post, I show you how I used materials that are very affordable and easy to come by to build my own top bar hive.
One of the main reasons I decided to try the top-bar hive method of beekeeping is because I knew that it will be fairly easy and inexpensive to build my own hive.
When I was in elementary school we had an agriculture class as part of our academic studies (I grew up in Israel in a small Kibbutz. Agriculture was the main source of income of the village).
One of the topics we studied was beekeeping which was an important business for the Kibbutz not only because of the revenue coming in from selling honey and other hive products but also because the bee hives were spread around the fields so the bees can pollinate the crops.
One day we went to visit the apiary building. This place was where they stored the equipment and extracted the honey. They made hive product there, packaged them, and managed the whole bee business.
We stepped into the room, and to this day, I can’t forget the smell, the sound, and the taste.
There was a sweet honey smell in the air and a few bees were buzzing around. Then they gave each of us a piece of fresh comb still full of honey and I just about died.
DIY Top Bar Hive From a Barrel…

Friends, I have a terrible memory. I usually can’t remember what I ate for breakfast and I definitely can’t remember much of what I did when I was 8 years old…
But that piece of honeycomb… The Smell of it, the color of it, the shape of it, the taste of the honey… This will be a memory to last forever.
I was fascinated by the bees and the honey and I knew that one day I will have bees.
Fast forward many years and I am ready to have my own bee operation. What I didn’t realize until I started researching what I need to make this happen is the amount of money I will need to purchase all the equipment.
There is so much stuff you need… Supers, covers, frames, floorboards, feeders, queen excluder, tools, and so on and so on…
Not only it’s so expensive, it’s also a lot of stuff… And I hate stuff. I don’t have room to store a lot of equipment and I hate managing material things. I lean towards minimalism… If I don’t absolutely have to have it I prefer not to have to store it, clean it, or fix it.
Hanging around the online creative homesteading community for a while, I figured there must be a simpler way to do this. So I started searching and came across the top-bar method of keeping bees.
If you are here, I assume you are interested in this method as well and so I recommend you read my Langstroth vs. Top-Bar Hive post. It will help you understand the difference between the common Langstroth hives to the Top-Bar hives and the difference in keeping bees using the two methods.

Top-bar hive beekeeping spoke to me right away because of its simplicity and because it seemed to me like it’s a more natural way to keep bees.
It is fairly simple and inexpensive to build a top-bar bee hive. If you build it yourself you can save a lot of money, if you buy some of the ones they sell online, you are probably going to spend as much as you would have spent on a Langstroth hive.
In nature, bees will make a hive in any hollow space. The top-bar hive is trying to allow the bees to act naturally by providing them a hollow space while at the same time making it possible for the beekeeper to manage the hive properly.
There are only a few simple rules you need to follow when you build your own hive, we will go over those in this post, but there is also a lot of room for creativity when building a top-bar hive.
So after much research, I was ready to build my first bee hive. Most of the hives I saw were made entirely of wood but after I looked around the homestead I realized I didn’t have enough wood to build the hive. I did, however, came up with a few things that can work, among them a plastic barrel and a few 2 x 4s. And so, I decided to use those.

Before I start going through the process let me be super honest here. This is the first hive I built and I have no experience keeping bees (as of the beginning of 2018). I researched a lot and tried to follow all the principles of a top-bar hive but this is an experiment for me. I hope the bees would love it but only time will tell. I am sure that this design will evolve over time but I hope the concept will stay the same.
Make sure to flow along my beekeeping journey by following the blog. I usually choose the “hard” way of doing things, so this should be interesting… Of course, we are not just going to buy bees, right? We are going to try to call them from Mother Nature to come to this hive I built (read: How to Set Up a Trap Hive and 61 Plants That Attract Honeybees). Hopefully, they’ll hear the call and this beekeeping ball will start rolling. This is going to be a fun adventure. I will keep updating.

One of the first rules of a top bar hive is that the sides should be at an angle. In other words, the hive can not have straight walls or the bees will attach the comb to the side walls and you won’t be able to lift the comb out of the hive.
If you build a wooden hive, you want to achieve a 120-degree angle for the side walls, since I am using a barrel that is round I don’t have to do anything special here. Hopefully, the bees will like the roundness of the barrel and won’t attach the comb to the sides.
A friend gave me seven of those barrels a few years ago. My kids love playing with them, my dog loves her barrel dog house, I use them to store rebars and scrap wood on to lift the material off the ground, and now one of them is going to turn into a couple of bee hives.
The top is not removable and I think this makes them very cheap. In our area, you can find them on Craigslist for around $10. I got those from a car dealership. I think their parts department gets some kind of automotive liquid in them so if you want to try and get them for free you can try calling the parts department of a local car dealership (of course, make sure to clean the barrel well no matter what you are going to do with it).

We need to cut this barrel in half. Make sure to mark the cutting line (I used paper tape) between the two holes that are on the top of the barrel. Thos holes will be the entrance of the hive so we want to keep them whole.
One-half barrel will be one (pretty large) hive, so one barrel can make two hives.

Excuse me for not taking a picture of the cutting of the barrel… I am not sure where I was when that happened…
David did that with a jigsaw, just following the edge of the paper tape. Also, those barrels have a lip around the top, we remover that too with the saw.
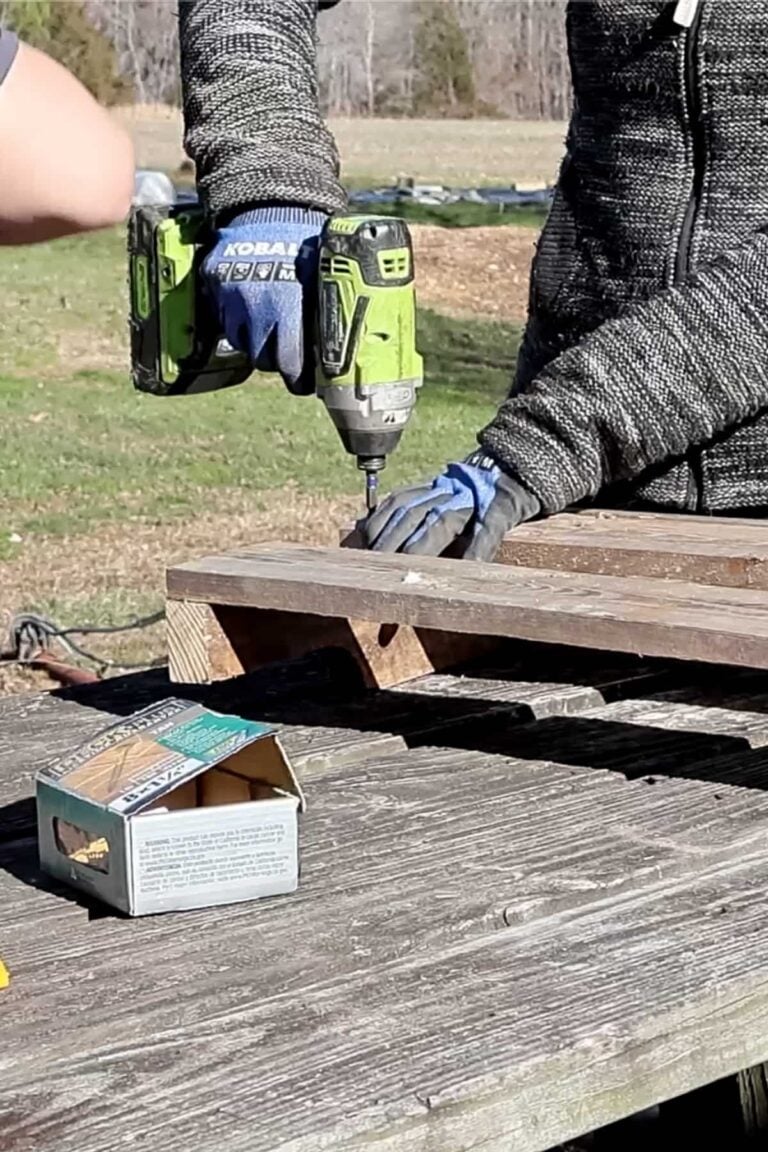
After the barrel was cut we turned it on a table and framed the opened part with 2 x 4s.

We didn’t do anything fancy here. Simply cut the 2 x 4 to length and screwed them together around the barrel.

Next, we turned the whole thing on its side and screwed the barrel to the frame

We used four screws with wide and round top on each side.

So now we have a half barrel with a frame around the open side…

We turned it over on the table again and attached four legs. I have to say that I love that the hive is standing tall so I don’t need to bend, but the downside to that it is the added weight which makes it so that you need two people to move this hive even before it is full of honey and bees (which can be an added weight of 50+ lb).
The wooden hives that you’ll see if you Google top-bar hives usually don’t have legs. Hives should not be placed on the ground so beekeepers will usually build a stand for them. The hives are not attached to the stand which makes it possible to move them, but they are heavy anyway and I figured I’ll need help to move them anyway if they are full of honey and bees so I decided to just build my hive tall legs instead.
In any case, since the barrel is round on the bottom, it can’t just rest on a stand.

All right, we have a framed barrel with four legs. You can see now how the hole is going to be used as the entrance to the hive.
Now we need to make this thing much more steady.

We added a piece of 2 x 4 between each pair of legs…

Then another one further down and a wide piece of wood to connect the two lower 2 x 4s. My thought here was that if for some reason the hive is not staying in place (we have some days of strong winds here…) then I will place a cinder block on the wide, bottom piece of wood. The last thing you want is your hive falling over…
That was pretty much it for the legs of the hive, now it was time to work on the top.

What makes a top-bar hive a top-bar hive is that the top of the hive is made of bars. Those replace the frames that you will find in the common Langstroth hive. The bees have a free hand at building their own comb and making the cells the size they want to make the cells, there are no pre-printed frames that force them to build the comb the way we want it.
However, in order for us to be able to manage the hive properly, we make the bars a certain width to respect what we call “bee space”. This is very important if you want to end up with individual combs that you can inspect, move around and harvest.
You’ll see in a minute how I made the bars, but in order to hold the bars in place, we added a piece of 1 x 2 on each long side of the hive.

We attached the piece of wood to the top of the legs not the top of the barrel frame…

Like so.

Next, we started cutting the bars.
The width of the bars of a top-bar hive must be 1 3/8’’ in order to keep bee space. It’s not hard to achieve because the actual width of the 1 x 2 lumber they sell at the local home improvement stores is pretty much 1 3/8’’. So we simply used the 1 x 2.

I used a marker to mark the exact spot of where I placed the first bar. This way, when I remove the bars I know exactly where to replace them back at.

We kept cutting and placing the bars until the whole top of the barrel was covered.

Here is another look, you can see how the bars sit in between the two pieces of wood we installed before.

I also made sure to number all the bars so I can return them in the right order if I remove them. You might not always want to return them in the same order… Part of hive good hive management is knowing how to move comb around. I am sure I’ll learn more about this when I actually have active bees in this hive but for some reason, I felt that I needed to know the order of the bars…

Ok, so now that we have the top bars in place we need to direct the bees to build the comb from the center of each of the bars.
The way to do this is to encourage them by making it easier for them to start a comb at that spot. We do that by installing a piece of molding or an inch of a cut sheet of bees wax right in the center of each bar.

I went into the home improvement store with the intention of getting a 1/2’’ quarter round molding strips that I can cut and install but I was surprised to find that molding is kind of expensive…
Right across from the molding there where those round sticks that you see in the picture. They are long (maybe 3 or 4 feet…) and only cost 68 cent each so I decided to try them instead.

I measured the length I needed to cut them, making sure to leave a little over an inch from the side of the barrel…

Then I used those U shaped nails to connect them to the bottom part of each top bar…

Like so.

Here is another look… So each bar has this round piece of wood running through it’s center connected by two nails on each end. Don’t forget that this is the under side of the bar, so it will be flipped over and this round piece will be inside the hive.

To make it even more appealing for the bees to start building their comb from the round piece I covered it with beeswax.
I cut some wax from this big block that I have which proved to be so very hard!
If you get beeswax from the store, make sure to get it in smaller blocks or go with pellets which are so much easier to handle and measure.
It was also a good lesson for the future for me because I now know that when I harvest my own wax it will be better to melt it into small blocks instead of one big block.

I placed the pieces of wax in a can that I kept after we ate the corn that was in there…

And used my GiGi wax heater to melt the wax. This is what you use to melt their wax for hair removal.
If you are fortunate enough to not need one of those you can probably use a double boiler system or something of that sort to melt the wax on the stove top.
If you do own one of those you now know that there is indeed a benefit to growing more hair than you really need! You can use it to melt beeswax for your DIY top-bar bee hive or for your homemade cosmetics.
Life is good when you are hairy!

Anyhow… I sacrificed one of my kitchen brushes and covered the round piece of wood with beeswax…

Like so. I made sure to cover the nails too.

Another good thing about the wax is that it glues the little stick to the bar and makes it much more steady.
Seriously, if you were a bee, wouldn’t you build your comb on this bar. Of course you would. They are not going to be able to resist!

Last but not least is the roof. We got to cover the hive somehow because bees don’t swim.
I toyed with the idea of making an A-frame roof, and you can certainly do it… but at the end, I decided to keep it simple and go with a piece of plywood.

Whatever you choose to use for the top, just make sure it is heavy enough so it doesn’t fly in the wind and also make sure you don’t use a material that heats, you don’t want to cook your bees in the summer.

I built a little frame for the plywood so it hugs the hive and holds it in place. If I see that this is not enough I can always put a couple of bricks on top of it since it is flat.

I used this Olympic clear waterproofing stain to protect the wood.

We made sure to apply a couple of layers. I also made sure to leave the hive in the rain. I then inspected the inside to make sure there was no water in there.
It’s been in the weather for a few weeks now and so far so good but I will have to stain it again probably every year. Or maybe I’ll come across a piece of tin I can put on top of it.

We also painted the legs with outdoor white paint. You can get creative and make it as colorful as you’d like.
I think its a good idea to use treated wood for the legs and roof but make sure to use untreated wood for your bars.
I looked at the hive as you see it in the picture above and had this feeling like something is missing…

Then I realized that the bees can probably benefit from a place to land when they come to the hive so I added this landing bar for them.
You’ll be surprised but I’ve learned in the bee class that I am taking that bees rob each other! A strong colony might find a weak colony and try to rob their hive of honey and pollen. So the bees always have “bee guards” at the entrance to the hive. They can smell which bee is part of their colony and if a robber comes along they fight it off.
I thought it will be easier for them to fight if they have a bar there. I am totally invested in helping them as much as I can because no one robs my honey!
I was then thinking that the barrel’s hole might be too big so I am thinking about blocking at least half of it. If the entrance to the hive is small it’s easier for the bees to protect the hive.
Also, reducing the opening might make it harder for field mice and birds to end up in there.
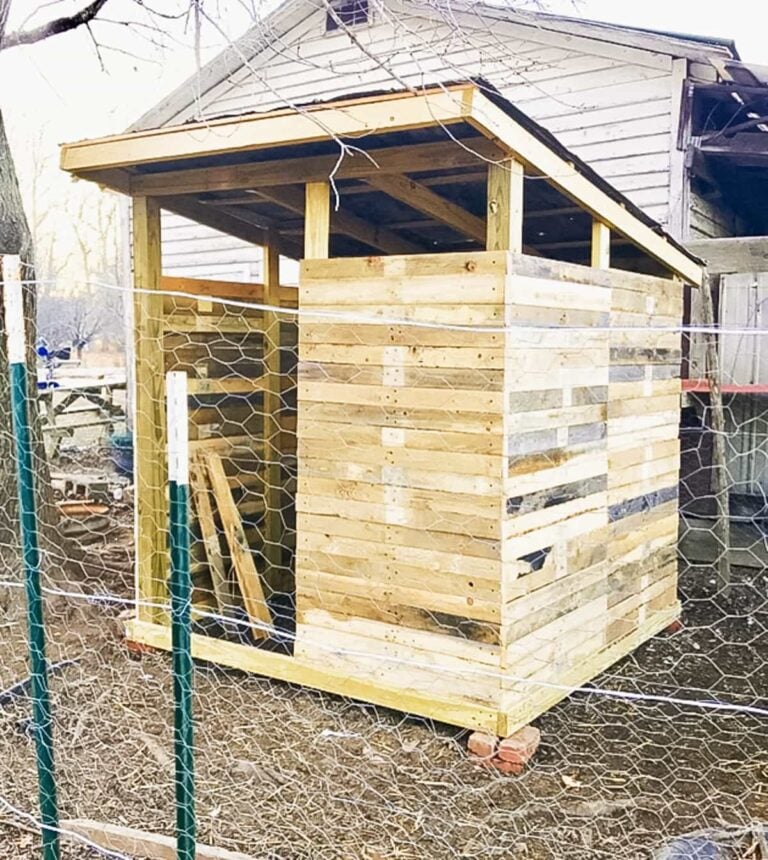
So there you have it! My very own first top-bar hive. I really REALLY want this to work. I didn’t keep track of my expense but I probably didn’t spend more than $50 and that after buying the gallon of stain which is expensive. I bought a gallon because I need to stain my awesome pallet wood chicken coop but I don’t think I used more than a cup of stain…
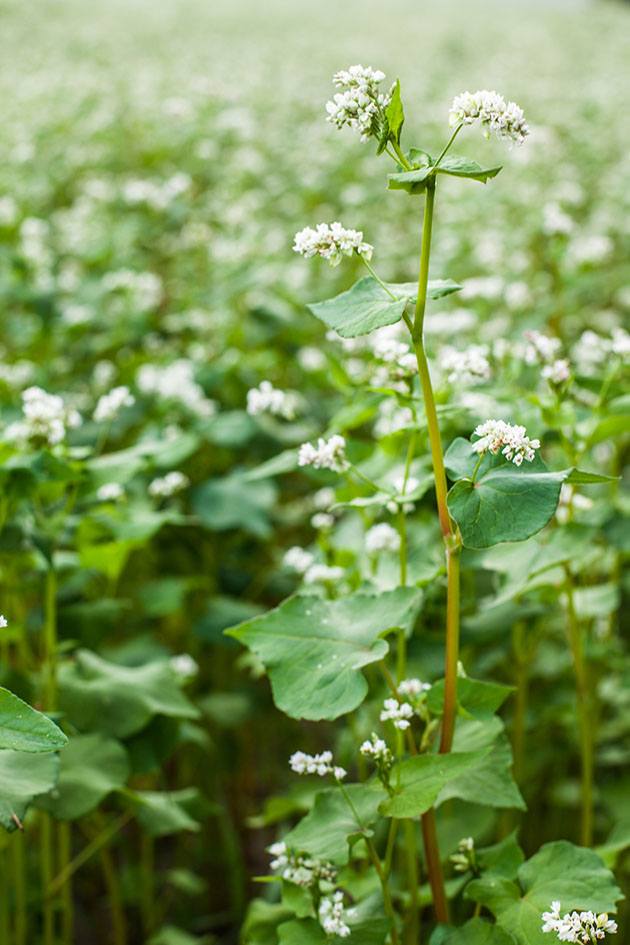
Here is the plan… I already planted about an acre of crimson clover at the farm, I am going to find a nice spot right on the edge of it and place the hive there.
There is a nice creek there and our waterhole is not far away so the bees have plenty of water. I will place a container with sugar water inside the hive and there is a trick you can do to attract bees to the hive. We will talk about this in another post since this one is long enough, but I am hoping that a swarm of bees will find my hive and make it their own.
If this happens, I will go through the season and make sure this hive works. If it does, I have enough material to build three more hives exactly the same.
Hopefully, by the end of next season I will be harvesting honey from my own hive and everyone at the local beekeeper’s club will hate me because it cost me under a $100 to start beekeeping (I need to buy a veil and a hive tool and gloves…), but you guys will love me and that’s what’s important!
XOXO…
Lady Lee.

I loved the article and pics. I have Langstroph hives, top bar hives, barrel tree hives and horizontal langstrophs. I was going to say “reduce the entrance”. I do only “comb honey ” and always take just a little pour moi. Good luck to you.
Do you like your top-bar hives? Do you feel like the bees like them?
Hi Lee
Did you have a chance to try the hive?
if so did the bees love it?
I didn’t. I placed it in the field one season to try and attract bees but that didn’t work.
Beekeeping is still my dream but I just can’t add it to the plate at the moment… Hopefully, one day soon!
Wow thank you so much you. I have to make this asap as i just found honey bees in a hole in my field and just feel the need to make them a home which is this Barrel Top bar Hive. From Isle of man i say thank you.
They will love it!
I have been inspired! Thanks!
Berta Barrett
So glad you liked it! Thanks for stopping by!
I think this is lovely but what are you going to do about ventilation and mites with no screened bottom ?
Xx
Maybe drill some holes in the bottom x
Yes, that’s a good idea. It’s very possible to drill holes and place a screen in the barrel from the inside.
A very brilliant idea
I love it and sure I am going to make one then two then probably ten or more for my farm
God bless you
Harold
So happy that you liked it! I’m gonna make more of them too.
Thank you for your plans. We have seven of these blue plastic barrels and I aim to do as you have done. Did you think of putting an angle brace between the leg and the cross pieces of 2×4? That might help it be more stable.
My oldest son and daughter will enjoy working with this top bar hive. I, too, wonder whether they will want to make burr comb because it lacks the flat bottom and sides with the 120 degree angle. But, I think it will not matter to them.
I think the bees would love it. Think about it… In nature, many times they will make their comb in a hollow log. A log is round… I’m sure that they won’t have a problem with the round shape.
I think it’s a great idea to place an angle brace between the legs. I might add it to my hive in the spring.
Thanks for stopping by!!
Interesting…did you inhabit your top bar hive with wild bees lured to the barrel from local area? Or, did you purchase bees and place inside?
Last year I tried trapping bees but it didn’t work out. Next spring I am planning to purchase bees. I am dying to see if they like this hive and if I like this hive!
My goal is to raise bees on my homestead but haven’t yet. However from all that I’ve read there is greater success when bees are placed into a hive and their queen introduced to them. It seems everyone then owns the new home…unless of course a second or third queen is hatched, then the original queen takes bees with to find a new home.
How has your hive worked for you?
Jamie, last year after I built it I had to leave for a five week trip to Israel to visit family so I decided not to purchase bees. I set it up as a trap hive but I didn’t get a swarm. This year I just had too much on my plate since I am going through a divorce so I had to let it go for now. I am hoping that I’ll be able to purchase bees next year and house them in the hive. We’ll see.
Hi some thoughts
Ventilation is essential
Insulation is essential for the wax not to melt and the bees to preserve energy in winter and summer
A flat roof is utterly bad. It will stress the bees during rain enourmously.
Adding a angled roof will increase airflow from the hive in warm summer
Ventilation under angled roof can be createf by separation of bars with 1 mm
Preferably you want to make a periskop opening to prevent birds and othets to eat the bees anf for the bees to have a place to rest outside.
You want to have several opening so you can control the amount of bees that moove in and out- especcially when other bees are on a stealing frenzy
The two wooden bars on the side just makes it more diffucult to get hold of the frames.
Good points, thanks!
If I build an angled roof for it, won’t the bees then have another space to build the comb. I see how it will provide a much better airflow but I’m afraid that they’ll venture into that cavity to build the comb and will make a mess.
How about putting several holes in the very bottom of the barrel to drain any water that does make it into the barrel. Very small holes. 1/8 inch. or so
That would be an option. You just have to take into consideration that colonies of bees steal honey from each other. Every colony has “bee guards” by the entrance to the hive. They recognize which bees that try to enter the hive is from their colony or not by its smell. If a bee from a different colony is trying to enter the hive they will fight it away. Crazy, huh? Anyway, the fewer entrances you have the easier it is for the bees to protect their hive (in other words, your honey…). I didn’t have a problem with water going in the hive but I see that the wooden cover I made is not in great shape after just one year. So before spring, I’ll put a metal roofing piece on it and hopefully, this will help.
Brilliant way to re-purpose the old barrel! How is the hive looking now?
I think the weather is too hard on the roof. I either need to paint it with something a bit more protective or find a piece of metal to put on top. Other than that it’s all good.
You need more ventilation, holes on the other side for cross ventilation. It will heat up inside in summer. You can cover them with screen.
Good luck.
Thanks, John. My thought was to maybe remove one bar from the front and one bar at the back of the hive for ventilation. I am a bit worried that if I make wholes in the barrel rain water will drip into the hive. I have to think if there is a way to do this…
That’s cool Lee! You know the saying “Build it and they will come”.
I hope it’s true 🙂