This post may contain affiliate links, view our disclosure policy for details.

Learn how to preserve lemon peel to reduce waste and add a delicious citrus kick to sandwiches, fish, chicken, and many other dishes.

Lady Lee’s Note…
Preserved lemon peel is a Middle Eastern/Moroccan kinda dish. In Israel, we don’t use salad dressing as much as we do here in the U.S. Most of the time, when we make salads, we dress them with olive oil, lemon juice, and salt (you can watch me do it in this video).
Considering the Mediterranean diet is full of vegetables, we eat a salad with almost every main meal. At the end of the week, the lemon rinds pile up. My mom would keep them in a bag in the fridge, and then, when she had enough, she would preserve the lemon peel in oil and salt.
The jar of preserved lemon peel stayed in the fridge, and we’d grab lemons from it to add to sandwiches or to cook with, especially fish or chicken dishes. The lemon rinds aren’t too bitter; they are delicious and add a ton of flavor anywhere you’d use them.
Why Should You Preserve Lemon Rind…
- Reduce waste – as a farmer, who knows how much work goes into growing food, I just can’t handle food waste. It hurts my heart! Preserving lemon peel is a great way to reduce waste and make one more delicious dish out of lemons.
- Hard to compost – even if they aren’t wasted, but instead go to the compost pile, they take forever to break down. Often, you can find them in the pile after most of it has turned into beautiful compost.
- The chickens won’t eat them – if you are a homesteader, you probably throw all the kitchen scraps to the animals. Well… chickens and ducks won’t eat lemon rind… I’m not sure if pigs or any other animals do either.
- Flavor – they are simply so delicious preserved! I think that you’re going to be hooked after trying this.

Ingredients…
- Lemons – whatever kind
- Oil – vegetable, canola, olive, sunflower…
- Salt – table salt is ok, but sea salt or kosher salt is better
Step By Step Instructions…

Step One – prep the rinds. Cut the lemon rinds into pieces. Larger or smaller, it doesn’t matter.
Note – if there are lemon seeds in the way, add them to a ziplock bag and keep them in the freezer. You can use them later to thicken jams naturally.


Step two – boil the rinds. Add the lemon peels to a pot and cover them with water. Place the pot on the stovetop and bring the water to a boil. Lower the heat to keep a rolling boil and boil until the rinds are soft. About 30-45 minutes. Check for softness by inserting a fork into the rinds (as you’d do to check a potato).
Once the peels are soft, scoop them into a strainer and set over a bowl. Give them a few minutes to drain and cool. You can keep the water you boiled the lemons in for smoothies, juices, or cooking.


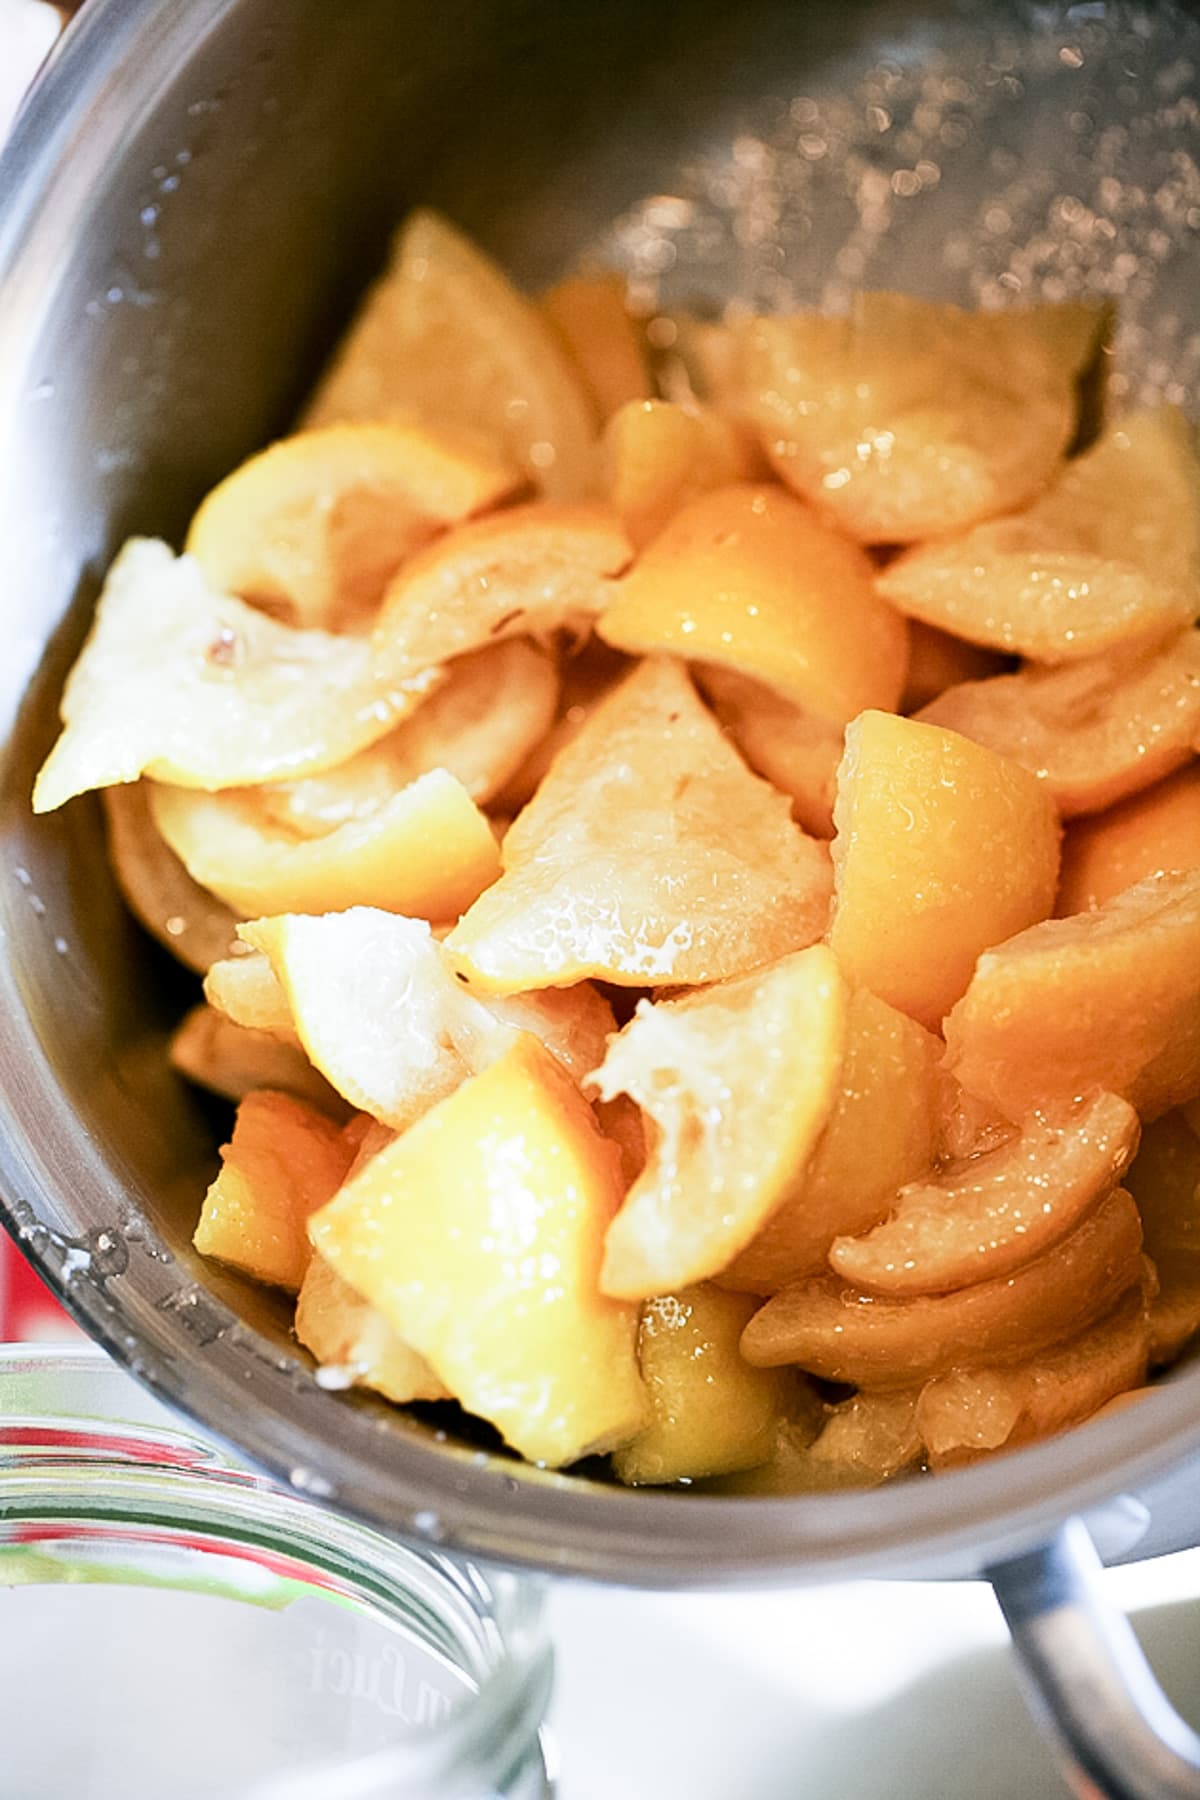
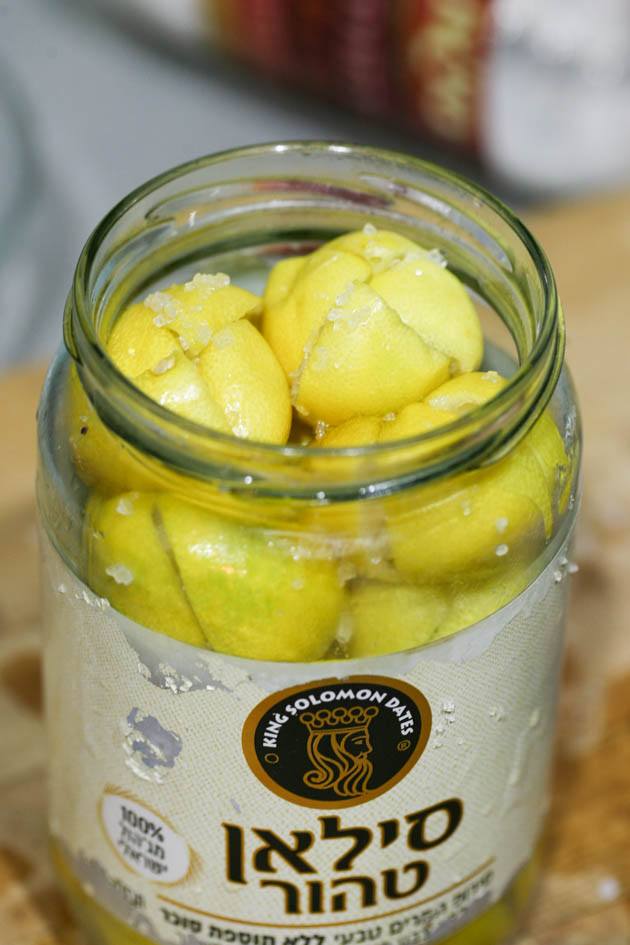
Step three – add oil and salt. Add the peels to a bowl. Add the oil and salt and mix to coat.
How to Store…
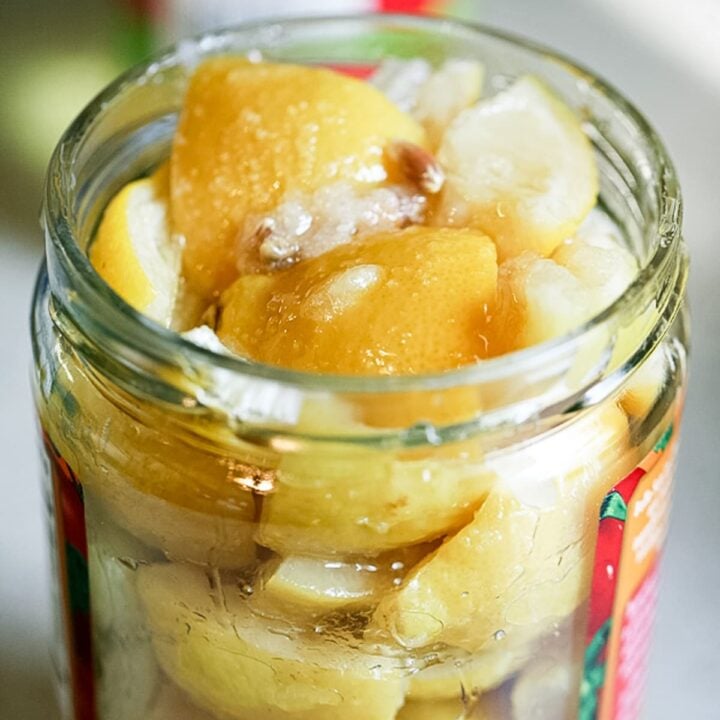
Add the lemon rinds to a jar, top it with a bit more oil, and store in the fridge. Preserved lemon rinds will last in the fridge for months! Make sure to use a clean fork every time that you grab rinds.
How to Use…
- In sandwiches – your turkey sandwich will be elevated to a whole different level with a few lemon rinds added in there. Trust me. Also, add them to a chicken sandwich or a vegetarian one.
- Add to salads – try these Mediterranean salads with lemon rind: egg salad, roasted pepper salad, eggplant salad, or a simple vegetable salad.
- Add to chicken or fish – add lemon rinds to baked chicken or grilled fish, or baked fish.
- Add to sauces – if you are making a homemade salad dressing that calls for lemon, use these instead. Try adding them to the sauce of these delicious spinach patties or this dish of chicken meatballs.
Kitchen Notes…
- Boiling – the reason we boil the lemons is that we want them to be ready to eat right away.
If you don’t want to boil the lemons, you can cut your lemons, put some salt in a jar, then a layer of lemons, then a layer of salt, then a layer of lemons, and so on until the jar is full.
Once the jar is filled with lemons and layers of salt, add oil all the way to the top. If you do it this way, you can leave the jar in the pantry, but it will take the lemons a couple of months until they soften. - Storing – the reason we keep the preserved lemon peels in the fridge is that we want to use a smaller amount of oil.
If you want to keep your jar at room temperature, you would just have to add some more oil and make sure the lemons are covered. - Seasoning – another note to make is that you can add different seasoning to the lemons. You can add whole cloves of garlic, red pepper flakes, cayenne pepper if you like it spicy, maybe some thyme… Be creative.
- Whole lemons – if you don’t use many lemons and don’t have just the rinds. Try this recipe for preserved lemons.
Listen, are you listening? If you happen to squeeze lemons and there are a few lemon rinds in the kitchen somewhere, give this a try. Salt and oil are all that you need to create this magic, and I promise you, you’ll never look at lemon rinds the same ever again.
More Preserving Recipes…
- Apple Scrap Vinegar (let’s use apple peels as well, shall we!?)
- Pickled Beets Recipe
- Preserving Peppers in Vinegar and Salt
- How to Make Candied Oranges and Can Them
- Pickled Green Tomatoes
- Lacto Fermented Green Beans
How to Preserve Lemon Peel
Delicious preserved lemon peels in oil and salt.
Ingredients
- Peel from 6-8 lemons
- 6 tablespoons oil (vegetables or canola will do, you can also try olive oil)
- 4 tablespoons salt (preferably sea salt)
Instructions
- Cut the lemon peels (each lemon to at least 8 pieces).
- Place the peels in a pot, fill it with water. Place the pot on the stovetop and bring to a boil.
- Lower the heat so the water is boiling gently.
- Boil until the lemons are soft (probably 30 minutes or so).
- Place lemons in a colander and let them cool down and dry.
- Transfer the lemons back to the pot or to a mixing bowl and add the oil and salt. Mix to coat the lemons.
- Transfer the lemons into a jar and keep in the fridge.
Notes
Kitchen Notes…
- Boiling – the reason we boil the lemons is that we want them to be ready to eat right away.If you don’t want to boil the lemons, you can cut your lemons, put some salt in a jar, then a layer of lemons, then a layer of salt, then a layer of lemons, and so on until the jar is full.Once the jar is filled with lemons and layers of salt, add oil all the way to the top. If you do it this way, you can leave the jar in the pantry, but it will take the lemons a couple of months until they soften.
- Storing – the reason we keep the preserved lemon peels in the fridge is that we want to use a smaller amount of oil.If you want to keep your jar at room temperature, you would just have to add some more oil and make sure the lemons are covered.
- Seasoning – another note to make is that you can add different seasoning to the lemons. You can add whole cloves of garlic, red pepper flakes, cayenne pepper if you like it spicy, maybe some thyme… Be creative.
Nutrition Information:
Yield: 1 quart jar Serving Size: 1Amount Per Serving: Calories: 942Total Fat: 86gSaturated Fat: 6gTrans Fat: 1gUnsaturated Fat: 76gCholesterol: 0mgSodium: 25420mgCarbohydrates: 63gFiber: 19gSugar: 17gProtein: 7g

Thank you for this post! I needed this information today. Thank you for step-by-step instructions.
You are very welcome!
can you freeze the peels after the boiling component, then after a couple hours, take the frozen peels and vacuum seal them for longer freezer storage? just wondering if this method would work for any recipe that calls for preserved lemon peels….?
I never tried it but I think that you can…
I was given a huge bag of lemons from a friends tree. I juiced most of them and poured the juice into ice trays, the peels I boiled, then strained off the water and bottled it for drinking, I added some honey too, it’s a delicious drink in the morning and heat it for a drink before bed.
Oh wow, that sounds like a great idea. How many lemon peel to water did you use?
Always wanted to try this! Thank you! I’ve been adding juice of half lemon to my water every day! I’m ready to make!
It’s so delicious! Such a great way to use lemons and a really great way to add a ton of flavor to sandwiches, salads, and many other dishes.
can you make the paste, then freeze in cube trays for a longer ,more indefenate storage.th
I’ve never tried. The oil preserves it so usually use just leave it at room temperature or in the fridge.
Hi Lee, I’m trying out your recipe – the non-boiled version with layers of salt and lemon peels and covered completely in oil.
My one concern is that there are plenty of gas bubbles in the jar. I was afraid that the jar would explode, so I opened the jar to let the bubbles out and ran a clean spoon down the sides to make sure it was thoroughly degassed but they have appeared again.
Is this ok or a sign of spoilage? The lemon peels have been in the jar for less than 3 weeks…
I am honestly not sure! I’ve never had bubbles in mine. Will have to ask my mother, she made it a million times. But I would just smell it. It shouldn’t smell sour, if it does it might not be good to eat. I’ll reply here again after I check with my mom.
A few weeks further down the line and it has spoiled – there’s a bit of funky growth on the surface. But I’m happy to report that the version I tried with boiled lemon peels has worked a treat and is delicious!