This post may contain affiliate links, view our disclosure policy for details.
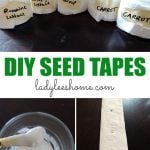
A seed tape is a strip of toilet paper that has seeds “glued” to it. It can be made ahead of time and then planted in the garden. In this post, you’ll learn how to make seed tape at home, what the benefits are of preparing a seed tape, and how to use it.
When my kids were younger, I was constantly trying to find ways to include them in the process of growing food. Gardening is my passion and I wanted them to enjoy it as much as I do.
But, let’s be honest… Kids can make a huge mess super fast (at least my kids). I would let them plant something in the garden and end up with a million seeds planted in one spot, plants in weird places, and plant spacing that I couldn’t correct.
How to Make Seed Tapes…
So in the beginning, I came up with the idea of having a separate space just for them, I called it the Kid Garden Project. I did some research and chose different kinds of vegetables that are small, not too hard to grow, and can be consumed right there in the garden.
It turned out to be a great space for the kids, however, one problem remained… I still had a hard time teaching them how to plant with the correct spacing. Then, one day I heard about homemade seed tapes. I can’t remember how this idea came to me but I knew right away that it was going to work wonderfully!
What Are Seed Tapes?
Seed tapes are simple toilet paper tapes that have seeds glued to them. You can make them ahead of time and when the weather is right, you can plant them in the garden.
If you grow vegetables by the square foot growing method, you can use napkins instead of toilet paper to make seed mats since they fit perfectly for this gardening method.
What Are the Benefits of Seed Tapes?
Make ahead – pretty much every gardener dreads the cold winter months when the ground is frozen and there is pretty much nothing that can be done in the garden. To relieve the pain, we often devote this time to planning the garden, making a planting schedule, ordering seeds, and starting seeds indoors. Well, now you can add to this list making seed tapes! They are perfect to make ahead of time, a perfect activity for kids (and mamas) during the winter, and will last easily until planting time.
A wonderful activity for kids – Have I already mentioned that it’s a wonderful activity for kids? It’s an easy gardening/craft project for the whole family.
Eliminate the need to thin – one of the greatest benefits of seed tapes is that it can help you prevent the need to thin plants in the garden later. One gardening chore that most gardeners hate is the time consuming process of thinning seedlings.
This is a necessary chore that we often have to devote time to especially in beds that are sown with tiny seeds like carrots or lettuce since it’s hard to space those seeds correctly at planting time.
When you make seed tapes, you space the seeds in the correct spacing to allow each plant enough room to grow. So then, after you plant the tapes and the seeds germinate, they germinate in the correct spacing and you don’t have to spend any time thinning.
This is especially great for kids because they plant the tape instead of the tiny seeds so you don’t have to worry about someone dropping ten thousands seeds in one spot. It’s not only better for the plants, it also saves you a lot of money buying seeds.
Perfect for square foot gardening – napkins are exactly 12 inches by 12 inches. In this post, I’ll show you how to make seed tapes for row planting, but if you grow vegetables according to the square foot gardening method, you can use napkins instead of toilet paper.
My friend Rachel from Grow a Good Life uses napkins to plant her square foot garden. You can see how she does that here.
Easy to plan succession planting – usually, most of us don’t need 20 heads of lettuce to be ready for harvest at the same time. Seed tapes are easy to label so when you store them you can include the date of planting on the tape. This way, when it’s time to plant it’s super easy to plant only the tape with the right date on it and leave the rest for another time.
What You’ll Need to Make Seed Tapes…
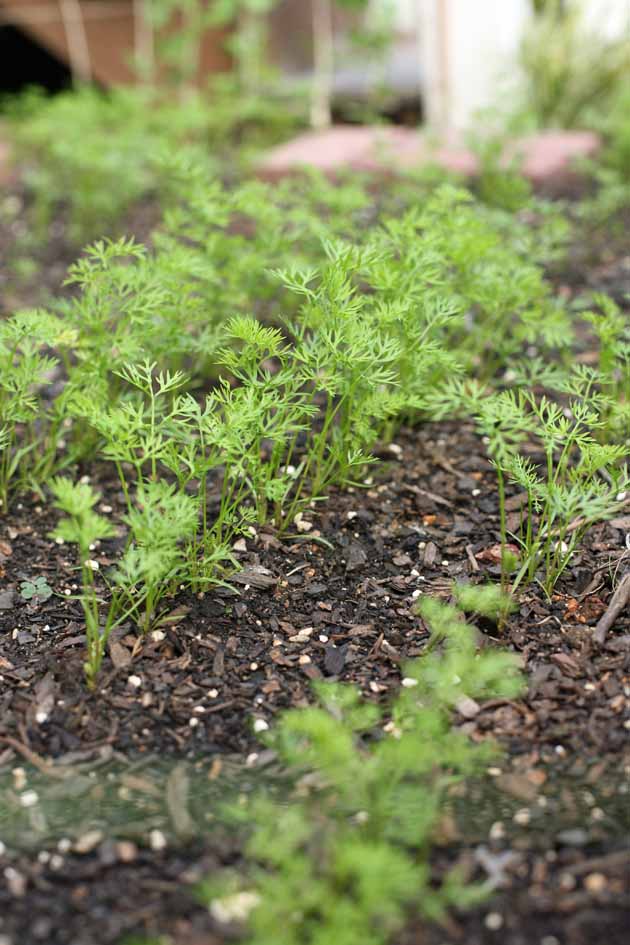
- Seeds. Seed tapes are best for small seeds like radish, carrots, lettuce, spinach, celery, arugula, and so on.
- Toilet paper and scissors to cut the paper to the length of your row or garden bed (or napkins).
- A small bowl to mix the “glue”.
- All purpose flour and water (one tablespoon of each). This will be our homemade glue that will not harm the seeds.
- A small paint brush to mix the glue and apply it to the toilet paper.
- A ruler and a pencil if you want to measure the space between the seeds exactly.
- And lastly, a ziplock bag to store the seed tapes or a paper tape to roll them and hold them rolled for storage. And make sure that you also have a sharpie for marking the tapes.
Making Seed Tapes…
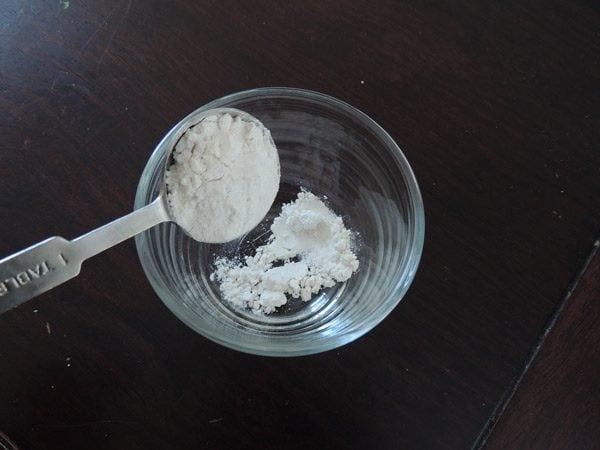
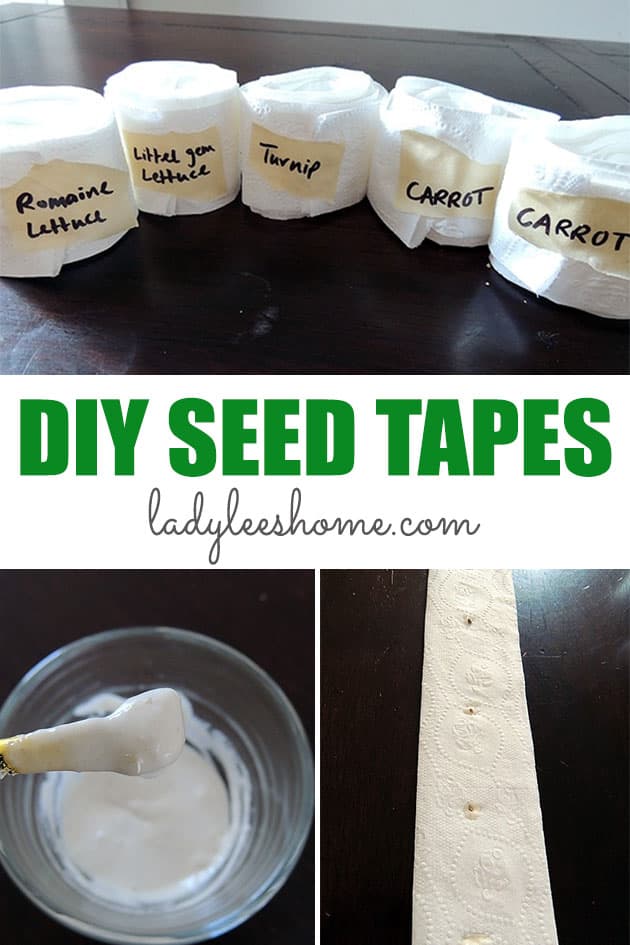
Step 1 – prepare the “glue”. To a small bowl, add one tablespoon of all purpose flour…
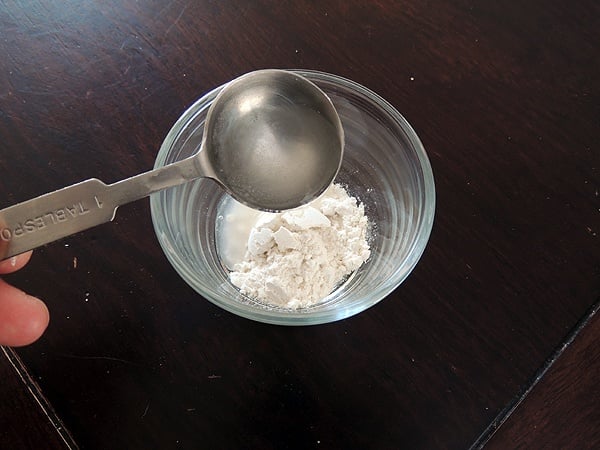
And one tablespoon of water…
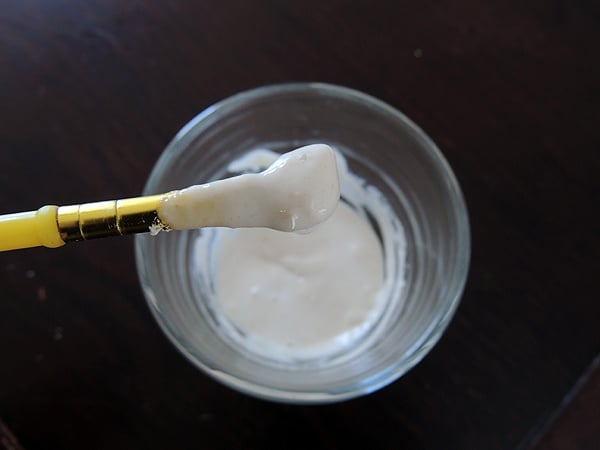
Use the small paintbrush to mix the two to create a paste.
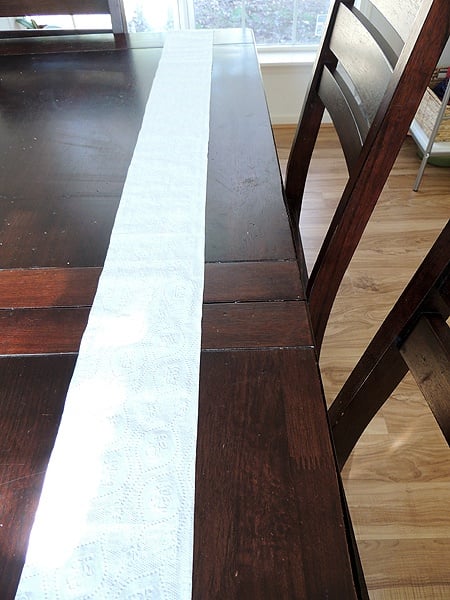
Step 2 – prepare the toilet paper. Cut the toilet paper as long as you’d like it. It is a good idea to measure your garden bed or row to know exactly how long you need your tape to be.
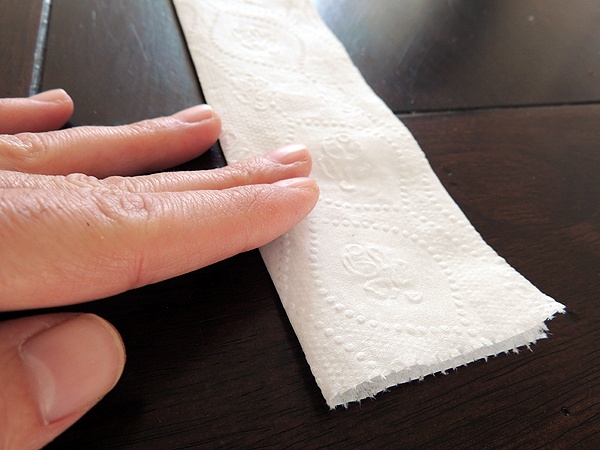
Lay the toilet paper on a table and fold it in half to create a thinner strip of paper…
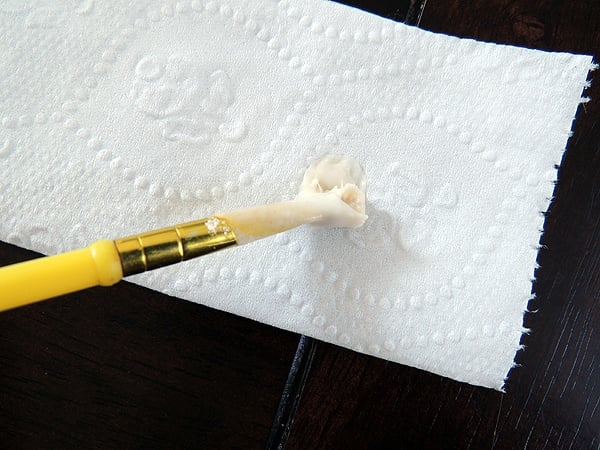
Step 3 – plant the seeds. With the brush, add a little bit of the flour paste to the paper tape…
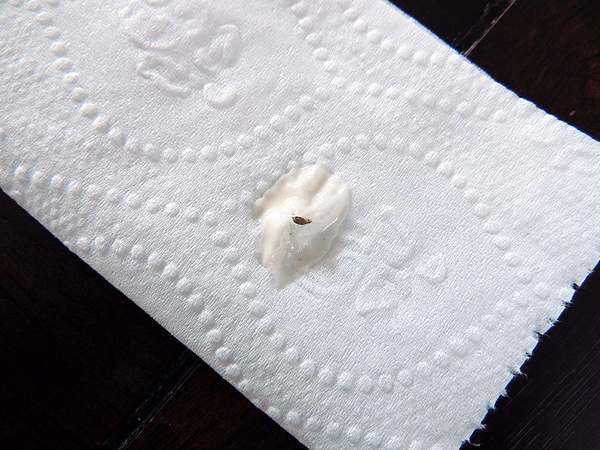
And add the seed right on top of it. In the picture is a tiny carrot seed. You can add one or two, or more seeds if you are worried about germination, especially if you’re planting old seeds.
You can use the ruler and pencil to measure and mark where the next seed should be, then add another dot of the flour paste and another seed on top of it and so on until you get to the end of your tape.
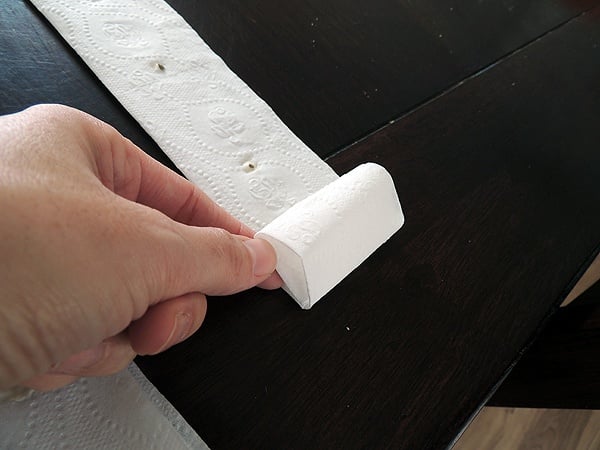
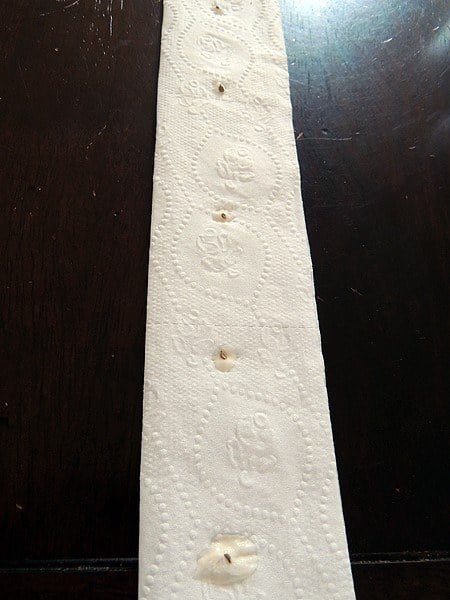
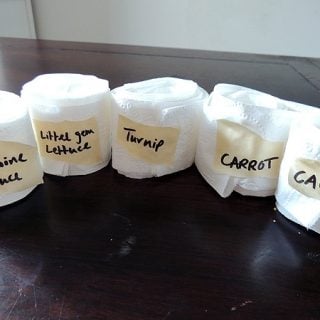
Step 4 – let your tape dry. Now all that is left to do is let the flour mixture dry for a couple of hours. When it’s dry, you can roll the tape or fold it and place in a ziplock bag until it’s time to plant it.
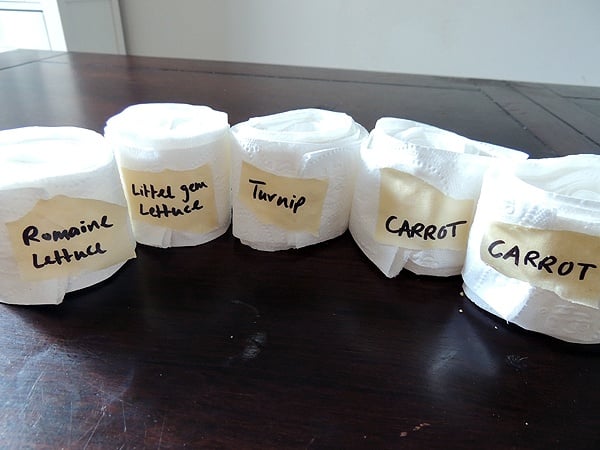
Remember to mark the roll so you know what seeds you have on it! If you’d like, you can also write the planting date so you know when it is the right time to plant it.
How to Plant a Seed Tape…
Planting your seed tape is very simple! You can dig a trench, place the tape in it with the seed side pointing up and cover with soil.
If you are planting in a raised bed I find that it’s sometimes easier to scrape the top one inch of the soil and transfer it to a bucket. Place your seed tapes wherever you want them and then cover back with the soil that you previously removed.
After covering the tape with the soil, remember to water the bed well and you are done!
Frequently Asked Questions…
Toilet paper or napkin paper are pretty thin so they won’t be able to easily handle large seeds (like beans, peas, or corn) and since large seeds are pretty easy to direct plant by hand there is really no need for the tape when using them.
Think about a seed tape as a method to help you plant tiny to medium seeds. Seed like carrots, lettuce, spinach, radish and so on are perfect for seed tapes.
No it won’t. I’ve made many seed tapes and have never had a problem with the paste ruining the seeds.
A few months before planting is just fine! Making your own seed tapes is a great activity for the winter so you can easily make seed tapes in January and plant them in March or April or May. I’d say up to six months ahead is just fine!
Toilet paper or napkin work the best since they are thin and decompose quickly yet strong and thick enough to hold the paste and the seeds. If for some reason, you’d like to use a different paper, look for paper with the same characteristics. Also consider that this paper is going to break down into your soil so you don’t want anything with a gloss or paint on it.
I hope that you give this project a try! DIY seed tapes are both fun and useful. They are a great way to handle tiny seeds and a great gardening project for those cold and dark winter months!
You May Also Like…
- 22 Crops to Grow in a Small Vegetable Garden
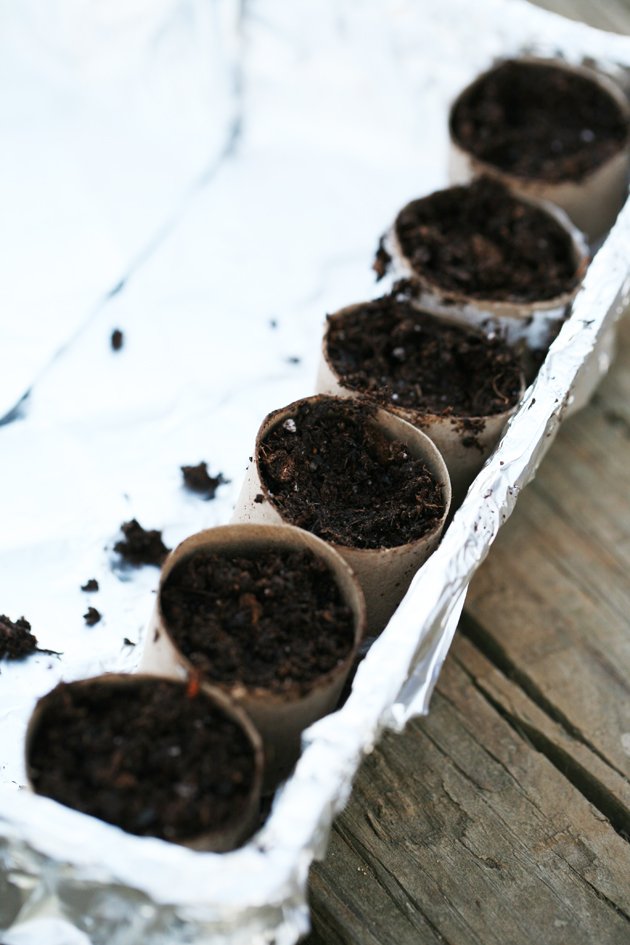
- How to Make Toilet Paper Roll Seed Starter Pots
- Easy Garden Preparation, the No-Till Way
- Building Raised Garden Beds – Simple and Quick Construction
- What to Consider Before Planning a Vegetable Garden
How to Make Seed Tape
A seed tape is a strip of toilet paper that has seeds “glued” to it. It can be made ahead of time and then planted in the garden. In this post, you’ll learn how to make seed tape at home, what the benefits are of preparing a seed tape, and how to use it.
Materials
- One tabs all-purpose lour
- One tbs water
- Seeds of your choice
Tools
- Toilet paper
- Small paintbrush
- Small bowl
- Scissors
- Ruler and pencil
- Sharpie
- Paper tape or ziplock bag
Instructions
- To a small bowl, add one tablespoon of all purpose flour and one tablespoon of water. Use the small paintbrush to mix the two to create a paste.
- Cut the toilet paper as long as you’d like it. It is a good idea to measure your garden bed or row to know exactly how long you need your tape to be. Lay the toilet paper on a table and fold it in half to create a thinner strip of paper.
- With the brush, add a little bit of the flour paste to the paper tape. And add the seed right on top of it. You can add one or two, or more seeds if you are worried about germination, especially if you’re planting old seeds.
You can use the ruler and pencil to measure and mark where the next seed should be, then add another dot of the flour paste and another seed on top of it and so on until you get to the end of your tape. - Now all that is left to do is let the flour mixture dry for a couple of hours. When it’s dry, you can roll the tape or fold it and place in a ziplock bag until it’s time to plant it.
Remember to mark the roll so you know what seeds you have on it! If you’d like, you can also write the planting date so you know when it is the right time to plant it.
Notes
How to Plant a Seed Tape…
Planting your seed tape is very simple! You can dig a trench, place the tape in it with the seed side pointing up and cover with soil.
If you are planting in a raised bed I find that it’s sometimes easier to scrape the top one inch of the soil and transfer it to a bucket. Place your seed tapes wherever you want them and then cover back with the soil that you previously removed.
After covering the tape with the soil, remember to water the bed well and you are done!

I have to admit – I’m intrigued!! I’ve never heard of this before! Can I ask – is there an advantage to this instead of just planting them spaced out in the yard? I love it! I wanna try it! I’m just curious 🙂 Either way, I’m stoked to find out how it all turns out and seeing your garden this Summer!!
Thank you so much for sharing your post with us at Fresh Foods Wednesday! I hope you’ll be back this week with more fresh food posts 🙂 xo, kristy
It is easier to use this method when dealing with the tiniest seeds like lettuce and carrots. It is just hard to space them correctly when sowing directly in the soil. I will make sure to update when I pant it and when the seeds germinate. Thanks for visiting.
Brilliant idea!! Thanks for sharing via Family Fun Friday.
Can anyone think of a gluten free way to make these? I don’t think we even have ap flour in the house anymore.
How about using Almond flour? And I think there are other kinds of gluten free flours….
Wonderful instructions and idea. Just did strips of mixed lettuce seeds. I never like to thin the plants and throw away alive ones, so this is ideal for me. Thinking of Spring on this cold night. Thank you for sharing this info.
Oh great! Come back to let me know if everything germinated. Thanks for visiting.
These is a really clever idea! Thanks for sharing. I’d like to know how well the seeds sprout in the spring. I hope you will update on your Facebook page!
Yes, will do.
Thanks for sharing on Green Thumb Thursday! I pinned this one because, any way you slice it, that’s just cool stuff to know!
Thanks!
I’ve used commercial seed tapes but didn’t like the spacing. I don’t like to destroy plants to thin them out! I ended up cutting the tape into shorter segments and planting at MY choice of spacing. The grew but I think just scratching out a row and planting loose seeds is just as good in my opinion.
I never used the commercial tapes. I hate destroying young seedlings as well, I always end up replanting them but this takes me a long time. I hope this is going to work. I only did it with the really tiny seeds the other ones I’ll just plant straight in the ground. I will have to wait for the end of the growing season to make a decision of what I like best. Thanks for visiting!
I was worried that sitting in flour gloop might rot the seed; maybe letting it dry prevents that risk?
It takes some time for the paste to dry but it doesn’t seem like it affected the seed at all. It looks just like it did before I “pasted” it.
Seed tape is great – I tried this last year and had great results. This year I’m thinking about trying something new and making my own paper pots. I finally have a greenhouse so I thought why not try something new. Direct seed though will always be my favorite and the seed strips makes that so much easier. -Carole
Great to hear it worked out. I don’t see a reason why it won’t work. Paper bags are a very nice idea. Will you plant the plants in the garden with the paper bag when the weather is right?
They will be paper pots made from newspaper not bags but yes I will directly plant them. 🙂
I really like this idea… for me thinning means I’m destroying part of my crop and I just don’t like that waste…
This is completely fabulous. Have you checked your tapes to see if there was / is any affect on the seed by having them sit in the flour paste?
Hi Julie, I just checked the tapes. The seeds look completely fine, just like they looked before. The only thing I would do differently will be to let the “paste” dry all the way before rolling the tape. I didn’t have a hiding place for them and knew that if my kids discover them when they wake up from nap they will be gone in no time. So I rolled them when they were still a little wet and now had to peel the tissue off a few seeds. No big deal but still…. Thanks for stopping by.
What a fabulous idea!! I also love that I could start on it now while it’s still SO cold out! Thanks!
Yes, the first thing I was thinking when I heard about it is how great it will be to be able to do something in the dead of Winter that will actually save me lots of time in the busy Summer. Thanks for visiting!
Great idea! I’ve been looking for things to do inside to get my garden going. This is a perfect cold weather task and will save me a bunch of time in the spring.
It will definitely save some time and also many seeds. The tips of my fingers start to itch this time of the year…. I am dying to do some gardening but unfortunately I don’t have room in my house for starting seeds indoors and I don’t have a green house, so this calmed me down a little. I felt like I am actually gardening without really gardening… If that makes any sense 😉
This is a great idea, we’ve talked about trying it but haven’t seen it in a step by step. Great tutorial, thanks!
You are welcome! It is very simple and actually fun. If you have kids and they are old enough to handle the tiny seeds, I think it might be a nice family project. Thanks for visiting.
This is brilliant. I just always throw in seeds randomly and wonder why my garden sucks. This is amazing. Thanks for the idea.
LOL! I am sure your garden doesn’t suck. But plants do need a certain amount of room to grow properly. Every year I get too excited at planting time and over plant, then I promise myself I won’t do it again and guess what… I do it again!
I’m just wondering if using paper towels is the best idea? I hear it is processed with all kinds of toxic stuff. Maybe using newspaper would be a better choice: I know about the ink, but they** say if you don’t have clean material, to wrap a baby up in newspaper because it is the best choice for lessening contamination…..? Just a thought. This is a GREAT idea!!!
mmmm… Not sure. I used toilet paper and I know you can put white or brown paper in your compost but you can’t know these days. Almost everything around us is processed with chemicals…
What a great idea! How much time did it take for you to finish them up? I look forward to hearing how well they work this year.
Maybe about an hour and a half or so to make the five rolls. I hope it will work. Thanks for stopping by!