This post may contain affiliate links, view our disclosure policy for details.
In this post, we will learn how to can pumpkin. Pumpkins are a low acid food so we will have to use a pressure canner, but don’t let it scare you! I’ll show you step-by-step how easy it is to can your pumpkins using a pressure canner so you can enjoy your harvest (or the pumpkins you got throughout the season) year-round.
I love canning. It’s definitely a process but I love that I can preserve something in a way that I am not dependent on electricity to keep it. I think jars of homemade canned food are a beautiful thing to look at, but what I love most of all about canning is that there is no need to remember ahead of time to thaw the food. It’s just there on the shelf waiting for you to use it.
But, to be honest, my least favorite thing to can are vegetables. I like my vegetables firm and crunchy and fresh, but, most of the time, the canning process involves cooking them and they turn mushy and/or soft. Not my favorite texture when it comes to vegetables. However, with pumpkins (or tomato sauce, for example) it doesn’t really matter since I most likely am going to use what I can to make a puree.
How to Can Pumpkin…

BUT! We can’t can pumpkin puree (we can freeze pumpkin puree but not can it). The National Center for Home Food Preservation states that “only pressure canning methods are recommended for canning cubed pumpkin”. This is honestly not a big deal because the cubed pumpkin inside the jars is going to be soft, so when you want to use it you just get the cubes out of the jar and mash them to make a puree. Super simple.
What Kinds of Pumpkins Can We Can at Home?
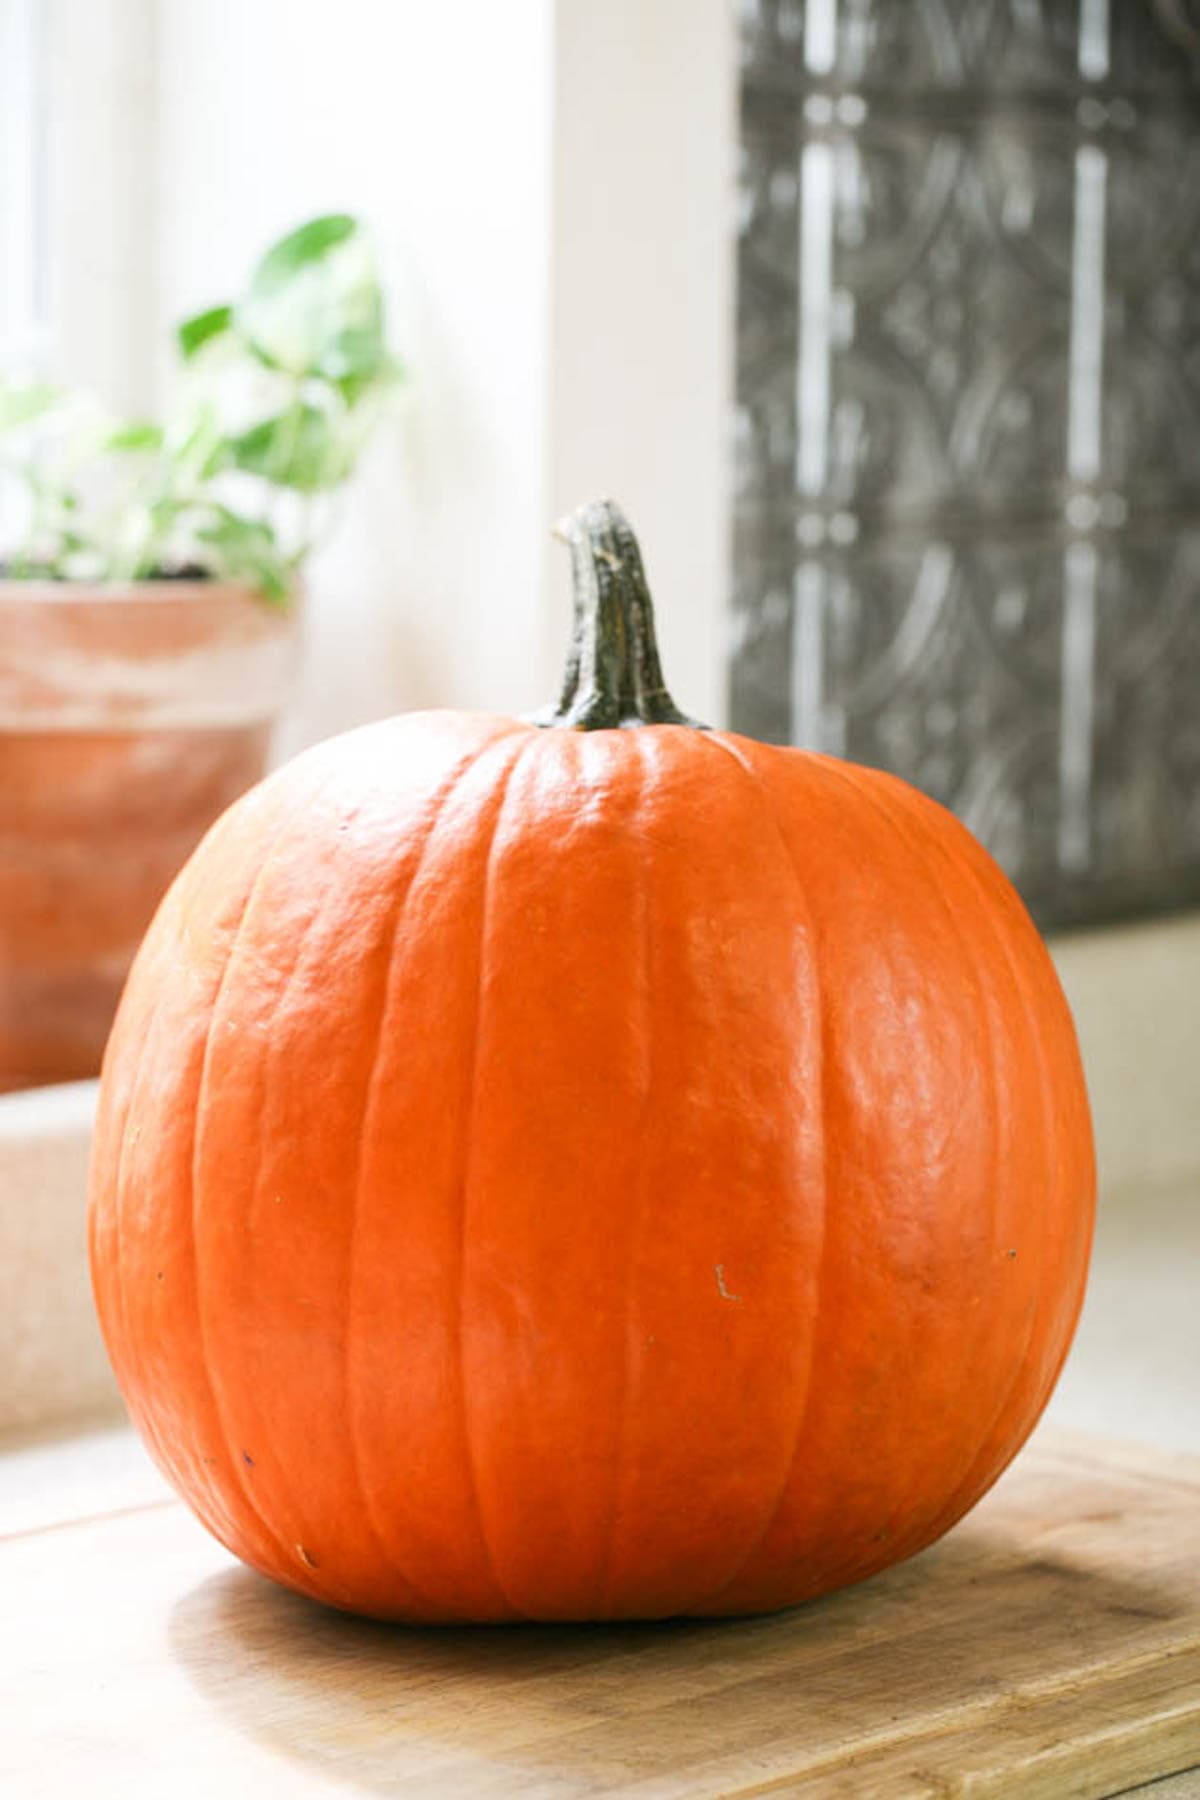
All of them! Let’s get one thing clear… You won’t hear me telling you to use this kind or that kind of pumpkin. I honestly don’t care if my pumpkins are pie pumpkins or a cheap carving pumpkin. I love them all! A pumpkin is a pumpkin and I turn red when someone tells me that they tossed their pumpkin because it wasn’t a pie pumpkin.
- Pie pumpkin – these are the smaller pumpkins that we find at the grocery store during the fall. It’s denser and has fewer seeds. Usually, it’s the recommended pumpkin for baking.
- Jack-O-Lantern pumpkin – these are the larger pumpkins that we see at the stores during the holiday season. Their flesh is not as dense as the flesh of the pie pumpkin and they are usually sold for carving and decoration but again, I have used them plenty of times for cooking or baking.
- All the rest – if you’ve ever flipped through a seed catalog, you know that there are a million varieties of pumpkins that you can grow in your home garden. If they are edible, they can be preserved by following this tutorial (just a note here, you should know that you can also follow this tutorial to can butternut squash).
Kitchen Tools…
- Large cutting board
- Knife
- Vegetable peeler
- Large pot
- Pressure canner
- Ladle
- Quart jars
- Lids and rings
- Paper towel
- Canning utensils
How to Can Pumpkin Step By Step…
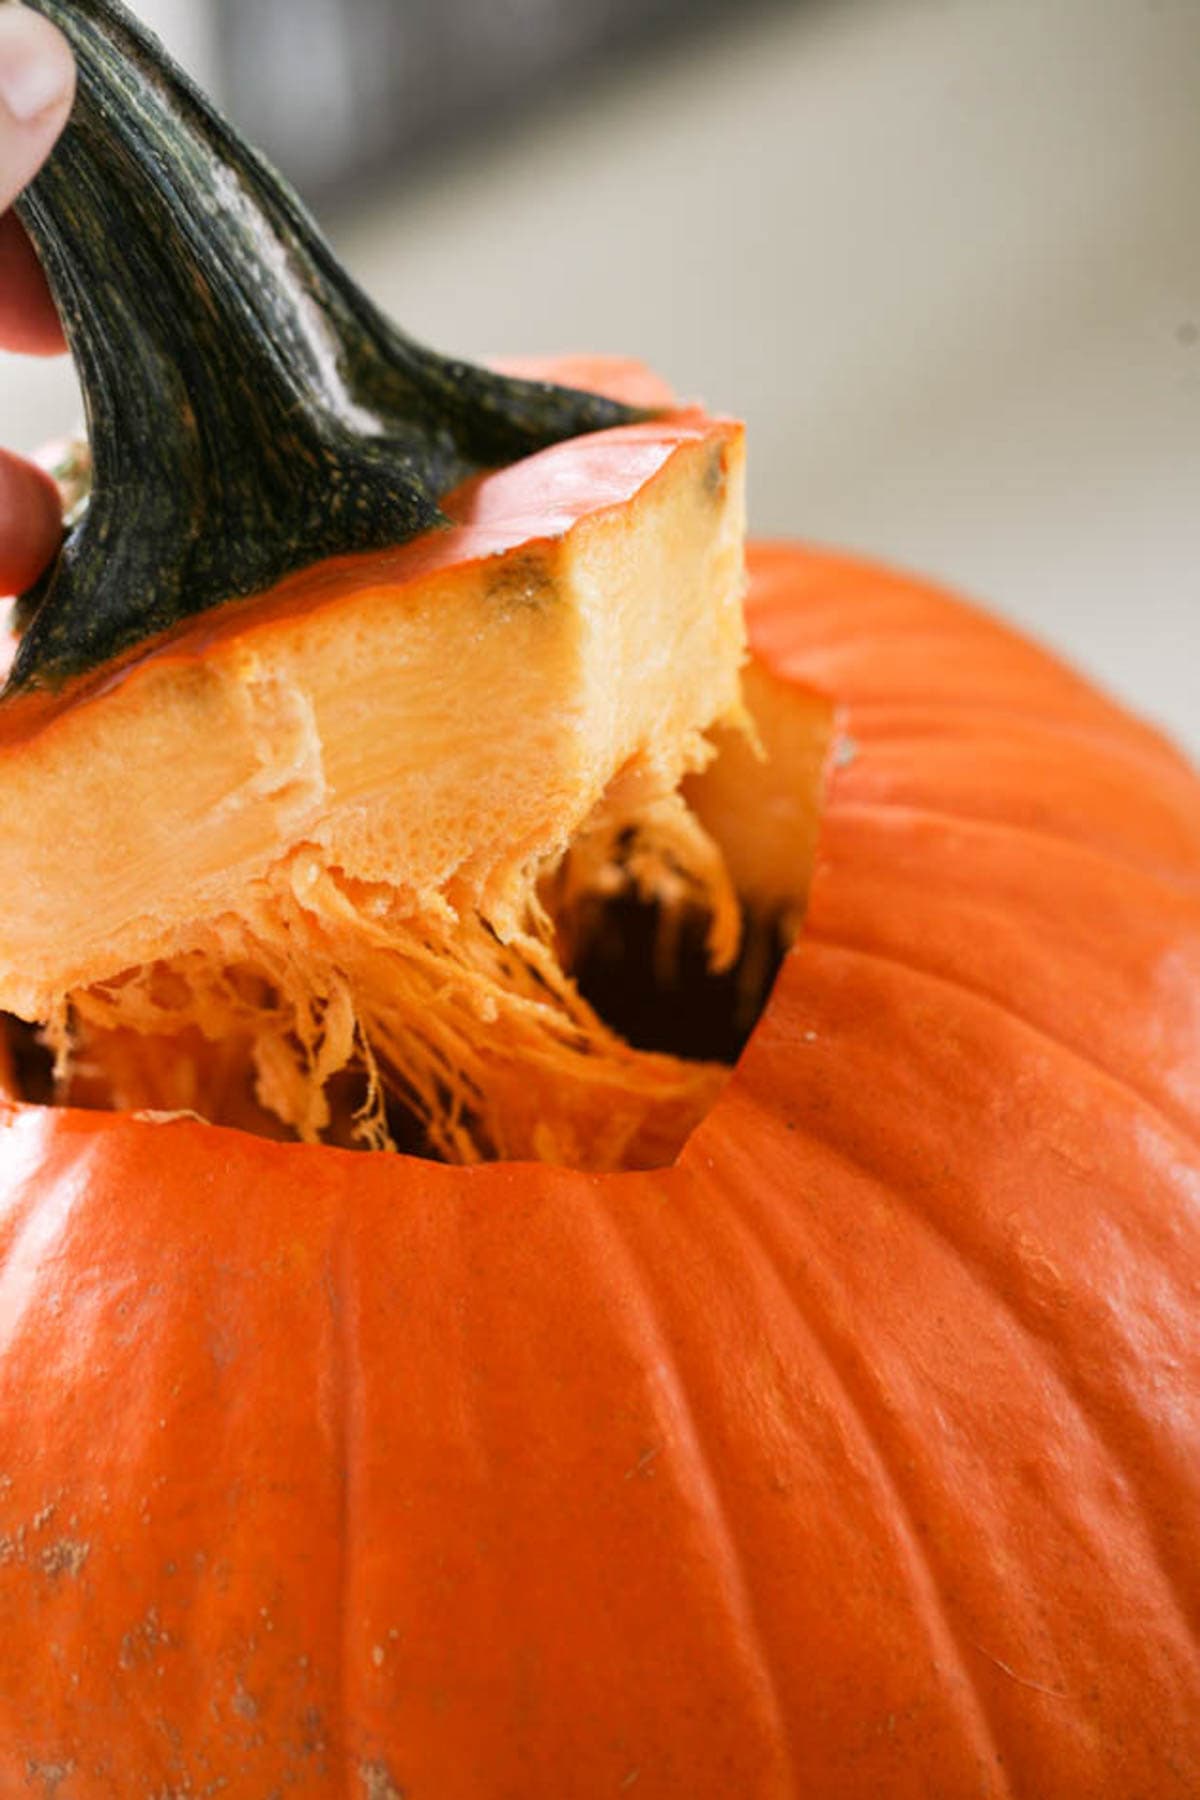
Step one – prep the pumpkin for cooking. Start by inserting your knife at the top of the pumpkin and cutting around the stem to remove it…
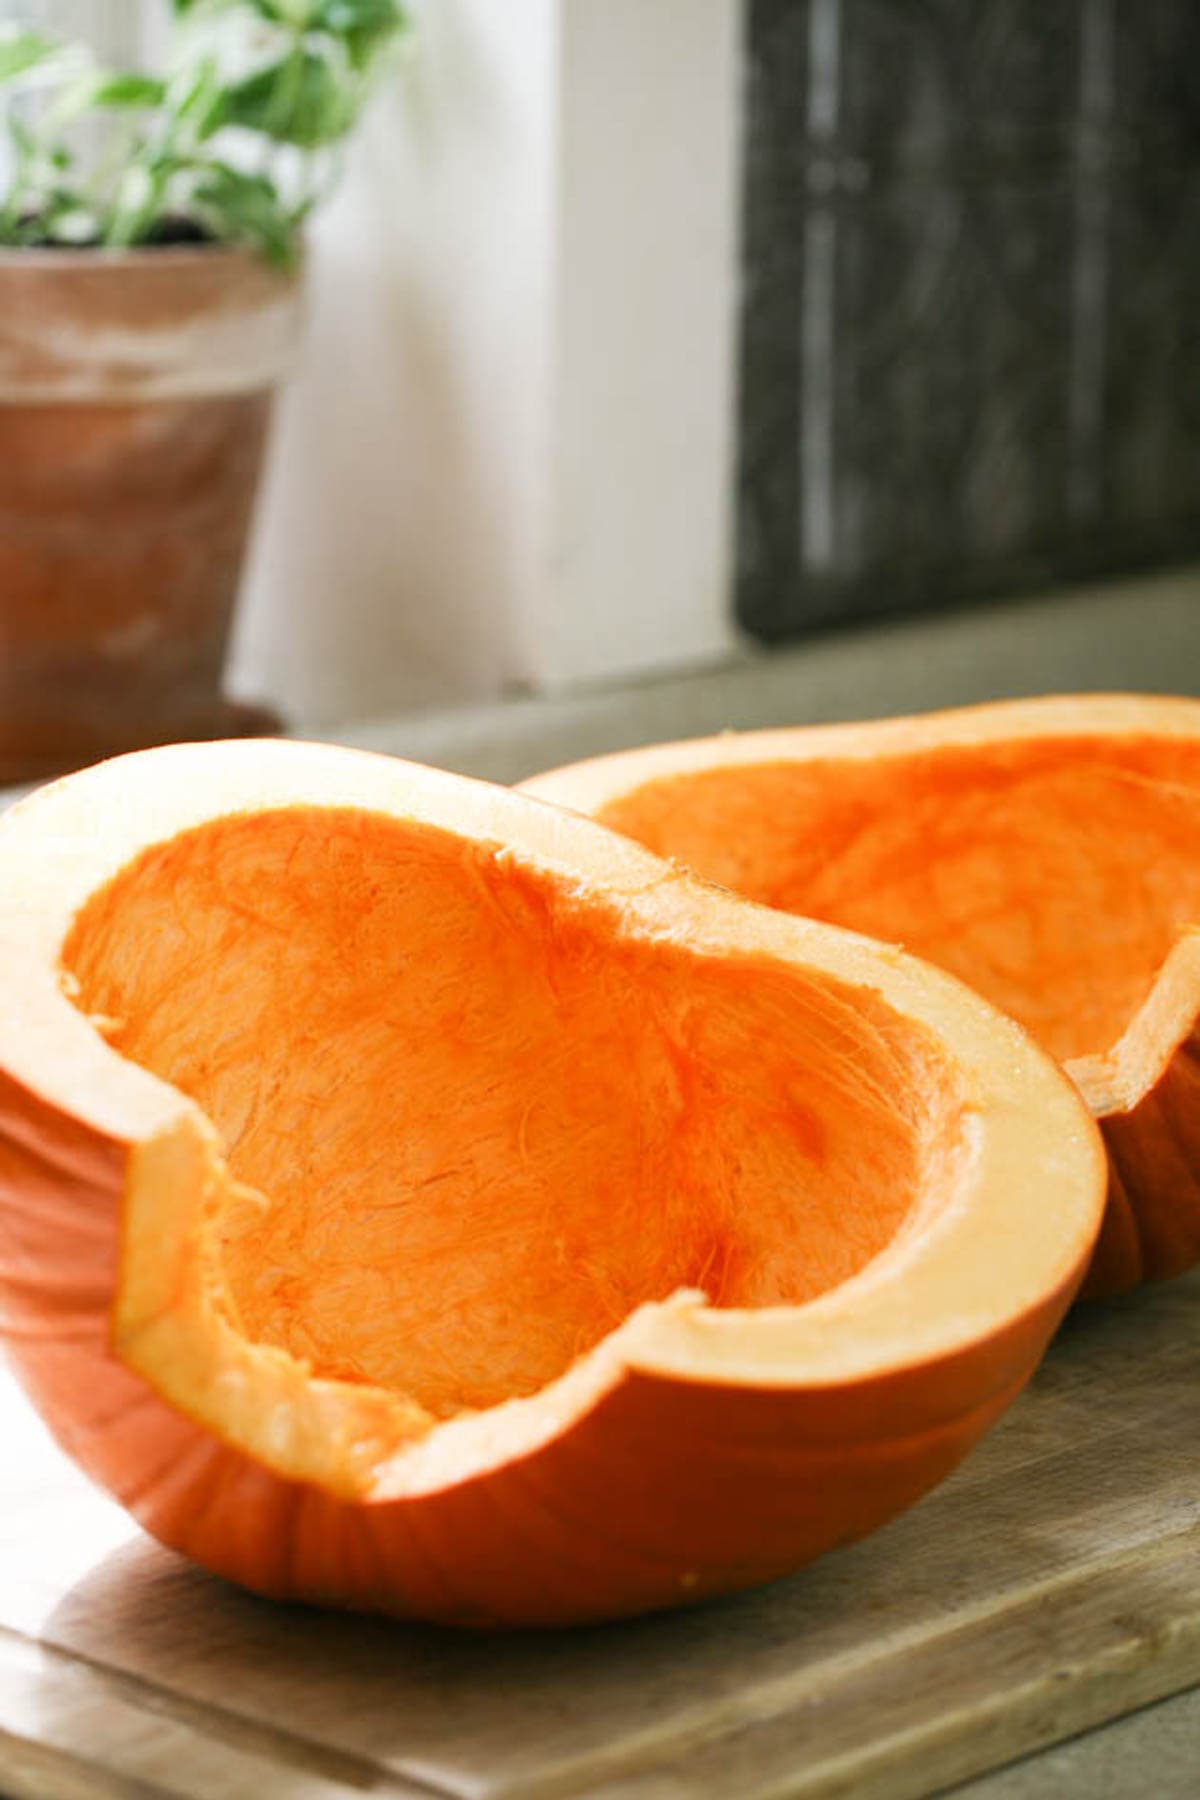
Next, cut the pumpkin in half and clean out the seeds. Pumpkin seeds are amazing so don’t throw them away! Check out my post about 15 amazing health benefits of pumpkin seeds, and check out how I roast my pumpkin seeds for a yummy fall snack or make a delicious pumpkin seed butter.
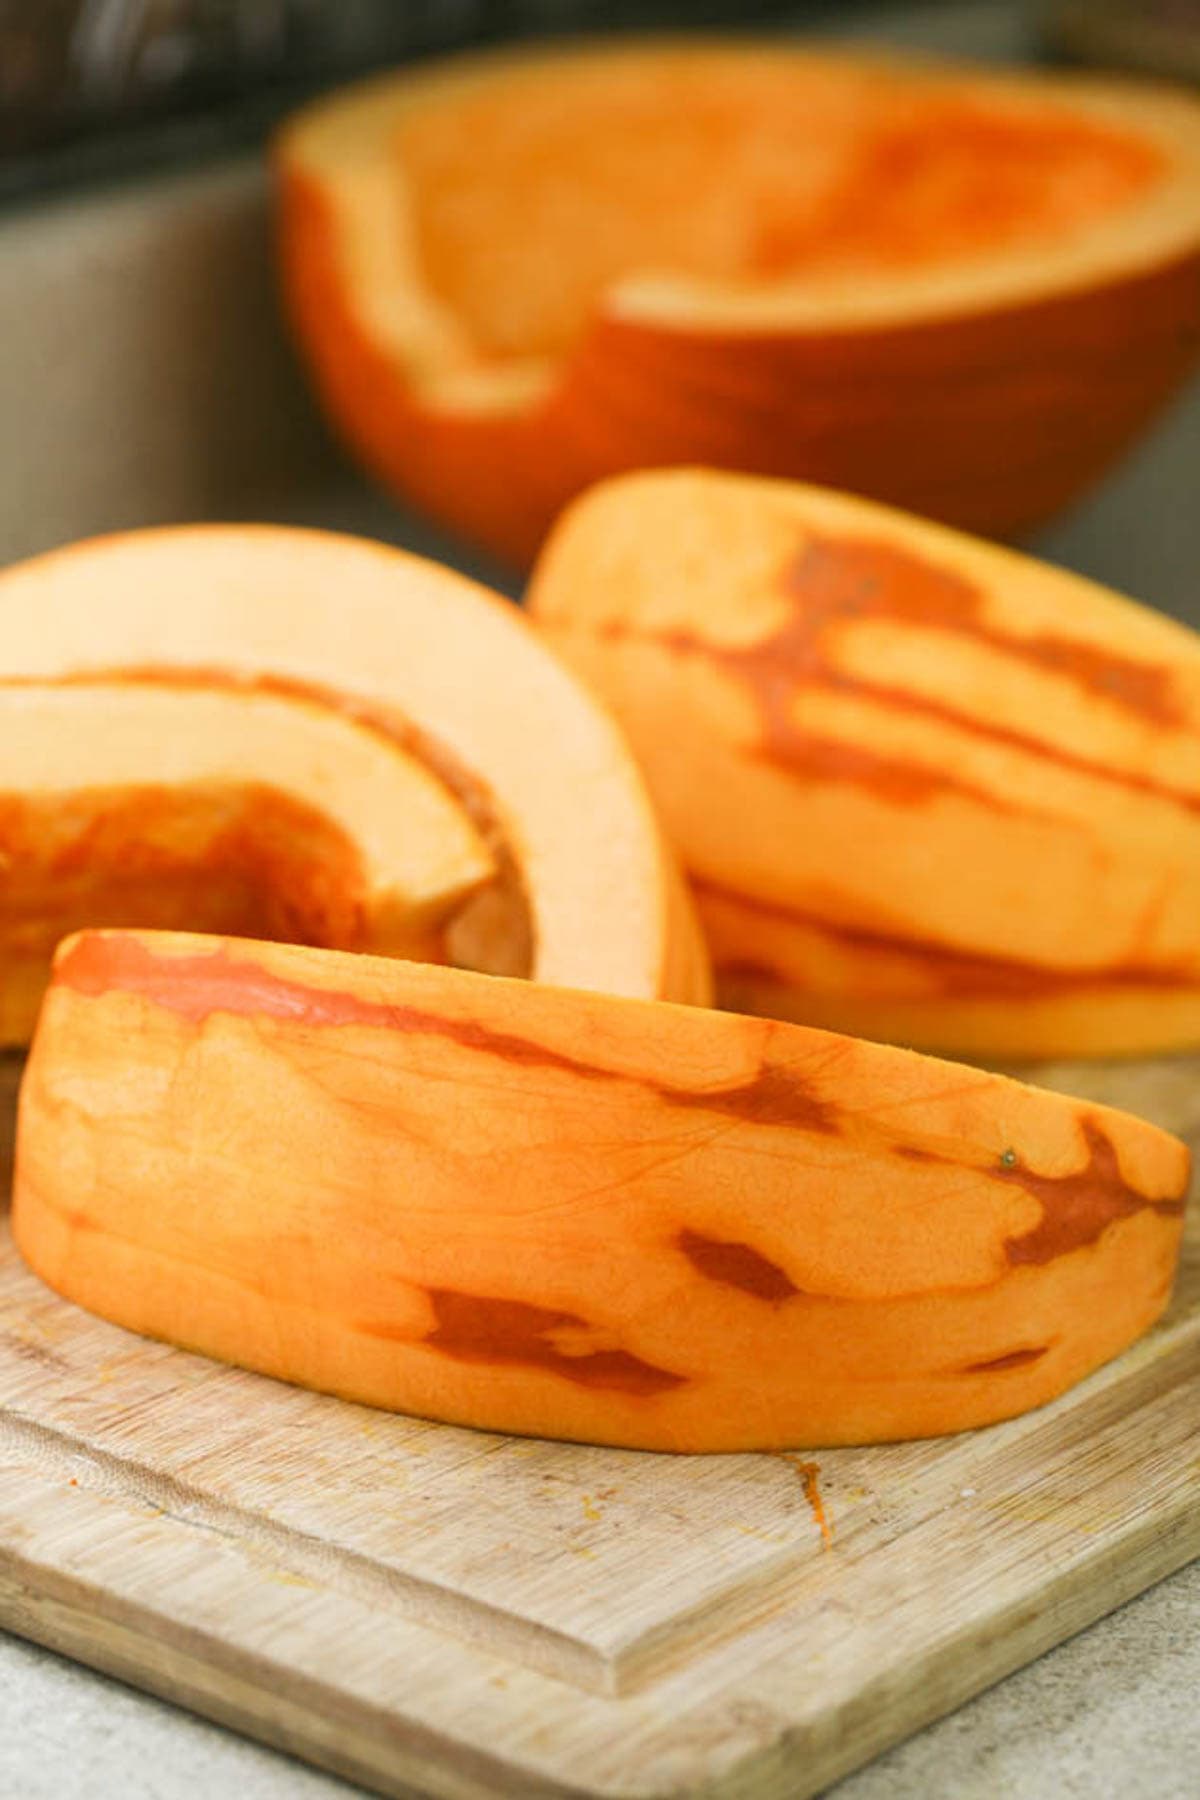
Now, use the vegetable peeler to remove the skin of the pumpkin. I am usually able to remove most of it before I start cutting the pumpkin into smaller pieces. As you cut it, keep peeling until you are able to remove all of the skin.
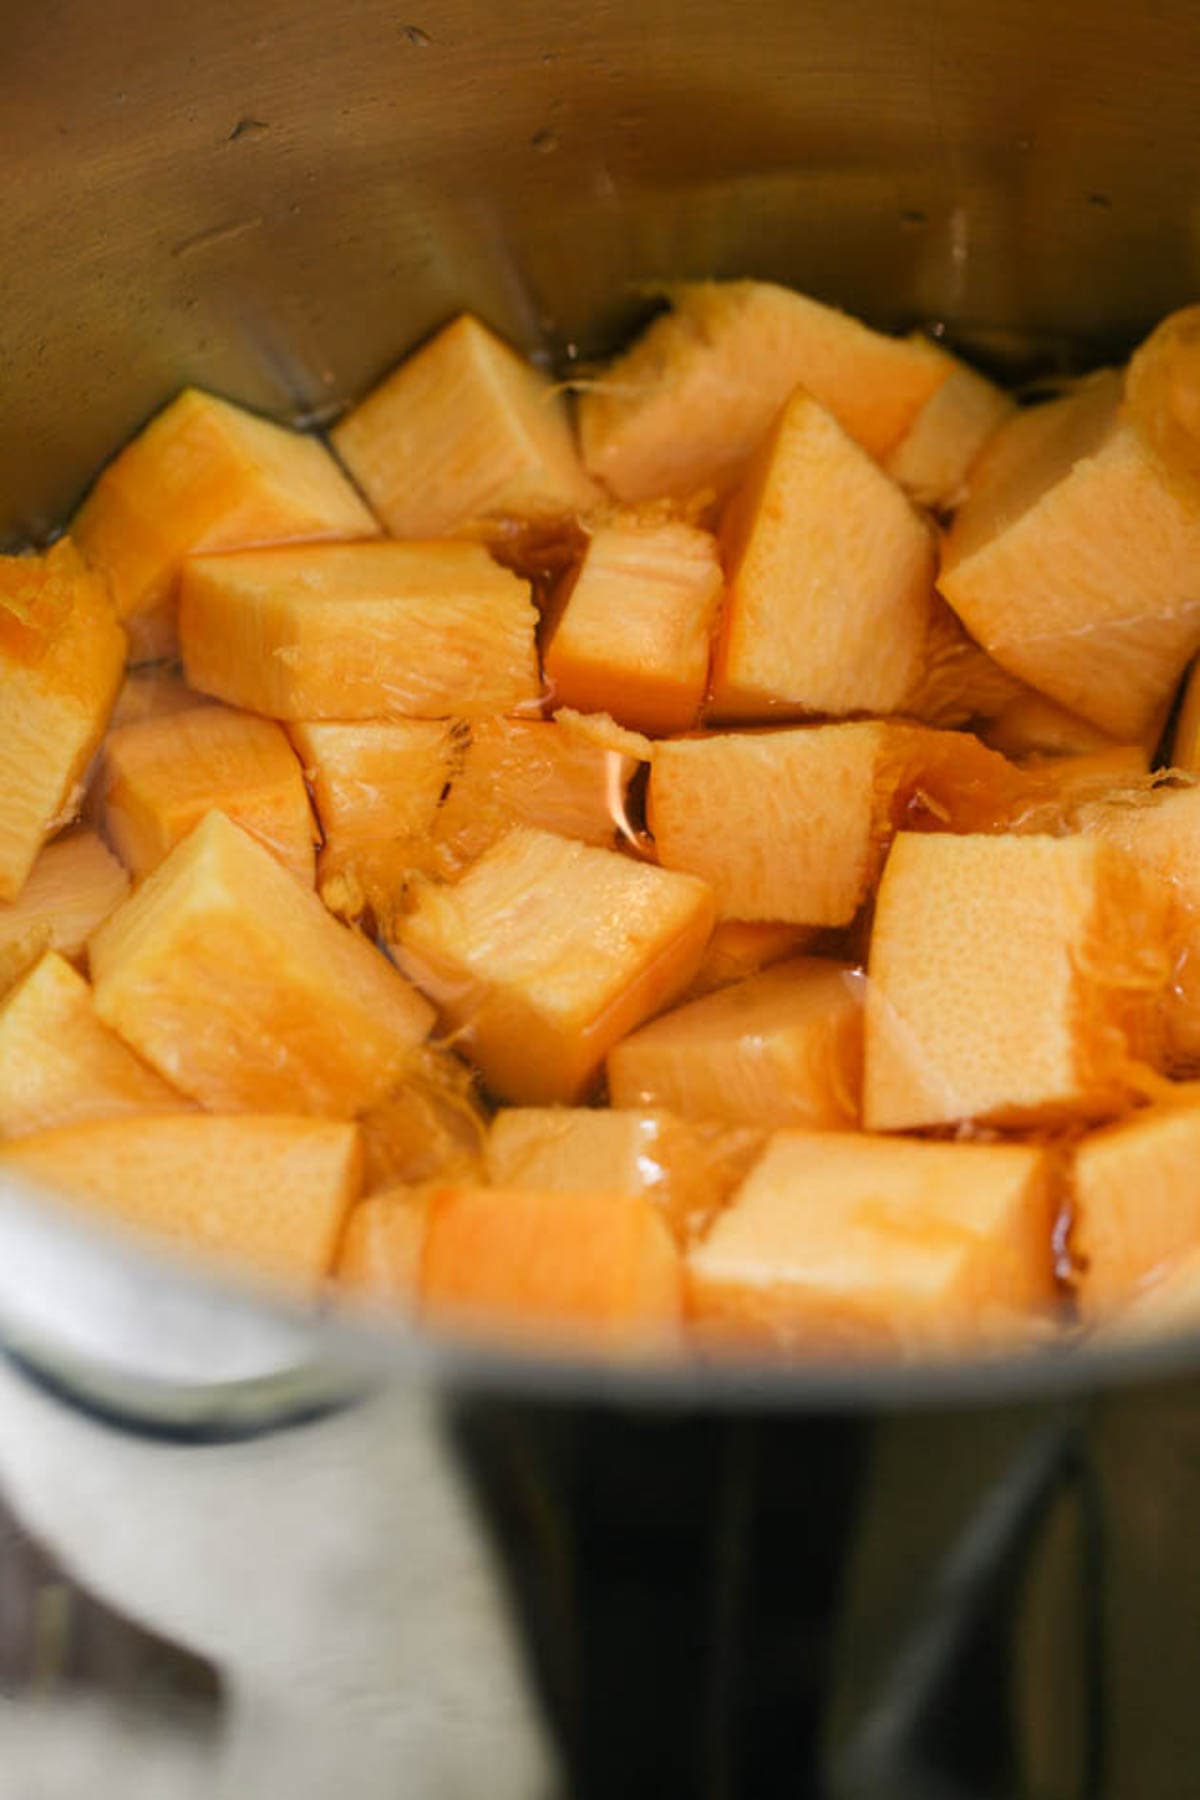
Step two – cook the pumpkin. Keep cutting and peeling until your pumpkin is cut down into 1” cubes. Now, add them to a pot and cover with water. Place your pot on the stove and bring the water to a boil. Once the water is boiling, let the pumpkin cook for 2 minutes. Then turn the heat off and remove the pot from the burner.

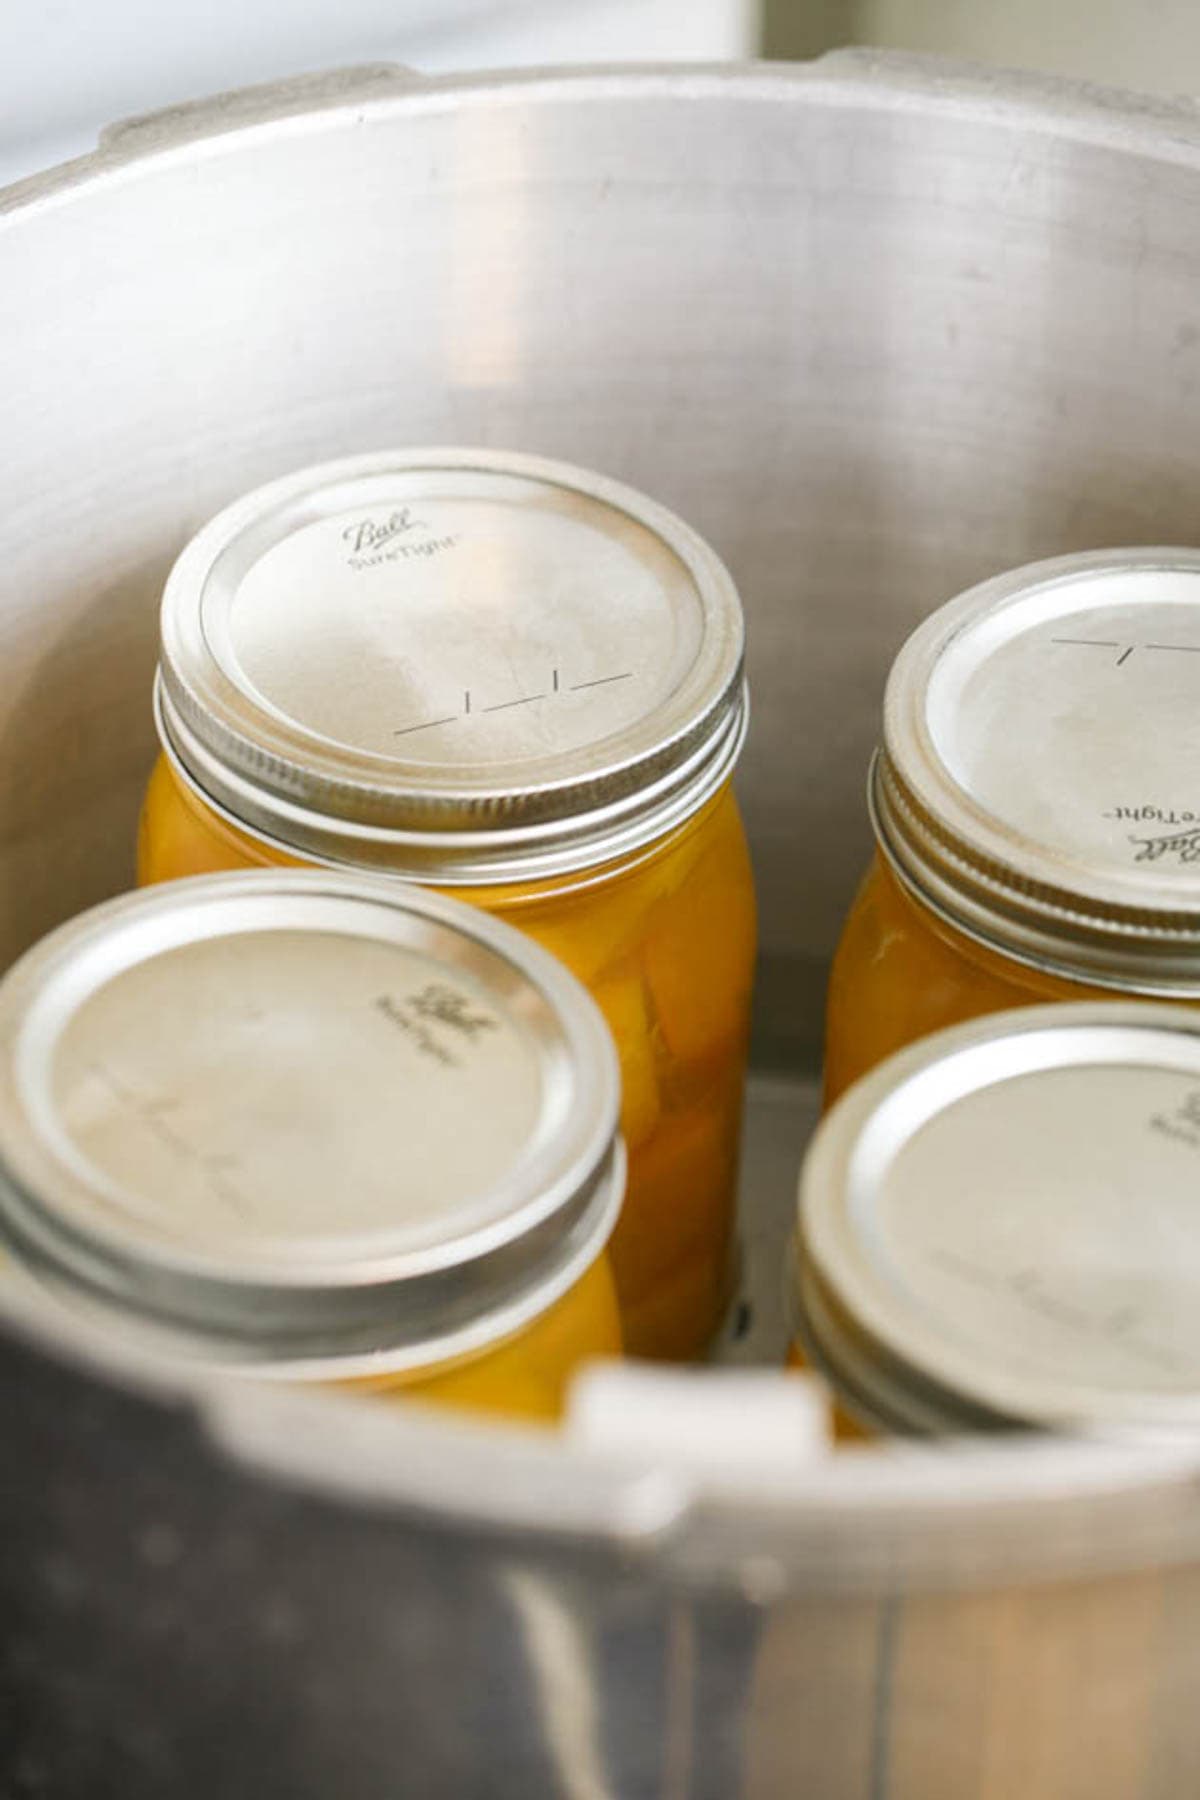
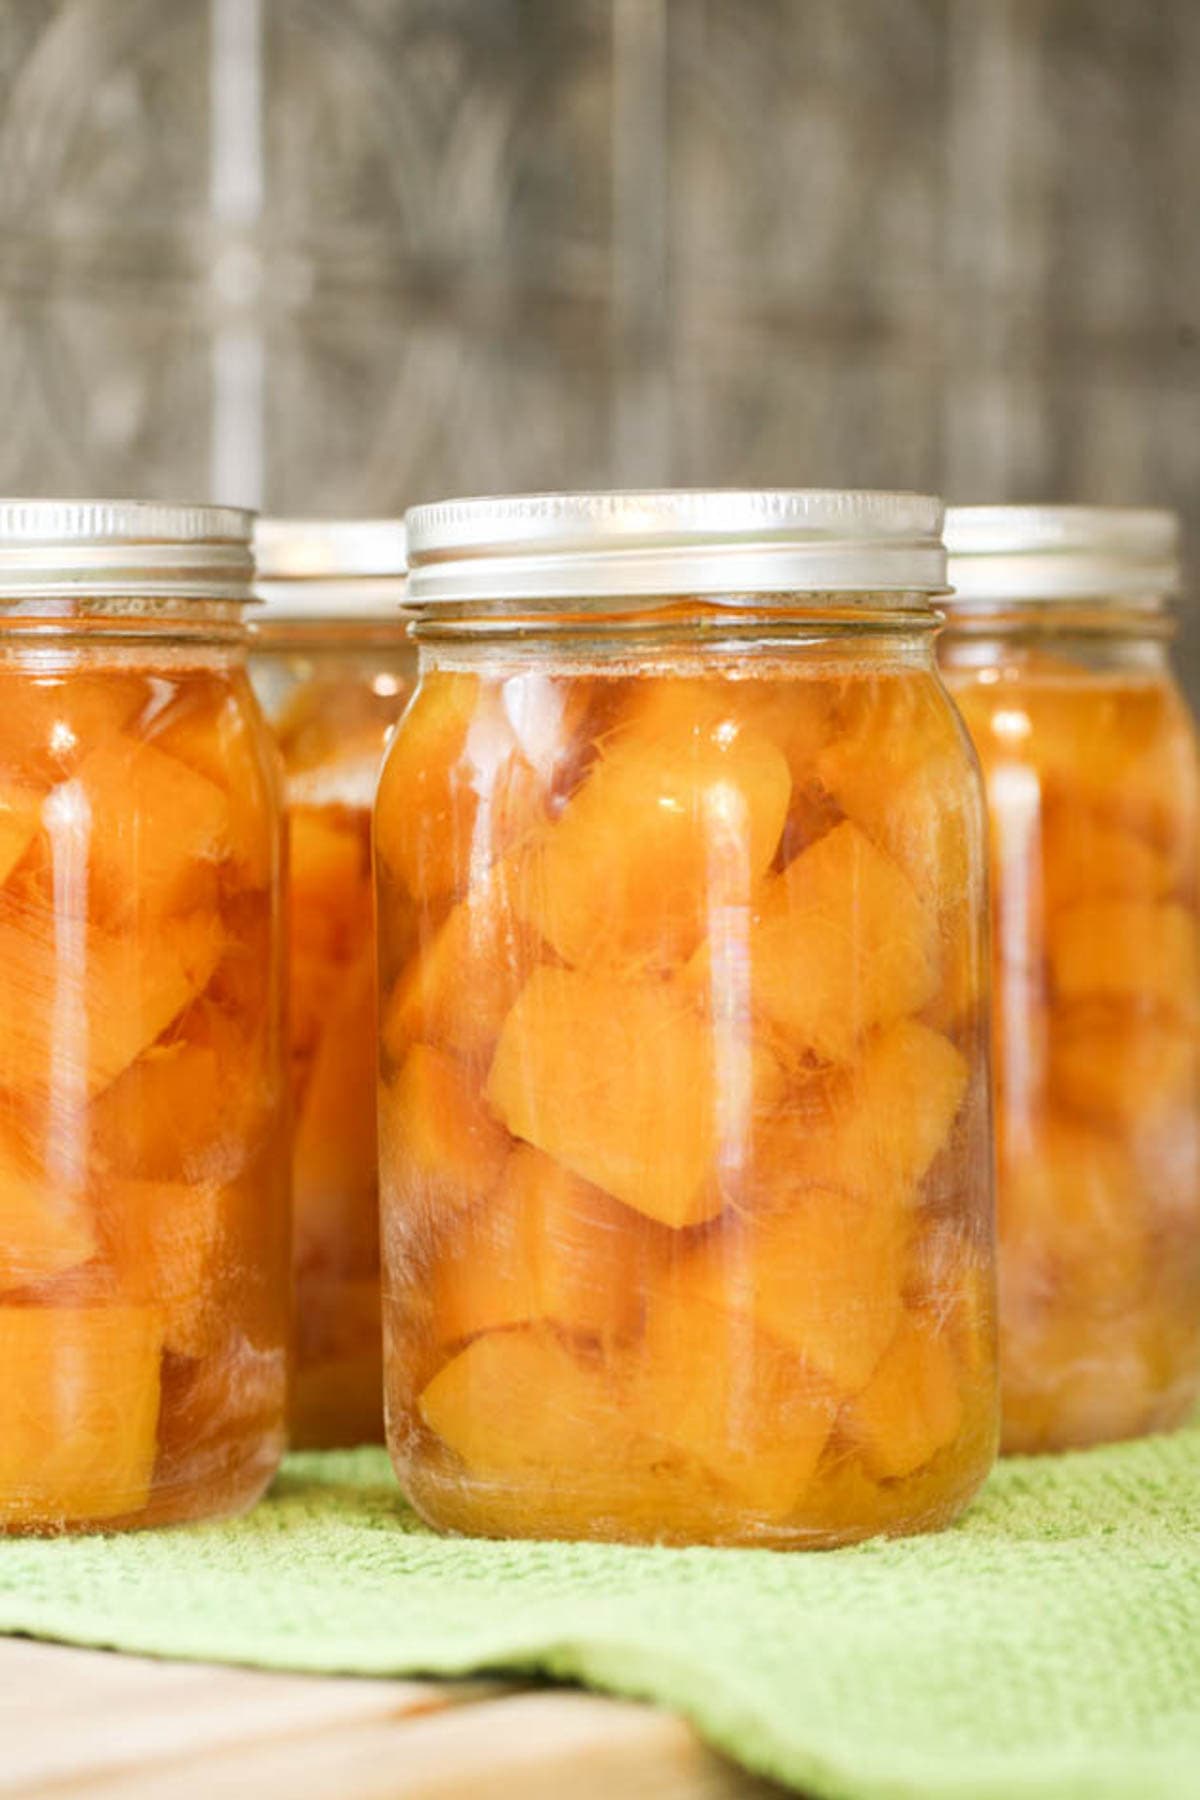
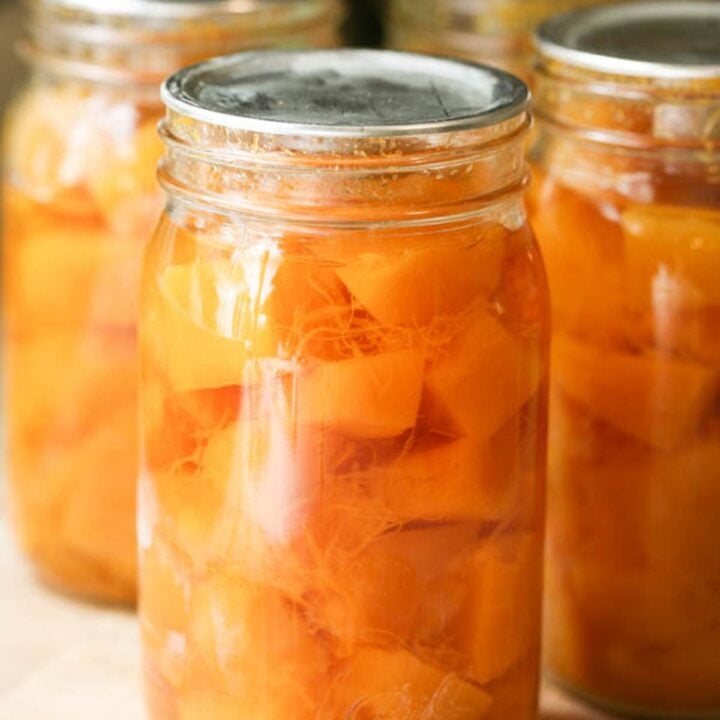
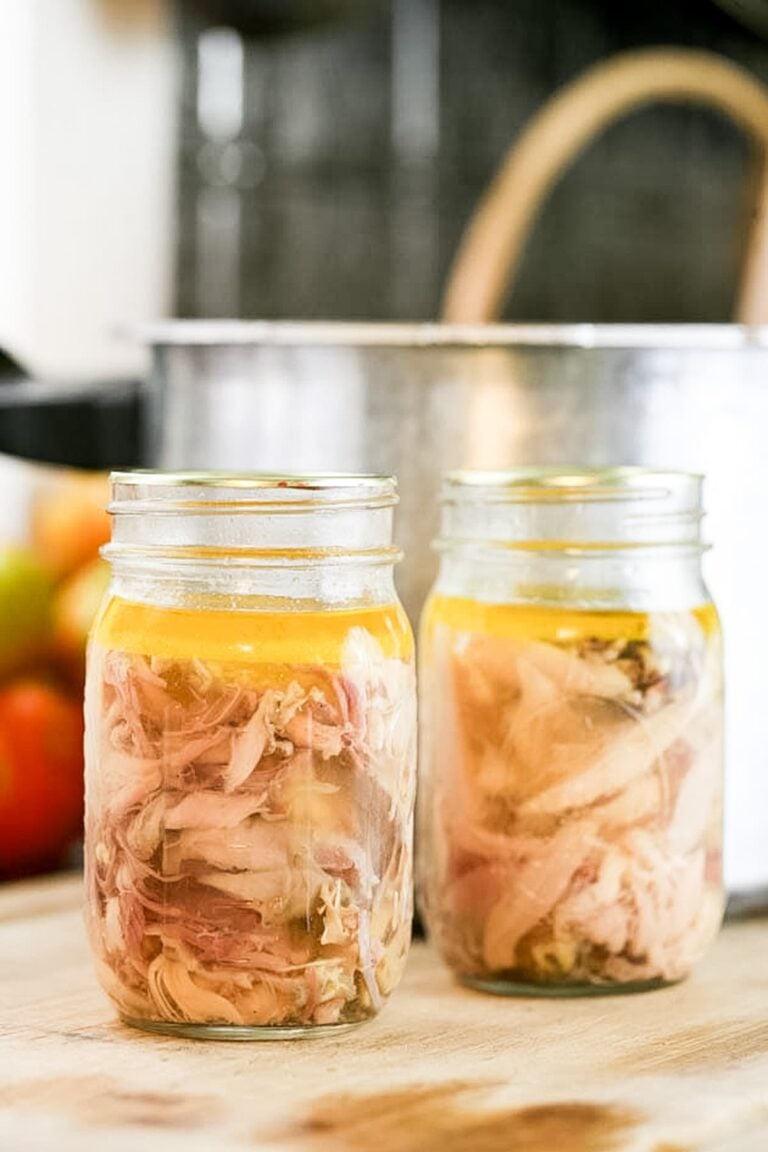
Step three – pack the jars. Wash your jars, lids and rings with hot water and dish soap (there is no need to sanitize them). Use the canning funnel and a ladle to fill the jars with the cubed pumpkin leaving about an inch of headspace.
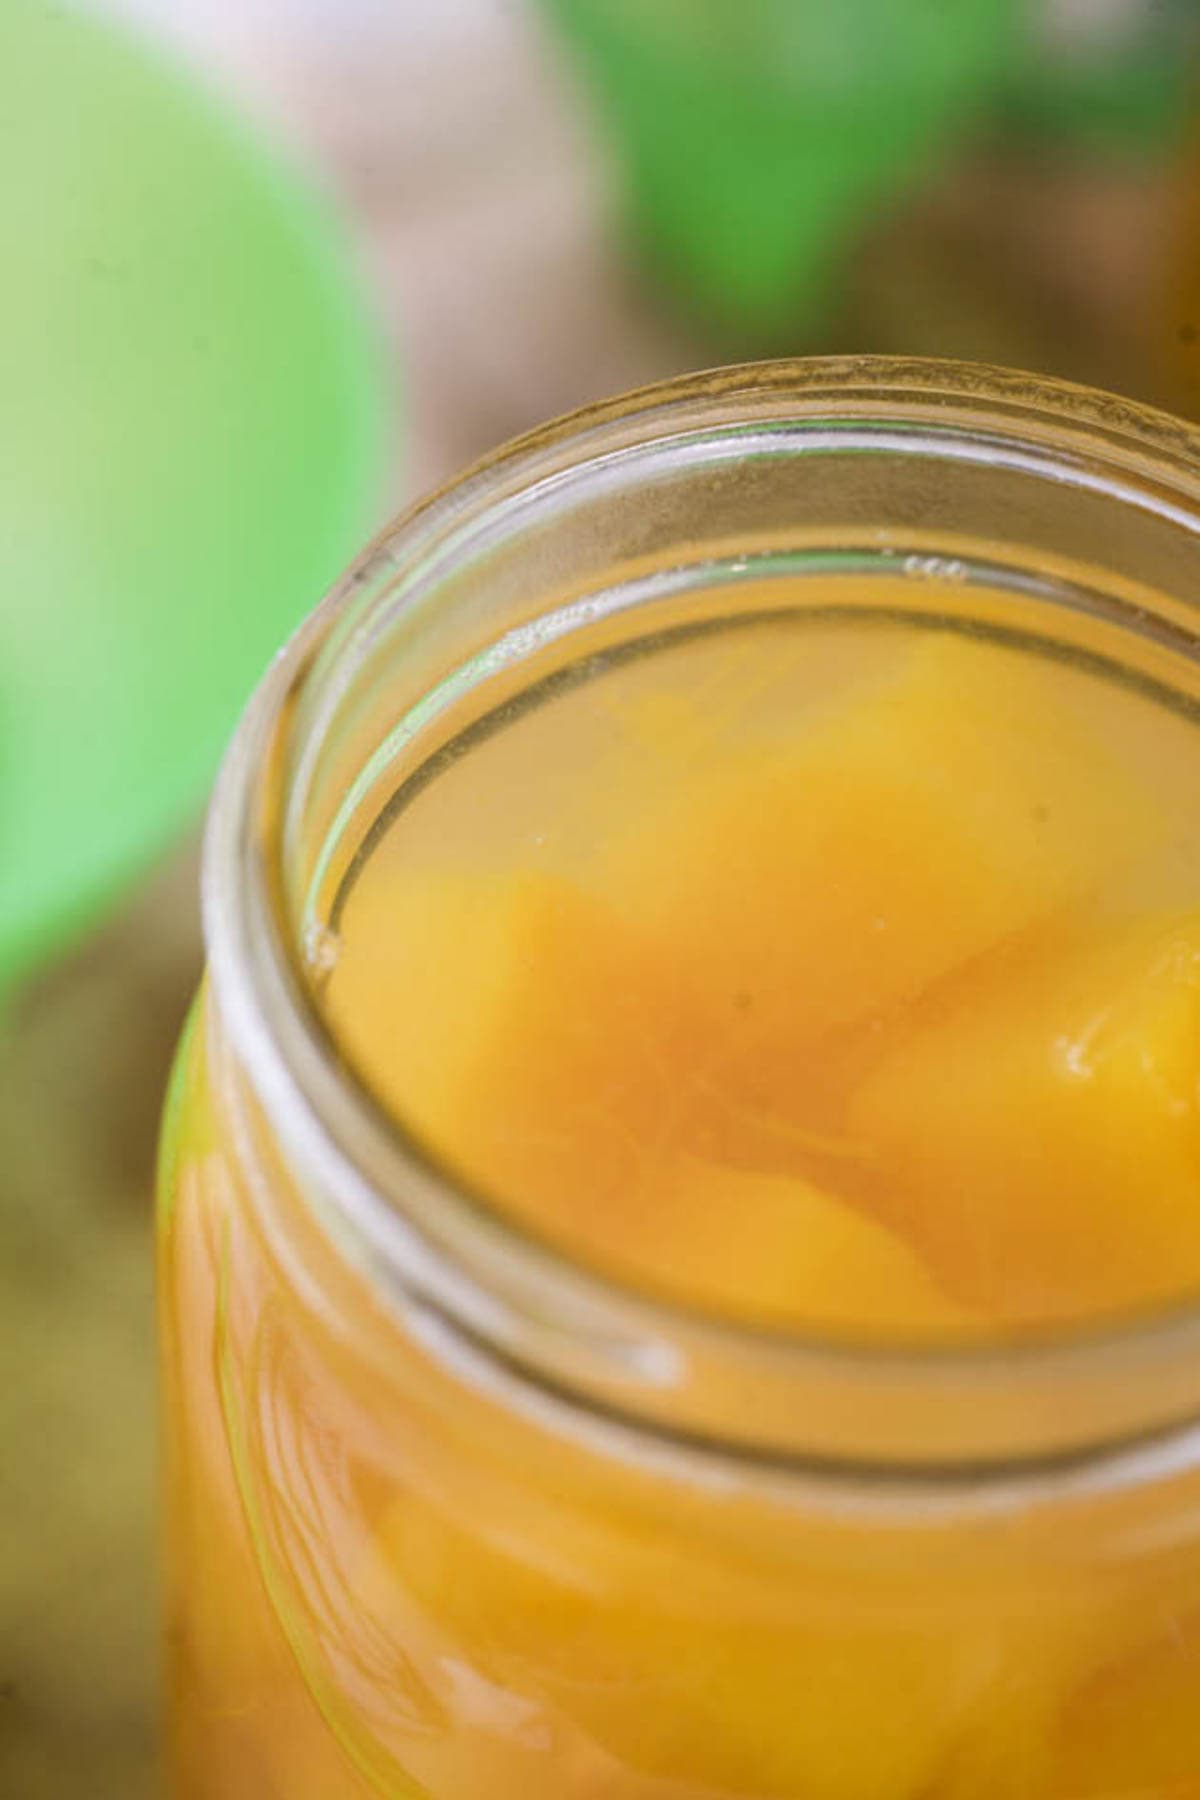
Then fill the jar with the pumpkin cooking water leaving one-inch headspace. Next, use the bubble remover to remove air bubbles by scraping it along the inside of the jar.
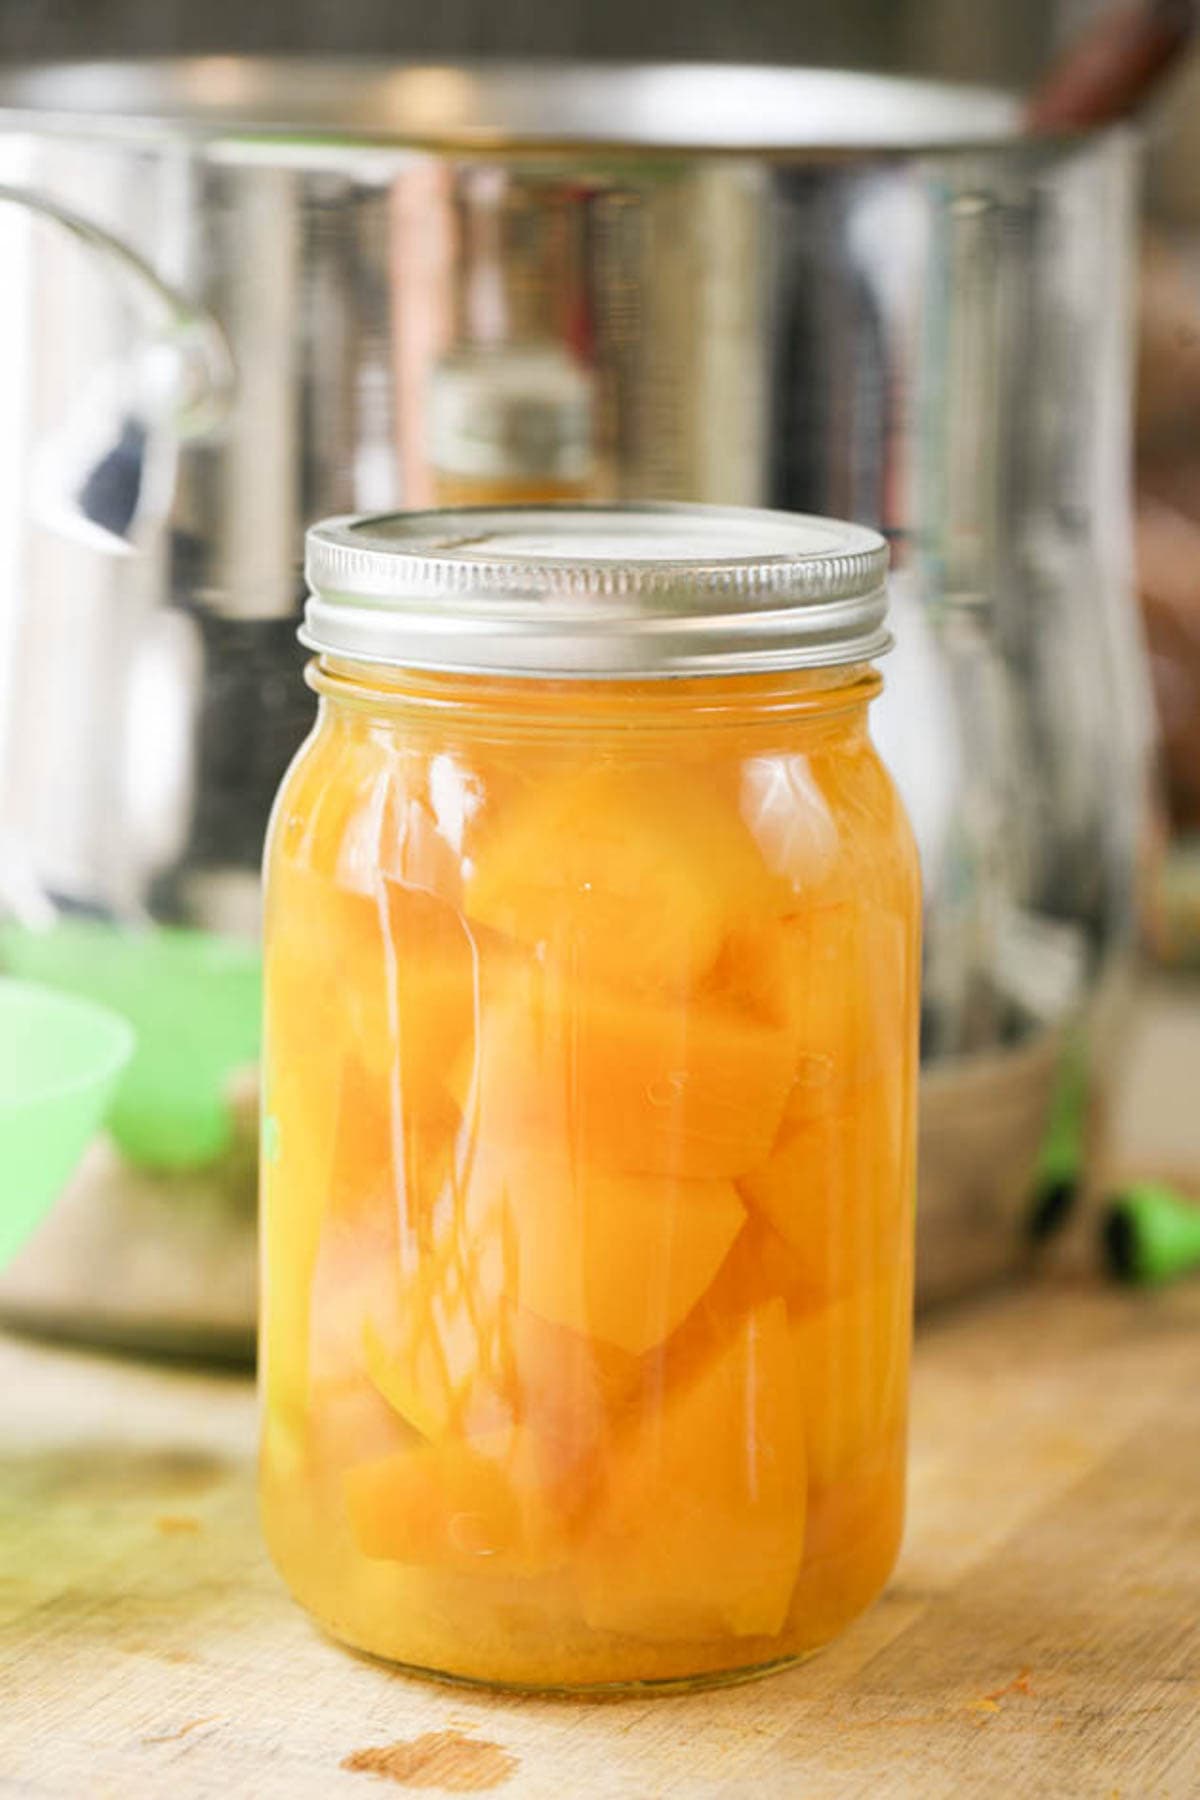
Lastly, clean the rim of the jar with a damp paper towel, center the lid, and close the jar. Repeat this until all of your jars are ready for processing.
Step four – process the jars of pumpkin in the pressure canner. Fill your pressure canner with about 2-3” of water (I use a Presto canner. If you are using a different canner, make sure to follow the manufacturer’s directions). Set the canner on the stovetop and turn the heat to high. Bring the water to about 140 degrees F. Now, place the jars on the rack in the canner and close the lid.
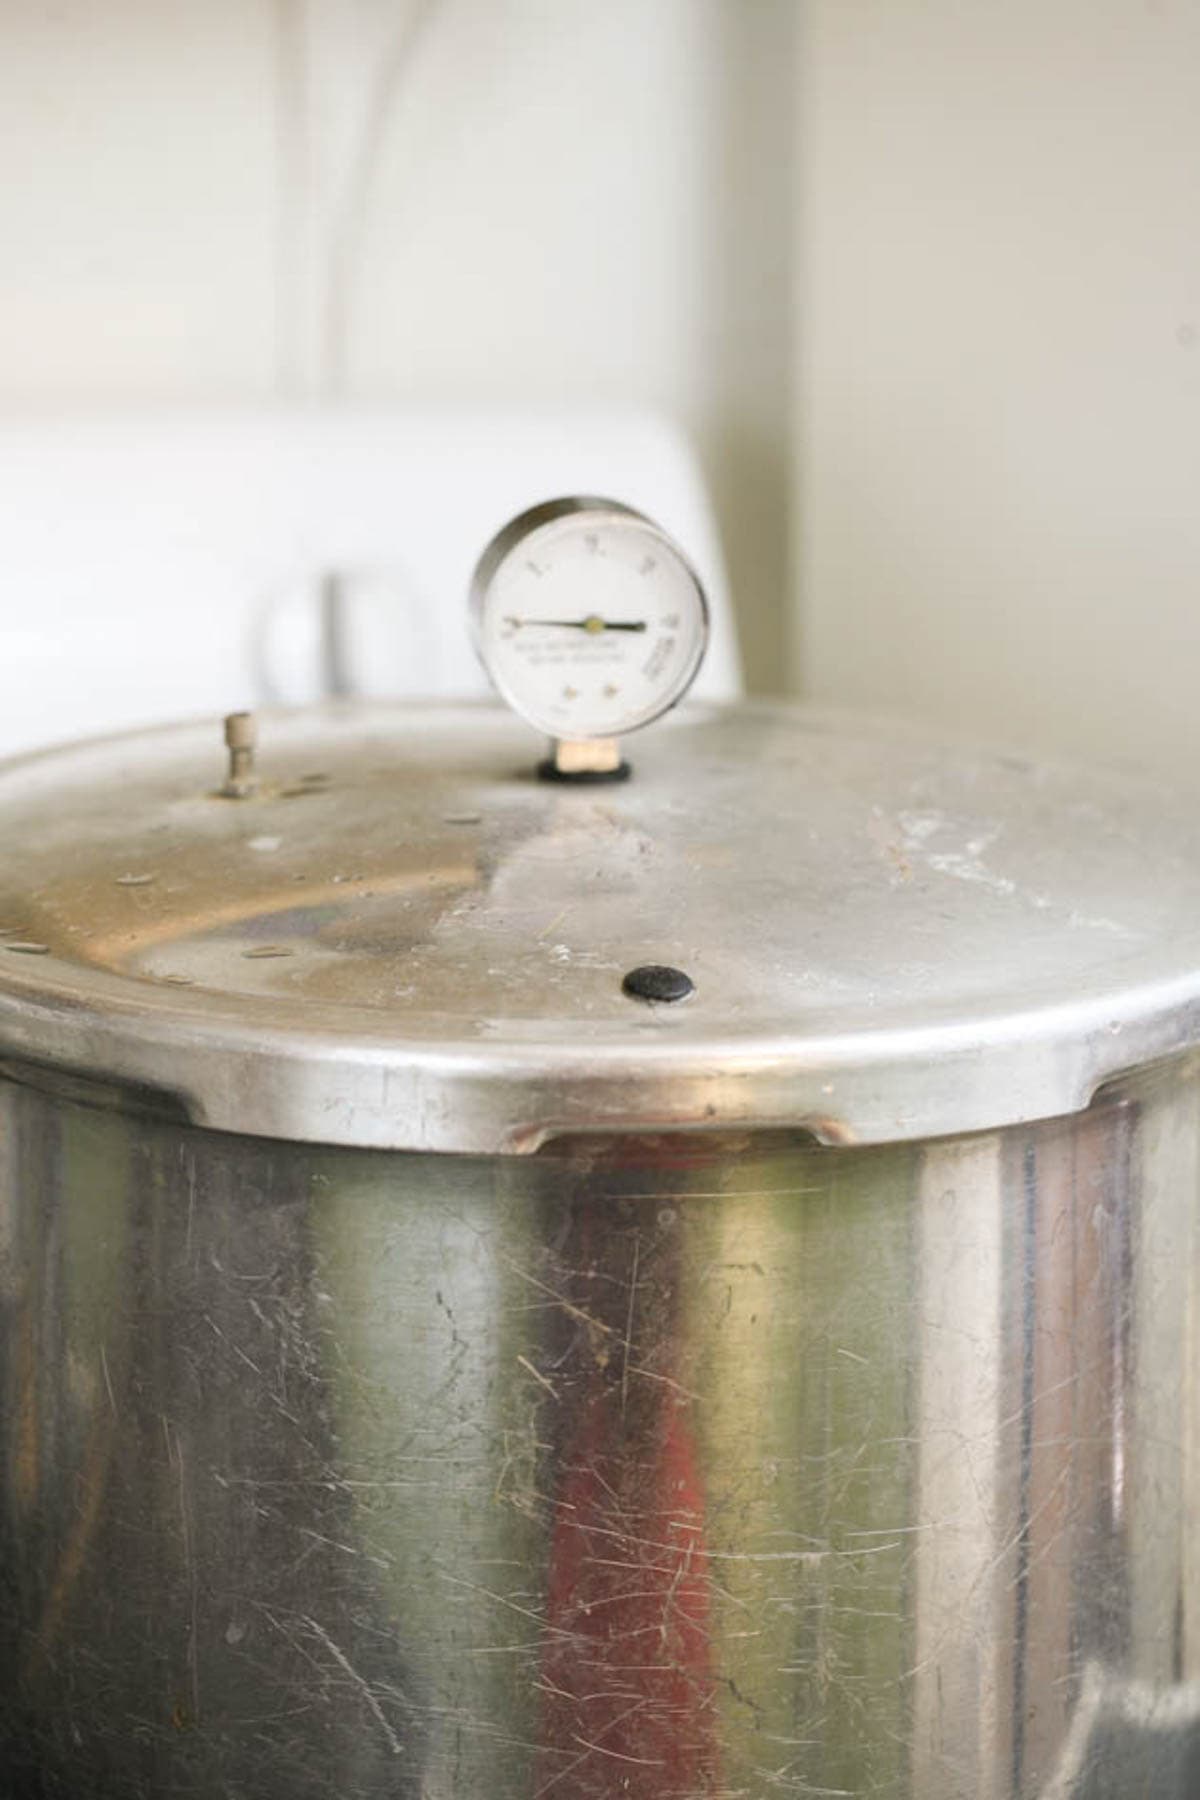
At this point, keep the weight off of the vent. Let the heat build-up inside the canner until steam starts to escape from the vent. Let the canner vent steam for ten minutes.
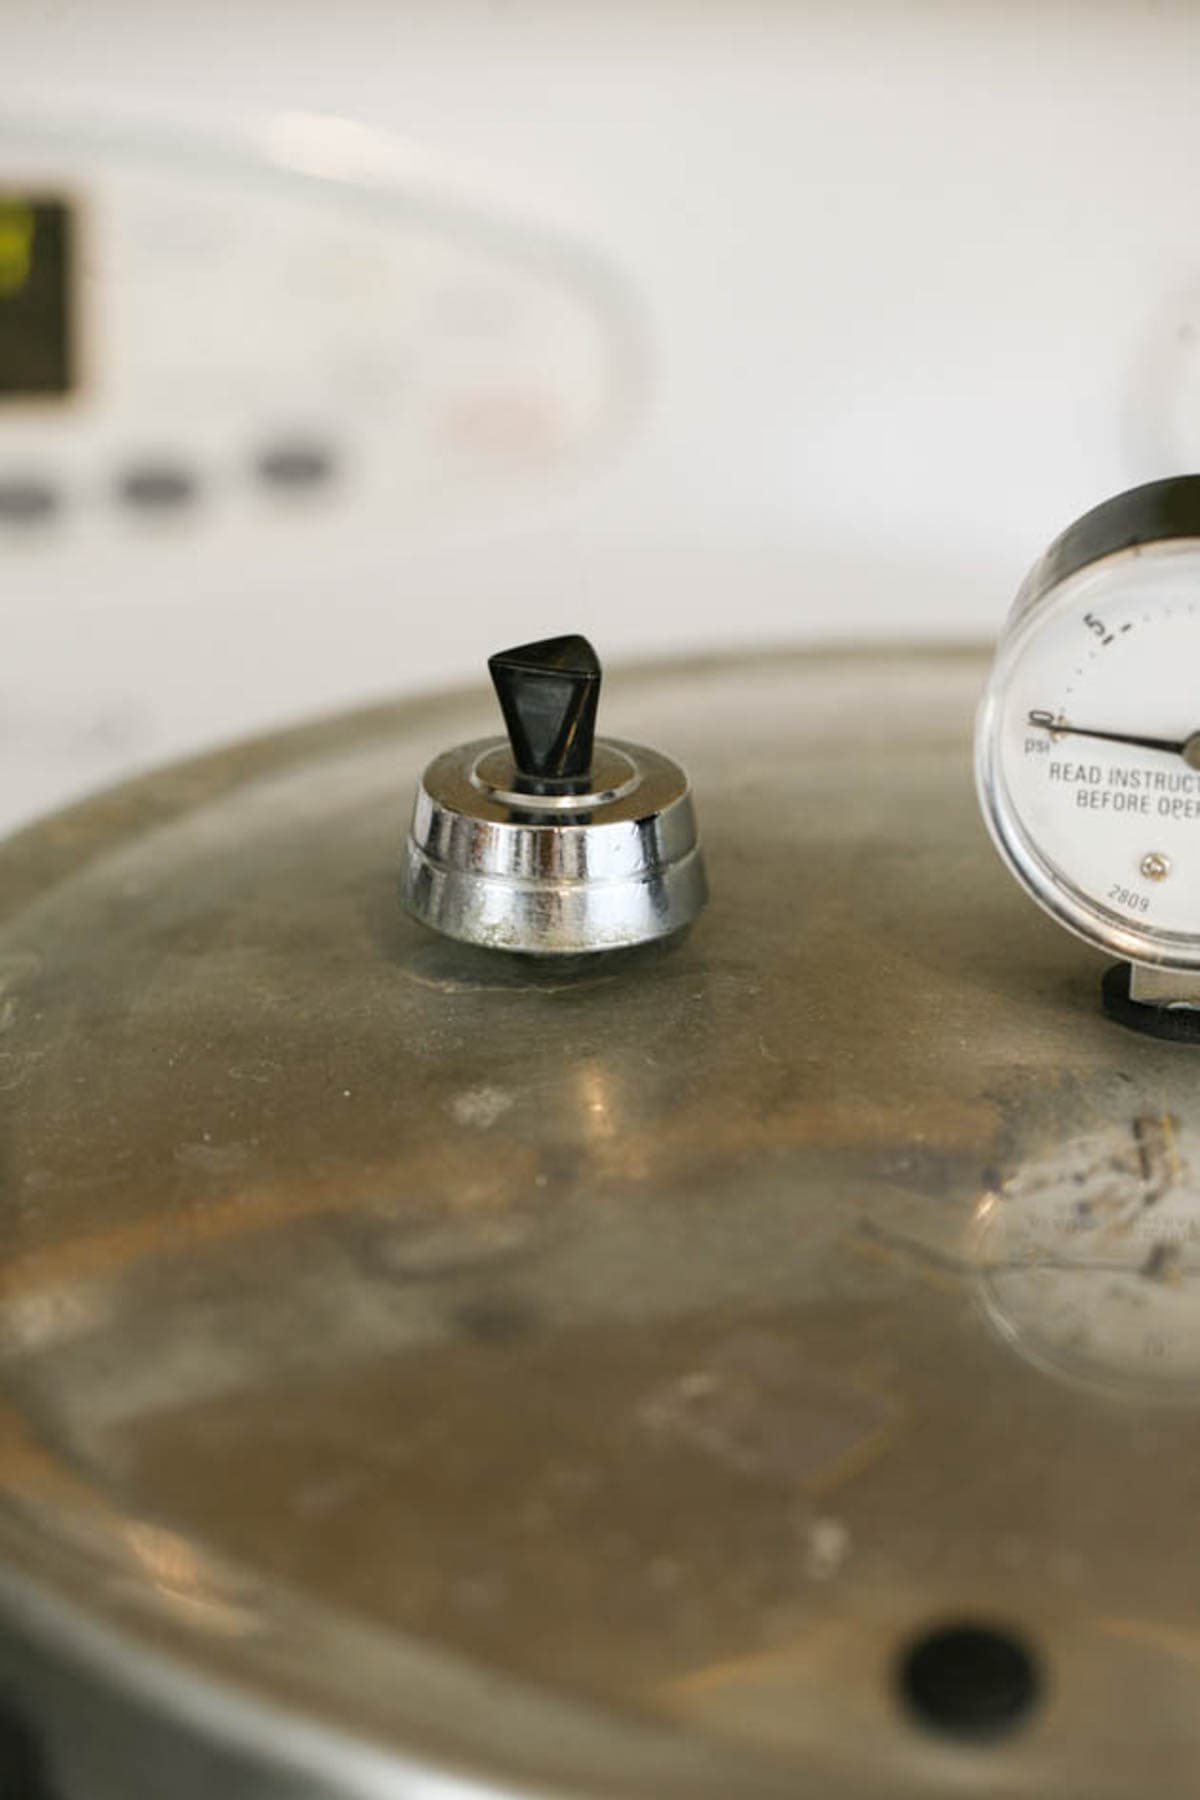
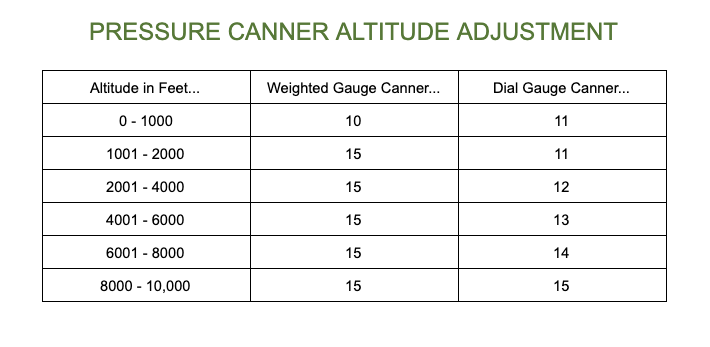
After ten minutes of venting, place the weight on the vent and watch the gauge. Once it reaches 11 psi, adjust the stovetop heat to keep the pressure (if you are using a weighted gauge canner use the 10 lb weight). Process quart jars for 90 minutes and pint jars for 55 minutes. Remember to adjust the pressure according to the table below if you live above 1000 feet in elevation.
Once processing is done, turn off the heat and let the canner cool slowly back to room temperature (this may take a couple of hours). Once the dial shows 0 pressure, open the lid but don’t remove the jars just yet, let them stay in the hot water for about ten minutes. Then, use the jar lifter to remove the jars from the canner and set them on a kitchen towel on the counter to cool completely overnight.
Storing Home-Canned Pumpkin Jars…
Make sure that your jars have been sealed before you store them by pressing on the center of each jar. If there is no movement there it means that the jar is sealed and ready for storage. I usually remove the rings because they rust over time and make it hard to open the jar months later, and then wipe my jars. Store at room temperature in the pantry or a kitchen cabinet. Home-canned pumpkin should last up to 18 months on the shelf.
How to Use Home Canned Pumpkin…
Home canned pumpkin is soft and ready to be mashed and turn into a puree. You can use it to make any dish that calls for a pumpkin puree. Here are some favorites…
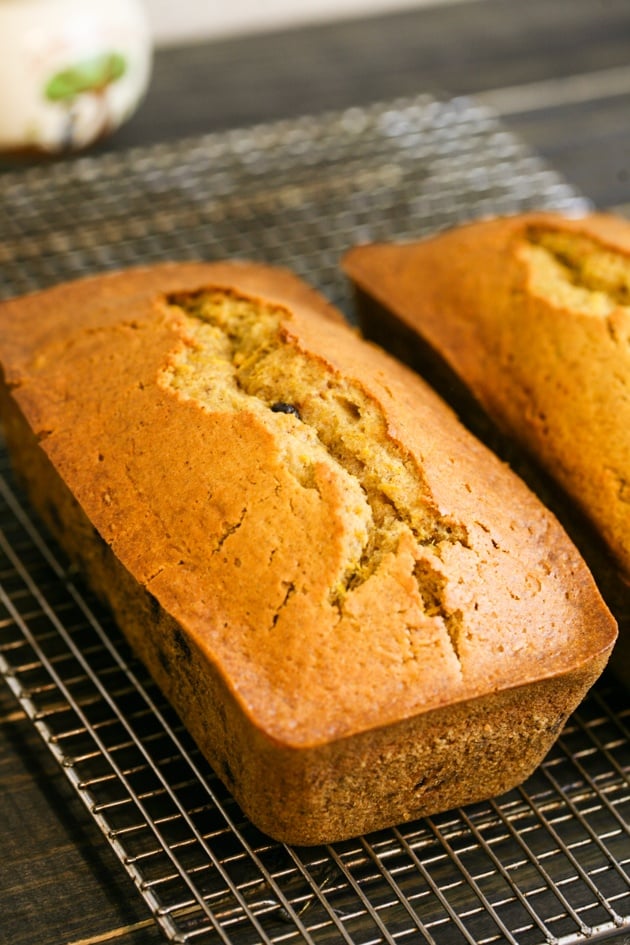
- Low Sugar Pumpkin Bread
- Pumpkin Cheesecake With Ginger Crust
- Mediterranean Pumpkin Soup
- Pumpkin Yellow Curry
- Find more ideas in my collection of 47 pumpkin recipes
Frequently Asked Questions…
No, you can not. Puree can’t heat evenly and isn’t safe for canning at home. Always can cubed pumpkin.
No. Pumpkin is a low acid food and the only safe and approved way of canning it is in the pressure canner since it can reach higher temperatures that will kill botulism spores.
It’s hard to say exactly. It’s said that 16 pounds of pumpkin make 7 quart jars. I find that if I puree the cubes in one quart jar I get two cups of pumpkin puree. I hope that this gives you a little bit of an idea…
Yes, pumpkin is canned hot packed so you want to boil the cubed pumpkin for two minutes before packing the jars. This is called blanching and it helps to preserve the taste and color of the food.
As long as your jars are sealed it’s ok if the pumpkin is not covered by water completely. It should last just as long on the shelf.
When pumpkin turns brown after processing it usually means that you processed it at a too-high temperature. The sugars in the pumpkin caramelized during the canning process. Your pumpkin is still good to eat, in fact, some people really like the taste of it caramelized.
Pumpkins are filling and healthy for us. You can easily can enough pumpkin to last you from one Fall to the other. I know that they are kind of a Fall thing, but I personally don’t see any reason not to make pumpkin bread for breakfast in February! I also add my pumpkin to many delicious soups throughout the year. I hope that this tutorial was helpful!
More Pressure Canning Tutorials…
How to Can Pumpkin
How to can pumpkin at home. A step by step tutorial.
Ingredients
- One large pumpkin
- Water
Instructions
- Prepare your pumpkin by removing the stem, peeling the pumpkin, and cutting it into one-inch cubes. Add the cubed pumpkin to a large pot, cover with water and bring to a boil. Let the pumpkin boil for two minutes.
- Wash your jars, lids, and bands with hot water and soap. Add about two inches of water to your pressure canner (or follow manufacturer direction here), set it on the stovetop, turn the heat to high and bring the water to about 140 degrees F.
- Use the canning funnel and a ladle to fill the jars with the hot cubed pumpkin. Next, scoop some of the hot water the pumpkin was cooking in and add to the jars, make sure to leave about an inch of headspace.
Use the bubble remover to remove bubbles, use a damp paper towel to clean the rim of the jar, center the lid, and close the jar with the band finger tight. - Set the jars in the pressure canner and close the canner (make sure that the weight is not on the vent at this point). Pressure will start to build in the canner and steam will start to escape from the vent. Let the canner vent steam for 10 minutes.
Set the weight on the vent and watch the dial. When it gets to 11 psi, adjust the stovetop temperature to keep the pressure at 11 psi (if you are using a weighted gauge canner, use the 10 pounds weight). Remember to adjust pressure if you live higher than 1000 feet in elevation (adjustment table in the notes below).
Process quart jars for 90 minutes and pint jars for 55 minutes (processing time starts when the canner reaches the desired pressure). - Turn the stovetop heat off and let the canner cool back to room temperature slowly. This may take a couple of hours. When the dial shows 0 pressure, open the lid of the canner but don't remove the jars just yet. Let them stay in the hot water for 10 minutes or so. Use the jar lifter to remove the jars from the canner and set them on a kitchen towel on the counter to cool completely overnight.
- Check that your jars have been sealed by pressing on the lid of each jar. If there is no movement there, it means that the jars are sealed and ready for storage. Remove the band (because it rusts over time and makes it hard to open the jar down the road), wipe the jars, and store at room temperature for up to 18 months.
Notes
Make sure to adjust pressure if you live above 1000 feet in elevation...
Frequently Asked Questions...
- Can I can pumpkin puree instead of cubes?
No, you can not. Puree can’t heat evenly and isn’t safe for canning at home. Always can cubed pumpkin. - Can I water bath my pumpkin instead of processing it in the pressure canner?
No. Pumpkin is a low acid food and the only safe and approved way of canning it is in the pressure canner since it can reach higher temperatures that will kill botulism spores. - How much pumpkin fits in a jar?
It’s hard to say exactly. It’s said that 16 pounds of pumpkin make 7 quart jars. I find that if I puree the cubes in one quart jar I get two cups of pumpkin puree. I hope that this gives you a little bit of an idea… - Do I have to boil the pumpkin before canning?
Yes, pumpkin is canned hot packed so you want to boil the cubed pumpkin for two minutes before packing the jars. This is called blanching and it helps to preserve the taste and color of the food. - During the pressure canning my jars lost some water and now the pumpkin is sticking out of the liquid, is that ok?
As long as your jars are sealed it’s ok if the pumpkin is not covered by water completely. It should last just as long on the shelf. - My canned pumpkin is brown… Why?
When pumpkin turns brown after processing it usually means that you processed it at a too-high temperature. The sugars in the pumpkin caramelized during the canning process. Your pumpkin is still good to eat, in fact, some people really like the taste of it caramelized.
Recommended Products
As an Amazon Associate and member of other affiliate programs, I earn from qualifying purchases (there is no change in product cost or charge to you! Thank you for helping me support the blog).


Nutrition Information:
Yield: 8 Serving Size: 1Amount Per Serving: Calories: 6Total Fat: 0gSaturated Fat: 0gTrans Fat: 0gUnsaturated Fat: 0gCholesterol: 0mgSodium: 2mgCarbohydrates: 2gFiber: 0gSugar: 1gProtein: 0g
What’s a good way to use these pumpkin cubes once they have been canned? I mean, are they best for soup, or can you still use them to make pie? I’m curious what kind of a texture the pumpkin cubes have after 90 minutes of pressure cooking.
My favorite use for them is soup since you can’t can pumpkin soup. You can also use them for pies or really anything that calls for pumpkin puree. They hold the cube shape but you can mash them with a fork.
Do I have to peel the pumpkin if I’m just planning to use it for dog food?
I would say yes because I doubt your dog will eat the skin. Also, the skin has bacteria on it that can mess up the canning process.
Thank you, very well laid out and explained. I’ve done a lot of canning over the years but never pumpkin and I have quite a few of them in the garden this year. They are almost ripe now and will never make it to be Jack-o-lanterns for the great grand kid, and I don’t want to see them go to waste so I’m going to follow your instructions and see how it comes out. I did notice you didn’t make mention of using your cubes for pumpkin pies… did I miss something? What is your favorite pumpkin dish? Thanks for such a super well written article. I’m an old school teacher and I’ll say you earned an A+. My wife thinks so too! Goodspeed and have a great year ahead!
A+ and English is not even my first language! You just made my day 🙂
You can definitely use the cubes for a pumpkin pie! We just don’t like pumpkin pie so I don’t make it much. Our favorite is pumpkin bread. I have the recipe fr that here on the blog!
I’m just curious why, if you can perfectly safely can applesauce, which is pureed, why you can’t do it with pumpkin? Does it have to do with the acid in the apples?
Yes, pumpkin is not acidic enough.
Not sure if anyone else addressed this, but…you note that you start the time rfrom the point that you put the weight on the vent. I believe you start when it reaches the correct pressure, right? I would have for someone to get sick!
Yes, you are correct. I’ll make sure to fix this. However, either or, I doubt that anyone is going to get sick. It’s only a few minutes difference and the temperature inside the canner kills all bacteria pretty quickly anyway.
I pressure canned a bunch of quarts of pumpkin cubes, they all ended up dark, is that normal? I was canning a Cinderella Pumpkin cut into cubes, in water. 10 pounds of pressure for 90 minutes.
They all are a dark orange/brown color, the water also. Is there a way to prevent this? They all sealed well.
Mmmm… I’m not sure why they turn dark. I have a jar of pumpkin on the shelf now from 2 years ago and it’s still orange.
Make sure that you clean the jars well and maybe try a different variety of pumpkin. Also, did you boil your pumpkin cubes before you packed the jars?
I just finished canning my pumpkin, I thought I got all the bubbles out, but all my jars are bubbling. Should I Open and re-process?
No no! You did a good job. It’s completely normal for the liquid inside the jar to bubble. It’s just because it’s boiling. As long as your jars sealed you are good to go!
I have a question, this is my first time canning pumpkin. I have a Carey electric pressure canner. I did all the necessary things to do but I wasn’t sure if I was supposed to vent the canner after the cook time. I did. Also half of the liquid was gone after canning. I’m not sure what went wrong. I just took the pumpkin out of the jars and I’m hoping I can still use it. Could you give me some advise on what I did wrong and am I able to use the pumpkin. Thanks
Yes, you can use the pumpkin. I have never used an electric canner before but in the stovetop canners when you lose water in the canes it means that there was a too-quick change of temperature in the canner.
You want the liquid in the jars and the water in the canner to be at similar temperature before you place the jars in the canner. Make sure to leave 1” headspace and not to overpack the jars. I steam the canner for 10 minutes BEFORE placing the weight on and bringing the pressure up. After you are done canning it’s important to let the canner cool slowly. Don’t open it. Let it cool for a couple of hours, then open the lid and leave the cans in the warm water for an additional 10 minutes before removing them from the canner.
Again, I’ve never used an electric canner so I have no clue if what I am telling you even makes sense for an electric canner but this is how we prevent the loss of liquid when using a regular canner. It’s a good idea to read the manual of your canner, I bet they have information on preventing the loss of liquid there.
So, if you lose liquid at the top is it still going to be ok? I have canned as 8nstructed but lost about 1 addituinal inch of liquid.
As long as your jars sealed, it should be ok. I’ll make sure to remember to check the jars every couple of weeks. And use the ones that lost liquid first.
Just a question, since we are pressure canning why do we need to cook before packing the jars?
I don’t think you have to but if you cook it’s easier to remove the skin and you know that your pumpkin is soft so it’s easy to puree it later. I never tried not to cook before so I am not sure if it will soften all the way if you just pack it fresh. The thing is, most people use pumpkin as a puree but it’s not safe to can it as a puree so we are trying to do the next closest thing.
I love canning! When I find a good end of season deal I really jump-in to it. Now’s the time to keep an eye out for the holiday deals on turkey. Few years ago I canned-up 5, just cut to the right size for sandwiches and casserole quick meals. Keeps me out of the over-priced deli, $7.99 for sliced turkey!?……and who cares about the fancy Italian name they stuck on it. Oh! Turkey Pumpkin soup! With a dollop of sour cream and chives tossed on top with your crusty bread! Yum! You teach your children the art of canning, including the “wait & pressure watch time” and how to utilize it. I found out yesterday that even an 18 year old couldn’t figure out how to open a can of tuna without spewing it on half the kitchen.
Sheri, I am also watching for deals on turkey. How did you can it? Do you cook it in the oven first then divide and can in liquid?
I LOVE this!
Question though – would one quart equal one pie? or one pint?
Trying to gauge what I would need for baking 🙂 Thanks! Can’t wait to try this 🙂
I just opened one jar, mashed the pumpkin and got exactly two cups of puree. I hope this helps. Thanks for stopping by!