This post may contain affiliate links, view our disclosure policy for details.
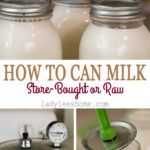
In this post we will learn how to can milk. It can be raw milk or store-bought milk, cow’s milk or goat’s milk… They are all done the same. The process of canning milk is not complicated at all and I was pleasantly surprised to taste my milk months later and find it sweet and delicious. It’s a really great way to preserve milk!
I have this fascination with old ways of doing things… If it’s how to tan a deer hide or weaving a basket or preserving food, I always find myself wondering how people did things before modern amenities.
Often when milk from my Lamancha goats starts to pile up in the fridge I make cheese. I usually make feta or goat cheese or my favorite; this easy raw goat milk cheese… But all those need refrigeration or to be frozen if I want to keep them for a while.
Lately, I’ve been wondering if there is a way for me to keep the milk at room temperature in its original form instead of processing it into cheese…
Can I can milk?
How to Can Milk at Home…

I did some research and I found that indeed I can can my milk!
I had to give it a try…
Is it Safe to Can Milk…
Well, you’ll have to do the research and decide for yourself.
After spending some time researching I found out two things…
- Most modern research says that canning milk at home is not safe…
- People have been doing this for generations…
It’s kind of like drinking raw milk, the debate is heated and opinions are very different.
I personally side with grandma most of the time with all due respect to modern research. I drink raw milk and I also decided to try and can it.
It’s a personal decision and, again, you’ll have to research and decide for yourself if you want to do it or not.
Feel free to voice your opinion in the comments below or share your experience, just please keep it respectful.
I will say that though… Milk is a low-acid food. From my research, I found that there are communities around the world that can milk (and can meat) in a water bath canner. Some of them are very close to us like the Amish, for example.
However, to kill bacteria they must keep a steady temperature for 3 hours or so.
It’s very labor-intensive in my opinion and still, the risk for Botulism (a bacteria that can grow in air-tight containers but is killed by high temperatures) is real, so I decided to use my pressure canner to can my milk.
I recommend you use your pressure canner but I did want you to know that there is a way to can milk in a water bath.
Why Would You Want to Can Milk?
There are many reasons… In my case, I just had more milk from my goat than we could drink.
I already had enough cheese in the freezer and I work so hard to keep my goats alive (goats are not for sissies! Not where I live at least, they are the most desirable playground for worms around these humid parts…) that their milk is even more valuable to me.
I raise LaMancha goats. They go into heat in the fall and birth in the spring. So between October and somewhere around April I don’t have fresh milk from them.
I wanted to try to can as much milk as I can to use during those months.
I also thought that it would be great to learn how to can milk so I am not dependent on electricity to preserve it as I would be if I froze it.
If you live off the grid, keeping food without electricity is something you are familiar with.
But even if you are on the grid, it’s still nice to save some energy, or save room in the freezer for other things, or not needing to worry about food spoiling if the electricity goes out (for example, if you live in areas with many storms and power outages).
Another reason to can milk is if you don’t want to need to go to the grocery store often. Some of us live far in the country or are a single person and often a gallon of milk spoils before we can use it all. So canning is a great option.
Another great reason is canning for travel…
If you are packing for a camping trip, going to spend the weekend at the lake, or going on a road trip across the country, canned milk is a great ingredient to pack.
Tools That We Are Going to Need…
Before we start with the tutorial, let’s gather all the kitchen tools that we are going to need…
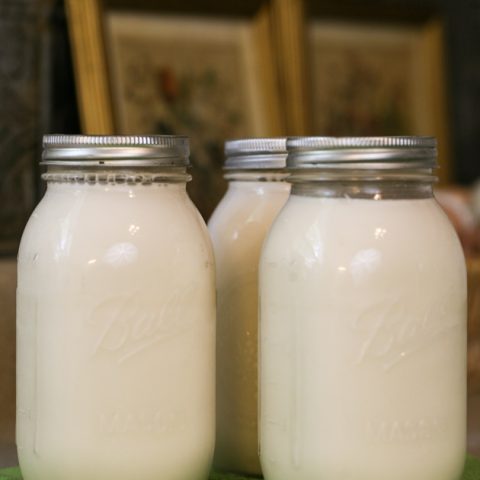
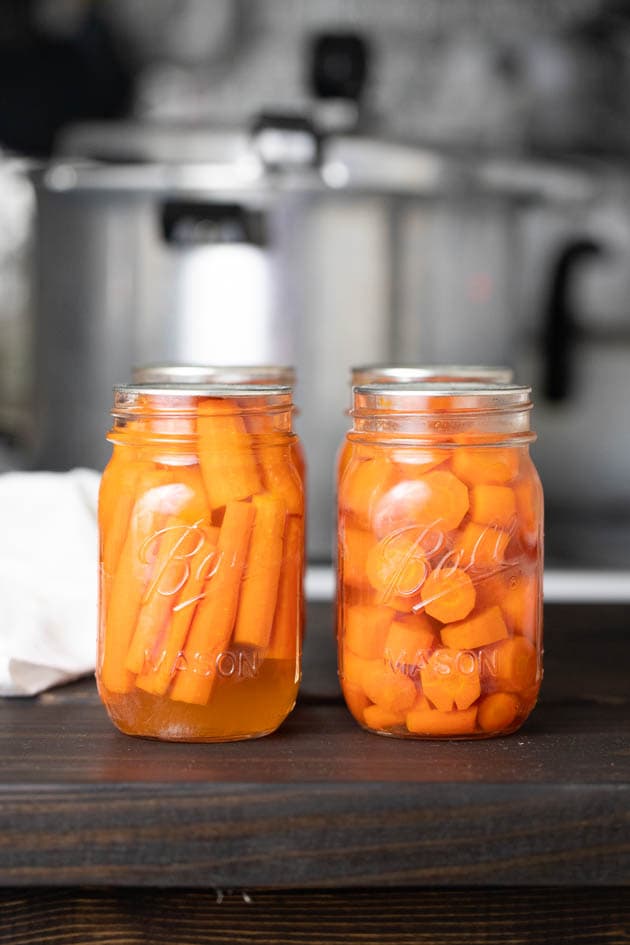
Jars – I think that the best size of jars for canning milk are the quart jars but you can follow the same tutorial with any size of jar that you choose to use.
Lids and bands – you can reuse bands but make sure to use new lids so we know that the seal is in great condition.
Canning utensils – we’ll use most of them.
Ladle – to help us fill the jars.
Pressure canner – I use my Presto pressure canner. The All-American canner is also popular.
That’s all we need. Let’s learn how to can milk…
How to Can Milk, Step-by-Step…

We start by taking the milk out of the fridge to warm up a little bit.
Don’t can older milk, the fresher the better. This is my supply from five milking (two and a half days) from one goat.
My kids were with their dad over the weekend and I just drink a tiny bit of milk with my morning coffee so the jars just piled up in the fridge.
Preparing the Jars and Canner…

While the milk is warming up a bit, wash your jars in warm water and check that there are no cracks or chips around the rim. Let them dry for a few minutes.

Next, it’s time to sanitize your jars. You can do this by placing them in a water bath and boiling them for 10 minutes or so, placing them in the dishwasher, or using the oven.
I like the oven method. I place my jars on a baking sheet and heat the oven to 320F. Once the oven is hot I place the jars in there for 10-15 minutes.

After 10-15 minutes, remove the jars from the oven and use the jar lifter to remove them from the baking sheet. Place them on a towel and let them cool down.
We want the jars and the milk at a similar temperature so the jars don’t break.

Place your lids and rings in a pot of water, bring to a boil and hold that boil for 5 minutes or so.
You can reuse rings but make sure you use new lids each time so that you know for sure that the seal is good.

Let’s also fill the pressure canner with some water. I have a Presto pressure canner that I love! You will have to follow your canner’s instructions but if to be honest, I could not find any instructions in the manual on canning milk so I went with 2.5” of water.
I also left the tray in there.
Filling the Jars With Milk…

Once the jars cooled a bit and the milk warmed a bit and the difference in their temperature is not too great, I fill the sanitized jars with milk.

Make sure to leave 1/2’’ headspace.
Make sure you do not touch the rim or the inside of the jar with your fingers! I used a canning funnel to make sure the milk goes in the jar and not all over the place.

Use a paper towel to clean the rim of the jar, again, DO NOT touch it with your fingers!

Use the magnetic lid lifter to lift the lid from the pot of hot water and place it on your lid. Do not touch the bottom of the lid with your fingers.

Now, use the ring to close the jar (not too tight, finger tight), and we are ready for processing!
Processing the Milk in the Pressure Canner…

Use the jar lifters to lift the jars and place them inside the pressure canner.

Close the canner and turn the heat to high.

Now we are watching the little nozzle for steam. It took my canner 18 minutes to reach the point where I can see steam coming out from the nozzle.
Once the canner starts to steam let it exhaust steam for 10 minutes before placing the gauge on the nozzle.

Before placing the gauge on the nozzle.
Now watch your pressure gauge, once it showed you 11 psi (it will take some time…), turn the heat off immediately and let the canner cool completely (this may take an hour or two).
Adjustment For Higher Elevations…

I’ve never canned milk in higher elevations but I assume that you’ll have to adjust according to the table above.
So, for example, if you live at 4500ft in elevation instead of turning the heat off when the canner reaches 11psi you’ll have to wait until it reaches 15 psi or 13psi depending on what kind of canning you are using.
Removing the Canned Milk From the Canner…

Wait until the dial shows 0 pressure and then remove the weight If steam doesn’t come out anymore, it is safe to open the canner. Please be careful when you remove the weight.
Place a towel on the counter and use your jar lifters to remove the jars from the canner and place them on the towel. Now let the jars rest and cool completely for 24 hours.
We are done!
How to Store Canned Milk…

After the milk has cooled completely store it in a dark and cool place like in the pantry or a kitchen cabinet for example.
You will see the cream separating from the milk and that is normal and completely fine. The milk also turns a bit of a yellowish color.
It should store for a year or so but I plan to just use it over the winter until my goats freshen again in the spring.
It seems like everyone agrees that you can use it for cooking but not everyone agrees with drinking it. Many do though. If you do use it for drinking I think it tastes better if chilled.
Once you open a jar you do have to make sure to store it in the fridge and use it within a couple of days.
If you’d like to read more about canning milk, my friend Heather from The Homesteading Hippy shares her experience in her post Home Canning Milk via Pressure Canner.
If you give this a try come back and let me know how it went, or share your opinions or experience in the comments below.
If you liked this tutorial, you might like these as well…
How to Can Milk
How to can milk at how step by step.
Ingredients
- Milk
Instructions
- If your milk was in the fridge, take it out and place it on the counter. We want the milk to warm up a bit.
- Meanwhile, wash your jars (I use 3-quart jars) with warm water and soap. Place them on a baking sheet.
- Heat your oven to 320F. Place the jars in the oven for 15 minutes to sanitize them.
- Also, place your bands and rings in a small pot, cover them with water, set on the stovetop and bring to a boil. Let the water boil for 5 minutes to sanitize the bands and lids.
- Take the jars out and turn the oven off. From this point on, do not touch the rim of the jars with your fingers (use the jar lifters if you need to move the jars).
- Place the jars on a cutting board or a kitchen towel and let them cool for a few minutes.
- Meanwhile, set your pressure canner on the stovetop and add 3 quarts of water to your canner (or follow manufacture directions). This is about 2.5'' of water (I use a Presto dial gauge canner).
- Use the canning funnel and a ladle to fill the jars with milk. Make sure to leave about 1/2'' headspace.
- Clean the rim of the jars with a clean paper towel, center the lids, and close the jars with the bands, fingertight.
- Place all of your jars on the rack in the pressure canner.
- Close the canner and turn the heat to high (do not place the weight on the vent yet).
- watch the vent. When steam starts to come out, set your timer to 10 minutes. Let the canner steam for 10 minutes.
- After 10 minutes, place your weight on the vent and watch the dial. When the canner reached 11psi, turn the heat off and let the canner cool completely (please see notes for pressure adjustments).
- Once the dial shows 0 pressure (it might take the canner a couple of hours to completely cool), open the canner.
- Let the jars rest in the open canner for a few minutes before removing them.
- Set your jars on a kitchen towel and let them cool completely (I usually leave them overnight).
- Check that your jars have sealed. Remove the bands, wipe the jars, and store in the pantry.
Notes
If you live in an altitude higher than 1000ft, you will need to change the pressure. Please check the table in the post for more altitude adjustment information.
You might notice that the cream separates from the milk in the jar. This is normal.
You might also notice that your milk get a yellowish color to it. This is also normal.
I use quart jars but you can follow the same process with any size of jars.
I try to use my canned milk within a. year.
Nutrition Information:
Yield: 1 Serving Size: 1 quartAmount Per Serving: Calories: 125Total Fat: 5gSaturated Fat: 3gTrans Fat: 0gUnsaturated Fat: 2gCholesterol: 20mgSodium: 127mgCarbohydrates: 12gFiber: 0gSugar: 0gProtein: 9g


Just did 3 quarts! I had tried canning milk 6 years ago and it clabbered. I’ve since learned quite a bit about sterilizing my equipment.
Question, would this now be pasteurized milk? I would need to know this for making cheeses. Thank you!
It’s the same as evaporated milk.
It didn’t go through the exact process of pasteurizing but we did process it through high temperatures so I say treat it as pasteurized milk.
How do you use the canned milk? Is it used as regular milk, or only in cooked foods?
I mostly use it for french crapes, pancakes, and such. I also use it in my coffee. It is just the same as evaporated milk.
is this for store bought milk or milk from a farm? I have access to both, but I don’t want to use the wrong one lol
Both! You can follow the same process for both.
This is great! I can many items: meat, veggies, fruit, soups, beans, etc. My question: When you turn the heat off and let the pressure decrease, do you remove the pressure canner from the hot burner or leave it on the hot burner? (I use a propane stove.)
Thanks again!
I left it on the hot burner. You don’t want fast/drastic temperature changes. This way everything cools off very slowly and the jars don’t break.
Hi, thank you for sharing your recipe. I need just 1 cup of milk for recipe’s and i have an electric canner. It vents for 10 mins then processes for the time I program in…I dont have an idea when it reaches 11 lbs. any ideas?
thank you again
mary ann
I have never used an electric canner so I’m afraid I can’t be of much help here…
Since we program our “processing time” into the electric canner at the start, I would suggest programming for 1 minute (I don’t think it would accept 0 minutes). I wondered the same thing when reading the article. I have a Presto canner, but also use my electric canner for smaller batches. I’m going to try this, and hope it works well for you! 🙂