This post may contain affiliate links, view our disclosure policy for details.
Canning roasted red peppers at home is fairly easy! It’s a great way to preserve your garden peppers and the result is delicious. Canned roasted red peppers can be used in many ways and add amazing flavor to many dishes.
Peppers are a must-have in the summer garden. In fact, you’re most likely going to find a few different pepper varieties in my garden, the classic red bell pepper is one of them! We eat most of our bell peppers fresh right from the garden as a snack. The peppers that reach the kitchen are usually served as a side to a sandwich or we add them to a salad.
I also love making Mediterranean stuffed peppers, we can eat this dish all day long! And I also make a delicious red pepper paste that you must try, and after all that, if I have any peppers left, I can them as roasted red peppers.
Canning Roasted Red Peppers…
Peppers are a low-acid food and for that reason, we have to use a pressure canner to can them. Canning roasted red peppers require some work, but it’s not hard or complicated.
Selecting Peppers for Canning…
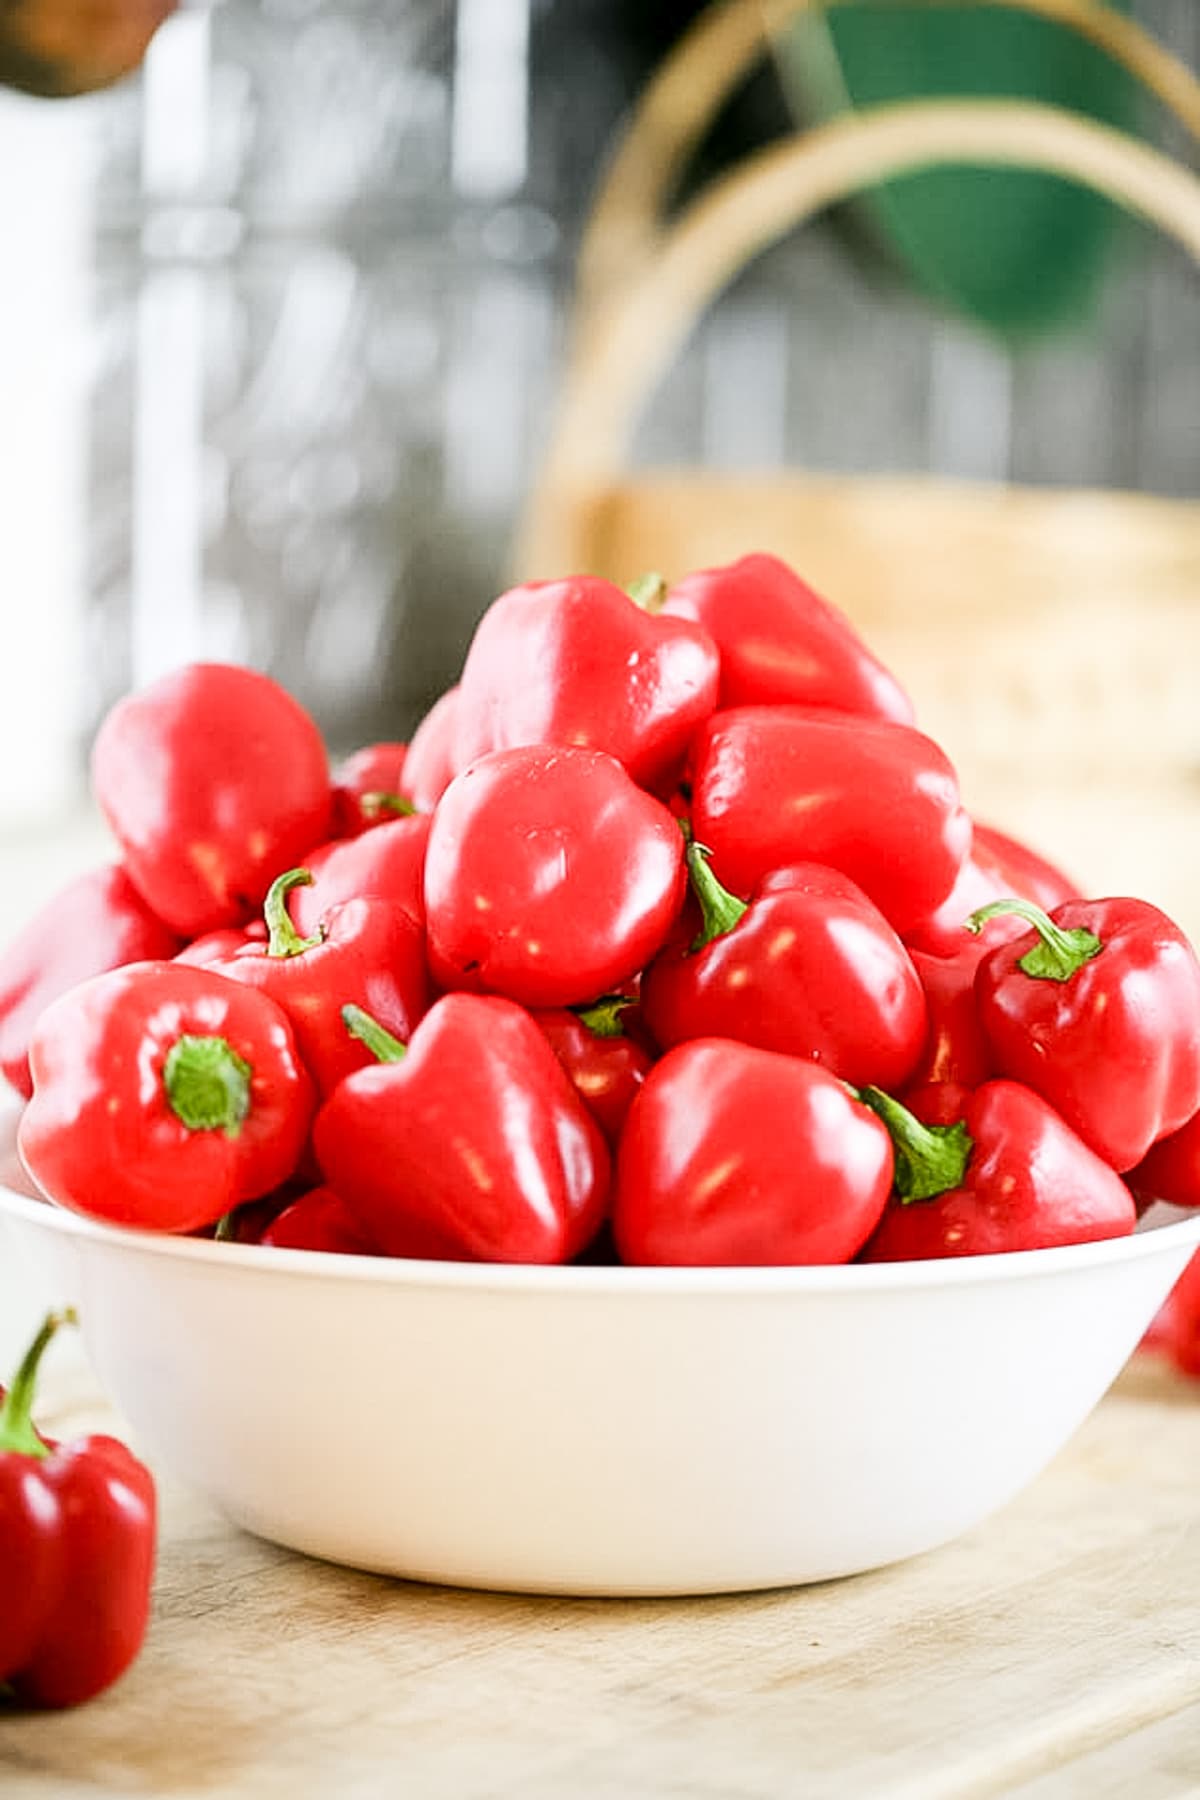
Any pepper that you can use for cooking can be canned in this method, it doesn’t have to be red bell peppers. You can choose hot peppers like jalapenos or a mild chili pepper like the poblano pepper. Since we are going to roast and peel the peppers in this method of canning peppers, it will be easier to use medium or large peppers. The small ones are just hard to clean and peel.
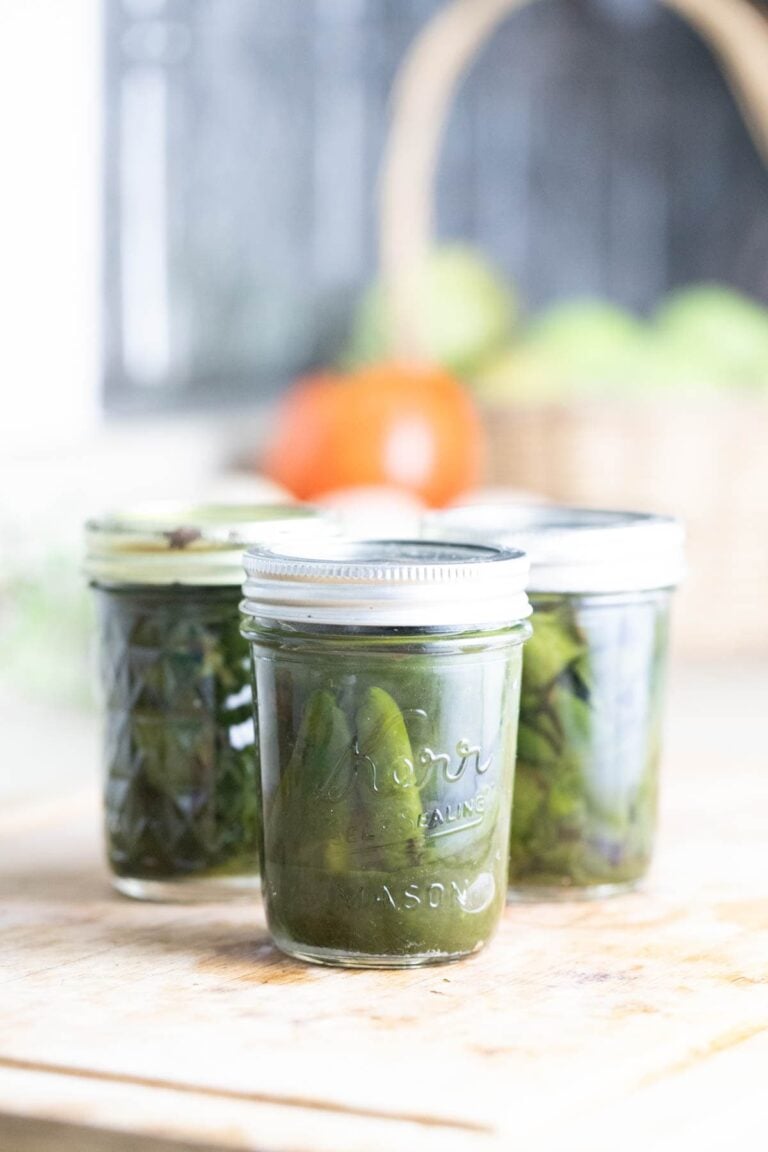
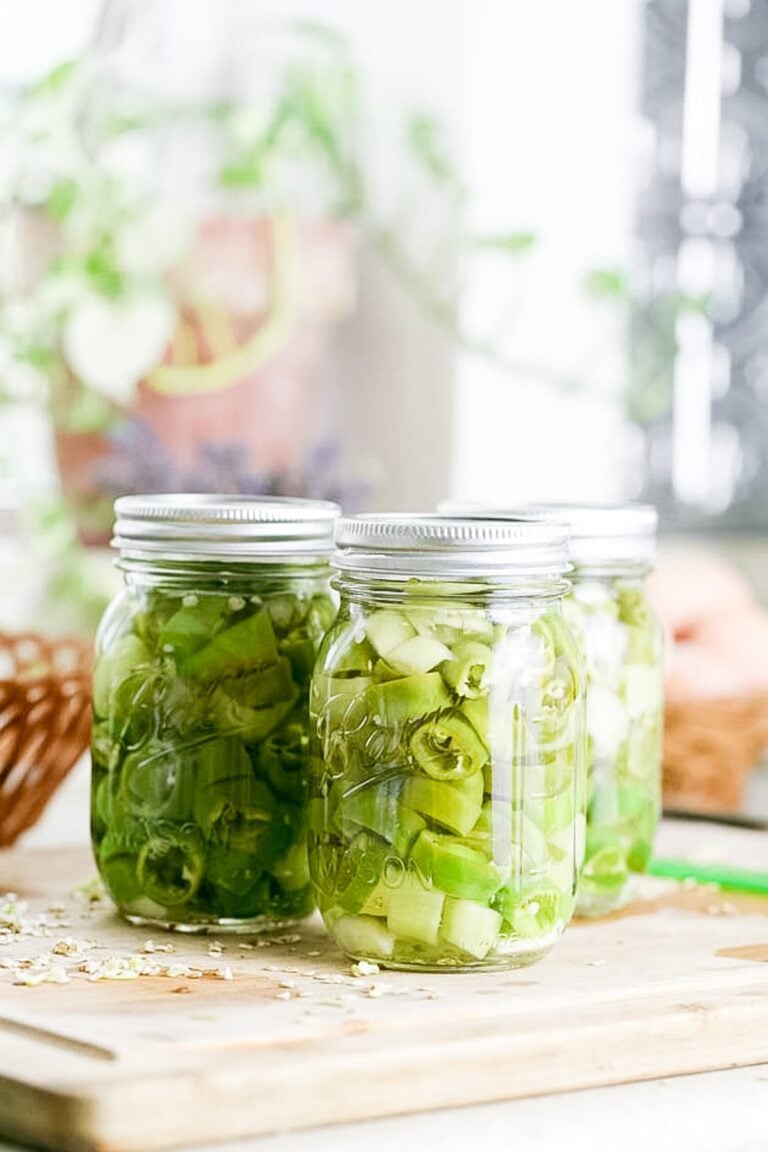
Also, try to choose meaty peppers. They are also easier to peel, however, you can see in the picture above, that the peppers I canned were rather small and not too meaty. It just means that prep work took me a little longer. I started with 6.5 lb of peppers here and after cleaning them I was left with just under 5 lb. This 5 lb made three pints of canned roasted red peppers.
Ingredients…
- Red peppers like Bell
- Oil spray (it doesn’t matter what kind)
- Salt – Kosher, sea, or canning
- Boiling water
- Seasoning – this is optional but feel free to add a clove of garlic to each jar or thyme, oregano, chili flakes, cayenne pepper, and so on…
Equipment You’ll Need…
- Cutting board
- Knife
- Baking sheet
- Parchment paper
- Oil sprayer
- Spatula
- Ziplock bag
- Pint, or half-pint jars
- Canning utensils
- Paper towel
- Pressure canner – I use the Presto canner but this All American canner is also popular.
Roasting Red Peppers For Canning…
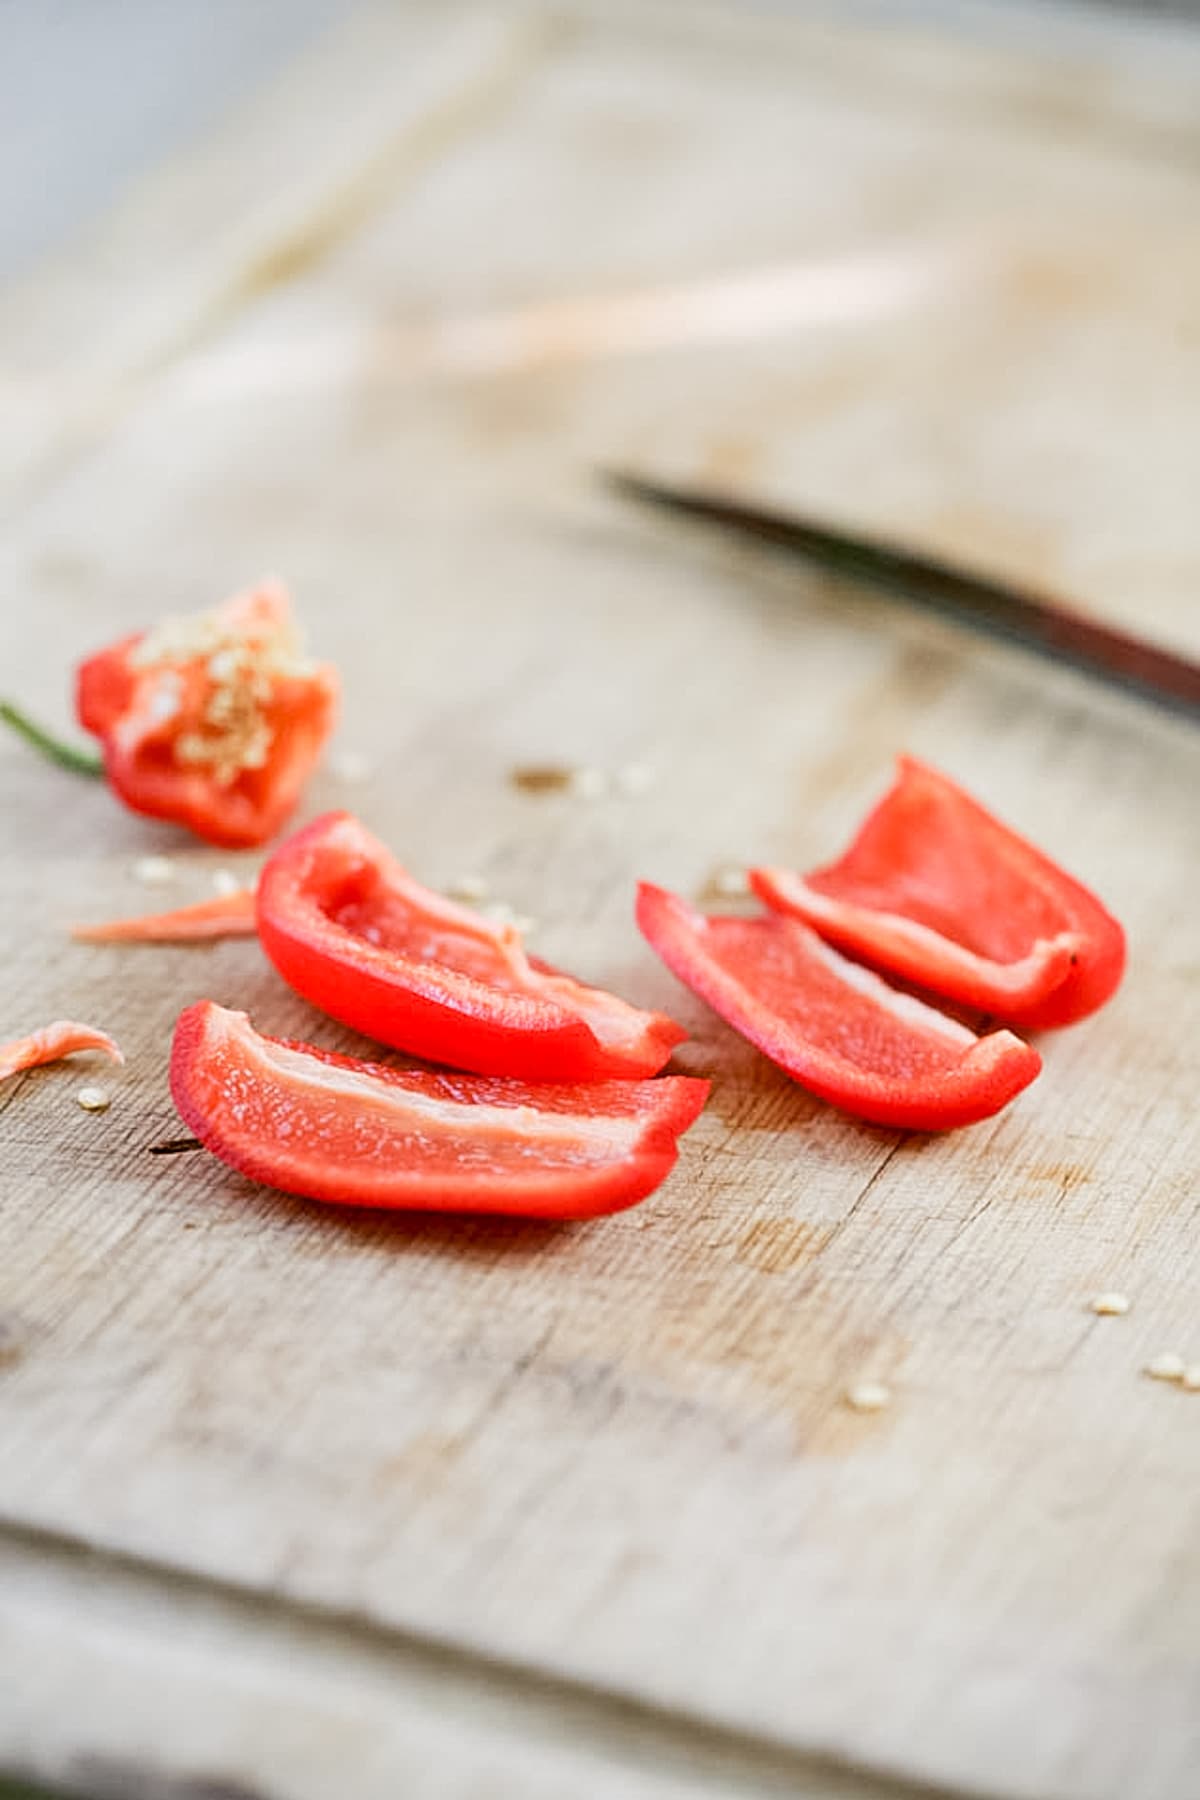
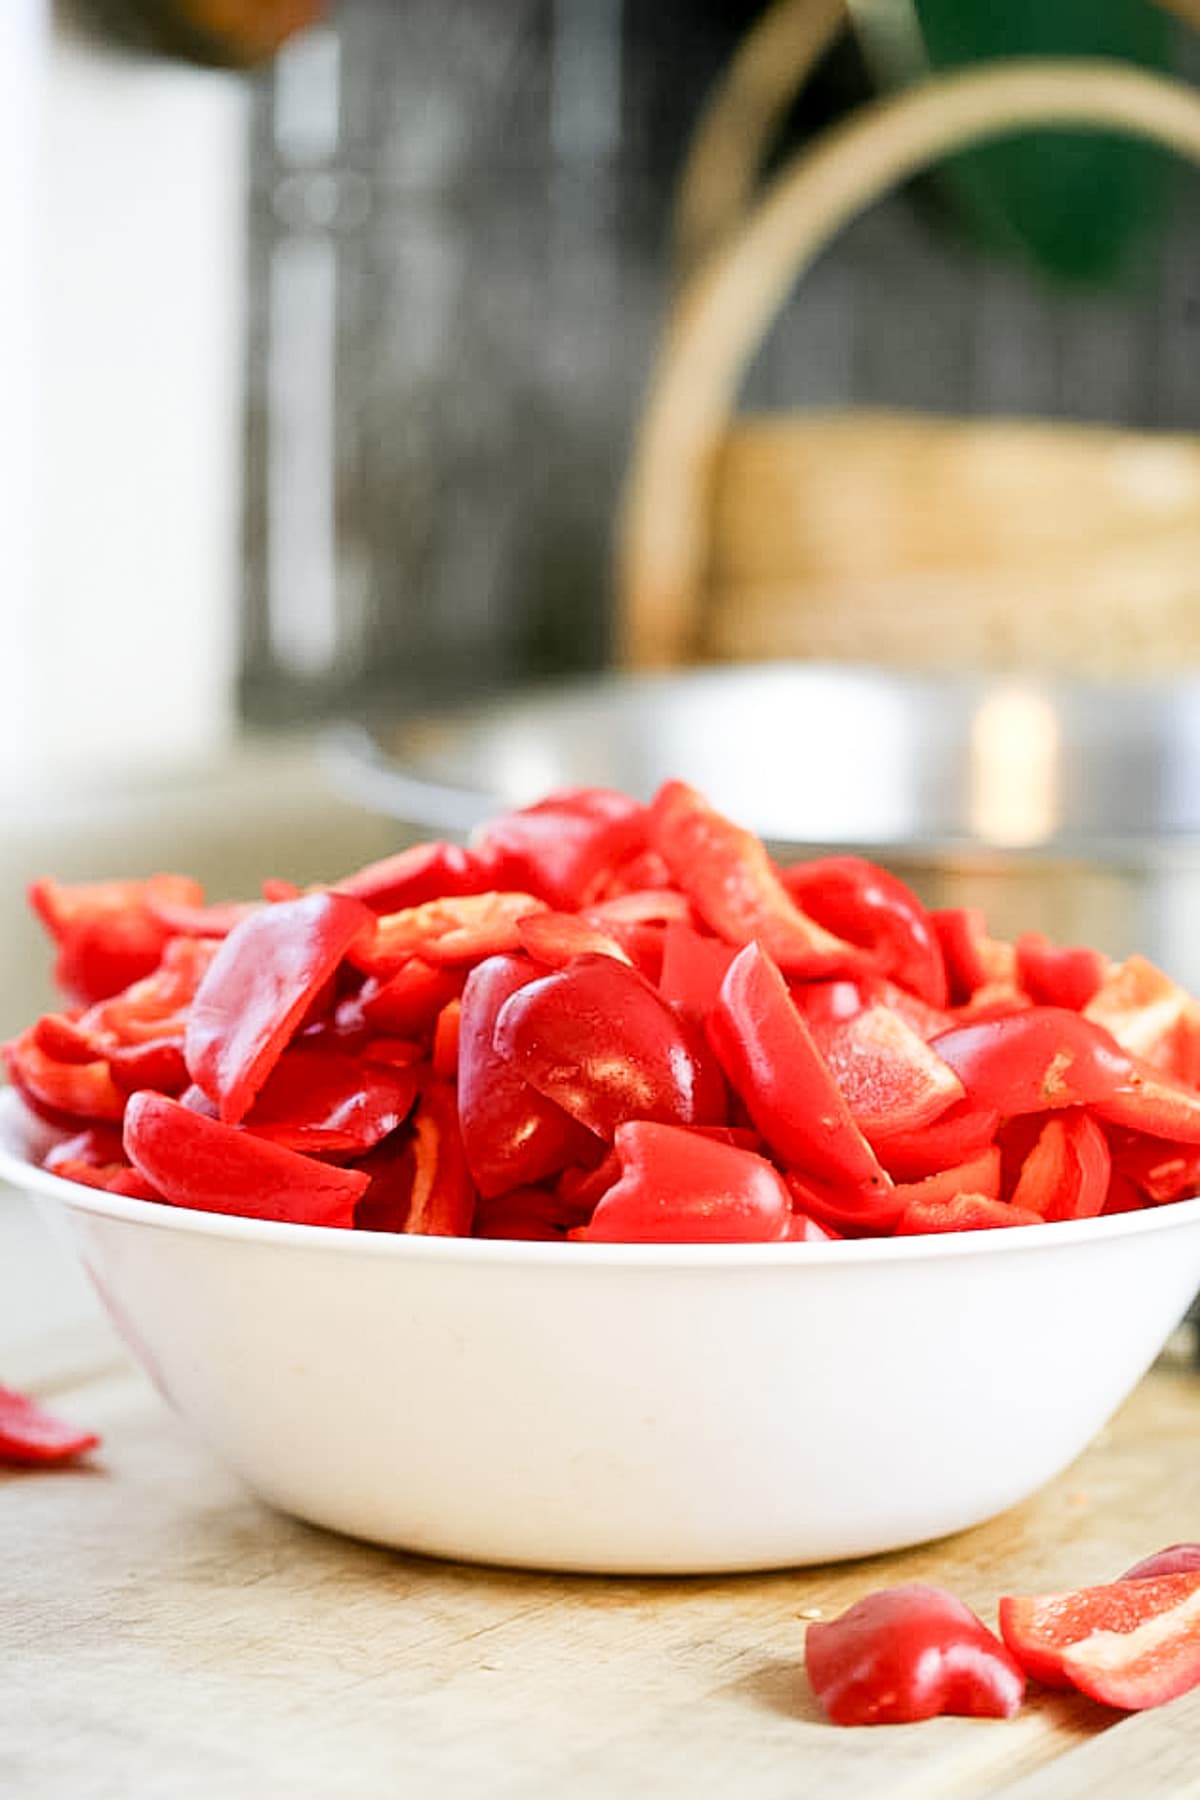
Step One – prep the peppers for roasting. Some people like to roast their peppers in the oven whole and clean them after they peel them. I prefer to first clean them and then char them. Start by cutting around the stem and removing it. Then, halve the pepper and clean it from the seeds before you quarter it. Keep working until all of your peppers are clean.
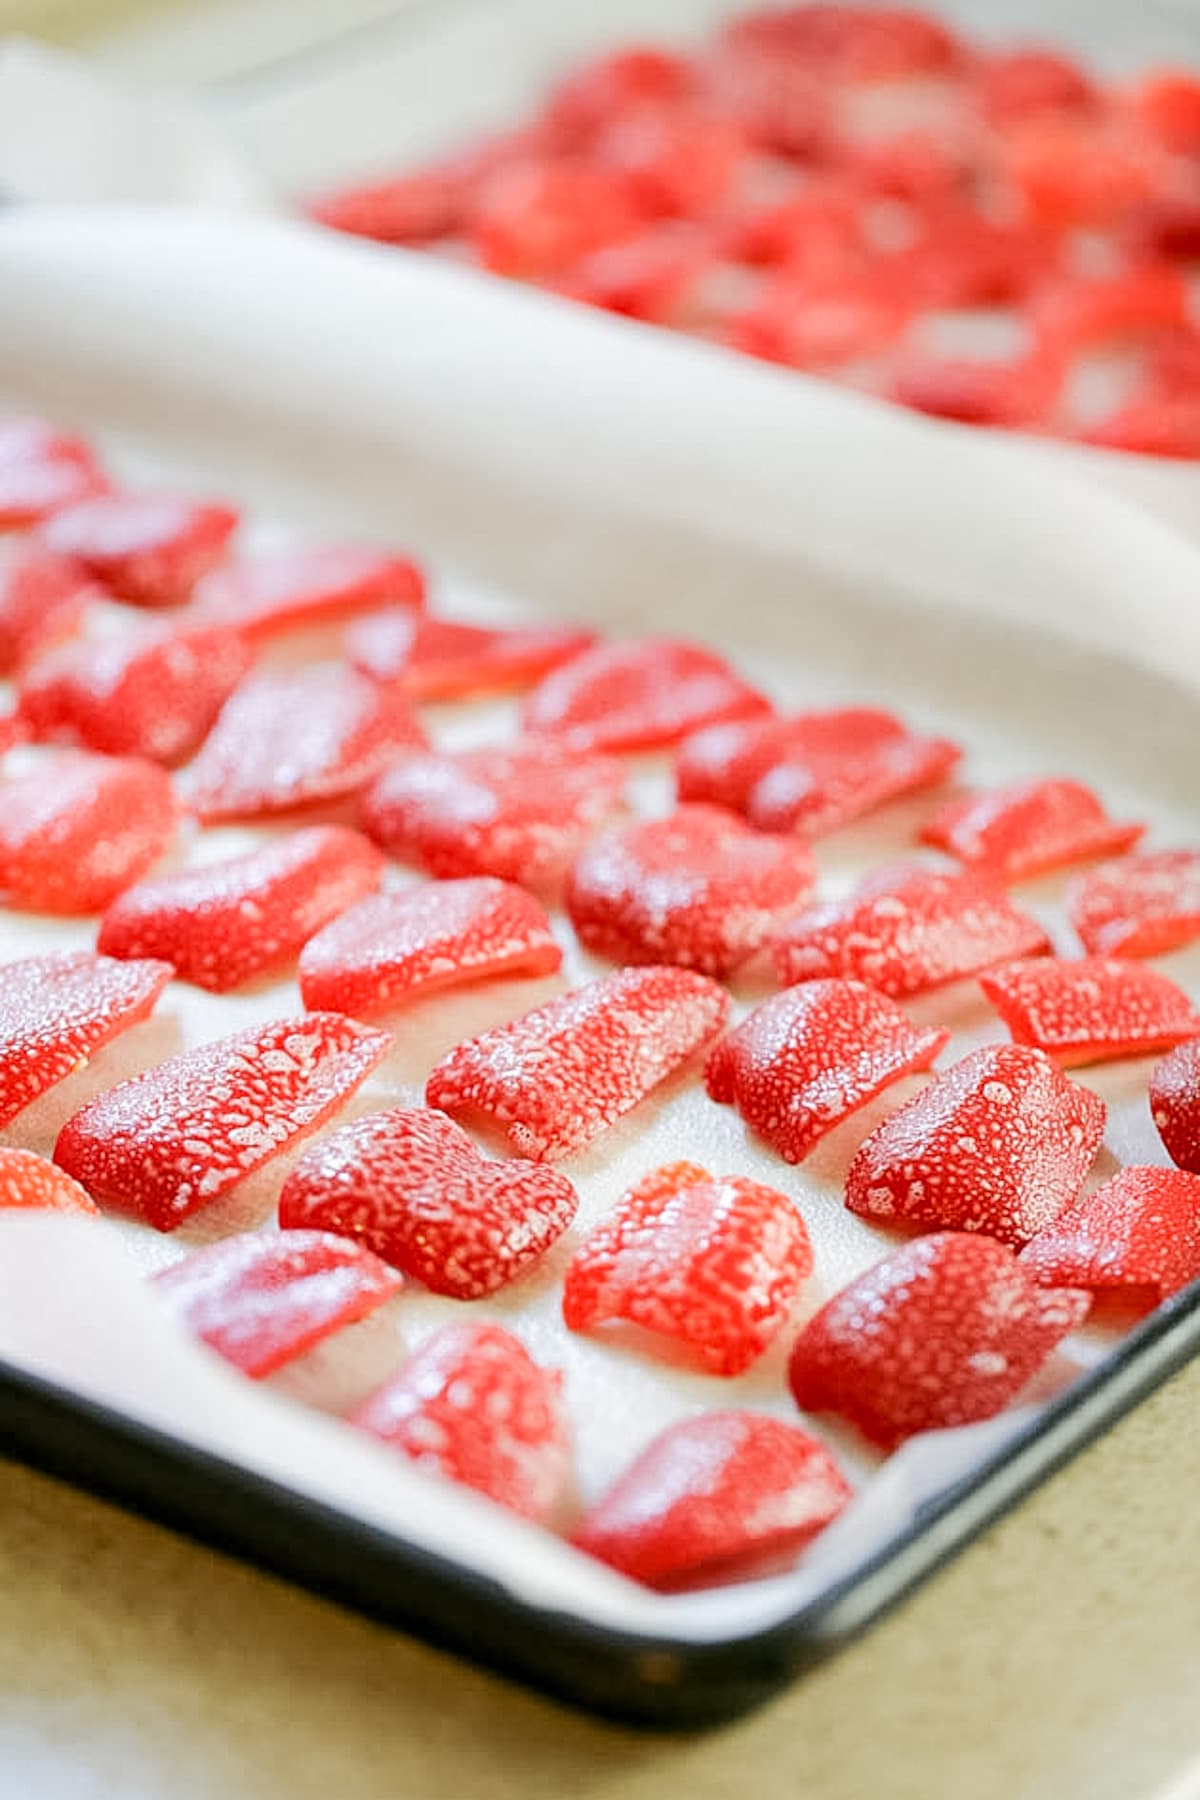
Step two – roast the peppers. line a baking sheet with parchment paper and lay the peppers in one layer with their skins up. Spray the peppers with oil (it doesn’t matter what kind). Roast the peppers in a 400 degrees F preheated oven for anywhere between 10 to 20 minutes (depending on the size of the peppers).
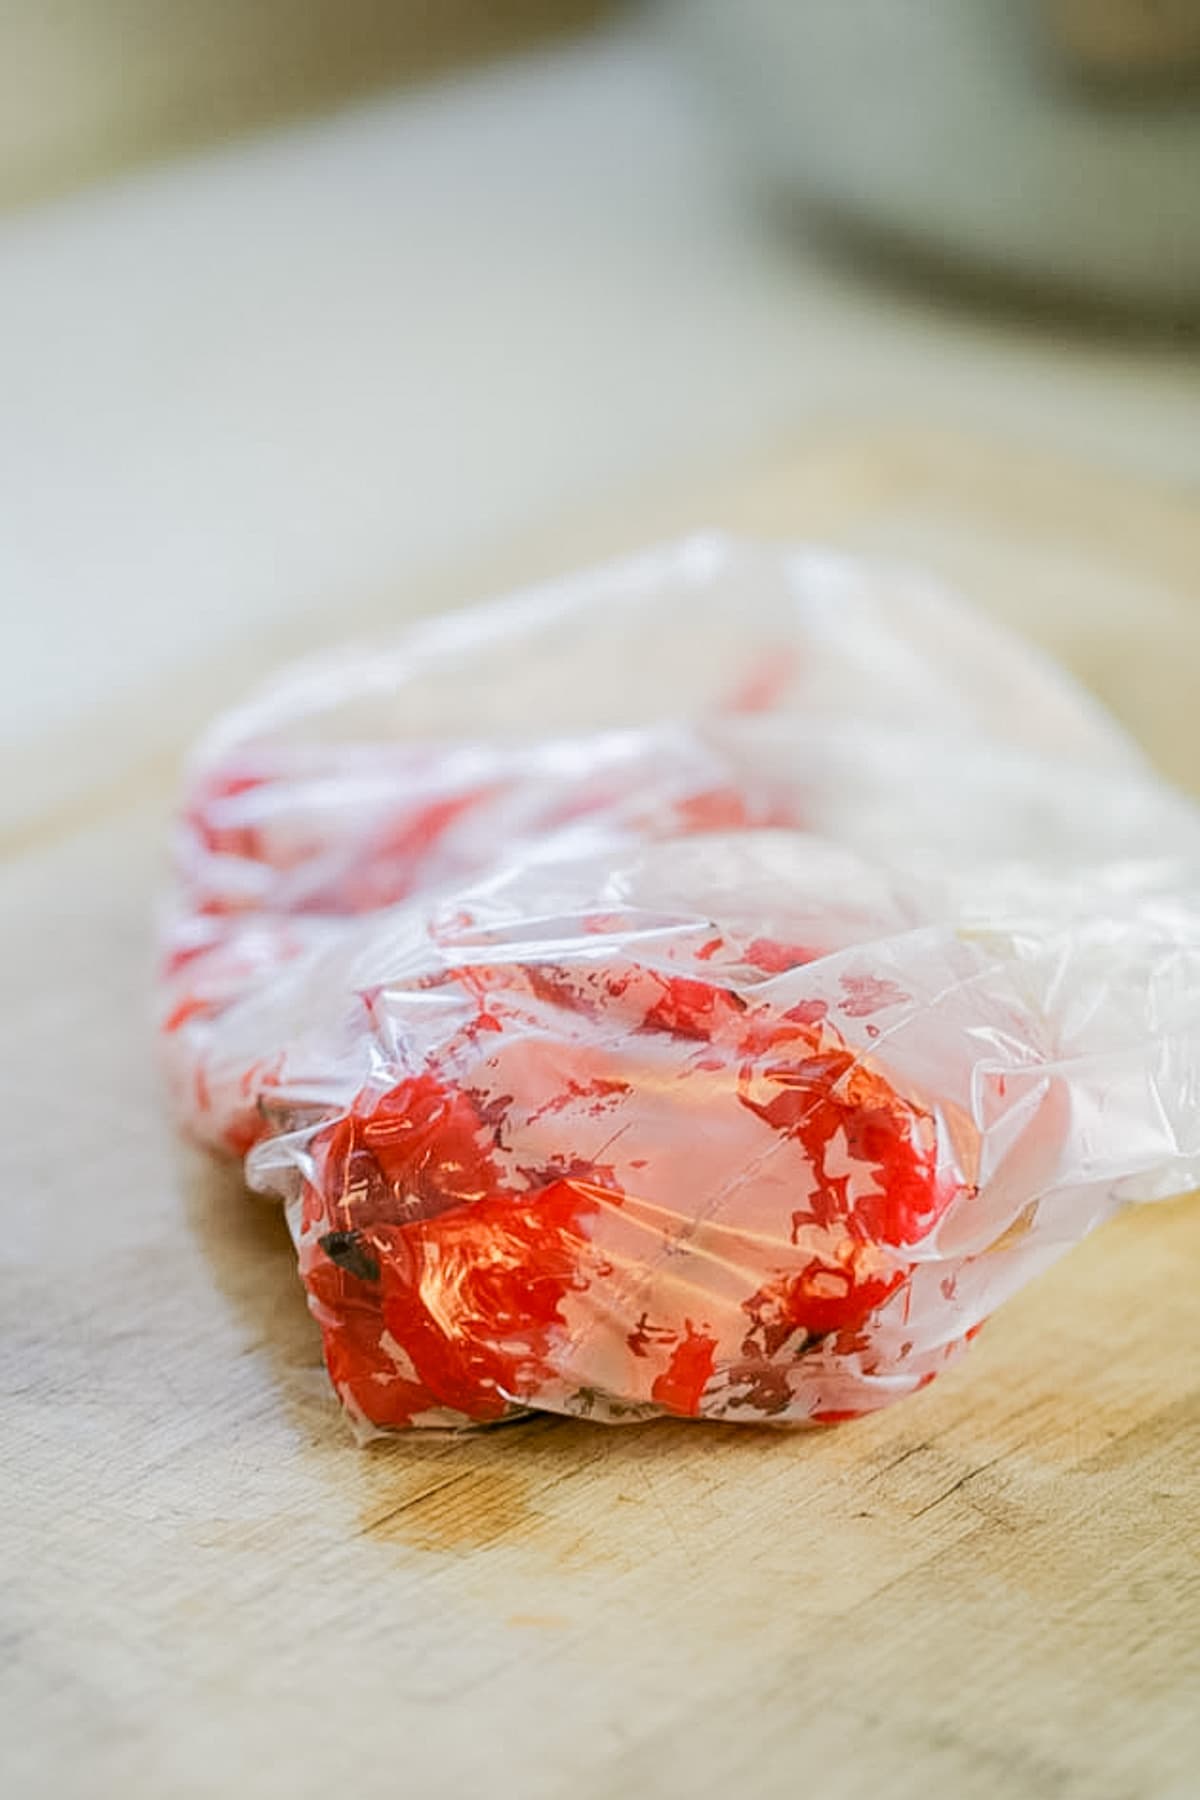
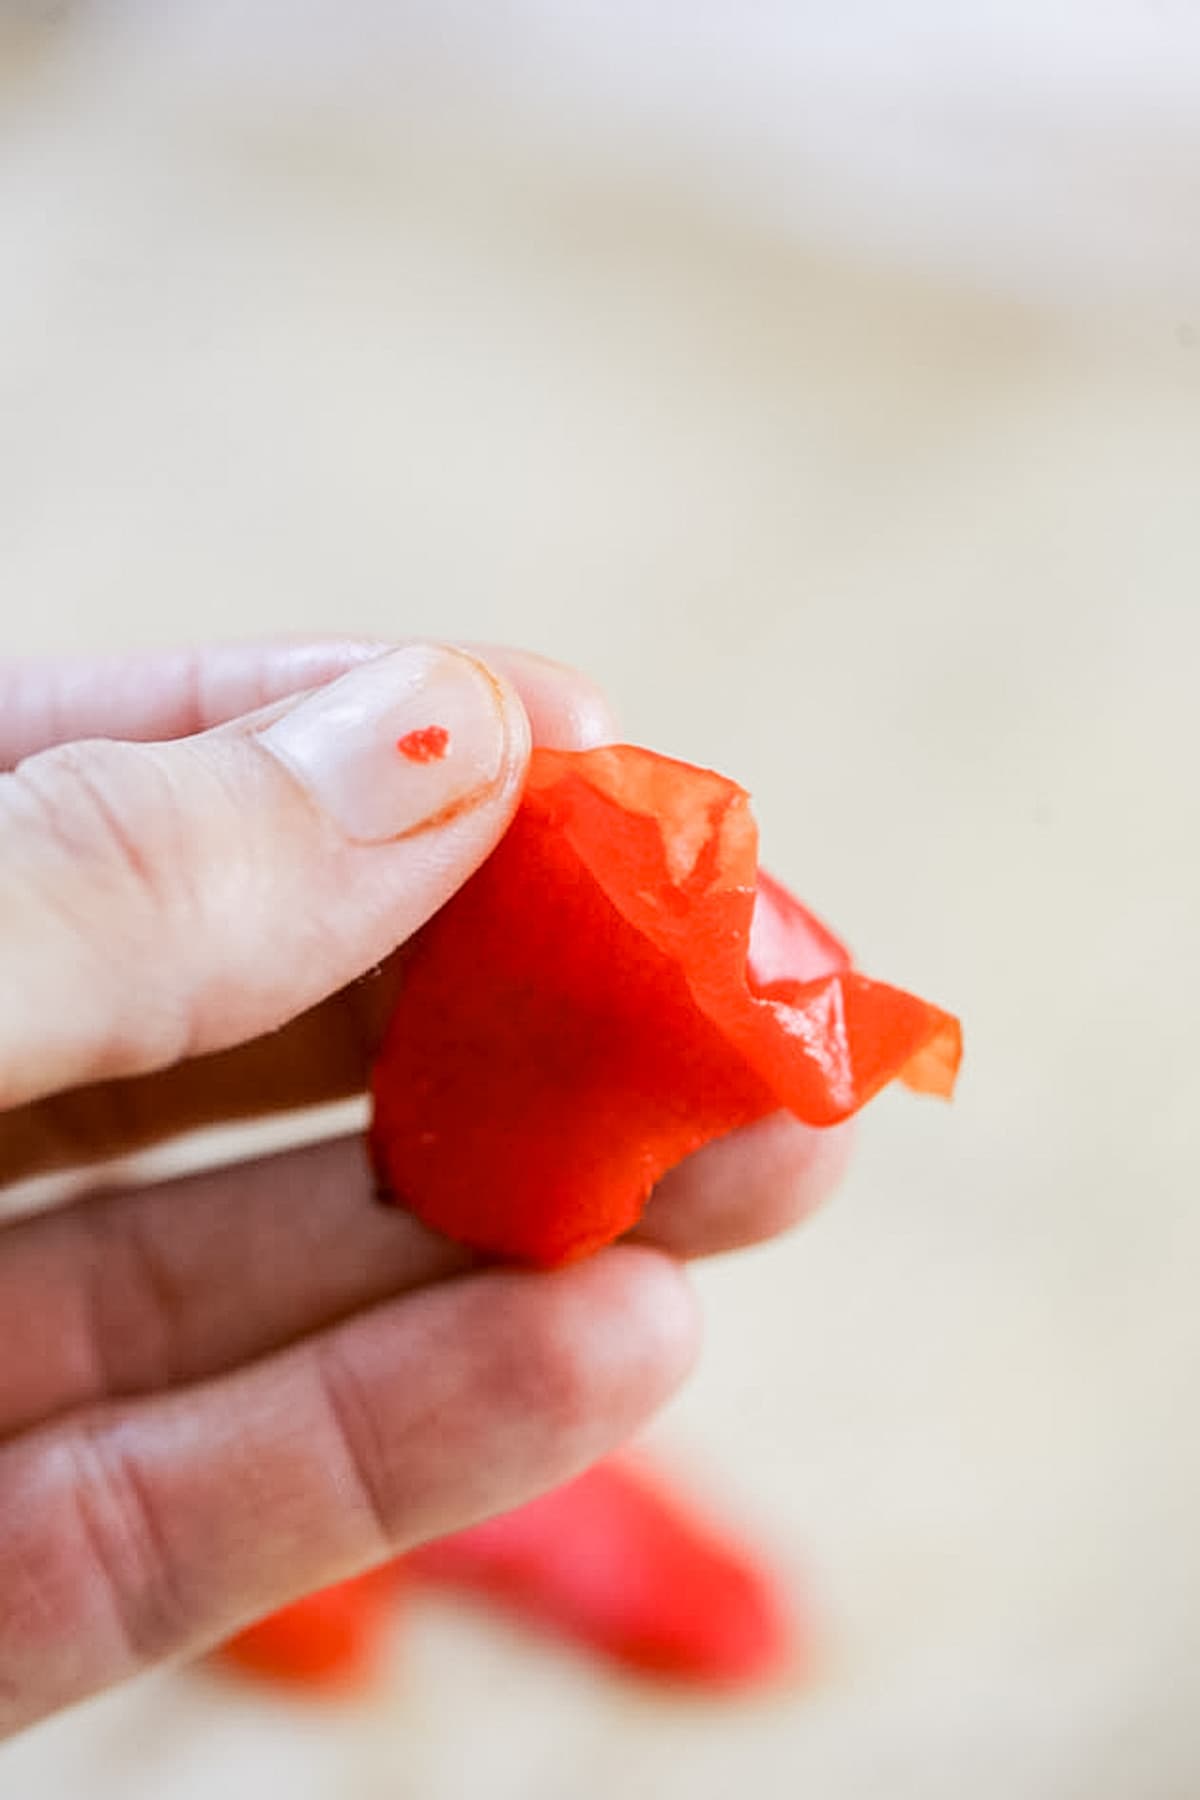
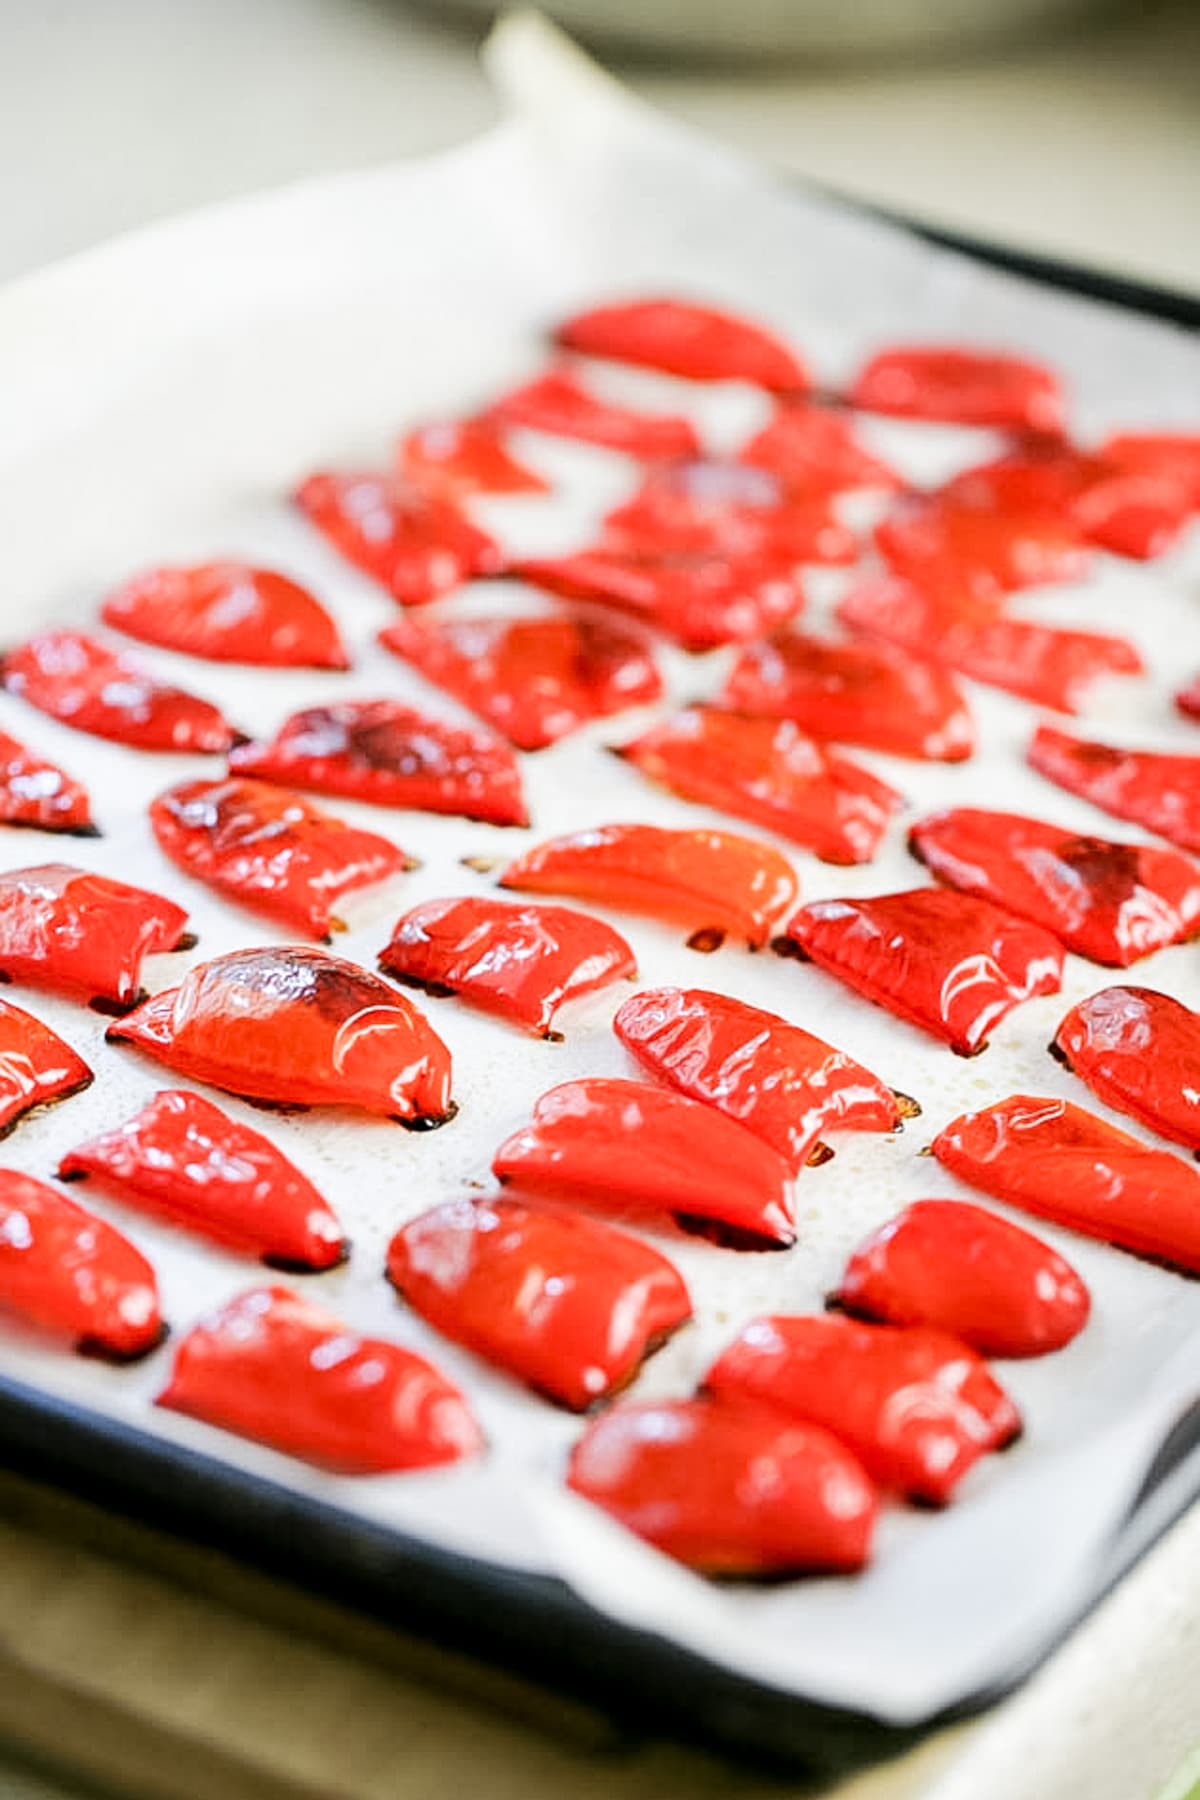
Step three – remove the skin of the peppers. As the peppers roast, you’ll notice that at some point the skin starts to separate from the flesh of the peppers. Once the peppers reach this stage, take the baking sheet out of the oven and use a spatula to scoop the peppers right into a plastic bag. Let the peppers rest for a few minutes in the plastic bag.
After a few minutes open the bag and let the peppers cool for a minute before peeling them. The skin comes off easily at this point. Keep working until all of your peppers are peeled. I ended up giving the skins to the chickens, but if you have a dehydrator, you can dehydrate them and make powder with them that you can then use as seasonings for soups or many other dishes.
How to Can Roasted Red Peppers…
Step four – prep the jars for canning. While you work on preparing the peppers, add about 2” of water to the pressure canner (or follow the manufacturer’s directions), set it on the stovetop, and turn the heat to high. Bring the water to a simmer (180 degrees F). Also, wash your jars, lids, and rings well with warm water and soap and set them aside.
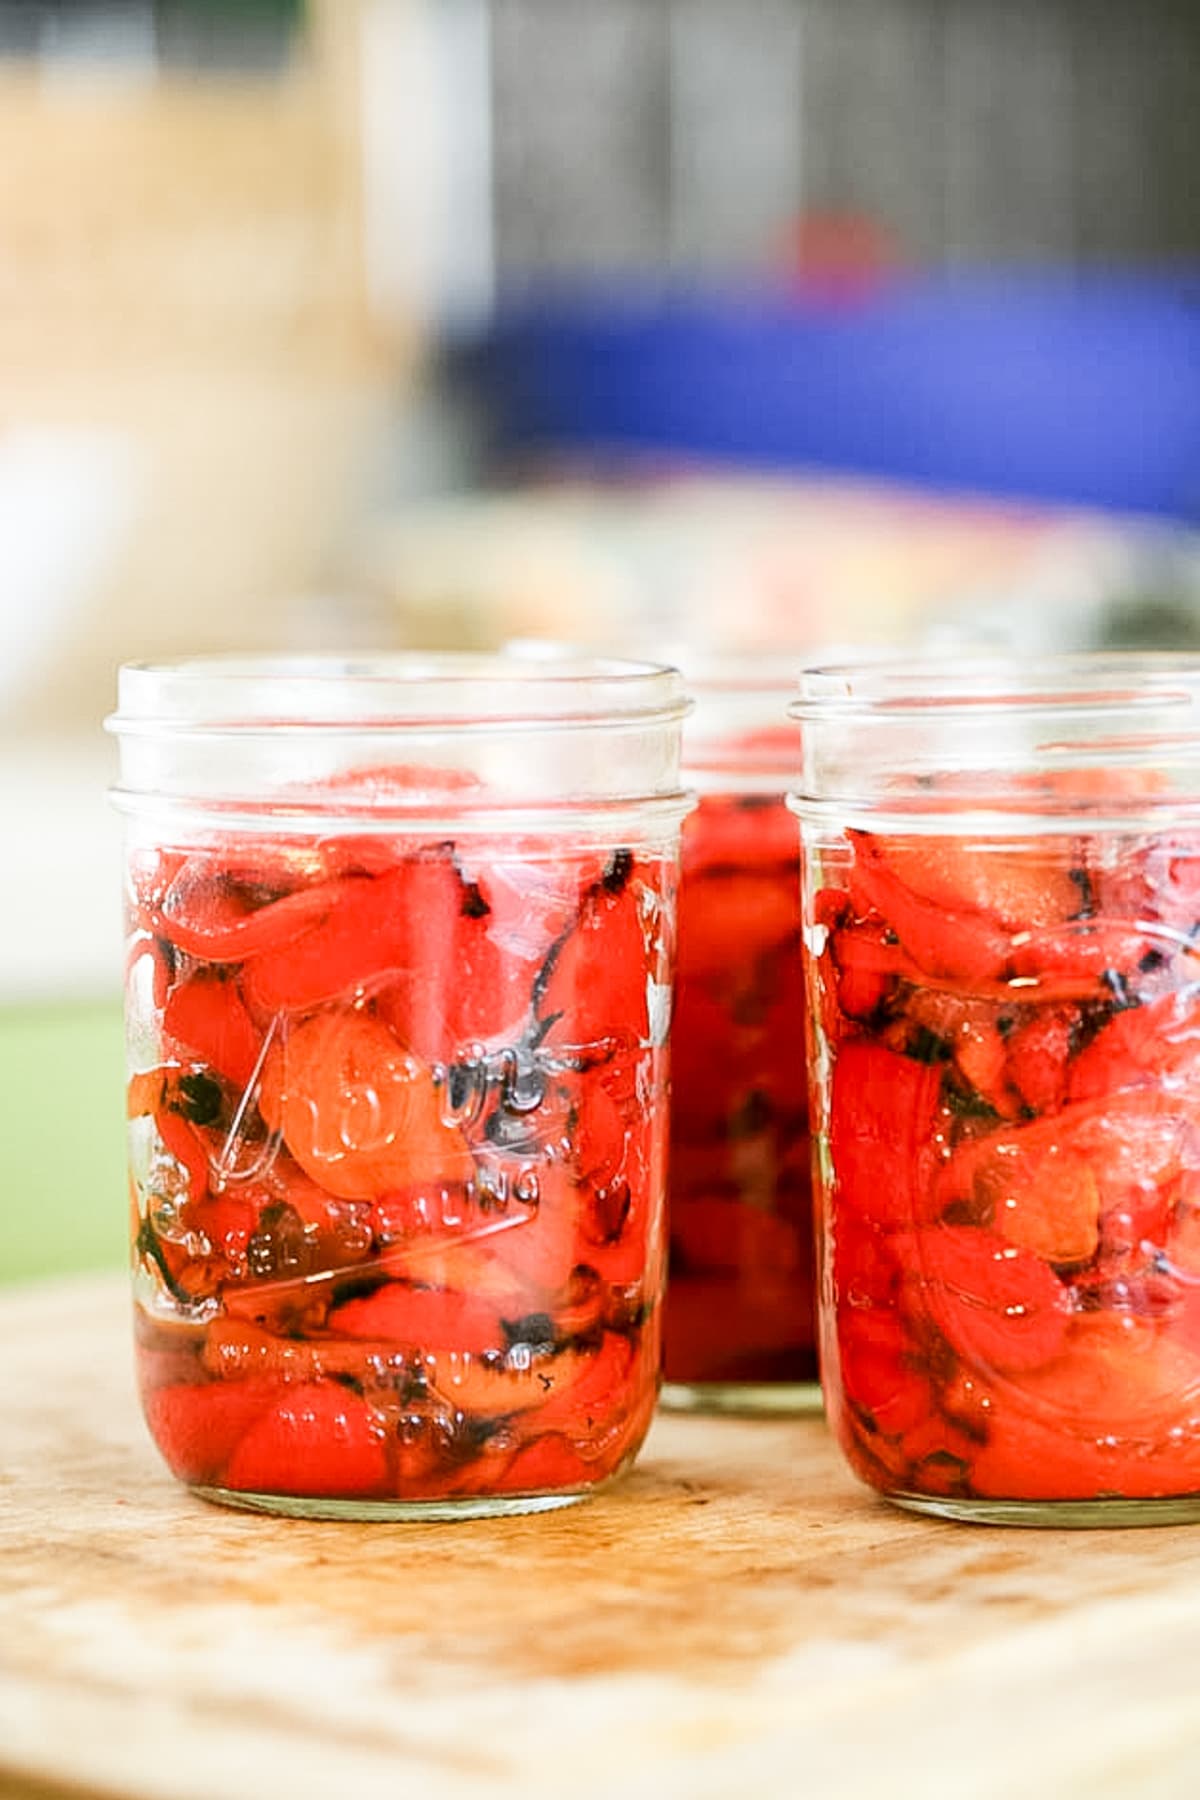
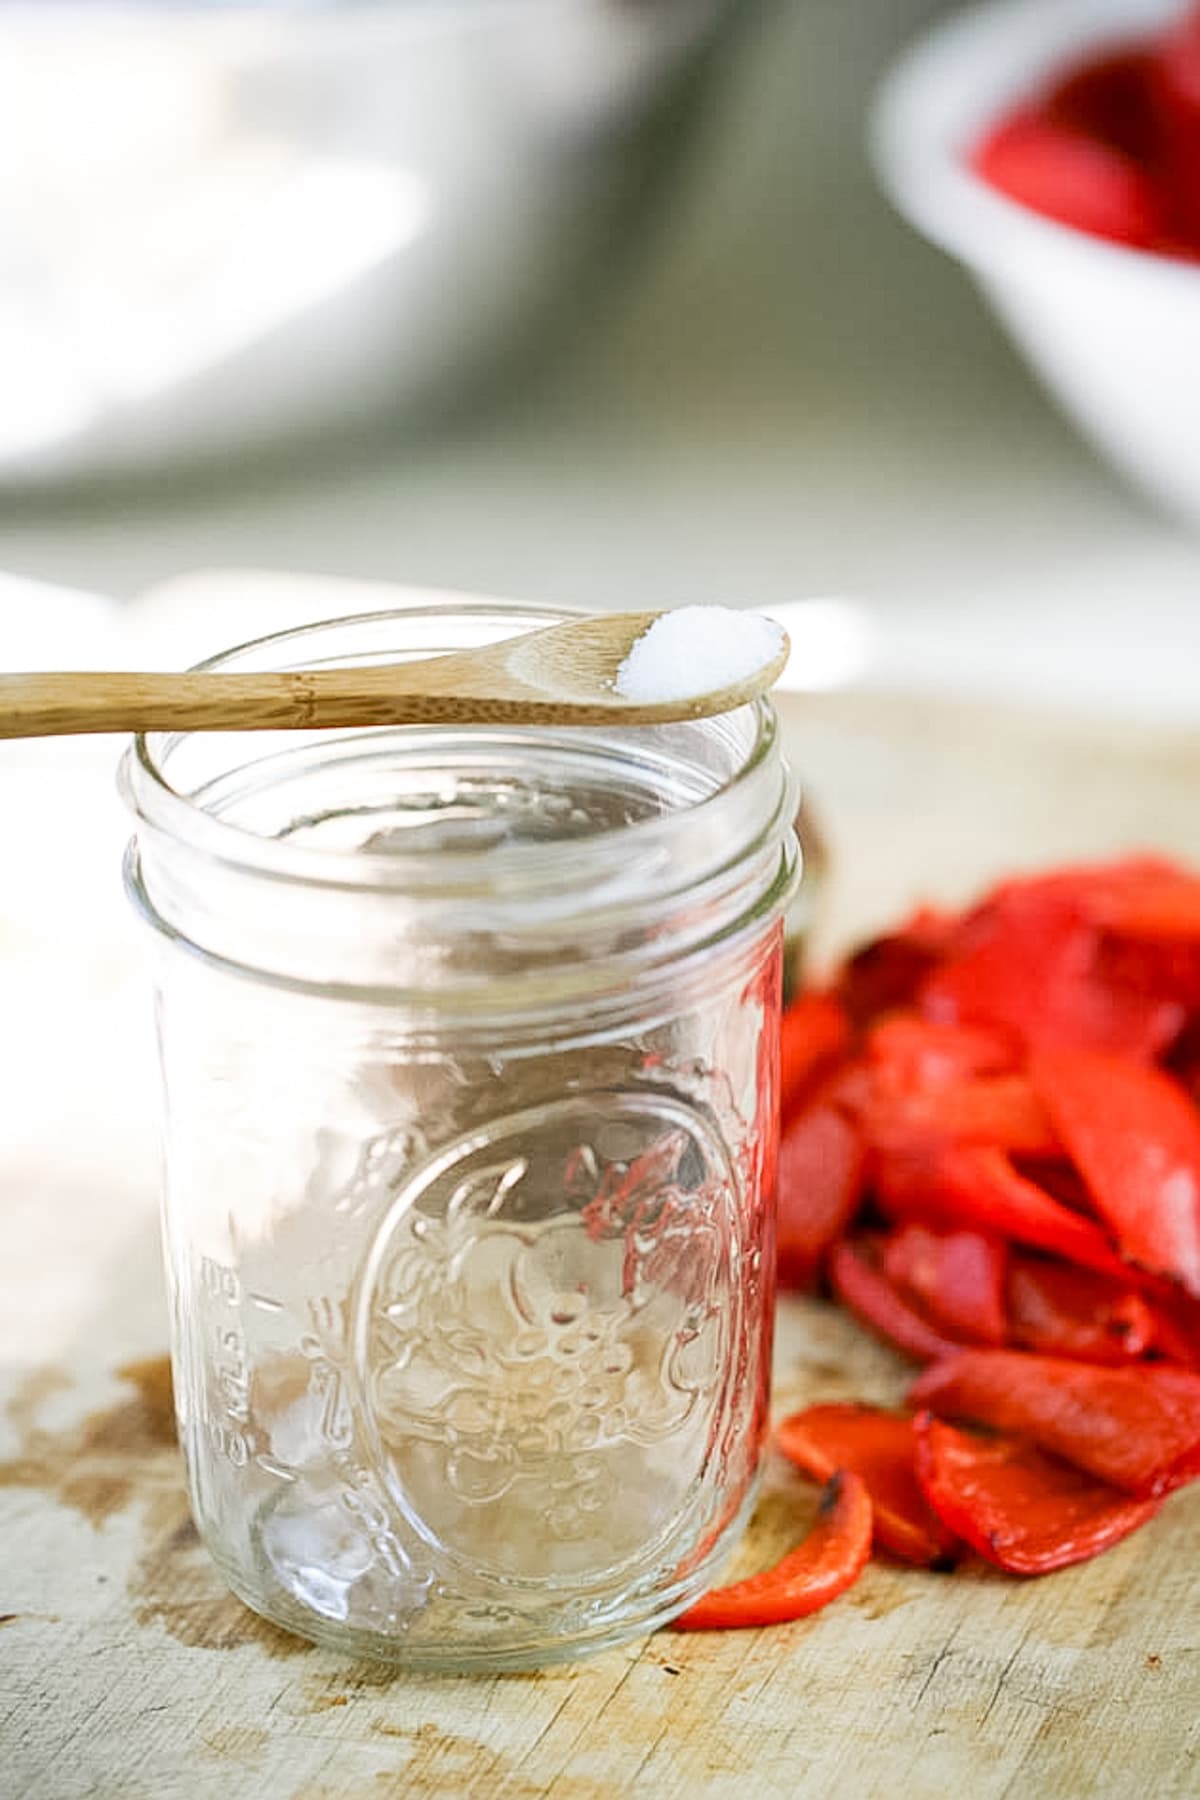
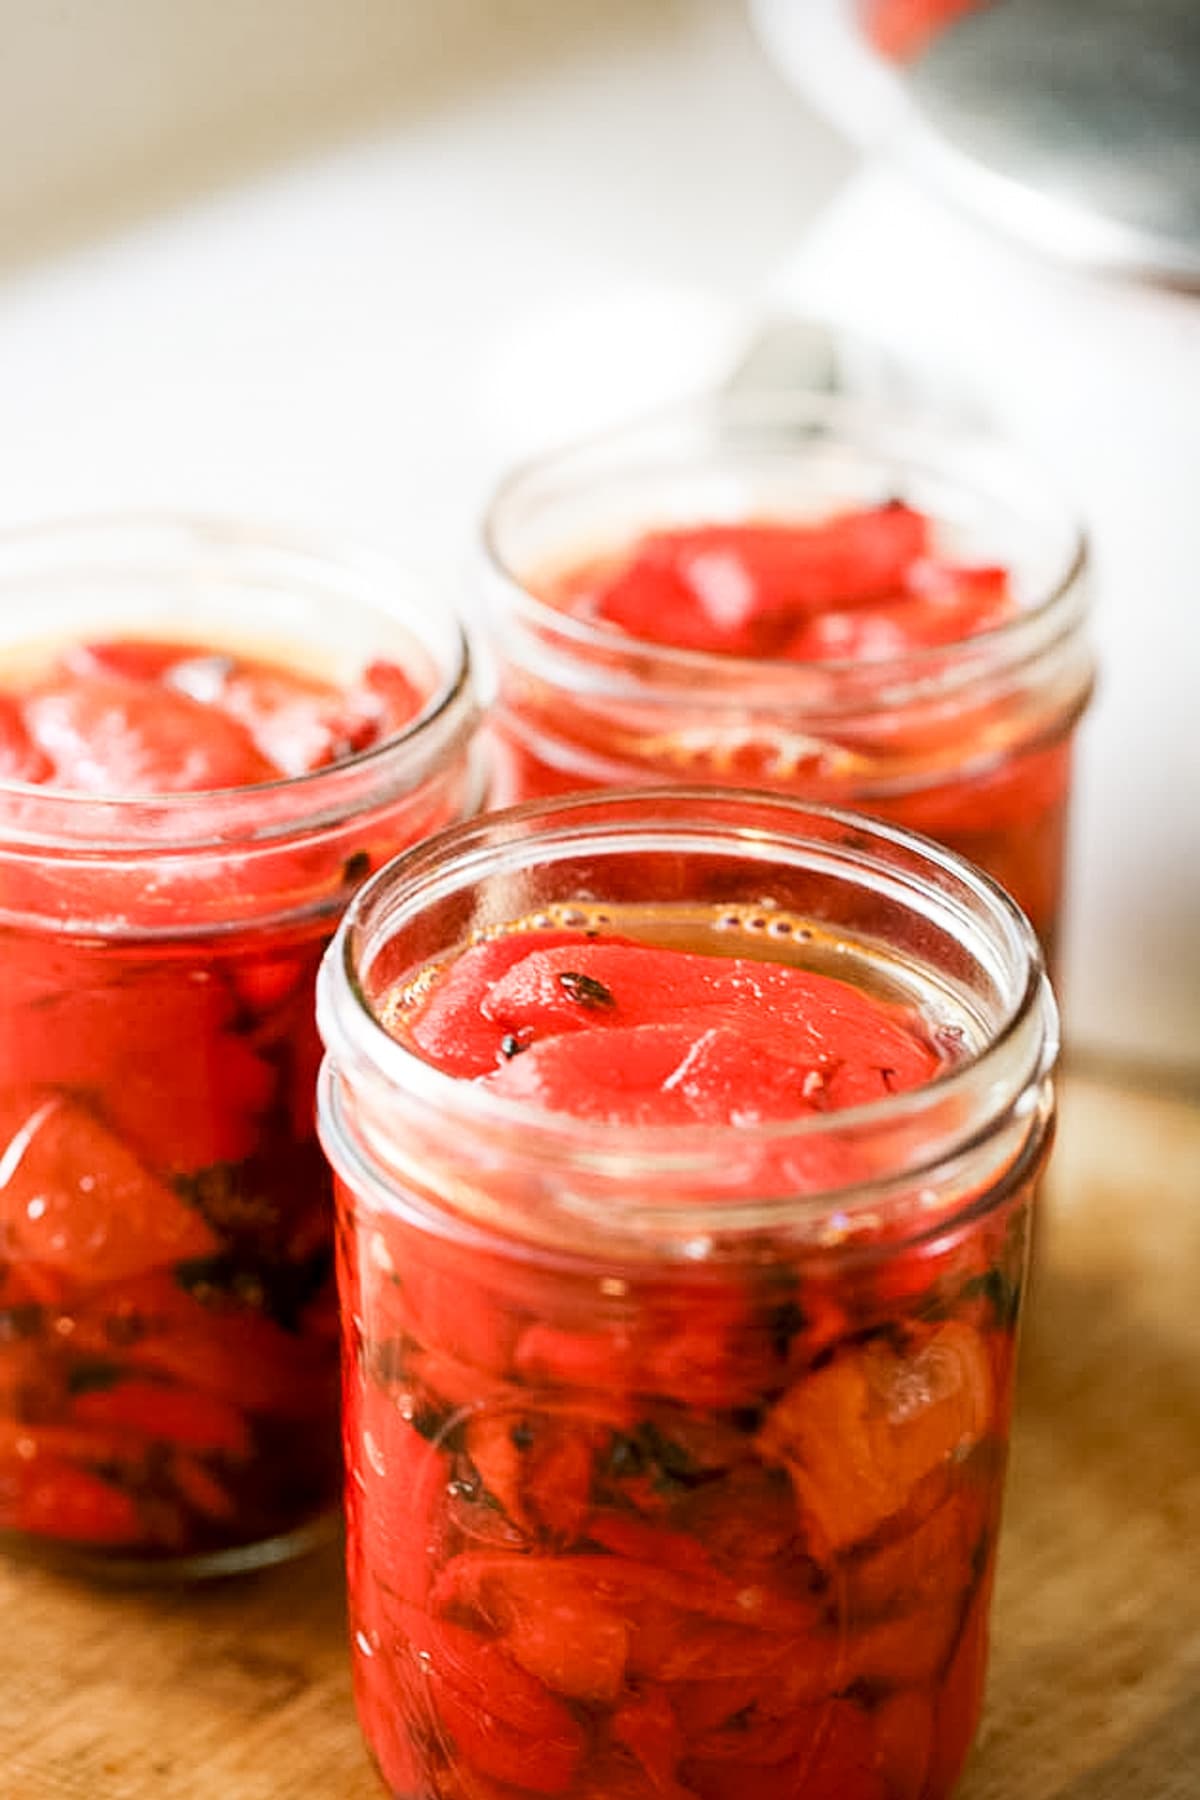
Add 1/2 teaspoon of canning or kosher salt to each pint jar (or 1/4 to each half-pint). If you like the taste of vinegar, you can also add 1 1/2 tablespoons of vinegar to each jar but this is optional. Add the roasted red peppers to the jars. Make sure to leave 1” of headspace. Then add a little bit of boiling water to each jar, still making sure that you leave 1” headspace. The peppers pack in there pretty well so usually there is not a lot of room for the liquid but do make sure that you add some.
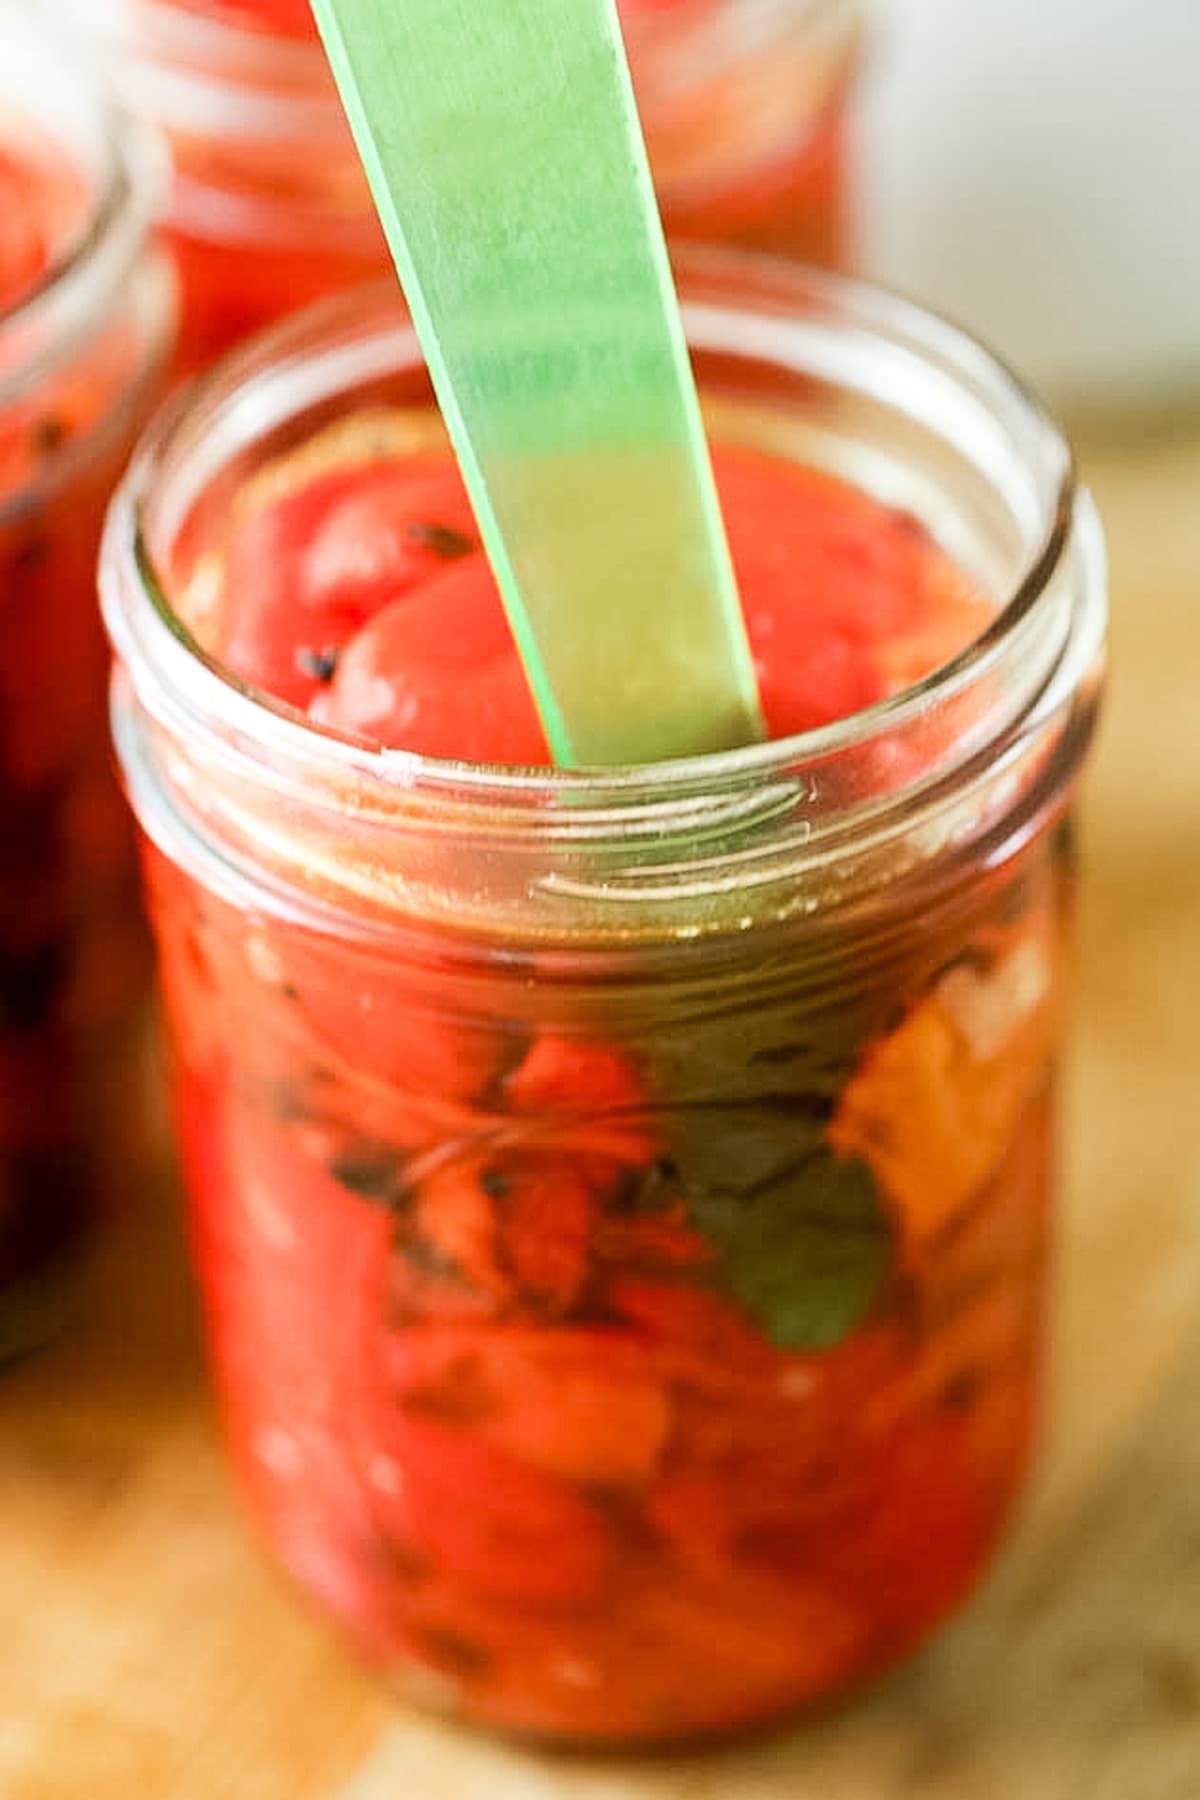
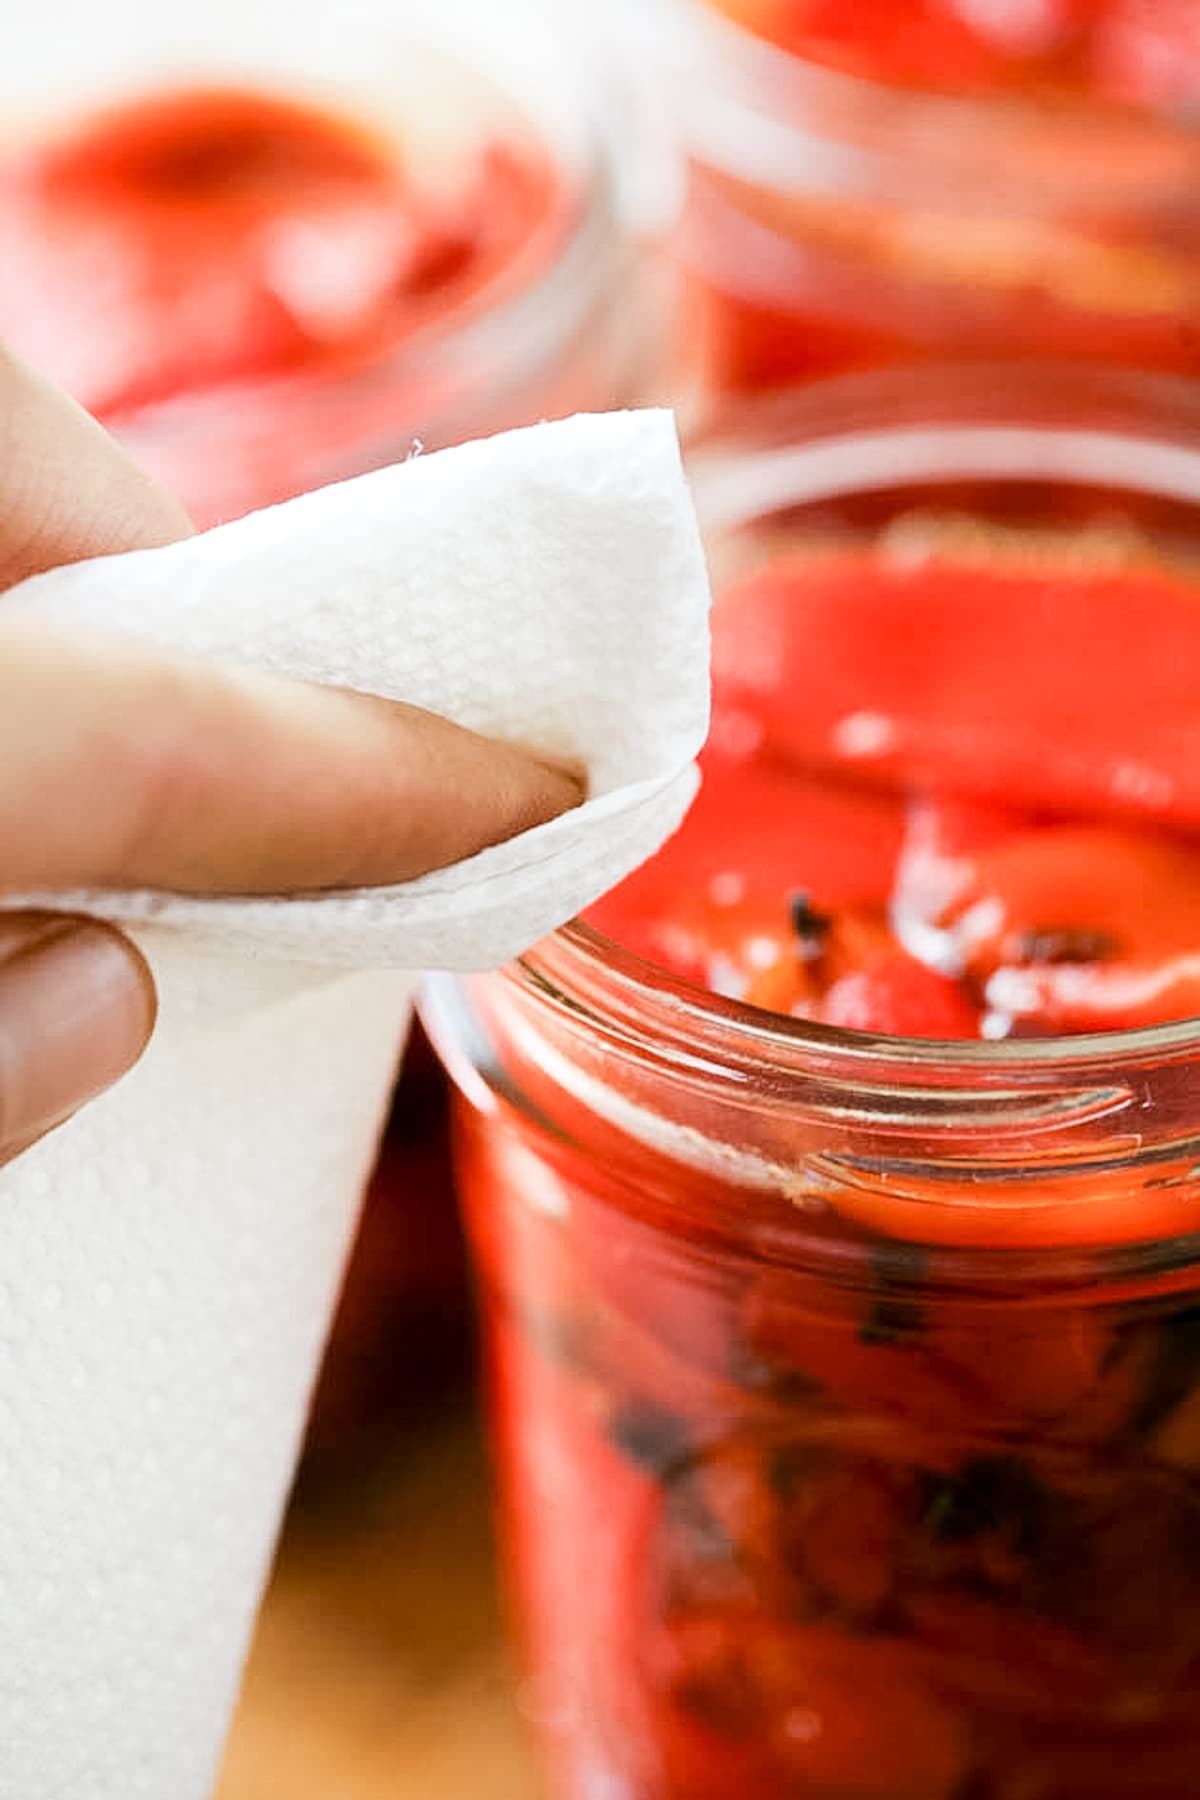
Use the bubble remover to remove air pockets by inserting it between the peppers and the jar. Press the peppers towards the center of the jar and make sure that the liquid fills the spaces between the peppers. Use a damp paper towel to clean the rim of the jars before centering the lids and closing the jars with the rings.
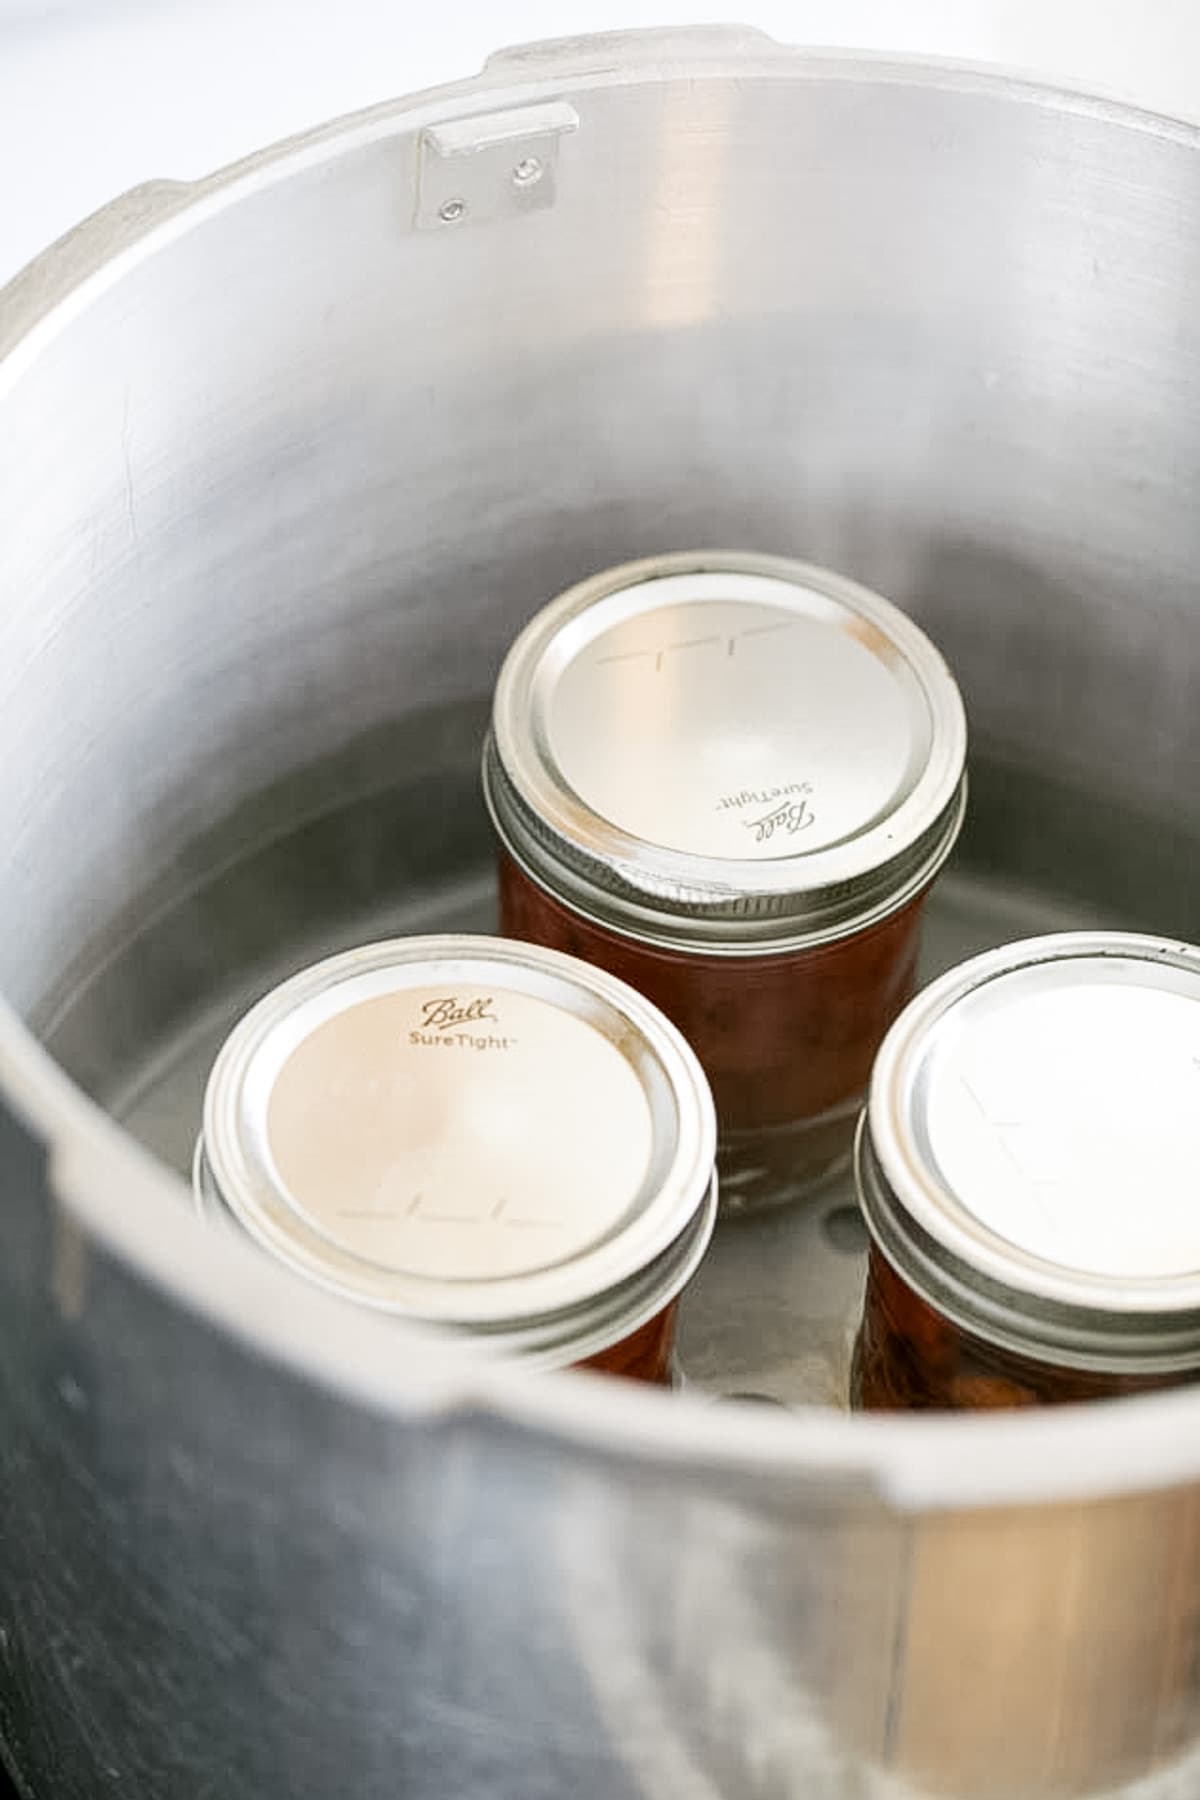
Step five – process the peppers. Set the jars on the rack in the canner. Close the canner and turn your heat to high. The weight should be off of the vent at this point. The water inside the canner will come to a boil and steam will start escaping from the vent. Let the canner vent steam for 10 minutes before placing the weight on the valve. Now watch the gauge. When it reaches 11 psi, turn the heat down to medium-high to keep the pressure on 11 psi. Process pint and half-pint jars for 35 minutes.
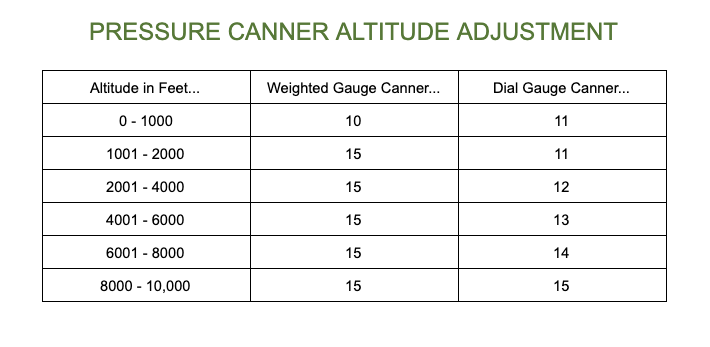
If you are using a weighted canner you need to process your jars under 10 pounds of pressure for the same amount of time. Remember to adjust processing time according to the table below if you live at an altitude higher than 1000 feet in elevation.
When time is up, turn the heat off and let the canner cool to room temperature undisturbed. This will take a couple of hours. Once the canner has cooled completely, open it but don’t remove the jars right away. Let the jars hang in the warm water for an additional 10 minutes or so before removing them. Set the jars on a towel on the kitchen counter and leave them undisturbed for at least 12 hours to cool.

Storing Canned Peppers…
Check to make sure that your jars are sealed by pressing the center of each lid. If there is no movement there it means that the jars have sealed and are ready for storage. Remove the rings (cause they rust and stick), wipe your jars, and store them in the pantry for up to 18 months.
Using Canned Roasted Peppers…
- My favorite way to use my canned roasted red peppers is in pasta sauce. This roasted red pepper pasta sauce from the Pioneer Woman has become one of my favorite pasta sauces!
- Roasted red peppers are amazing in a grilled cheese sandwich.
- They go well with fish, and also with chicken.
- Try this amazing roasted pepper salad.
- Have you ever made roasted red pepper hummus? It’s delicious and you have to try it.
- And of course, you also must try roasted red pepper soup!
Kitchen Notes…
- Always use a pressure canner when canning peppers. Peppers are a low-acid food and unless you pickle them in vinegar, you must use a pressure canner to can them.
- After processing the jars in the pressure canner, if the peppers in the jars are sticking out of the liquid it’s fine as long as the jar is properly sealed.
- Feel free to mix different types of peppers. You can roast poblanos, hot peppers, bell peppers… mix them all and can them this way together. It makes for colorful and interesting jars!
- You do not have to remove the skin of the peppers. If you don’t mind the texture of the skins, feel free to skip the peeling part and go ahead and can the peppers with the skins on.
I hope you enjoyed this tutorial on how to can peppers! Remember that you can do this with many kinds of peppers not only bell peppers. They are an amazing ingredient to have on the shelf.
More Pepper Recipes…
- Canning Hot Peppers
- Preserving Peppers in Vinegar and Salt
- Cowboy Candy
- Fermenting Jalapenos
- How to Roast Poblano Peppers
- Canning Poblano Peppers
More Vegetable Canning Tutorials…
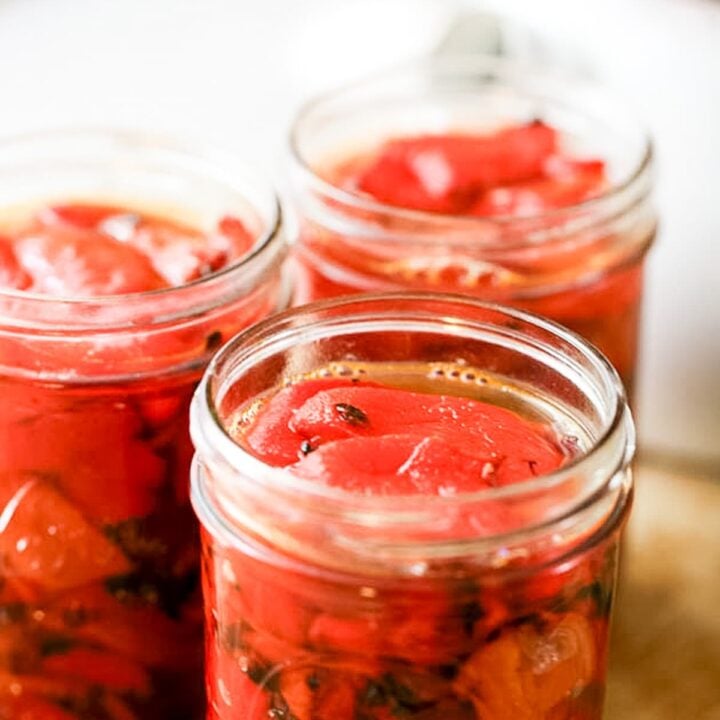
Canning Roasted Red Peppers
Canning roasted red peppers at home is simple. You can use this recipe to can any kind of peppers (they don't have to be red!).
Ingredients
- 5 lb of peppers, cleaned of stems and seeds, and halved or quartered
- Oil (doesn't matter what kind. It's easier if it's in a spray bottle)
- Canning or Kosher salt
- Vinegar (optional)
- Boiling water
Instructions
- Preheat oven to 400 F.
- Line a baking sheet with parchment paper. Lay the peppers, skin up, on the baking sheet in one layer, spray the peppers with the oil and roast in the oven for 10 to 20 minutes until the skin starts to wrinkle and separate from the peppers.
- Remove the baking sheet from the oven and use a spatula to add the hot peppers to a Ziplock or produce plastic bag. Close the bag and let the peppers rest for 10 minutes or so.
- While the peppers are resting in the bag, fill your pressure canner with 2'' of water and set it on the stovetop. Turn the heat to high and bring the water to a simmer (180 degrees F). Wash your jars, lids, and rings and set them aside.
- Open the bag and let the peppers cool for a minute then peel your peppers. The skin should separate easily at this point.
- Add 1/2 teaspoon of salt to each pint jar or 1/4 teaspoon to each half-pint jar. If you like the taste of vinegar, you can add up to 1 1/2 teaspoons of vinegar to each jar.
- Pack the jars with peppers, making sure to leave 1'' headspace then add boiling water to each jar still making sure to leave 1'' headspace.
- Use the bubble remover to remove air bubbles. Then, use a clean paper towel to wipe the rim of each jar before centering the lid and closing the jar with the ring.
- Set your filled jars in the pressure canner on the rack. Close the canner and turn the heat to high. Let the canner vent for 10 minutes before placing the weight on the vent.
If you are using a dial gauge canner, process the jars under 11 psi for 35 minutes. If you are using a weighted gauge canner, process under 10 psi for the same amount of time. Make sure to adjust processing time according to the table below if you live in altitudes above 1000 feet. - Once the time is up, turn the heat off and let your canner cool slowly. When the canner has cooled completely, open the lid and let the jars rest in the hot water for 10 more minutes.
Use the jar lifter to remove the jars and set them on a kitchen towel on the kitchen counter to cool for 12 hours undisturbed. - Wipe jars, remove rings (cause they rust and stick), label and store in the pantry for up to 18 months.
Notes
Adjust processing time according to the table below if you live over 1000...
Kitchen Notes...
- Always use a pressure canner when canning peppers. Peppers are a low-acid food and unless you pickle them in vinegar, you must use a pressure canner to can them.
- After processing the jars in the pressure canner, if the peppers in the jars are sticking out of the liquid it’s fine as long as the jar is properly sealed.
- Feel free to mix different types of peppers. You can roast poblanos, hot peppers, bell peppers… mix them all and can them this way together. It makes for colorful and interesting jars!
- You do not have to remove the skin of the peppers. If you don’t mind the texture of the skins, feel free to skip the peeling part and go ahead and can the peppers with the skins on.
Recommended Products
As an Amazon Associate and member of other affiliate programs, I earn from qualifying purchases (there is no change in product cost or charge to you! Thank you for helping me support the blog).
-
 TUO Cutlery Vegetable Meat Cleaver Knife - Chinese Chef's Knife - HC German Stainless Steel with Pakkawood Handle with Case - 7" - Fiery Series
 -
Norpro Canning Essentials Boxed Set, 6 Piece Set
-
Ball Regular Mouth Pint 16-oz Mason Jar with Lids and Bands (Pack of 24)
-
Presto 01781 23-Quart Pressure Canner and Cooker


Nutrition Information:
Yield: 4 Serving Size: 1 pint jarAmount Per Serving: Calories: 206Total Fat: 1gSaturated Fat: 0gTrans Fat: 0gUnsaturated Fat: 1gCholesterol: 0mgSodium: 1075mgCarbohydrates: 49gFiber: 9gSugar: 24gProtein: 7g


I have a couple of questions for you. Can I use my frozen peppers? and my pressure canner calls for 3 quarts of water. I want to use the 4 oz. jars they will be covered in the water is this ok?
I think that you can use your frozen peppers but I’m not sure what the texture will be after canning… You’ll just have to try and see if you like it.
About the canner… I’m not sure. I don’t think that the jars are supposed to be completely under the water when you pressure can but you should follow the manufacturer instructions.
Hi there, I’m just wondering if you can roast these peppers and freeze them in ziploc or vacuum bags
Absolutely! They freeze very well. Just remember to divide them into portions before freezing.
Is there a processing time for quart jars? I have a lot of peppers and not many pint jars
40 minutes should be fine, I think.
How long do you boil if you do not have a pressure canner?
It’s better if you freeze them then. They are low in acid so it’s not recommended to water bath them. What you can do is preserve them in vinegar and then water bath them since the vinegar will add acidity.
Wondering if I can do half pints, I’m sure I can, but mostly wondering if that would change the canning time. Got a pressure canner today and anxious to expand my canning experience, I just usually only need smaller amounts of roasted peppers thank you
You can definitely do half a pint. No change in processing time.
Can any spices such as dried oregano be added?
Definitely. Play with the spices however you want until you find something that you like.
I have a stove top canning pot also, can I just add a little lemon juice? I know it might change the flavour a bit but it adds acidity
Yo pressure can peppers because they are low in acidity. Since you pressure can them there is no need to add acidity.
This looks great and I can’t wait to try it. But I’m pretty new to canning and I was under the impression lemon juice had to be added to the jars for safety reasons. I see you don’t use it here. Did I miss is or is it not required?
We pressure can the peppers. You add acidity when you can using the water bath. For foods that aren’t acidic enough we use the pressure canner for canning which means that you don’t have to add acidity.
My skin didn’t come off the peppers, I put hem under my he broiler in the he oven, is it all k to leave some of them on
Yes, you can leave them on, that’s fine if you don’t mind the texture.
Do I have to use a pressure canner? I am new to canning and I bought a regular canning stainless steel pot for the stove. We have a garden and I don’t want to waste my veggies.
Thanks in advance.
Martha
Yes, for peppers you have to use a pressure canner because they are a low-acid vegie and it’s not safe to can them in just a water bath canner.