This post may contain affiliate links, view our disclosure policy for details.

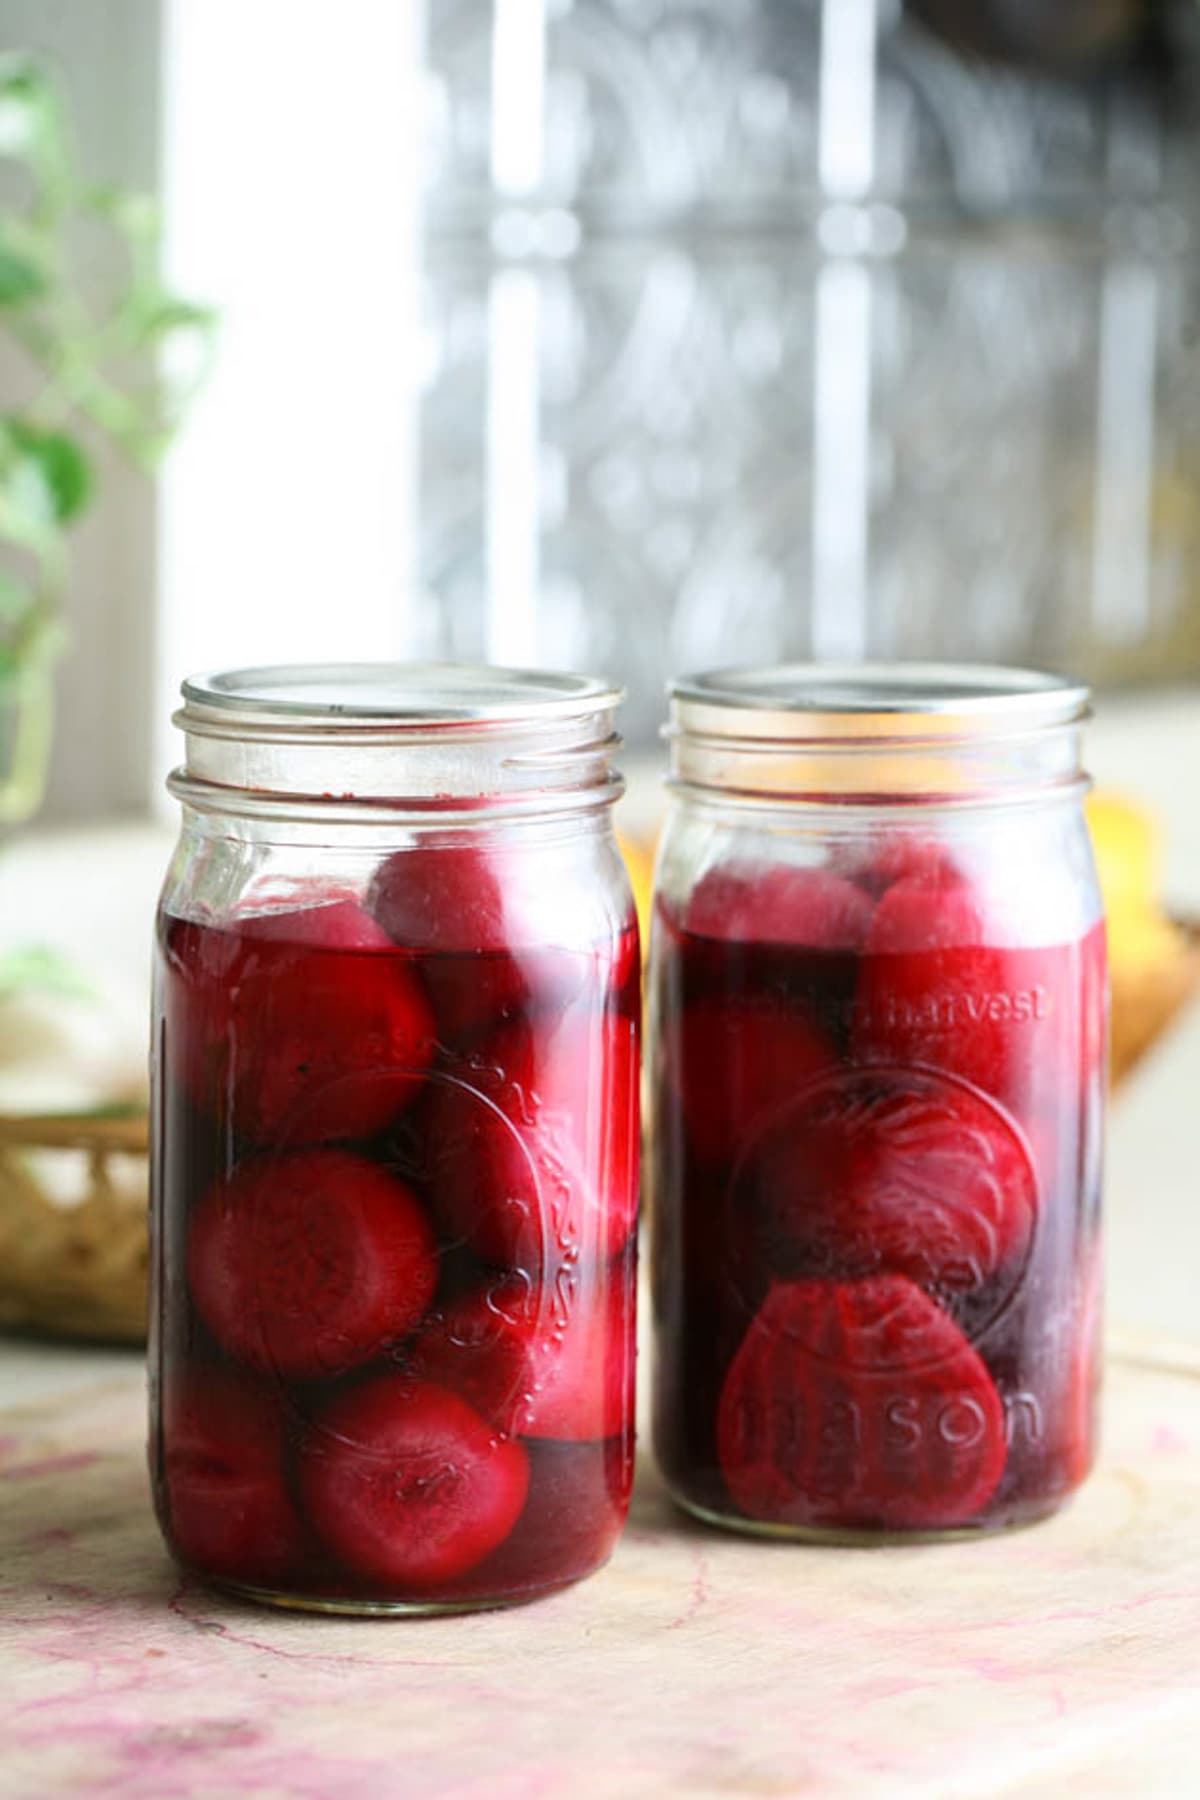
Canning beets is fairly simple! In this step-by-step tutorial, learn how to can beets at home so you can use them year-round and for long-term storage.
Lady Lee’s Note…
For years I was so frustrated because I couldn’t figure out how to grow beets in my garden. I come from Israel and I don’t think growing up that there was ever a dinner table at my mother’s that didn’t have an Israeli beet salad on it.
Not only beets are delicious, filling, and healthy but for a homesteader they are also an amazing storage crop that can last for a long time. So I kept trying and after a few years, I am happy to say that now I feel like I have finally figured out how to grow beets in both my spring and fall garden! Now, the next step is to learn how to store and preserve beets.
Beets are pretty easy to store in a root cellar or the fridge, they are easy to ferment or pickle, they are easy to dehydrate, and they are easy to can at home. They are considered a low-acid food which means that we have to use the pressure canner to can them, but this is really simple. You’ll see.
Choosing Beets For Canning…
Beets come in different shapes and colors. The common beet is round with purple stems and green leaves that have purple veins, but you can find white beets (Avalanche), orange/yellow beets (Boldor or Touchstone Gold), and beetroots with white rings (Chioggia). You’ll also be able to find a few varieties that grow long roots instead of round roots (Cylindra) and a few baby beet varieties (Babybeet).
You can can any variety of beets that you grow or come by at the market. The more common varieties are Boro, Bull’s Red, Red Ace, Detroit Dark Red, and Merlin. These have a deep color. You will lose some of it during canning but your beets are still going to look beautiful in the jar and when they are served later.

Ingredients…
- Beets – about seven medium beets per quart jar. I cut most of them in half but as long as your beets are less than 2” in diameter you can also can them whole if you’d like.
- Water – clean boiling water.
- Sea salt, canning salt, or kosher salt – salt is optional if you find that you’d like to add it to each jar for taste. You can add a teaspoon to each quart jar.
Kitchen Tools…
- Cutting board
- Knife
- Large pot – to precook the beets. I use a pressure cooker to speed things up a bit but you can use a regular pot that will fit all of your beets and enough water to cover them.
- Wide mouth quart jars
- Canning utensils
- Paper towel
- Pressure canner – I use the Presto dial canner but many people like this All American weighted gauge canner. I’ll have processing instructions for both below.
How to Can Beets Video Tutorial…
Step-by-Step Instructions…


Step one – Prep the beets for canning. Cut the top of the beets off and cut a little bit of the long root. By leaving them as you see in the picture above, we eliminate some of the color loss that happens during the pre-cooking.
Place your beets in a pot and cover them with water. Bring the water to a boil, lower the heat just a bit to keep a gentle boil, and let the beets cook for 30 minutes or so. They don’t have to be completely soft, just enough that the skin comes off easily.
**Side note… Beet tops are edible and there are about a million things that you can do with them so don’t toss them away! You can use them just as you would use collards or chard. You can saute them, add them to casseroles, use them to fill pastries, and so on… My favorite way to use them is to make these veggie patties which are, hands down, my favorite vegetarian dish!
Pressure cooker – to speed things up just a bit, I pre-cook my beets in the pressure cooker. I add 4 cups of water to the cooker and add my beets. I place the cooker on the stovetop with the weight already on the vent and turn the heat to high. Once the weight starts to jiggle, I lower the heat just a bit and cook the beets for about 8 minutes.
Then I turn the heat off and take my canner over to the sink. I run cold water on it to cool it quickly then open the pot and let the beets cool just long enough that I can handle them.


Once your beets have cooled enough that you can handle them it’s time to peel them. Since they are cooked, the skin comes off easily.
Next, you can quarter or half your beets or leave them whole if they aren’t larger than 2” in diameter. I suggest that you keep your beets in large pieces. We are going to further cook them in the pressure canner. I personally don’t like my vegetables too soft and I find that if I leave the beets in larger pieces they keep their texture better.

Step two – pack the jars. Before you start packing your jars with beets, add 2” of water to your pressure canner (follow manufacturer instructions if you aren’t using the Presto canner like me), set your canner on the stovetop, turn the heat to high, and bring the water to a simmer (180 degrees F).
Wash the jars, lids, and rings, well with warm water and soap. Pack the beets into the jars and cover them with boiling water leaving 1” headspace. If you choose to add salt, add 1 teaspoon of sea, kosher, or canning salt to each quart jar or 1/2 teaspoon to each pint jar.
Next, remove air bubbles from the jar and use a clean and damp paper towel to clean the rim of the jar. Center the lid and close the jar with the ring.

Step three – process. Once the water in the pressure canner is simmering, place the jars on the rack in the canner. Close the canner and turn the heat to high (the weight is off the vent at this point). After a few minutes, steam will start escaping from the vent. Let your canner steam for 10 minutes before placing the weight on the vent.
After 10 minutes, place the weight on the vent and watch the dial. If you live under 1000 feet in elevation, process the beets on 11 psi (adjust the stovetop heat to hold the right pressure) for 30 minutes for pint jars or 35 minutes for quart jars.
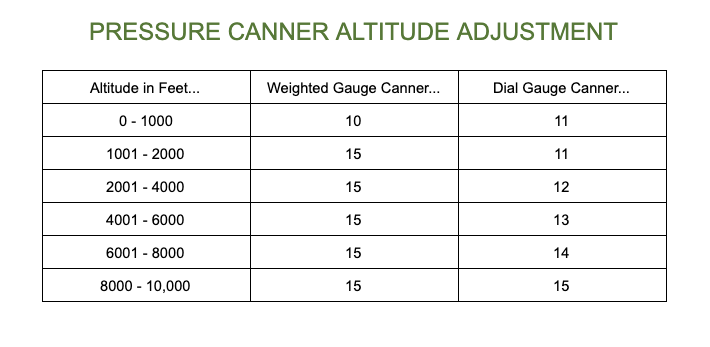
If you are using a weighted gauge canner, process on 10 psi for the same amount of time if you live under 1000 feet in elevation. Adjust processing time according to the table below if you live in higher elevations.
Once processing time is over, turn the heat off and do not attempt to open your canner! This is important, we want a slow temperature change (and it’s also dangerous to open the canner at this stage). Leave your canner on the stovetop and let it cool completely until the dial shows 0 pressure. This may take a couple of hours.
When the pressure canner is cool, open the lid and let your jars stay in the warm water for an additional 10 minutes (remember, slow temperature change!). Then, use the jar lifter to remove the jars from the canner. Set the jars on a kitchen towel on the counter to cool completely undisturbed overnight.
Storing Canned Beets…
Once the jars are completely cool, check that they are sealed by pressing the center of the lid. If there is no movement there this means that your jars are sealed and ready for storage. Remove the rings (because they rust over time and it’s hard to open the jar, and because you can then reuse them), wipe the jars, and store them in the pantry or a kitchen cabinet.
Canned beets will last at room temperature without losing their taste for 12-18 months.
Serving Canned Beets…
You can use canned beets in any recipe that calls for beets. Here are a few ideas…
- My favorite is this Israeli beet salad.
- Pumpkin and beetroot salad that I love making in the fall.
- Remove the beets from the jar, slice them, place on a baking sheet, drizzle with olive oil, season and roast in a 400 degrees F oven for just a few minutes.
- Remove from jar, slice, and toss with homemade feta cheese and a drizzle of balsamic vinegar.
- Beetroot soup – try the one I linked to or any other kind of beetroot soup.
- Beet smoothie – make a healthy beet smoothie to replace one of your meals during the day or as a healthy snack.
- Beet Brownies – yes! you can also make desserts with beets. Try these brownies or search for others. There are many more.
- You can also use the water in the jar to replace water in any recipe. Let me tell you, white rice made with beet water is a pretty interesting dish!
Frequently Asked Questions…
You can but most people don’t use any other seasonings but salt. I personally don’t add the salt either. I prefer leaving the beets plain so I can season them however I want before serving them.
Yes! It’s completely normal. Beets lose a lot of their color when cooked. You can use this water later in cooking if you’d like.
Yes, it’s very normal and totally fine if your beets are sticking out of the water in the jar as long as the jar has sealed.
If your jar of beets didn’t seal you can store it in the fridge and use it first or try to process it again. If you process it again, open it, make sure that you have enough headspace, clean the rim again, and center a new lid on the jar (many times it’s a problem with the lid that causes the jar not to seal). Then close the jar with the ring and process again.
Beets are fun to grow. They are healthy, filling, and so useful and tasty. Even though they are a simple crop to store in a root cellar or even to leave in the ground for the whole winter, I still love having a few jars of canned beets on my shelf. The fact that they are already cooked and ready to go saves me on a regular basis!
More Canning Tutorials…

How to Can Beets
How to can beets at home using the pressure canner.
Ingredients
- 14 medium beets (or more. It takes about 7 medium beets to fill a quart jar)
- Boiling water
- Sea, kosher, or canning salt (optional)
Instructions
- Wash the beets well and cut the tops (save those for patties or other recipes).
- Add the beets to a pot and cover with water. Bring water to a boil, then lower the heat just a bit to hold a gentle boil and let cook for around 30 minutes or until the skin can be removed easily and the beets are soft.
To cut back on some time, you can also cook your beets in a pressure cooker. Follow manufacturer directions here. - Let the beets cool just enough that you can handle them with your hands. Remove the tops, the root, and the skin.
- Quarter, half, or leave your beets whole (if they are smaller than 2'' in diameter).
- Add 2'' of water to your pressure canner and set it on the stovetop. Bring the water to a simmer (180 degrees F).
- Wash the jars, lids, and rings well with hot water and soap.
- Pack the beets into the jars, then add boiling water. Make sure that you leave 1'' headspace.
- Optional: if you want to add salt to your beets, add a teaspoon to every quart jar or 1/2 of a teaspoon to each pint jar.
- Remove air bubbles, clean the rim of the jar with a damp paper towel, center the lid, and close the jar with the ring.
- Set your jars in the simmering water on the rack in the pressure canner and close the canner. Leave the weight off the vent.
- Turn stovetop heat to high. When the canner starts to vent steam set your timer to ten minutes.
- After ten minutes of steaming, process on 11 psi if you are using a dial gauge canner or 10 psi if you are using a weighted gauge canner for 30 minutes for pint jars and 35 minutes for quart jars (if you live under 1000 feet in elevation. Adjust processing time according to the table below if you live in higher elevations).
- Once processing time is done, turn the heat off and let the canner cool for a few hours. Open the canner, remove the lid and let the jars stay in the hot water for 10 minutes before removing them. Place the jars on a kitchen towel on the counter to cool completely overnight.
- To store, check that the jars have sealed, remove the rings from the jars, wipe the jars, and store them at room temperature for up to 18 months.
Notes
If you live in higher elevations, adjust processing time according to the table below...
If your jars lost some water during the processing, don't worry. As long as the jars are sealed it's ok if some of the beets are sticking out of the water.
Recommended Products
As an Amazon Associate and member of other affiliate programs, I earn from qualifying purchases (there is no change in product cost or charge to you! Thank you for helping me support the blog).
-
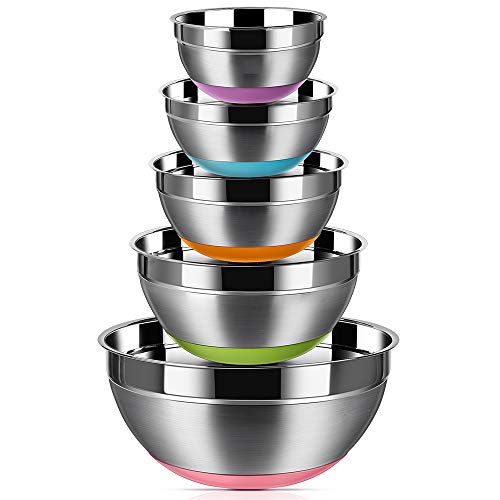
 Stainless Steel Mixing Bowls (Set of 5), Non Slip Colorful Silicone Bottom Nesting Storage Bowls by Regiller, Polished Mirror Finish For Healthy Meal Mixing and Prepping 1.5-2 - 2.5-3.5 - 7QT
 -
Norpro Canning Essentials Boxed Set, 6 Piece Set
-
Presto 01781 23-Quart Pressure Canner and Cooker
-
Ball Mason Jar-32 oz. Clear Glass Wide Mouth - Set of 4


Nutrition Information:
Yield: 2 Serving Size: 1Amount Per Serving: Calories: 154Total Fat: 1gSaturated Fat: 0gTrans Fat: 0gUnsaturated Fat: 0gCholesterol: 0mgSodium: 565mgCarbohydrates: 35gFiber: 7gSugar: 28gProtein: 6g
View the Web Story of this post.

what if you don’t have a pressure canner I have one of the old Timey boilers how long do I keep them in the boiler and do I cover them in water
Beets are low acid food so they have to be processed in a pressure canner if you are going to keep them at room temperature for months. I’ve never used a boiler… Not even sure how it looks so I don’t feel comfortable suggesting anything here, sorry. Try to research online, maybe there is some information about canning with a boiler…
Can I peel the beets with a vegetable peeler instead of cooking and peeling?
I think so… Just make sure to wash them real well. The cooking process kills any bacteria that is on the beets before canning them. I’ve never tried canning them without cooking but it might work if you make sure to remove all the skin and wash them real well. If you feel like it, you can also just blanch them for a couple of minutes in boiling water before packing the jars. It will heat them up and will kill the remaining bacteria.
If the beach are 100% cooked all the way.How long do I have to hot bath them
Still the same time. The processing time is for getting rid of bacteria and sealing the jar it’s not for cooking the beets. We don’t ccok them much before because we don’t want them to be overcooked after processing.