This post may contain affiliate links, view our disclosure policy for details.
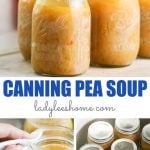
Canning pea soup is an easy way to preserve a meal. This soup is healthy and filling and it’s great to have it ready on the pantry shelf. In this picture tutorial, you’ll learn all the steps for canning pea soup!
There is nothing quite like a bowl of hot, filling, and delicious soup on a cold winter night.
Add to that a good homemade garlic toast and the crackling of a warm fire in the stove and a you are set.
Winter dinners can be very simple. What I love doing is making a huge pot of soup. Some of it we eat for dinner and the rest I can and preserve for later.
Any soup will do, in my book, but one of my very favorites is this Israeli split pea soup (you can make it with green peas or orange peas).
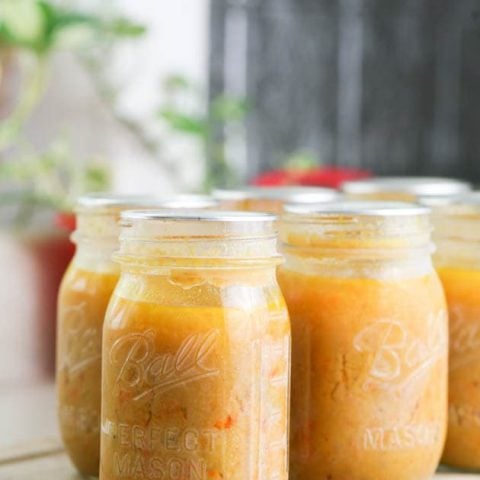
Canning Pea Soup…

I am a single mother of four, and between the kids, the farmer’s market, and a food blog, most of my time is spent in the kitchen.
I can my soups in pint jars, and so, when the kids are spending time with their dad, I try to take a break from the kitchen.
Having a meal ready in a jar (a pint is just the right amount for one person) mans that I don’t have to live off of yogurt and granola alone (as much as I LOVE the combination).
For me, it means that I have a healthy and filling meal that I don’t need to remember to thaw or cook.
I can focus on getting work done (like writing and such, things that I do when the kids are not around) without worrying about preparing meals for myself.
For me, this is the main reason to can this pea soup… For you, there might be a different reason.
Reasons to Can Pea Soup…
If you’d like to prepare and have some food ready on the shelf, this canned pea soup is a great meal to can.
If you find that you are often forgetful when it comes to thawing meat for dinner (the story of my life!) and you need a last-minute, ready-to-go dinner, this is a great solution (but also know that you can can meat and also can chicken).
If you came by a large bag of dry split peas and you want to preserve them somehow, to ensure they don’t turn too hard with age, making and canning pea soup is a great solution.
If you landed here, I believe that you have your reason for wanting to can pea soup, feel free to share it with me in the comments below!
Kinds of Pea Soup That You Can Can…

You can can any kind of pea soup with the method that I share with you below.
My personal favorite is a simple Israeli version. It’s healthy and simple to make and meatless (actually, it’s a vegan soup. Check out my Israeli Split Pea Soup Recipe). I made it this time with orange split peas because it’s what I had on hand, however, you can make it with green split peas as well exactly the same way.
But, if you prefer a more traditional American recipe of split pea soup, one with ham, for example, you can can it just the same way. And, you can also can bean soup this way!
We are going to use the pressure canner since peas are a low acid food so the meat can be processed right with them. No worries there.
So grab a pot of your favorite pea soup and let’s can it!
Tools That We Are Going to Need…
Canning jars – I use pint jars but you can definitely use quart jars as well.
Lids and bands – you can reuse bands but use new lids to ensure that the jars seal properly.
Canning utensils – we are going to use the funnel, bubble remover, and jar lifter.
Ladle – to ladle the soup into the jars.
A paper towel – to clean the rim on the jar before closing it.
Pressure canner – I use a dial gauge Presto pressure canner but the weighted gauge All American canner is another popular one.
Setting Up the Pressure Canner…
First thing to do is to start heating the water in the canner.
Add about 2 inches of water to your canner (leave the rack at the bottom of the canner) and set it on the stovetop.
Just a note here… I am using a Presto pressure canner, if you are using a different canner, make sure to read the manufacturer manual before canning.
Set the canner on the stovetop and turn the heat to high. I want to bring the water to a simmering temperature (about 180 degrees Fahrenheit).
Filling the Jars With Soup…

Whenever we can, we want to pay close attention to temperatures. If the water in the canner is simmering and the soup is cold… We are going to have a problem…
If the jars are cold and the soup is boiling… We are going to have a problem.
When canning pea soup, you don’t have to sanitize your jars, however, you want to make sure to wash them with hot water and soap.
We also want to heat the soup (if it’s not already hot) to about a simmering temperature of 180 degrees Fahrenheit.
We want to pay attention that the jars are warm, the soup is warm, and the water in the canner is warm to prevent the jars from breaking, and so on.

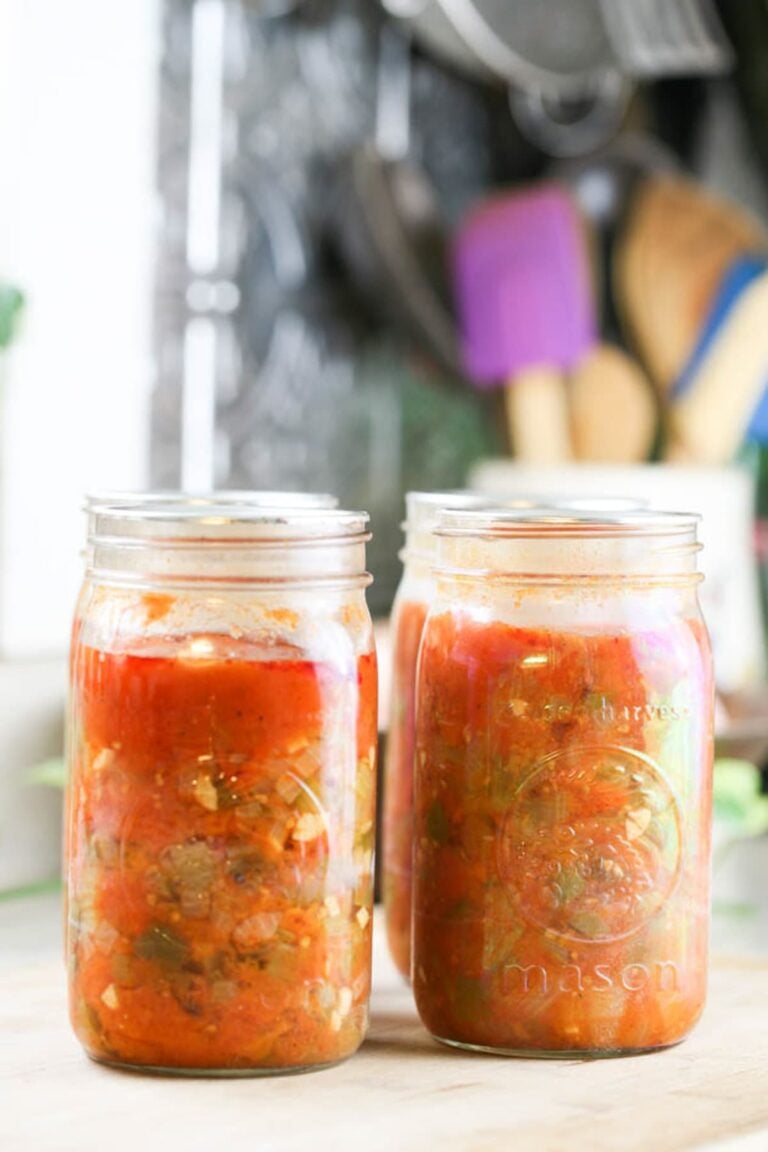
I fill my jars with the soup, making sure to leave 1” of headspace…

Then, I use my bubble remover to remove any air bubbles…

Before using a damp paper towel to clean the rim of the jar.

Next, I center the lid on the rim and close the jar with the band finger tight.
Pressure Canning Pea Soup…

Once all of my jars are filled and closed, I place them on the rack in the canner (remember, the water in the canner is simmering)…

I close the canner and make sure that the weight is off the vent.
I turn the heat to high and watch the vent. Once steam starts coming out of the vent (this can take a few minutes), I set the timer and let the vent release steam for 10 minutes.

After 10 minutes of steaming, I set the weight on the vent and watch the dial. I want the pressure to reach 11 psi before I turn the heat down just a tiny bit to hold that pressure.
I then set the timer and process pint jars 75 minutes and quart jars 90 minutes.
If you use a weighted gauge canner or live in elevation above 1000 feet, you are going to have to adjust your pressure according to the table below…

Letting Canned Pea Soup Cool…

Once processing time is up, I turn the heat off and DO NOT touch the canner. I leave it be and let it cool slowly (remember, we do not want rapid temperature changes).
After a couple of hours, when the dial shows 0 pressure, I open the canner carefully and remove the lid but I do not remove the jars yet.
I let the jars stay in the hot water for an additional 10 minutes before using the jar lifter to remove them from the canner.
I set them on a kitchen towel on the kitchen counter to cool down completely, undisturbed, overnight.
Storing Canned Pea Soup…

Once my jars have cooled all the way, I remove the band and wipe them.
I store my jars without the band simply because it makes it easier for me to monitor what is happening inside the jar. And, I can reuse the bands when canning something else.
I store my jars in the pantry or in a kitchen cabinet. The soup should be good for 12-18 months but I try to use all of my canned goods within a year.
All I need to do when I feel like enjoying a bowl of soup is to open a jar and add the soup to a small pot. I heat the soup and adjust seasonings if I need to.
Sometimes I also have to add a little bit of water. That’s it!
Garlic toast is a great companion to any soup in my opinion but you can add homemade croutons or crackers or whatever else you’d like.
Canning peas soup is really not a big deal! This soup is both filling and healthy and having it ready to go on the shelf will probably save you on a regular basis (if you are anything like me…).
I hope you liked this tutorial! Make sure to check my other pressure canning tutorials…
Bone Broth Recipe and Canning Bone Broth
Canning Pea Soup
Instructions for pressure canning pea soup, vegetarian or not.
Ingredients
- Enough pea soup (recipe of your choice) to fill your jars.
Instructions
- Fill your pressure canner with two inches of water (I am using a Presto pressure canner. Make sure to read the manufacturer directions if you use a different pressure canner), set the canner on the stove top and turn the heat to high. Bring the water to a simmer (180 degrees Fahrenheit).
- When canning pea soup, you don't have to sanitize your jars, however, you want to make sure to wash them with hot water and soap.
- Heat the soup (if it's not already hot) to about a simmering temperature of 180 degrees Fahrenheit (we want to pay attention that the jars are warm, the soup is warm, and the water in the canner is warm to prevent the jars from breaking, and so on).
Here is my personal favorite pea soup recipe. You can use a vegetarian recipe or one with meat. - Fill the clean jars with the soup, making sure to leave 1'' of headspace.
- Use the bubble remover to remove any air bubbles.
- Use a damp paper towel to clean the rim of the jar.
- Center the lid on the rim and close the jar with the band finger tight.
- Once all of the jars are filled and closed, place them on the rack in the canner (remember, the water in the canner is simmering).
- Close the canner and make sure that the weight is off the vent. Turn the heat to high and watch the vent. Once steam starts coming out of the vent (this can take a few minutes), set the timer and let the vent release steam for 10 minutes.
- After 10 minutes of steaming, set the weight on the vent and watch the dial. Let the pressure reach 11 psi before turning the heat down just a tiny bit to hold that pressure.
- Set the timer and process pint jars 75 minutes and quart jars 90 minutes (if you use a weighted gauge canner or live in elevation above 1000 feet, you are going to have to adjust your pressure. You can find the adjustment table in the notes below).
- Once processing time is up, turn the heat off and DO NOT touch the canner. Leave it be and let it cool slowly (remember, we do not want rapid temperature changes).
After a couple of hours, when the dial shows 0 pressure, open the canner carefully and remove the lid but I do not remove the jars yet.
Let the jars stay in the hot water for an additional 10 minutes before using the jar lifter to remove them from the canner.
Set the jars on a kitchen towel on the kitchen counter to cool down completely, undisturbed, overnight. - Once the jars are cooled all the way, remove the band and wipe them (I store my jars without the band simply because it makes it easier for me to monitor what is happening inside the jar. And, I can reuse the bands when canning something else).
- Store jars in the pantry or in a kitchen cabinet. The soup should be good for 12-18 months.
Notes
All you need to do when you feel like enjoying a bowl of soup is to open a jar and add the soup to a small pot. Heat the soup and adjust seasonings if needed. Sometimes you'll also have to add a little bit of water. That's it!
Garlic toast is a great companion to any soup in my opinion but you can add homemade croutons or crackers or whatever else you'd like.
Here is the processing adjustment table:
Recommended Products
As an Amazon Associate and member of other affiliate programs, I earn from qualifying purchases (there is no change in product cost or charge to you! Thank you for helping me support the blog).


Do you have to make the soup thinner than usual to can it??
I don’t but then I find that I have to add water when I reheat it. So you can definitely make it thinner before canning.
Love this. I’m brand new lol to canning and google brought me to your blog.
Great explanation of the entire process. I now feel confident to use the pressure canner.
Thanks,
Nathalie
Awesome! It’s really not too hard. Thanks for stopping by and thanks for the feedback! I’m happy it was helpful.