Cheesemaking Equipment That You Need!
This post may contain affiliate links, view our disclosure policy for details.
In this post, we’ll go over the cheesemaking equipment that you need in order to start making cheese at home. Homemade cheese is delicious and worth the effort! But in order to make it, you have to have some cheesemaking equipment. Let’s go over the list of what you need.
One very important thing that I learned in this homesteading journey, is that when you set out to build something, learn something, raise something, or grow something, you set up FIRST.
For example, leaving Tractor Supply with 20 baby chickens because they are so cute even though you don’t have a brooder, a heat lamp, a chicken coop, or a good fence built is a bad bad idea.
Planting a gigantic garden because you just want a whole lot of food before you have a place to store the vegetables (refrigerator, root cellar, a canner and canning skills and so on…) is a bad bad idea.
You see where I am going with this, right?
Cheesemaking Equipment You’ll Need…
When it comes to making cheese at home, it’s the same thing.
You want to make sure you have the right equipment BEFORE you start practicing to increase your chances of success.
I’ve learned that I can get so frustrated and spend so much time (that I could have spent elsewhere) and a lot of effort trying to make something work when all I really need to do is get the right tools for the job.
Now, when it comes to cheesemaking equipment it doesn’t really mean that you have to go and spend hundreds of dollars setting up and getting ready.
You could definitely choose a kind of cheese that coagulates when you add lemon juice or vinegar and I am pretty sure that you already own a stainless steel pot and a knife…
How to Get Ready For Cheesemaking…
If you have decided that you want to learn how to make cheese at home:
- Learn the basics of making cheese. There is kind of a general process of making cheese and it’s a good idea to learn it first.
- Decide what kind of cheese you want to make… Ask yourself, what do you like and then make sure that it’s a beginner’s kind of cheese like feta, or soft goat cheese, or this soft cheese made from cow’s milk, or maybe this rennet cheese… It’s NOT a good idea to start with cheeses like brie or cheddar since they are cheeses that need long aging in certain conditions. You are looking for a simple cheese to start with.
- Get all of the tools, cheesemaking equipment, culture, rennet, and anything else you might need.
- Then, when you are all set, get your milk and make the cheese!
So in this post, we are going to go over cheesemaking equipment for the beginner cheesemaker and then I will list the more advance cheesemaking equipment.
Again, in my opinion, start with a few simple cheeses first. If you find that you like making cheese and that you want to stick with it and learn the more complicated kinds of cheeses, go ahead and purchase the more advanced equipment.
Ok, before we dive into the list, lets start by understanding rennet and cheese cultures…
What is a Cheese Culture…
Not every cheese that you make will require you to use rennet or cheese culture.
Some cheese recipes might call for lemon juice or vinegar. Some might only call for rennet and you won’t need a cheese culture.
However, if you are going to learn how to make cheese at home, and if you’re going to try to make a few different kinds of cheeses, you’re most likely going to have to use cultures and rennet at some point.
So let’s understand what are they…
Cheese cultures are strains of bacteria. Each culture that you’ll find is basically a strain of different bacteria.
This good bacteria, when added to milk, will multiply and consume the lactose in the milk (the sugars) raising its acidity. This process is called ripening and it helps the rennet (which we add later) coagulate the milk.
It also help us to preserve the milk since the good bacteria takes over and chases away the bad bacteria.
Aside from changing the acidity level of the milk, cultures also affect the taste of the cheese. So feta culture will make the cheese taste differently than cheese made with chevre culture even though their consistency can sometimes be similar.
There are two main types of cultures…
Mesophilic culture – this is a culture that does not love heat. It’s used in making cheeses where the milk is not heated to more than 102 degrees Fahrenheit.
It’s the most common culture and the one you’ll use the most probably.
If you are making cheese like Feta, Chevre, Blue Cheese, Cottage Cheese, Farmer’s Cheese… And even more advanced cheeses like Colby, Cheddar, or Brie, you’ll use a mesophilic culture.
Thermophilic culture – is a heat-loving culture and can be used to make cheese that is heated to 130 degrees Fahrenheit.
For example, if you are making Parmesan cheese, or Mozzarella, or Swiss cheese, you’ll use a Thermophilic culture.
How to choose the right culture? Don’t let this overwhelm you! Even though making cheese at home will probably make you feel like you are in your high school’s lab again you don’t really need to go through a whole biology curriculum here! Just follow the recipe! It will tell you what type of culture you need.
When you purchase a culture, it will arrive in a form of powder in a little packet. You’ll add culture to milk by sprinkling the culture on the milk (usually after heating the milk) and stirring it to dissolve.
Make sure that you store your culture packet in the freezer! It will last for years (I am still using a packet that I purchased 4 years ago!).
What is Rennet…
Rennet is an enzyme traditionally taken from the stomach of farm animals (calf, lamb, goat…). It causes the protein components in the milk to coagulate and turn to curds which we can then work in different ways.
You can find all the products below on the Cultures For Health website or another good source is The New England Cheesemaking Supply Company.
Animal rennet – comes as a brownish liquid in a little bottle. It needs to be refrigerated. They say it’s losses 2% of its strength every month but honestly, I am still using rennet that I bought 4 years ago and it works great.
If you do feel like your rennet is loosing it’s strength a little bit you can always add a couple extra drops.
Vegetable-based rennet – today we can also find vegetable-based manufactured rennet (in case you are a vegetarian). It also needs to be refrigerated.
I’ve never used it but it supposed to hold its strength a little better than the animal rennet (or so I hear).
Tablet rennet – you can also find rennet that comes in the form of tablets. This form is a little more complicated for use since you are going to need to crush it before dissolving in water and it’s a bit hard to measure it but it’s more stable and can stay on the shelf without refrigeration for at least a year.
So if, for example, you live off the grid this might be a good option for you.
All types of rennet need to be diluted before they are added to the milk.
A Few Other Important Ingredients…
There are a few other important ingredients we should pay attention to before we move on to cheesemaking equipment…
Calcium Chloride – this comes in a form of liquid and is added when using store-bought milk to make cheese.
Since store-bought milk was pasteurized and homogenized, it will not give a good set without the use of calcium chloride.
We only use it in making hard kinds of cheese where a good set is required. If you are making a soft cheese from store-bought milk you most likely will not need to add calcium chloride. Again, just follow the recipe.
To use calcium chloride, mix half a teaspoon into 1/4 cup of cold water and add to one gallon of store-bought milk according to the recipe (usually we add it after we warm the milk).
Lipase Powder (traditional or mild) – this powder gives the cheese a tangy or sharp taste. We use it in cheeses like traditional feta, for example.
It comes in a form of a powder that needs to be kept in the freezer. It’s dissolved in water before it’s added to the milk.
Cheese salt – when we salt cheese, it’s important to remember to use non-iodized salt. Regular salt, since it’s iodized will turn your cheese a greenish color.
You don’t have to purchase cheese salt, you can use kosher salt or sea salt instead.
Citric Acid – is used when making mozzarella, Paneer, Queso Blanco, and sometimes Ricotta. It raises the acidity level of the milk quickly and gives the cheese a stretchy consistency.
Tartaric Acid – this acid is used when making Mascarpone, a creamy, rich, dessert-like cheese.
Ok, now that we understand cultures, some additives, and rennet, let’s move on to basic cheesemaking equipment and kitchen tools that you’ll need in order to make cheese at home…
Basic Cheesemaking Equipment and Supplies…
Stainless steel pot (medium, large) – milk scorches easily. You can get fancy cheesemaking pots (they are called cheese vats and are pretty much a double boiler system) but I just use my stainless steel pots.
You want a pot with a heavy bottom, you want to never set your stove top to high (use medium or medium-high heat to heat milk), and you want to never leave your milk.
Stir it constantly and watch it and don’t let it scorch.
Make sure to use a pot large enough to hold the amount of milk that you want to process.
Thermometer – temperature is everything when making cheese! Make sure you have a cheesemaker thermometer handy.
Measuring cups – the same ones you use for baking. We need to dilute rennet, or sometimes calcium chloride in water. To make sure we dilute in the right amount of water we need measuring cups.
Measuring spoons – make sure that you have the tiny measuring spoons in addition to the regular sizes. When adding cultures, you often need to measure 1/8th or 1/16th of a teaspoon.
Mixing bowls – I use mixing bowl to catch the whey. I place a bowl under the bag of cheese when I hang the curds and the whey drains into the bowl.
I then use it to make ricotta cheese, bread (instead of water), or I feed it to my dog.
Mixing bowls also come in handy when mixing salt or herbs into soft cheese.
Kitchen gloves – sometimes, we need to heat the curds in their whey while working them into a ball. It gets hot in there! So I use simple kitchen gloves that I set aside just for cheesemaking.
Fuzzy blanket – yes, there is a fuzzy baby blanket in my kitchen just for cheesemaking. After we heat the milk and add cultures and rennet we usually let the milk rest for an hour or so.
During this time, it’s important to maintain the warm temperature of the milk. This is what I use the blanket for. I wrap the pot with it and it usually works great.
Slotted spoon – we need a long spoon for stirring the milk. I find that a skimmer actually works best to stir the milk or later the curds.
Curd knife – after the milk has rested and coagulated, we usually cut the curds. A curd knife is a long knife that can reach to the bottom of the pot.
You can use an actual curd knife or a long kitchen knife, or even a long icing spatula.
Colander – often we line a colander with a cheesecloth before transferring the coagulated milk onto it.
Cheesecloth – I linked to a “proper” cheesecloth but I don’t use it. At your local Walmart, there is a pack of 10 flour sack towels for something like $5 (or so).
They are THE BEST cheesecloth! I use them and rinse them, and then stick them in the washer with the rest of our clothes to wash them before I use them again.
They are great! You can also find them here.
String – just a string to tie the cheesecloth and hang it. I usually use a piece of yarn but you can use any kind of string that is strong enough.
Cheese mold – until not too long ago, I used a small strainer or a random basket as my cheese mold. It’s fine… But then I purchased this set that I linked to and it’s so much better.
These molds make my cheese so pretty! They are great quality too so I think I’ll be able to use them for many years.
Storage containers – plastic containers or glass containers… They all work fine. You just want a container that you can store your cheese in when it’s in the fridge.
That’s it for the basic cheesemaking equipment. I bet that you already have most of this stuff in your kitchen. Let’s talk a little bit more about advanced cheesemaking equipment.
More Advanced Cheesemaking Equipment…
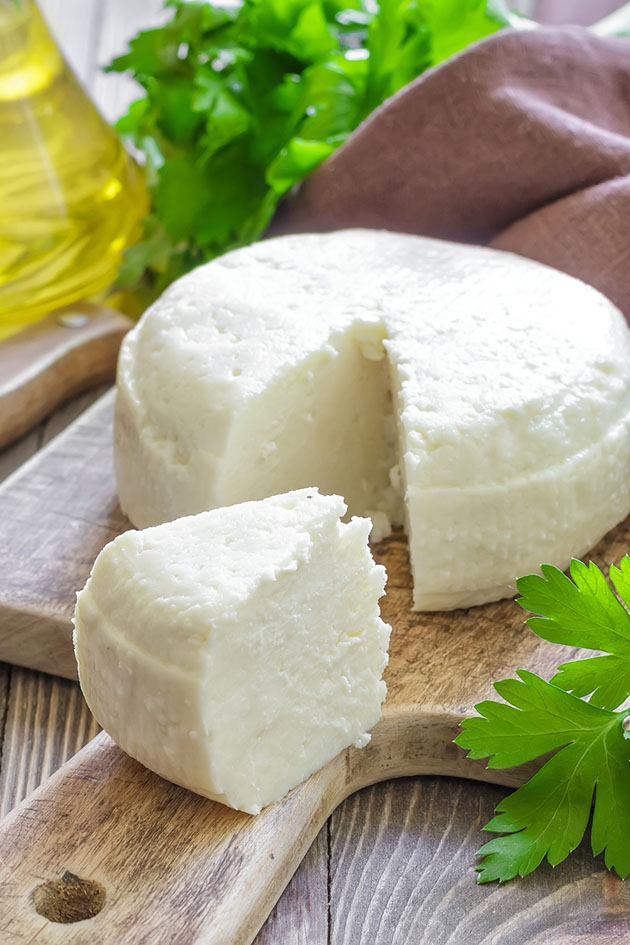
You’ll need this equipment to make more advanced kinds of cheeses like Colby, Parmesan, Provolone and so on.
If you are a beginner, start with making a few simple kinds of cheeses with the basic equipment first, then add to your cheesemaking equipment as you progress to more complicated kinds of cheese.
Cheese press – cheese press is required to make different types of cheeses that require pressing. A cheese press puts an even pressure on the cheese after it’s placed in a mold.
Some people make their own cheese press and you can probably find some ideas on Google or YouTube but I think this is a piece of equipment that it’s better to purchase so you can make sure your hard work is not going to be inappropriately pressed under bricks and such…
Cheese mats – these mats are used for drying and aging cheese like Brie, Blue cheese, Camembert and so on.
Cheese cradle – I could not find a place online to purchase this. A cheese cradle is a tool that allows you to evenly dry the rind of the cheese before waxing it.
Cheese molds (large) – this is a larger mold than the one I linked to above and is used when making Brie or Blue Cheese.
Spray bottle – when making mold-ripened cheese like Brie, for example, you’ll need a simple spray bottle to spray the cheese.
Aging cave – an aging cave is a place where you can control both the humidity and the temperature and where the cheese can be safe to age for months (where mice can’t get it!).
You’ll have to do a little bit more research about the cheese cave but many people set up a second fridge, ice chest, or even a wine cooler somewhere in their house or garage or basement just for cheese.
You can read more about how to make a cheese cave here.
Cheese wax – this is used to cover and protect the cheese while it is aging in the cheese cave. It comes in red, natural, and black and it doesn’t matter which one you use.
Cheese wax is not beeswax and can’t be replaced with beeswax.
A Few Advanced Ingredients…

Propionic Powder – this is a special bacteria called Propionic Shermanii. It produces gas that is responsible for the holes in cheeses like Swiss cheese.
Penicillium Roquefort – a mold spore used in making Blue Cheese and Roquefort cheeses.
Bacteria Linens – a bacteria used in making Brick cheese. It is mixed with water and sprayed on the outside of the cheese.
Penicillium Candidum – this is a special mold powder that is used to inoculate the outer surface of the cheese.
You know how Camembert and Brie have this edible bloom outside and creamy softness inside? This is what this mold does.
Cheese color – kind of like food coloring, cheese color is sometimes used to give homemade cheese a yellowish color.
That’s it! I know that I listed a lot of stuff here but it’s just because I wanted you (and me!) to have one place that is a list of all the cheesemaking equipment.
Again, you don’t need it all! Choose the kind of cheese that you want to make and then make sure that you have the right equipment for that particular cheese.
From there, move on to the next cheese and the next.
A Cheesemaker’s Journey is a great book and the one that I am currently working with.
I wanted to give it the credit it deserves because it’s the one that helped me put this master list of cheesemaking equipment together.
Another one that I’ve heard good things about and that I might try soon is The Art of Natural Cheesemaking.

Happy cheesemaking my friends! I hope that this post was helpful and that you understand better what is it that you need to make all the cheese!
But remember that is it comes at you too fast you can always can your milk as well.


Thank you for this easy introduction and you’ve peeked my interest in the cheese making process!
It’s not as hard and intimidating as it might seem. There are many easy kinds of cheese to start with! Thanks for stopping by!
Great write up and useful list!
I wish you much success in the production of milk products!
Thanks!