This post may contain affiliate links, view our disclosure policy for details.
In this post we will learn how to can milk. It can be raw milk or store-bought milk, cow’s milk or goat’s milk… They are all done the same. The process of canning milk is not complicated at all and I was pleasantly surprised to taste my milk months later and find it sweet and delicious. It’s a really great way to preserve milk!
I have this fascination with old ways of doing things… If it’s how to tan a deer hide or weaving a basket or preserving food, I always find myself wondering how people did things before modern amenities.
Often when milk from my Lamancha goats starts to pile up in the fridge I make cheese. I usually make feta or goat cheese or my favorite; this easy raw goat milk cheese… But all those need refrigeration or to be frozen if I want to keep them for a while.
Lately, I’ve been wondering if there is a way for me to keep the milk at room temperature in its original form instead of processing it into cheese…
Can I can milk?
How to Can Milk at Home…

I did some research and I found that indeed I can can my milk!
I had to give it a try…
Is it Safe to Can Milk…
Well, you’ll have to do the research and decide for yourself.
After spending some time researching I found out two things…
- Most modern research says that canning milk at home is not safe…
- People have been doing this for generations…
It’s kind of like drinking raw milk, the debate is heated and opinions are very different.
I personally side with grandma most of the time with all due respect to modern research. I drink raw milk and I also decided to try and can it.
It’s a personal decision and, again, you’ll have to research and decide for yourself if you want to do it or not.
Feel free to voice your opinion in the comments below or share your experience, just please keep it respectful.
I will say that though… Milk is a low-acid food. From my research, I found that there are communities around the world that can milk (and can meat) in a water bath canner. Some of them are very close to us like the Amish, for example.
However, to kill bacteria they must keep a steady temperature for 3 hours or so.
It’s very labor-intensive in my opinion and still, the risk for Botulism (a bacteria that can grow in air-tight containers but is killed by high temperatures) is real, so I decided to use my pressure canner to can my milk.
I recommend you use your pressure canner but I did want you to know that there is a way to can milk in a water bath.
Why Would You Want to Can Milk?
There are many reasons… In my case, I just had more milk from my goat than we could drink.
I already had enough cheese in the freezer and I work so hard to keep my goats alive (goats are not for sissies! Not where I live at least, they are the most desirable playground for worms around these humid parts…) that their milk is even more valuable to me.
I raise LaMancha goats. They go into heat in the fall and birth in the spring. So between October and somewhere around April I don’t have fresh milk from them.
I wanted to try to can as much milk as I can to use during those months.
I also thought that it would be great to learn how to can milk so I am not dependent on electricity to preserve it as I would be if I froze it.
If you live off the grid, keeping food without electricity is something you are familiar with.
But even if you are on the grid, it’s still nice to save some energy, or save room in the freezer for other things, or not needing to worry about food spoiling if the electricity goes out (for example, if you live in areas with many storms and power outages).
Another reason to can milk is if you don’t want to need to go to the grocery store often. Some of us live far in the country or are a single person and often a gallon of milk spoils before we can use it all. So canning is a great option.
Another great reason is canning for travel…
If you are packing for a camping trip, going to spend the weekend at the lake, or going on a road trip across the country, canned milk is a great ingredient to pack.
Tools That We Are Going to Need…
Before we start with the tutorial, let’s gather all the kitchen tools that we are going to need…
Jars – I think that the best size of jars for canning milk are the quart jars but you can follow the same tutorial with any size of jar that you choose to use.
Lids and bands – you can reuse bands but make sure to use new lids so we know that the seal is in great condition.
Canning utensils – we’ll use most of them.
Ladle – to help us fill the jars.
Pressure canner – I use my Presto pressure canner. The All-American canner is also popular.
That’s all we need. Let’s learn how to can milk…
How to Can Milk, Step-by-Step…

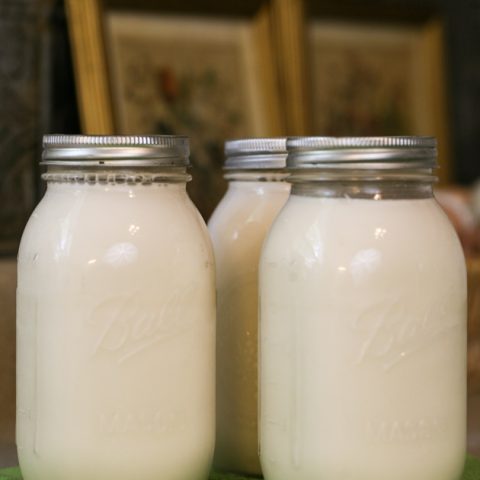
We start by taking the milk out of the fridge to warm up a little bit.
Don’t can older milk, the fresher the better. This is my supply from five milking (two and a half days) from one goat.
My kids were with their dad over the weekend and I just drink a tiny bit of milk with my morning coffee so the jars just piled up in the fridge.
Preparing the Jars and Canner…

While the milk is warming up a bit, wash your jars in warm water and check that there are no cracks or chips around the rim. Let them dry for a few minutes.

Next, it’s time to sanitize your jars. You can do this by placing them in a water bath and boiling them for 10 minutes or so, placing them in the dishwasher, or using the oven.
I like the oven method. I place my jars on a baking sheet and heat the oven to 320F. Once the oven is hot I place the jars in there for 10-15 minutes.

After 10-15 minutes, remove the jars from the oven and use the jar lifter to remove them from the baking sheet. Place them on a towel and let them cool down.
We want the jars and the milk at a similar temperature so the jars don’t break.

Place your lids and rings in a pot of water, bring to a boil and hold that boil for 5 minutes or so.
You can reuse rings but make sure you use new lids each time so that you know for sure that the seal is good.

Let’s also fill the pressure canner with some water. I have a Presto pressure canner that I love! You will have to follow your canner’s instructions but if to be honest, I could not find any instructions in the manual on canning milk so I went with 2.5” of water.
I also left the tray in there.
Filling the Jars With Milk…

Once the jars cooled a bit and the milk warmed a bit and the difference in their temperature is not too great, I fill the sanitized jars with milk.

Make sure to leave 1/2’’ headspace.
Make sure you do not touch the rim or the inside of the jar with your fingers! I used a canning funnel to make sure the milk goes in the jar and not all over the place.

Use a paper towel to clean the rim of the jar, again, DO NOT touch it with your fingers!

Use the magnetic lid lifter to lift the lid from the pot of hot water and place it on your lid. Do not touch the bottom of the lid with your fingers.

Now, use the ring to close the jar (not too tight, finger tight), and we are ready for processing!
Processing the Milk in the Pressure Canner…

Use the jar lifters to lift the jars and place them inside the pressure canner.

Close the canner and turn the heat to high.

Now we are watching the little nozzle for steam. It took my canner 18 minutes to reach the point where I can see steam coming out from the nozzle.
Once the canner starts to steam let it exhaust steam for 10 minutes before placing the gauge on the nozzle.

Before placing the gauge on the nozzle.
Now watch your pressure gauge, once it showed you 11 psi (it will take some time…), turn the heat off immediately and let the canner cool completely (this may take an hour or two).
Adjustment For Higher Elevations…

I’ve never canned milk in higher elevations but I assume that you’ll have to adjust according to the table above.
So, for example, if you live at 4500ft in elevation instead of turning the heat off when the canner reaches 11psi you’ll have to wait until it reaches 15 psi or 13psi depending on what kind of canning you are using.
Removing the Canned Milk From the Canner…

Wait until the dial shows 0 pressure and then remove the weight If steam doesn’t come out anymore, it is safe to open the canner. Please be careful when you remove the weight.
Place a towel on the counter and use your jar lifters to remove the jars from the canner and place them on the towel. Now let the jars rest and cool completely for 24 hours.
We are done!
How to Store Canned Milk…

After the milk has cooled completely store it in a dark and cool place like in the pantry or a kitchen cabinet for example.
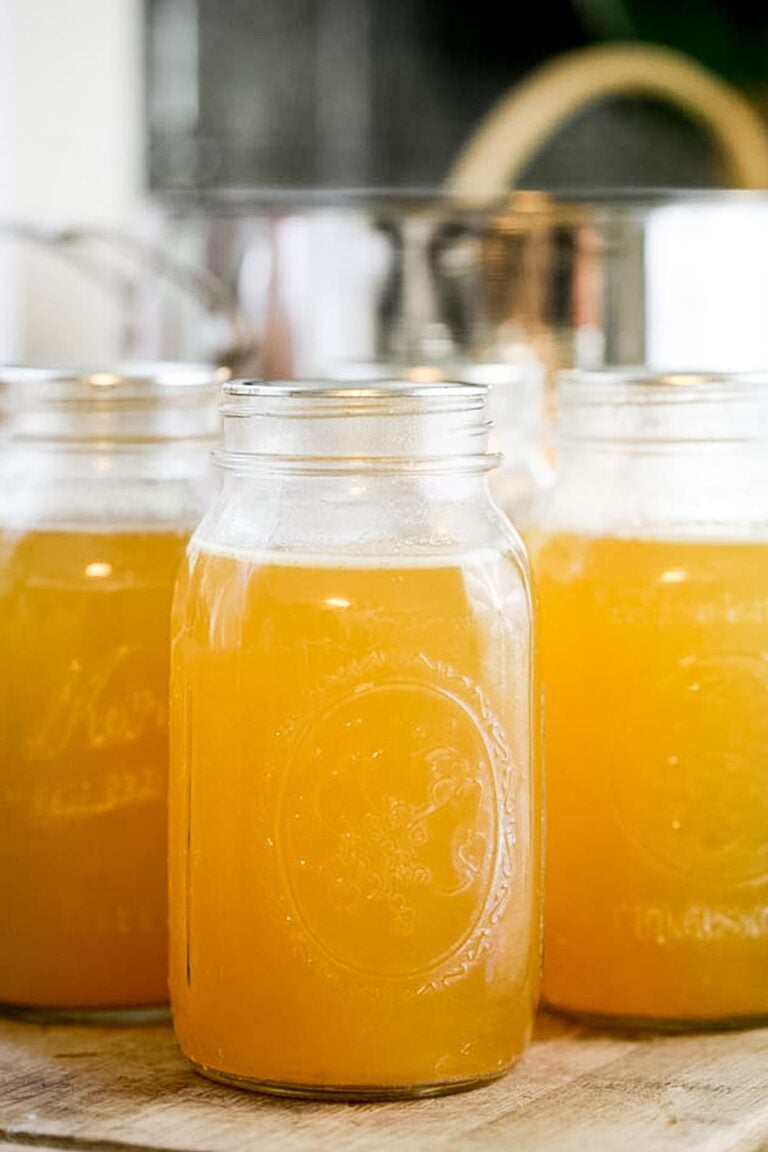
You will see the cream separating from the milk and that is normal and completely fine. The milk also turns a bit of a yellowish color.
It should store for a year or so but I plan to just use it over the winter until my goats freshen again in the spring.
It seems like everyone agrees that you can use it for cooking but not everyone agrees with drinking it. Many do though. If you do use it for drinking I think it tastes better if chilled.
Once you open a jar you do have to make sure to store it in the fridge and use it within a couple of days.
If you’d like to read more about canning milk, my friend Heather from The Homesteading Hippy shares her experience in her post Home Canning Milk via Pressure Canner.
If you give this a try come back and let me know how it went, or share your opinions or experience in the comments below.
If you liked this tutorial, you might like these as well…
How to Can Milk
How to can milk at how step by step.
Ingredients
- Milk
Instructions
- If your milk was in the fridge, take it out and place it on the counter. We want the milk to warm up a bit.
- Meanwhile, wash your jars (I use 3-quart jars) with warm water and soap. Place them on a baking sheet.
- Heat your oven to 320F. Place the jars in the oven for 15 minutes to sanitize them.
- Also, place your bands and rings in a small pot, cover them with water, set on the stovetop and bring to a boil. Let the water boil for 5 minutes to sanitize the bands and lids.
- Take the jars out and turn the oven off. From this point on, do not touch the rim of the jars with your fingers (use the jar lifters if you need to move the jars).
- Place the jars on a cutting board or a kitchen towel and let them cool for a few minutes.
- Meanwhile, set your pressure canner on the stovetop and add 3 quarts of water to your canner (or follow manufacture directions). This is about 2.5'' of water (I use a Presto dial gauge canner).
- Use the canning funnel and a ladle to fill the jars with milk. Make sure to leave about 1/2'' headspace.
- Clean the rim of the jars with a clean paper towel, center the lids, and close the jars with the bands, fingertight.
- Place all of your jars on the rack in the pressure canner.
- Close the canner and turn the heat to high (do not place the weight on the vent yet).
- watch the vent. When steam starts to come out, set your timer to 10 minutes. Let the canner steam for 10 minutes.
- After 10 minutes, place your weight on the vent and watch the dial. When the canner reached 11psi, turn the heat off and let the canner cool completely (please see notes for pressure adjustments).
- Once the dial shows 0 pressure (it might take the canner a couple of hours to completely cool), open the canner.
- Let the jars rest in the open canner for a few minutes before removing them.
- Set your jars on a kitchen towel and let them cool completely (I usually leave them overnight).
- Check that your jars have sealed. Remove the bands, wipe the jars, and store in the pantry.
Notes
If you live in an altitude higher than 1000ft, you will need to change the pressure. Please check the table in the post for more altitude adjustment information.
You might notice that the cream separates from the milk in the jar. This is normal.
You might also notice that your milk get a yellowish color to it. This is also normal.
I use quart jars but you can follow the same process with any size of jars.
I try to use my canned milk within a. year.
Nutrition Information:
Yield: 1 Serving Size: 1 quartAmount Per Serving: Calories: 125Total Fat: 5gSaturated Fat: 3gTrans Fat: 0gUnsaturated Fat: 2gCholesterol: 20mgSodium: 127mgCarbohydrates: 12gFiber: 0gSugar: 0gProtein: 9g

Does anyone know how to convert this recipe to a pressure canner with a weight instead of a dial gauge? I’ve been looking everywhere and am not sure how to do this.
That’s a good question! I’m not sure either.
Use your 10lbs weight. When the weight jingles you’re at the correct pressure. I have an All-American PC and it has both a dial gauge and weight. The instructions say the weight is more accurate than the gauge as it won’t need calibration. The gauge is just to give you a visual of where your pressure is.
Your pressure canner looks like mine. Model 0175003.
Can you flour and brown meat before you pressure can it? I’m not fond of meats that haven’t been floured and browned first. They don’t seem to have much taste to me.
Yes, you can hot pack the meat. I’m not sure about the flour, but you can definitely brown it before you can it.
So there are only a couple types of botulism that survive very long in boiling water. The long processing time used for water bath canning is to make sure the entire contents of the jar get up to boiling and kill off as much as possible.
But if you have some of those particular strains of botulism in the jars, it will still survive. If the environment in the jar is acidic enough it will keep the botulism dormant, and then it’s not a problem. But if it’s not acidic enough then it will grow.
So there are two additional things to do. Firstly, botulism produces copious quantities of gas as a byproduct of its metabolism. So don’t use the canned goods right away. Let them sit for at least as long as you would a good batch of pickles. If they’re contaminated the gas production will probably cause the seals to fail. Obviously don’t eat anything out of those jars.
The other thing is that botulism’s toxin breaks down in near boiling water. So when you open the jar, bring it back up to at least 85 degrees C for five to ten minutes. (According to the WHO anyway. If you want to be precise about it there are scientific charts showing the breakdown rate of the toxin at particular temperatures and you can do your own math.)
Now you know why grandma always boiled her green beans until they were limp and mushy.
But really, a pressure canner is just better. It’s way faster and you’ll have far less spoilage. And given that every jar that goes bad is a lot of wasted work, less spoilage is a good thing.
Thanks for the information and tips!
We canned some store bought milk. Most of the jars did fine and all sealed, however a few jars look as the though the milk is clotted. Can I assume these are unusable or is there a way to salvage them?
Are you sure it’s the milk or is it the cream hardening? After the milk cools, the cream will harden and it floats. It’s completely fine. I sometimes heat the milk to melt the cream back into it when I open the jar to use it.
i PC’d a hundred quarts of raw goat milk this season. i think about 7 or so jars did this. it’s just cheese now. drain the whey and enjoy the soft cheese! makes a great spread on crackers. i think i have a hot spot in my canner, and my stove might also. got a little hotter on those jars, hence the cheese. i havent opened those yet.
Since most of the large food distribution concerns are owned by a lot of the same people who fund research (“science”) it doesn’t surprise me their findings/opinions would favor/profit the large commercial milk producers. I respect the old ways. I grew up in the late 50s and early 60s, in a rural area. It was the odd person who didn’t produce their own food and preserve it in season. Since science is always disproving itself at a now exponential rate I’m going with what Grandma said/did.
Exactly! There is research to prove this and then two months later there comes another research to prove the exact opposite. Sometimes it drives me nuts to think that they are spending so many resources wasting their time on all this research! Grandma actually had life experience, not lab time.
Hi Thank you for this article. It was very insightful. My Mom has a pressure cooker is that the same thing as a pressure canner? Also, is it possible for me to use my electric pressure cooker? I know I can can in it but my goal is to can my homemade hot fudge sauce and have learned I have to use a milk canning method to do so safely.
It takes a lot of research not to make people ill.
Thanks again for all your hard work.
Sherrie
You are welcome! I’m happy this was helpful.
A pressure cooker is not the same as a pressure canner. The canner has a daily on it to gauge the pressure inside or a weight to restrict the amount of pressure inside. I’m not sure, but I think that you can’t do this in a pressure cooker.
I’ve never used an electric pressure canner. Honestly, I don’t even know how one looks like! If it operates similarly to a non-electric pressure canner it should be possible to do this in it but I’m not sure.
Thanks for stopping by!
I just did some half and half (it was on sale) and followed your directions. This was my first time using a pressure canner. Some of the milk left the jars. The water in the canner was white. Jars are sticky. I wasn’t expecting that. Is that normal?
Thanks
Yes, that’s fine as long as the jars sealed. Make sure that you leave enough headspace. But again, as long as the jars are sealed the milk should be ok for storage.
I would think 1″ headspace could be a safer level. If it ends up in the seal, it may interfere with the ability to work longer. In the photo, it even looks closer to 1″ headspace, rather than 1/2″. I tend to use 1″ for most canning to avoid too much overspill.
You can definitely do 1”!
Also, it is a good idea to always put a tablespoon or two of vinegar into the canner water to avoid mineral deposits and film coating on the outsides of the jars. I’ve canned a lot of pinto beans over the years. Vinegar in the water is necessary to avoid that clingy nasty on the outside of the jars. They come out much cleaner. I’ve accidentally forgotten the vinegar a few times and regretted it. Lol
I’ve never used vinegar but if it works for you then use it!
I have recently learned that you can use a pinch of cream of tarter as well. It is less harsh to the rings which you reuse. I have hard water so I must add something to my canner or otherwise I am cleaning jars when the process is finished.
I canned store bought 2%. After about a month I’ve noticed coating inside the jar. Is this normal? I know raw milk will separate, but does store bought as well? Thank you!
Yes, it still have a little bit of fat in it and it will separate. Sounds like all is well.
So when they process milk for the store they “homogenize” it. Basically they force it through a really tiny mesh at high pressure to break all the little fat globules into really really tiny fat globules. This makes them take far longer to clump back together and rise up to the top.
When you cook or can the milk, the heat makes all those little globules stick back together and then stick to everything else.
I do not see the length of time you leave the canner “at pressure”. Everything else I have ever canned has like 75 to 90 minutes at pressure – why would milk be different as far as being safe to eat after just letting canner come to pressure and then shutting it off? Does it not need to stay at pressure to kill the bad bugs?
No, it doesn’t need to stay at pressure. You just let the canner reach 11psi and turn the heat off. Basically, we are making evaporated milk, just like the one you can buy at the store in a can.
Just canned my first canned milk all sealed milk is a yellowish color what are some good uses for my milk ?
The milk might get a little yellow, if the jars are sealed, it should be fine. I use it mainly in baking/cooking or for my morning coffee.
How long can I just cold pack the milk
You mean how long you can keep it cold in the fridge? Not sure I understand your question…
Hi..we drink our canned milk, and it stays white. Tastes like store bought just colder being in glass..
We use cold milk into cold jars place in PC bring pressure up let vent 10 add jiggler as soon as it jiggles we turn off heat and move the pc to another burner and let depressurize.
Nice! Someone else just commented a few days ago that she also starts with cold milk and cold water in the PC. I might give it a try. Will be easier than waiting for everything to heat up. Thanks!
Thank You Terri! This is exactly what I’ve been looking for! I don’t want to wait for everything to get warm. Cold milk, cold jar, cold water let’s get ‘er done! And I will probably use Skim milk if it makes it thicker like the comments say. That way I would still have 1% milk to drink. Thank You so much for your reply!
Thank You Terri! This is exactly what I’ve been looking for! I don’t want to wait for everything to get warm. Cold milk, cold jar, cold water let’s get ‘er done! And I will probably use Skim milk if it makes it thicker like the comments say. That way I would still have 1% milk to drink.
Good to read your article on canning milk. I have been doing it for awhile now, but I use cold milk, cold jars, cold water in canner… I now have a Presto digital electric pressure canner and skip the jar warming cycle and start heating by holding the start button for 5 seconds, right after I fill it (cold everything) I let it vent the 10 mins, when it’s time to close the valve I do, I let the pressure build to lock the lid, then turn it off (by holding the X) let it cool, and voila.
Oh, and I’m still alive!
I’ve never used an electric pressure canner before! Definitely curious.
I guess when it comes to canning, the most important thing is that everything is at the same temperature when you start. If everything heats together you should be good. But, the problems start when you place a cold jar of milk into a bath of boiling water.
Sounds like you find a way to do it that works!
Please know that many lid producers now recommend NOT heating them to a boiling temp before use as changes in the seal ingredients may result in seal failures. Look on the box for recommendations.
Will check. Thanks!
Hi. I just came across this and I cannot wait to try it. Question though, what about lactose free milk? I wonder if that makes a difference. Thank you for the inspiration.
Honestly, I have no experience with lactose-free milk. I use my raw goat milk and store-bought cow’s milk. I am not sure if it’s safe to can lactose free milk, you’d have to do a little bit more research. Sorry I can’t be of more help!
I’m confused, at one part you say to pressure cook it for 25 minutes and then this other part it says once it hits 11 psi that you turn it off and let it cool down??? Which is it?
I don’t see anywhere that it says 25 minutes…
Fill the canner with warm water
Add the jars, close the canner
Turn heat to high, wait for the canner to start steaming
Let the steam escape from the vent for 10 minutes, place the weight on the vent
Watch the dial, once it gets to 11psi turn the heat off and let the canner cool slowely.