Fermenting Tomatoes Step By Step
This post may contain affiliate links, view our disclosure policy for details.

Fermenting tomatoes is a great way to preserve tomatoes without cooking them and it takes minutes to prepare a huge jar. Learn how to lacto ferment tomatoes and use your fermented tomatoes as a side dish, in salads, or add them to sandwiches.
My vegetable garden always consists of tomato plants. The garden just doesn’t feel complete without tomatoes in it. I usually plant a few different varieties, some are especially for canning and some for eating fresh in salads or sandwiches (like my favorite Matt’s Wild tomatoes although, I can those as well).
I can crushed tomatoes, can stewed tomatoes, and I can tomato sauce. We eat a lot of them fresh or I use fresh tomatoes to make pasta or pizza sauce (sometimes I freeze it). There are a million uses for tomatoes, and we always anxiously wait for the plants to produce but there are times during the growing season when tomatoes are coming faster than we can consume them or handle them.
Fermenting Tomatoes…

You probably know that tomatoes don’t last too long. I always pick my tomatoes at the green mature stage and let them ripen indoors, but once they are ripe, I know that I have to do something with them or I’ll lose them (and I worked way too hard to lose them).
Canning tomatoes is a great way to preserve them, of course. But to be honest, sometimes, in the middle of the growing season, when I have two million other things to do, I just don’t have time to can tomatoes. To help with that problem, I’ve started freezing my whole tomatoes. I simply throw them in the freezer and they stay there (piling up) until I have time to can them.
But I was looking for another way to preserve them that would be easy and quick and didn’t involve cooking and came across this fermented tomatoes recipe in an old Israeli preserving book that I have. I decided to give it a try and even though I have to admit that I still prefer eating fresh tomatoes or canning a sauce, this was a great way to keep tomatoes “fresh” for a little longer.
Why Should You Ferment Tomatoes?
- It takes minutes – literally, it took me less than 10 minutes to prepare a gallon of fermented tomatoes. Yes, they have to be left for a couple of weeks to a month to ferment but to actually put it together was super easy and did not involve any type of cooking (kinda like preserving whole lemons. Not so common but really easy and tasty!).
- They store well – at the right temperature (we’ll go over this later), fermented tomatoes can last in the jar for a few months. If you have a root cellar or a fridge that you can store the jar in, it can be a great way to keep tomatoes for the early months of winter and enjoy them fresh and not cooked.
- It’s a nice change – it gives me a bigger variety and another simple thing to do with my tomatoes. So I can enjoy them fresh, fermented, cooked…
- They are so healthy – lacto-fermentation actually increases the nutritional value of food! More on this below…
What is Fermentation?
Fermentation is the process of using microorganisms, such as bacteria or yeast, to convert carbohydrates to alcohol or organic acids under anaerobic conditions. There are a couple of types of fermentation…
Alcoholic fermentation is when we use yeast to break down sugars into carbon dioxide and ethanol. This is the process we use to make beer, wine, and bread.
Lacto-fermentation is the process of using bacteria, named Lactobacillus, to convert sugars into lactic acid. This bacteria (some form of it) is actually present in our digestive system naturally and is also present on the surface of plants.
Lactic acid is a preservative that helps us preserve foods by preventing the growth of harmful bacteria. Lacto-fermentation, which is the process we are going to use to preserve our tomatoes, also increases the vitamin and enzyme levels in the vegetables we ferment.
Adding those foods to our diet can help us introduce additional probiotics, or in other words, beneficial bacteria to our digestive system in a natural way. These lacto-fermented tomatoes are going to be both tasty and healthy to our digestive system!

What Kinds of Tomatoes to Ferment…
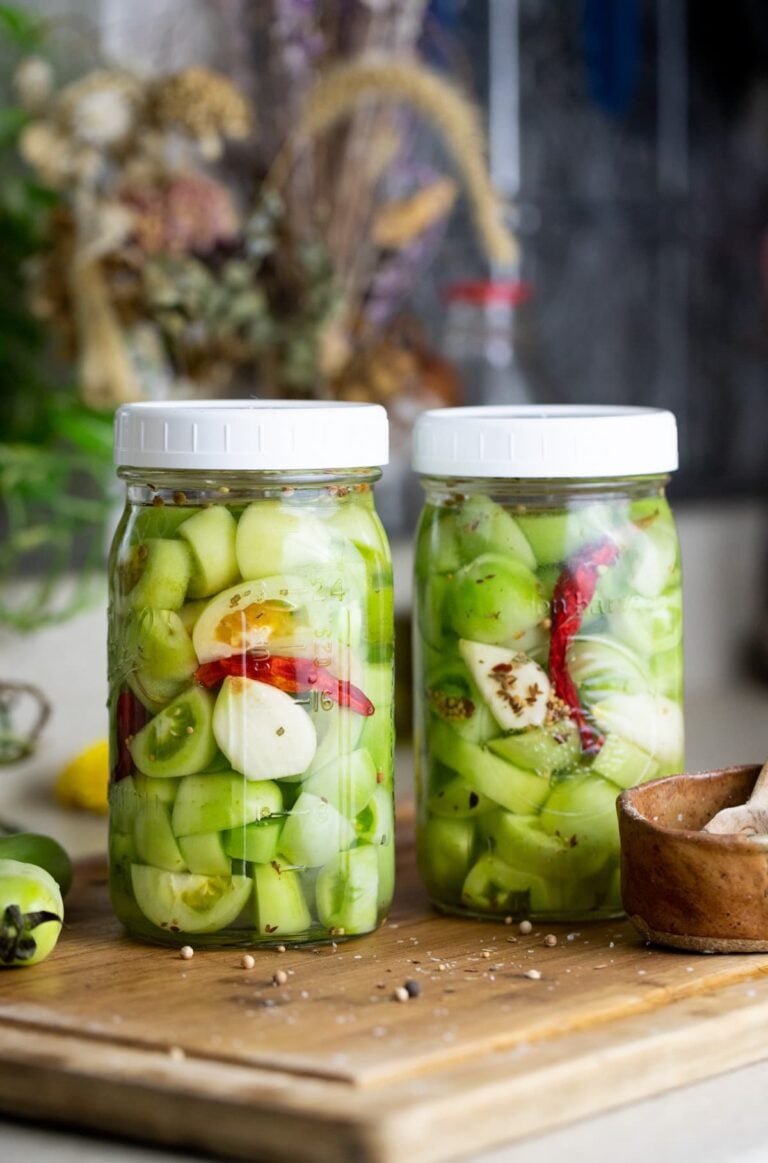
Any kind. Fermented tomatoes are a very popular dish in many European countries and as far as I know, they use all types of tomatoes for fermenting (you can also try fermenting green tomatoes if you find yourself with unripe tomatoes)..
Variety – if possible, I choose to ferment the slicing varieties and keep the canning varieties for canning. You’ll see below that I used a mix of whatever came from the garden, but they were all slicing varieties.
Size – choose medium to small tomatoes. They are easier to pack into the jar and they take less time to ferment. They also seem to hold better and it’s easier to handle them after they ferment.
Ripeness – for some reason, when I was doing a little bit of research before I fermented my tomatoes, I found a few places that said that you should use tomatoes that are not completely ripe because the ripe tomatoes have more sugar in them and the sugar wants to break down into alcohol in the fermentation process.
These were all American sources. When I looked up recipes from Israel or Russia or other European countries (where this dish is popular), there was no mention of alcohol anywhere and plenty of recipes listed ripe tomatoes. I chose to ferment my ripe tomatoes and I didn’t taste a hint of alcohol in my fermented tomatoes.
So, if you ask me, you can ferment tomatoes at any stage of ripeness. I’ll have a separate post about fermenting green tomatoes, but just so you know, you can even ferment them green. I believe that the noticeable difference is in their consistency after they are already fermented. The ripe tomatoes fall apart a little bit and the under-ripe tomatoes hold their shape and texture better. Makes sense since ripe tomatoes are softer to begin with. Anyway, you can experiment and decide what you like better.
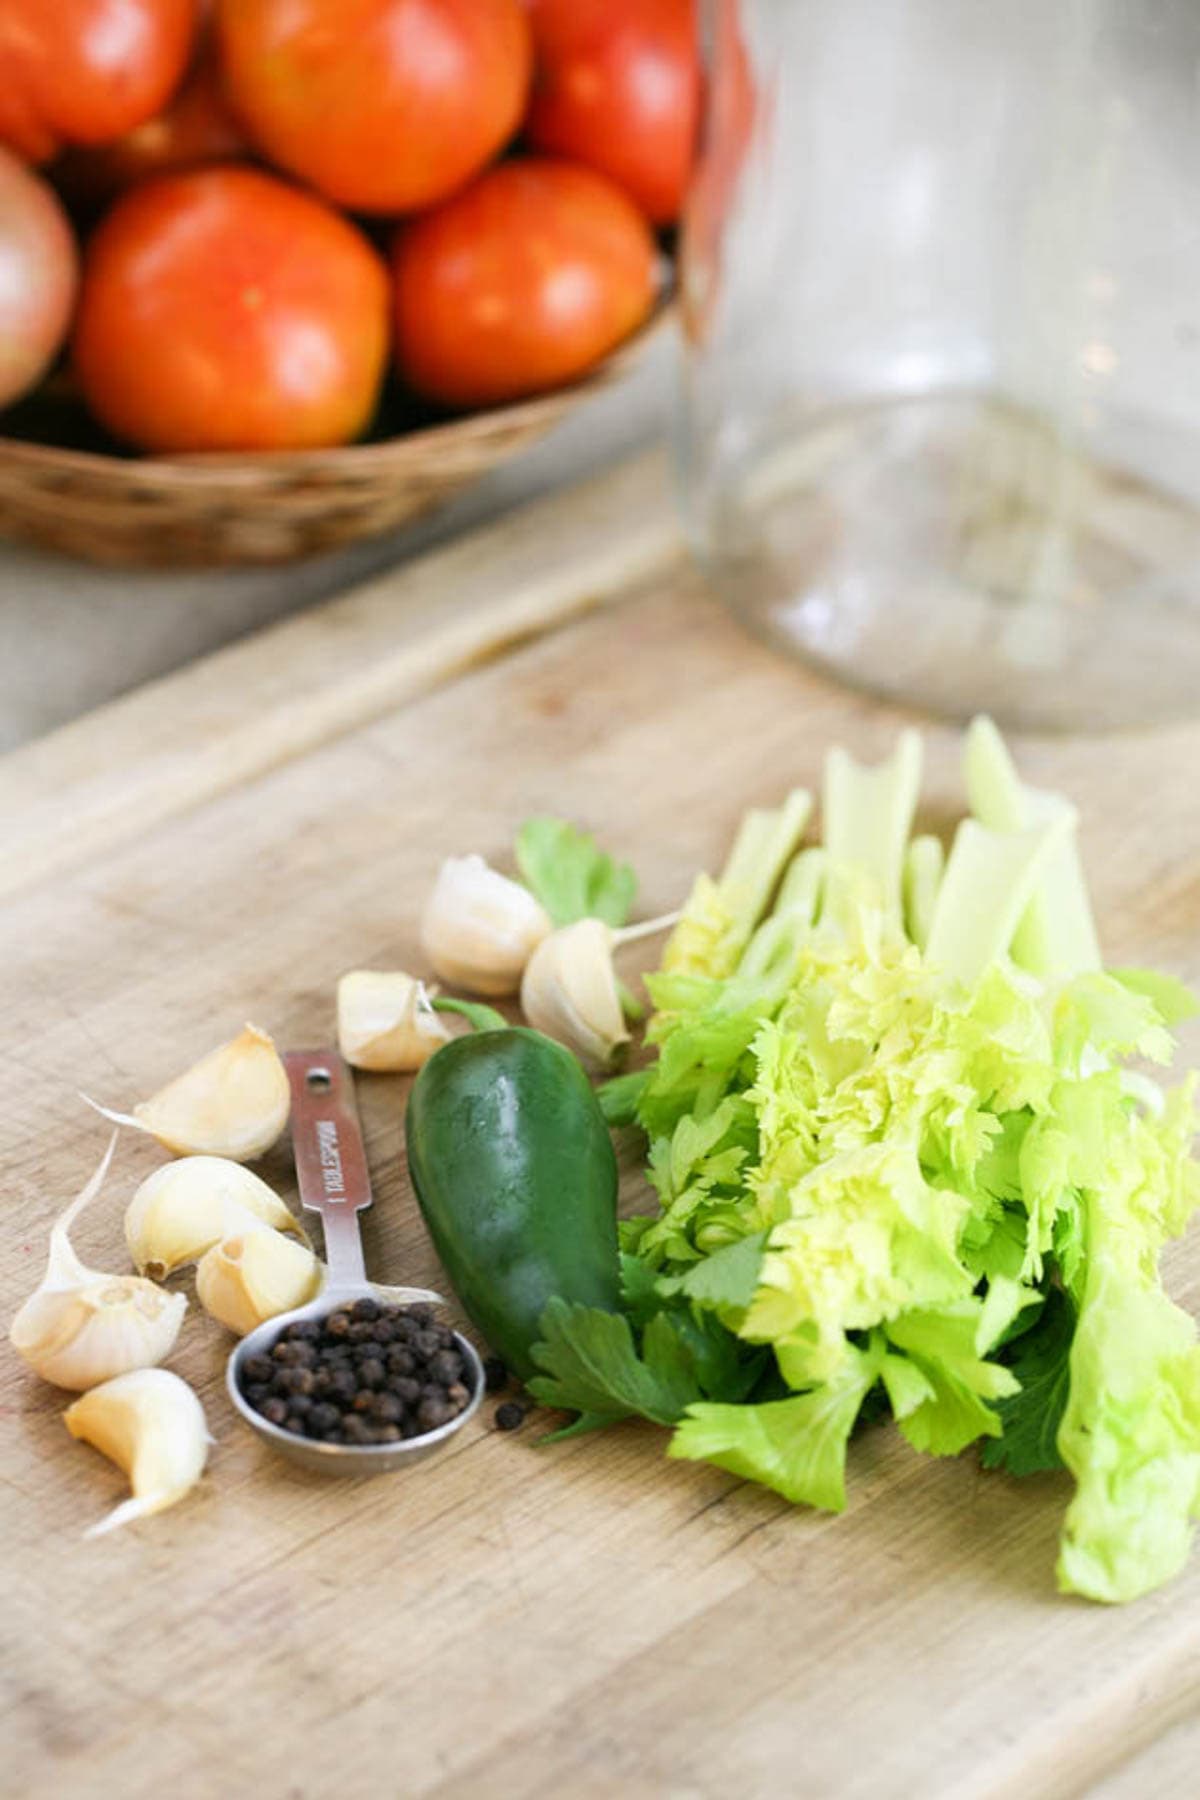
Ingredients…
These are the ingredients that I used to make a one-gallon jar of fermented tomatoes. There are really no rules here! You can add more or less of anything, add something different if you feel like it, or change things around. Use this list to give you a general idea…
- Tomatoes – as I mentioned above, use small-medium slicing tomatoes or cherry tomatoes. Make sure to wash them well.
- Celery – I used 5 celery stalks. I used the center stalks because they have more leaves on them and that’s where all of the celery flavor is.
- Jalapeno pepper – I used one but you can add more if you like the heat. Remove the stem and quarter the pepper. Remove the seeds or you can choose to leave them if you like the heat.
- Garlic – eight cloves for a one-gallon jar. There is no need to peel them but place your knife on each clove and press down to crush the clove. This will allow the juices to escape easily.
- Whole peppercorns – I used one tablespoon.
- Non-iodized salt – to make the brine we will need non-chlorinated water and non-iodized salt. Use canning salt, kosher salt, or sea salt. We’ll use one tablespoon of salt per one cup of water. This is a salty brine, which is how I prefer it, however, you can use less salt if you’d like but don’t use less than one teaspoon per one cup of water.
Kitchen Tools…
- Cutting board – we don’t have too much to cut but I always like to work on a cutting board anyway. We’ll use it to cut the jalapeno, crush the garlic, and so on.
- Kitchen knife
- Bamboo Skewers – we are going to use these to poke holes in the tomatoes so the brine can get in there.
- Measuring spoon
- 4-cup Measuring cup
- One gallon jar – I am using a gallon jar in this tutorial but you can also use half a gallon or even quart jars depending on the size of your tomatoes.
- Fermentation weights – please don’t be like me and promise yourself every season that you are going to get fermentation weights and never get them. Just get fermentation weights, they’ll make your life much easier. If you don’t have fermentation weights or you don’t want to get them, I’ll show you what I use and give you a couple of other ideas but really, just get fermentation weights (update – I finally got fermentation weights and my life will never be the same!).
- Fermentation lid – during the fermentation process gas is created. We need to let this gas out once a day. There are fancy fermentation lids that save us this work, but they are completely optional. It only takes a second to “burp” the jar (more on this later).
How to Ferment Tomatoes Step By Step…
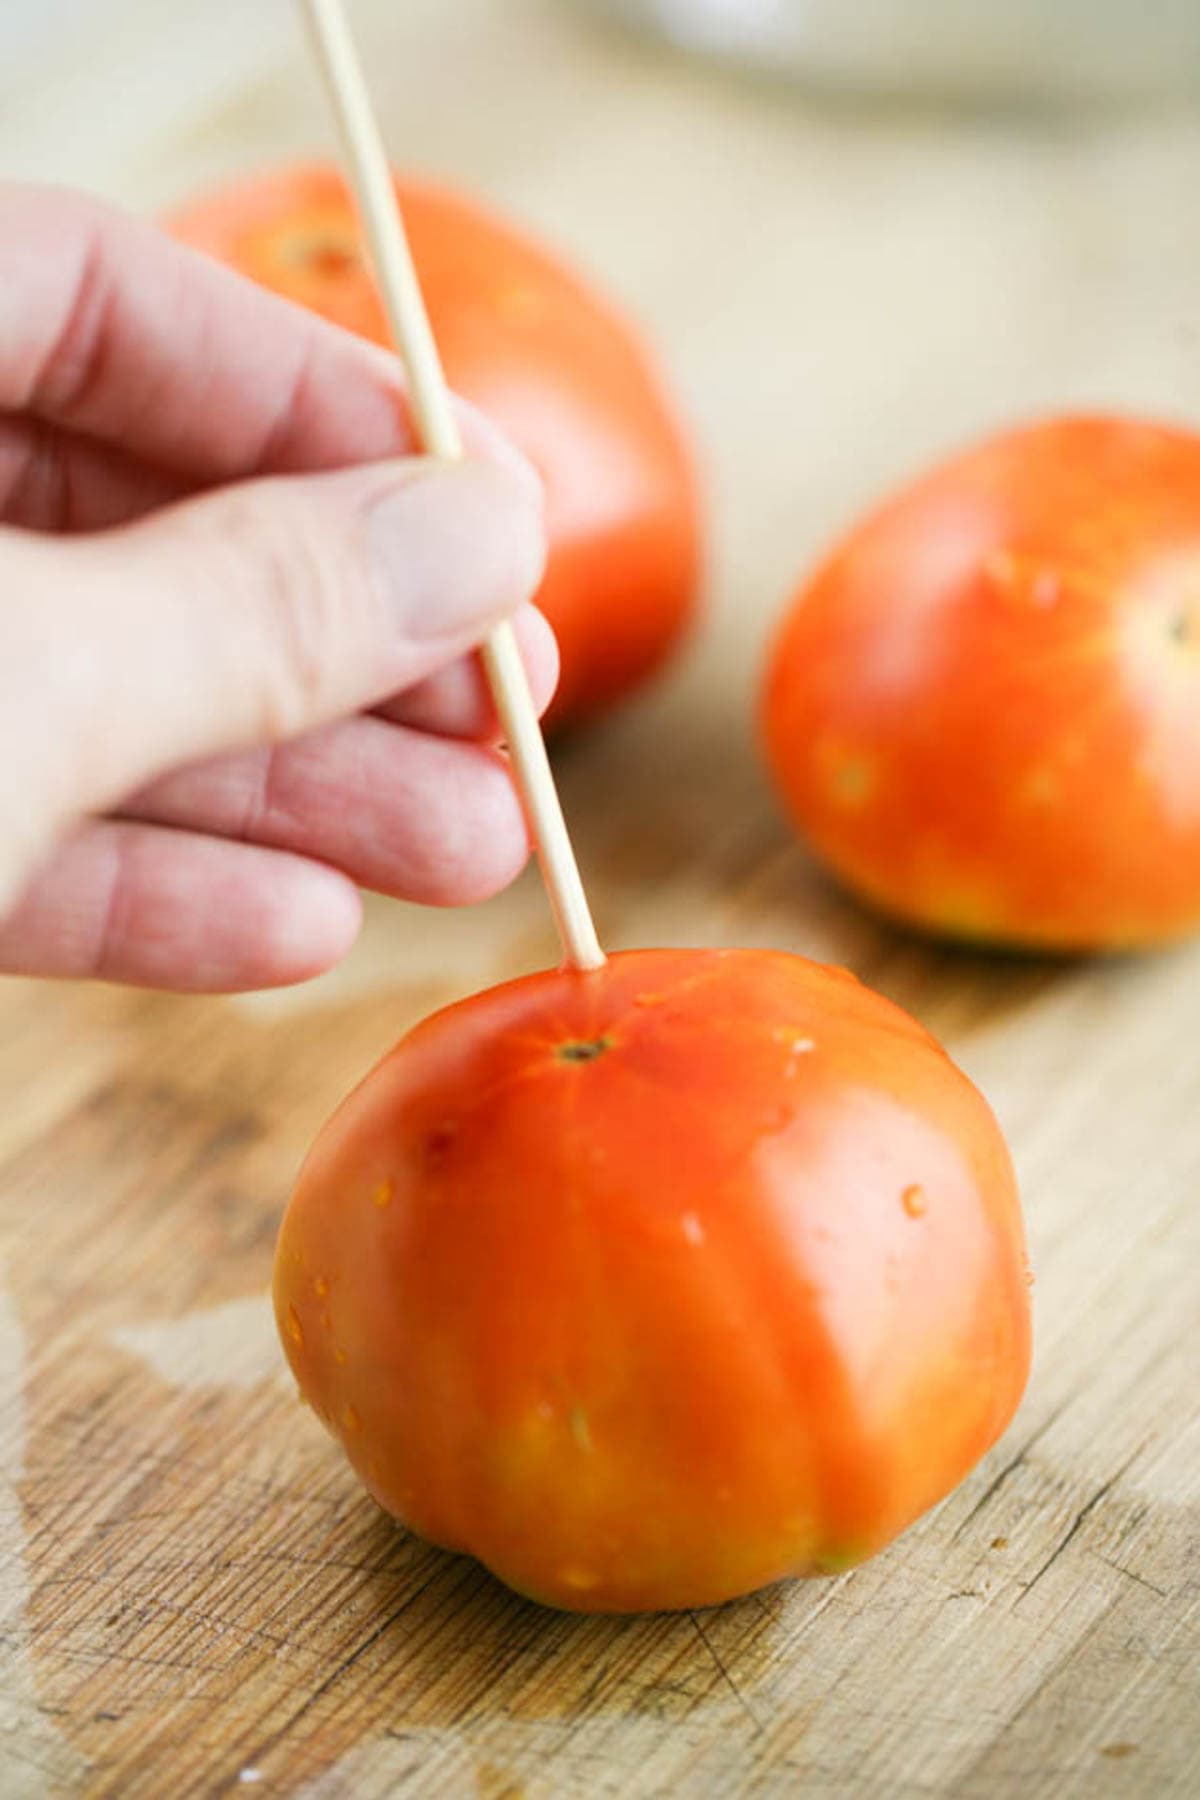
Step 1 – prepare the tomatoes. To make it easier for the brine to reach the inside of the tomato, use a bamboo skewer to poke holes in the tomato. No specific instructions here… Just a few holes in each tomato.
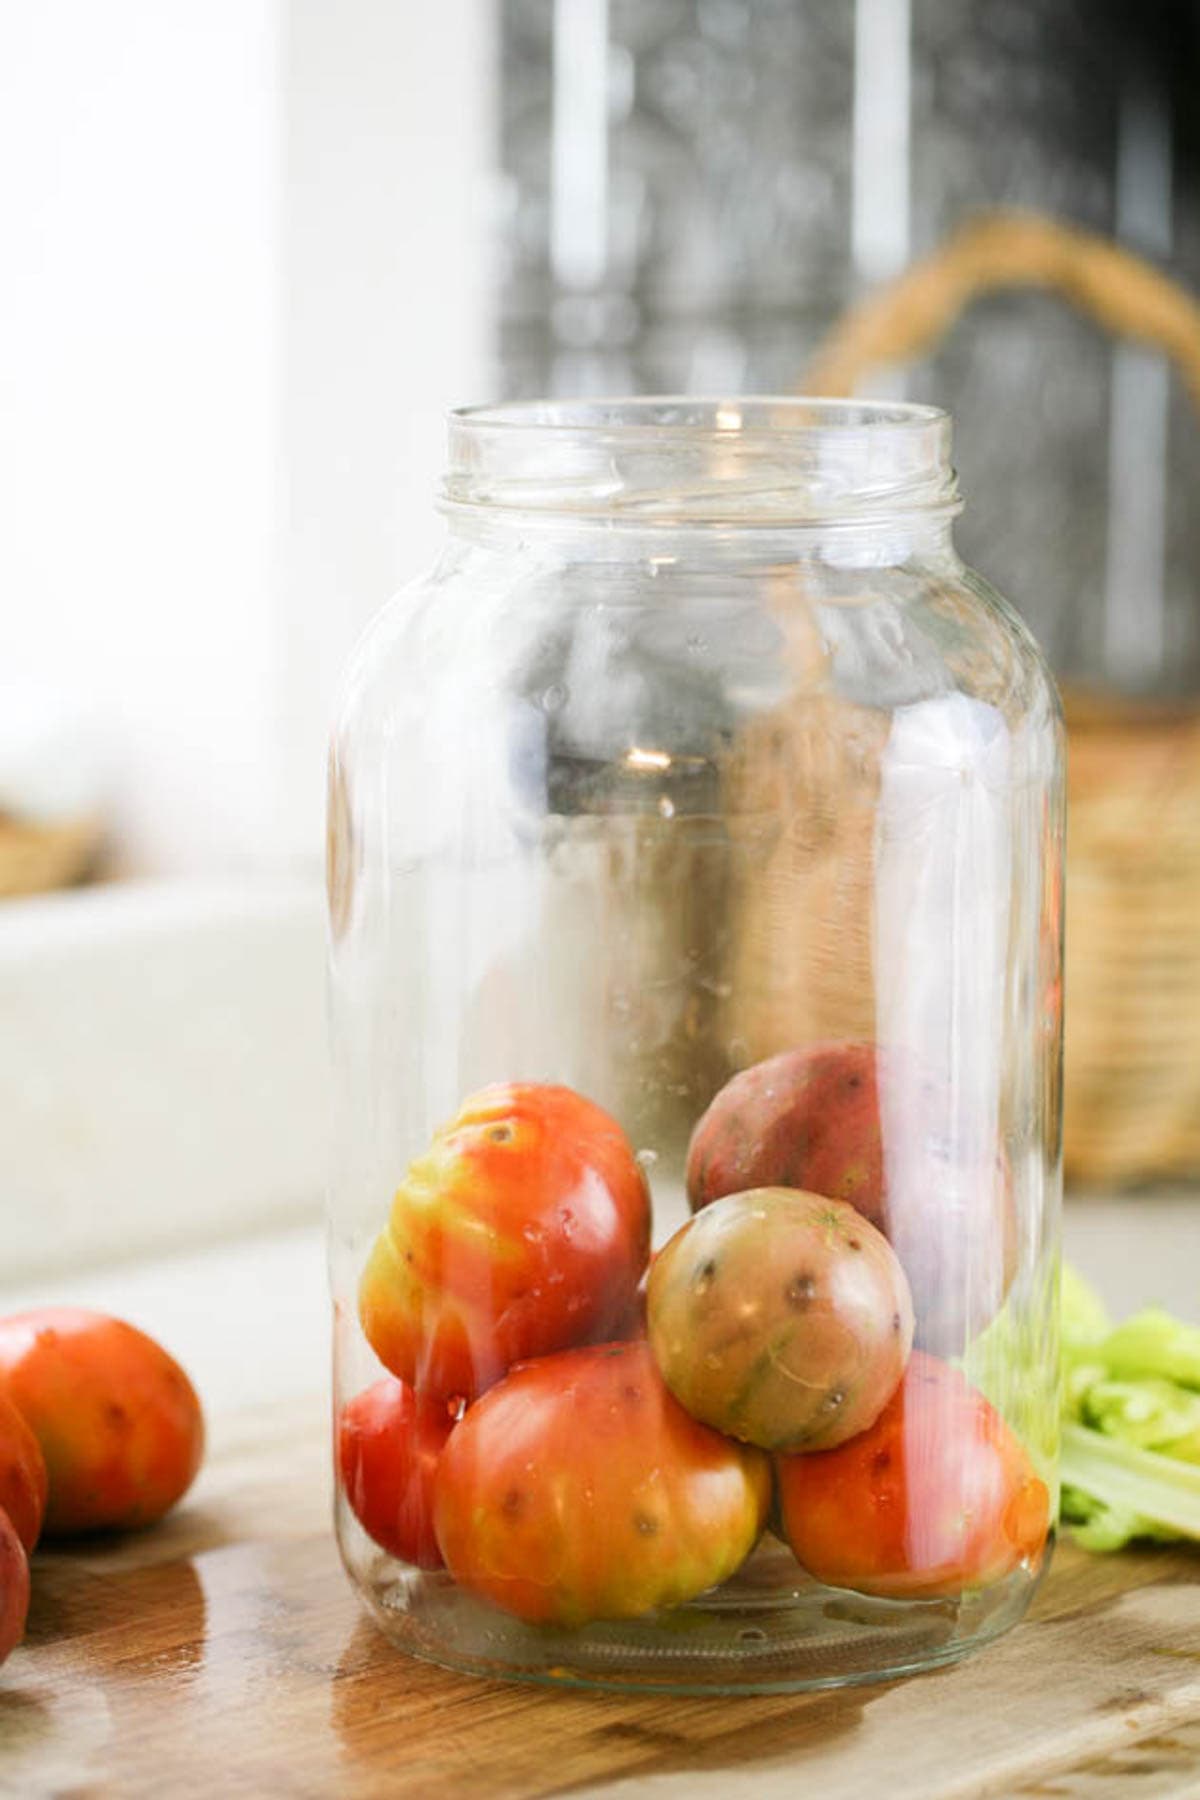
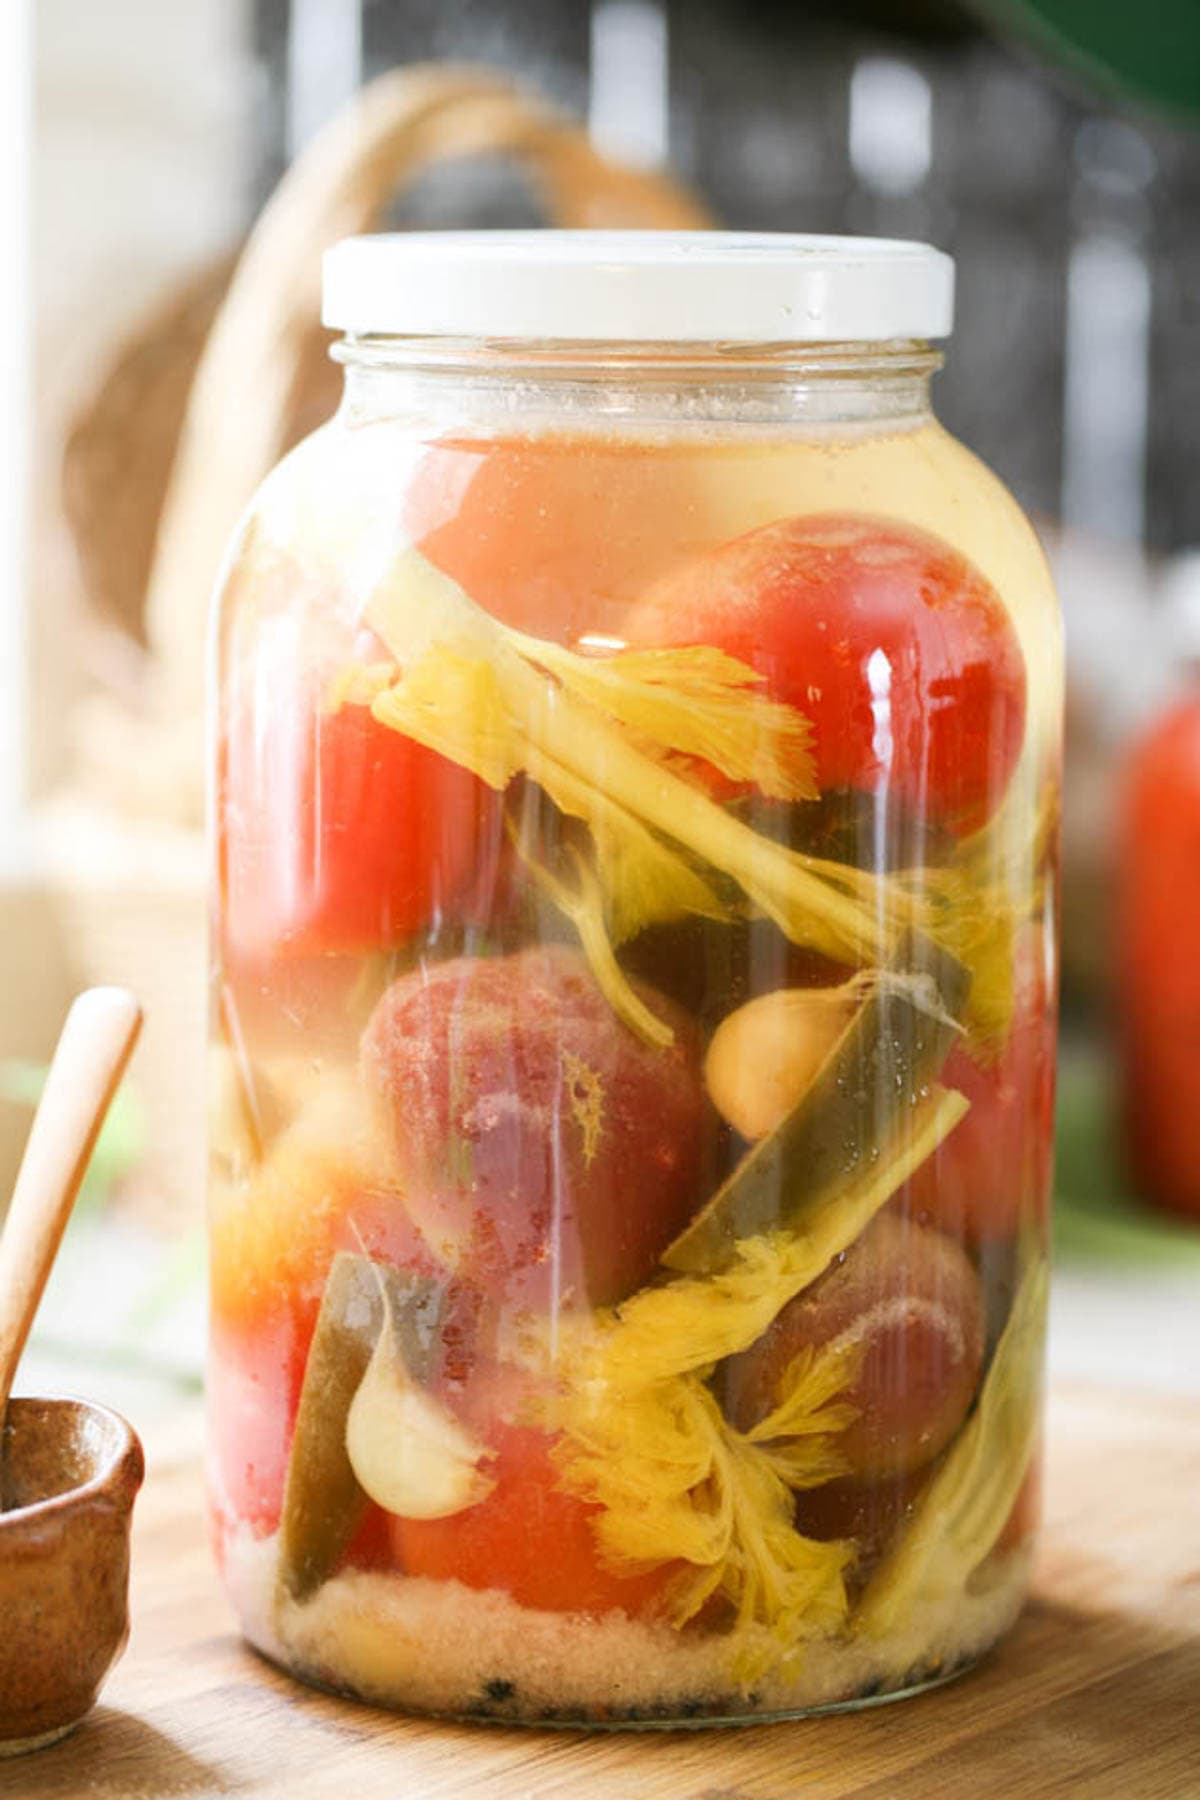
Step 2 – pack the jar. Pack a few tomatoes into a clean gallon size jar…
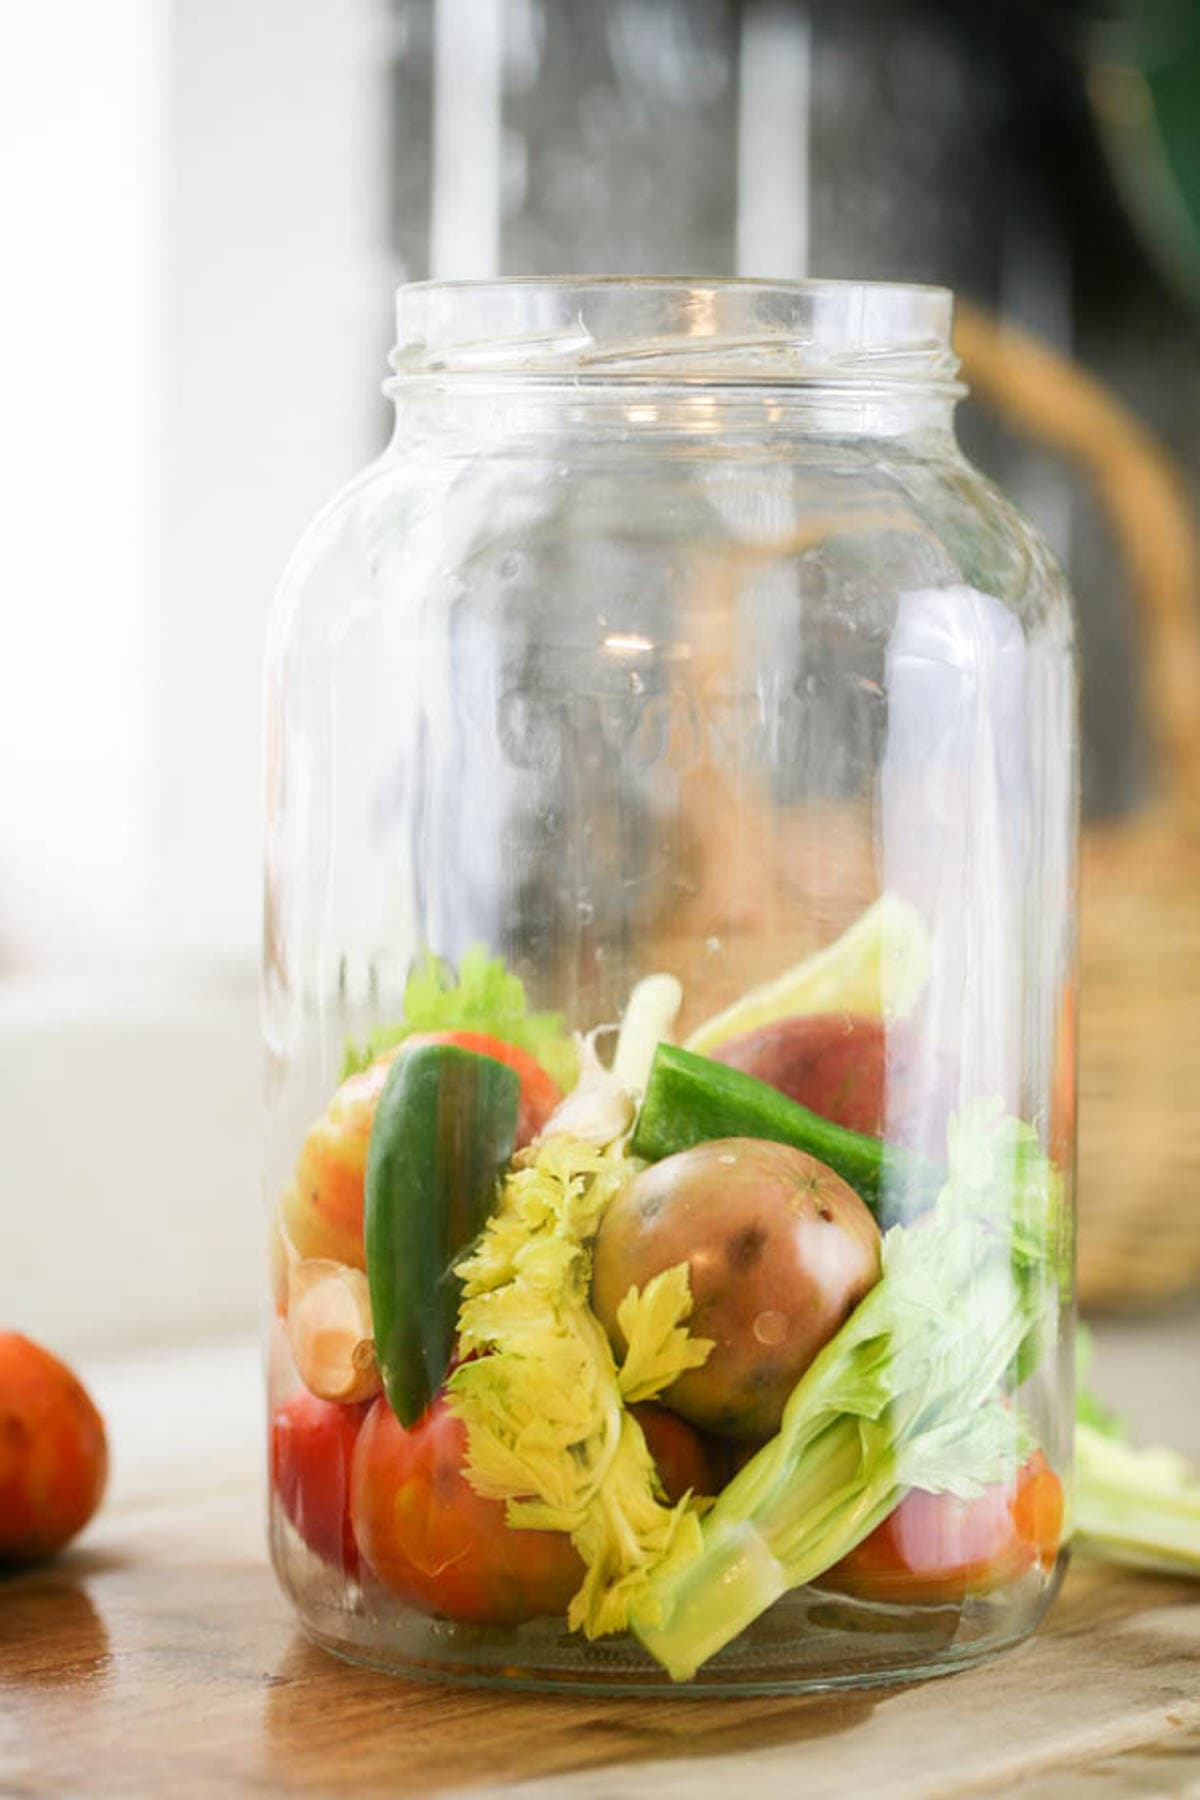
Then add some of the celery, garlic, and jalapeno…
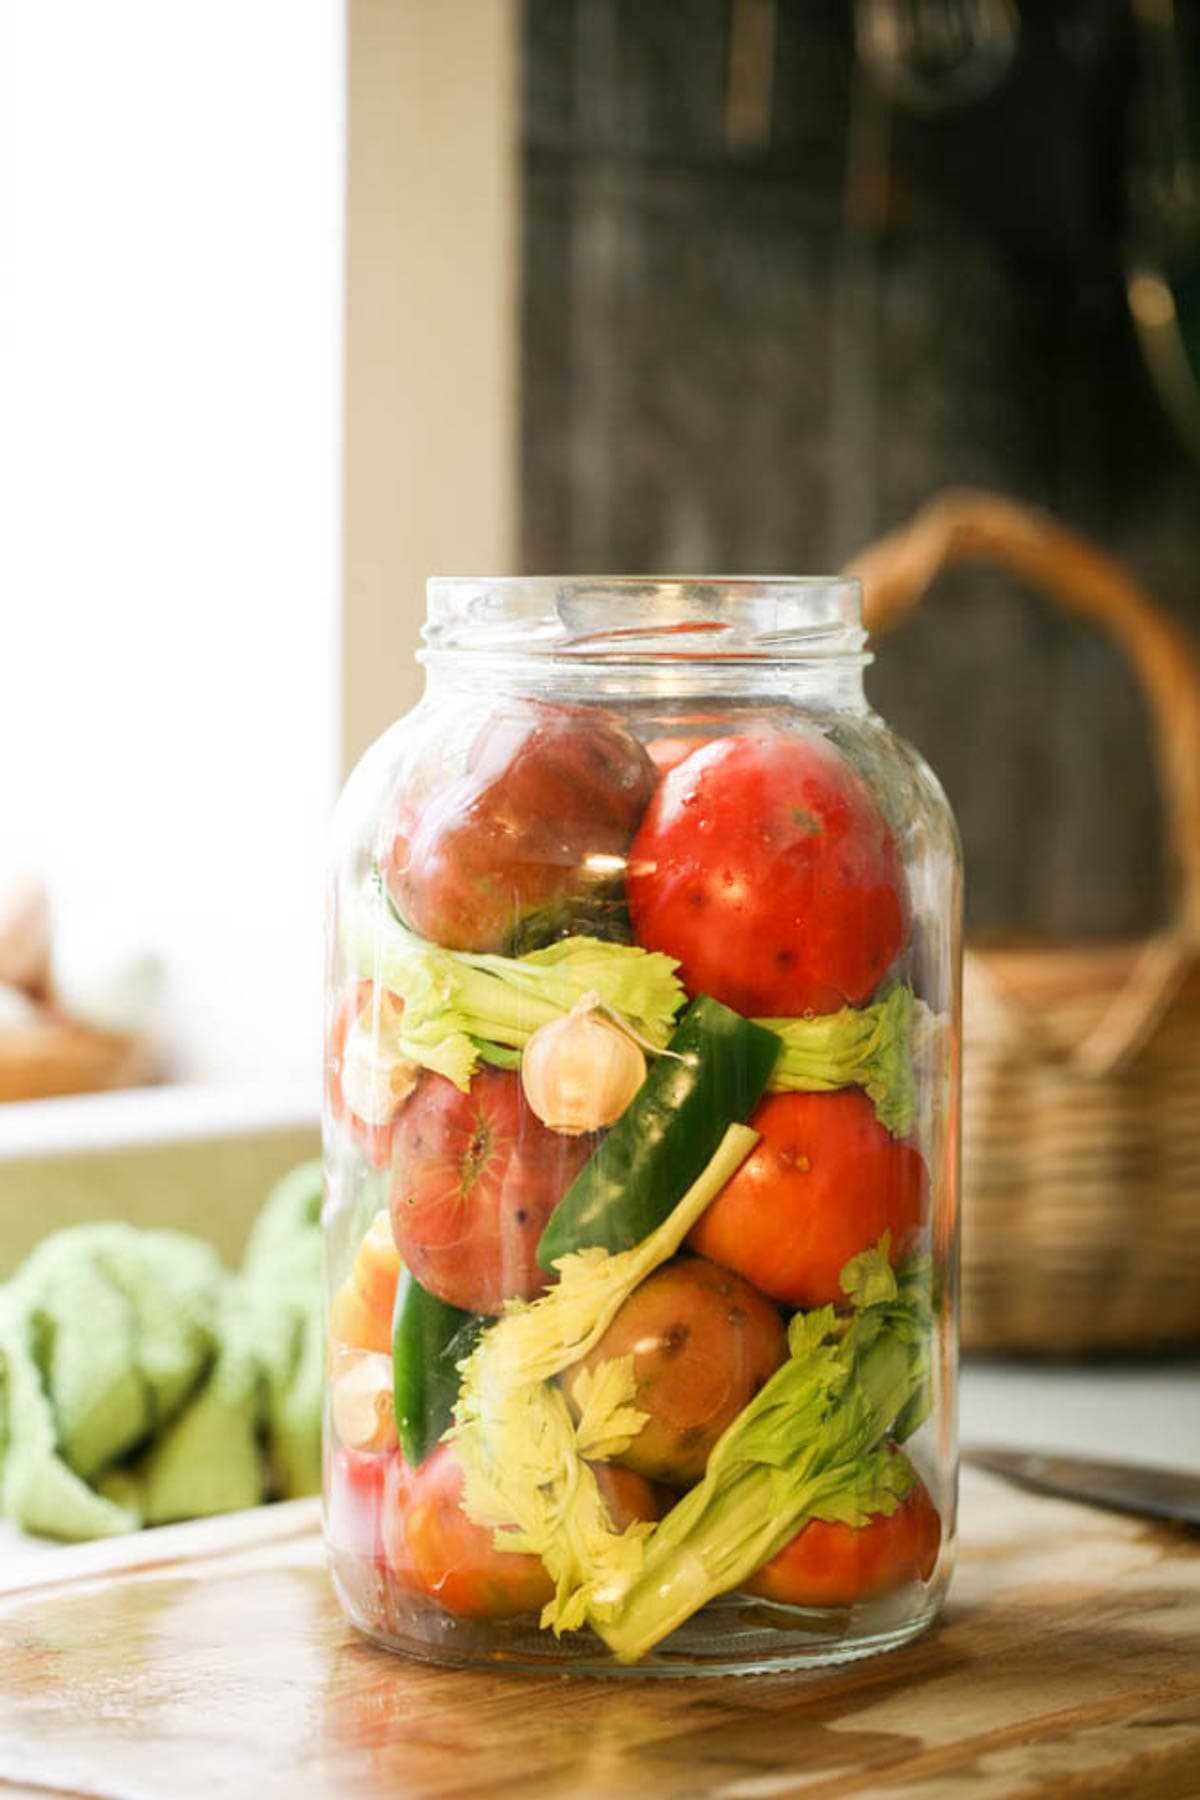
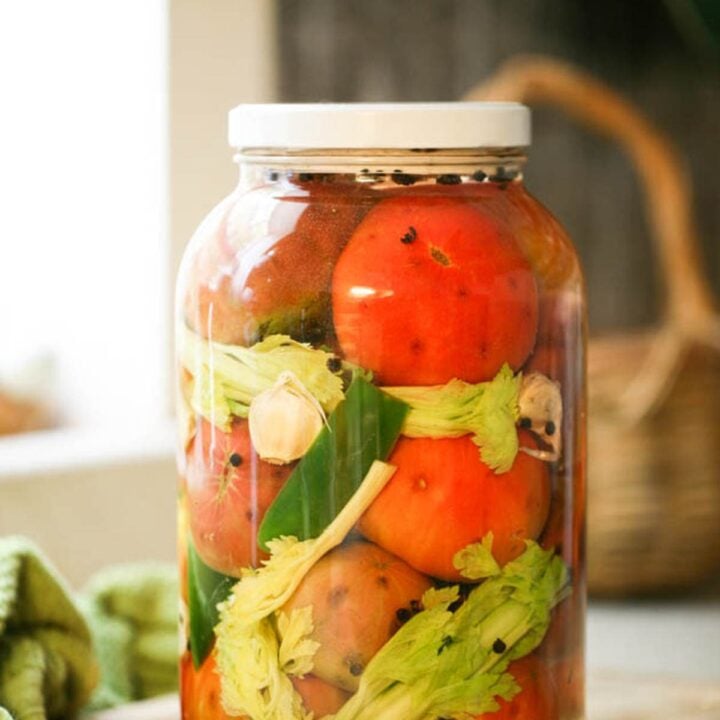
Keep adding and layering tomatoes (make sure not to crush them or pack too tight), garlic, celery, and jalapeno until the jar is full, leaving about 2” of headspace. Next, add the peppercorn and just let them fall in between the other vegetables.
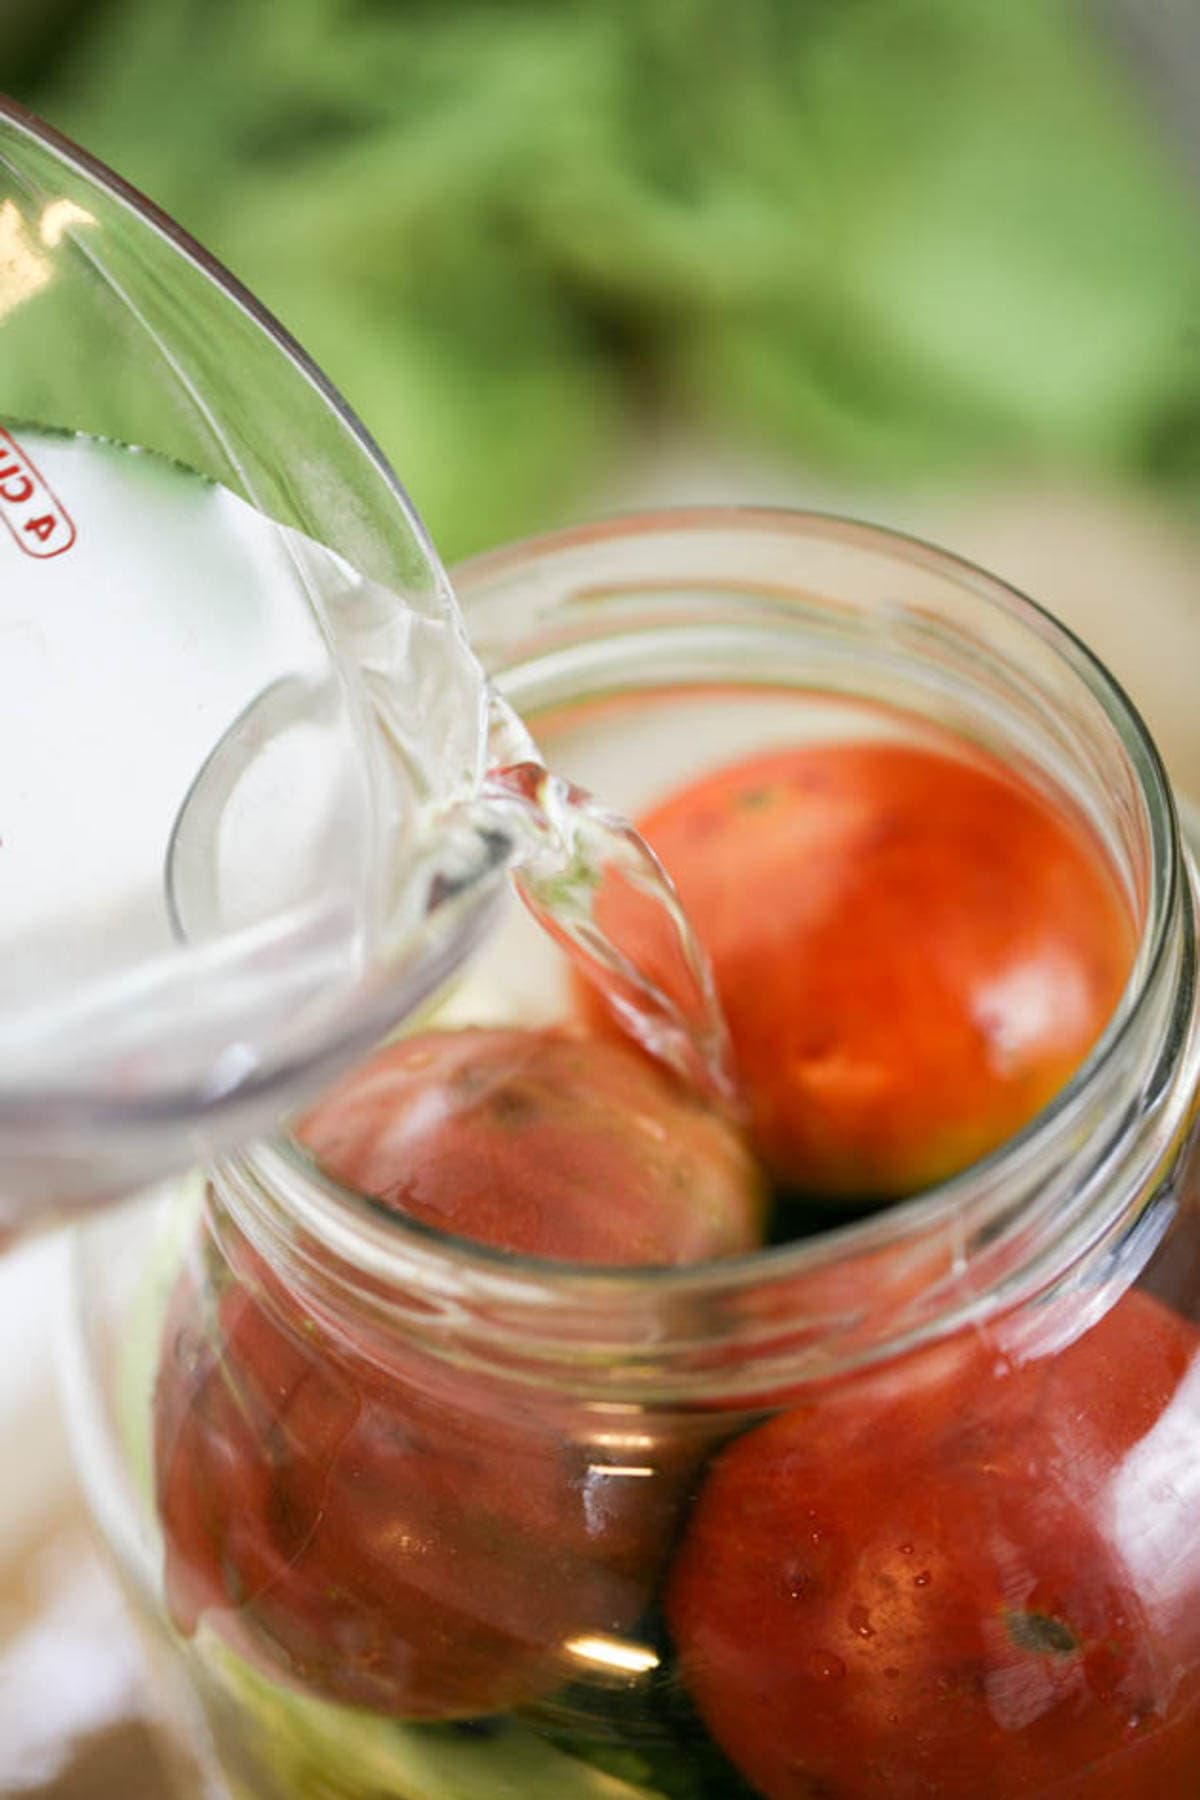
Step 3 – add the brine. Fill a four-cup measuring cup with water and add four tablespoons of salt. Mix until the salt dissolves and add to the jar. Do it again until the tomatoes are covered with brine.
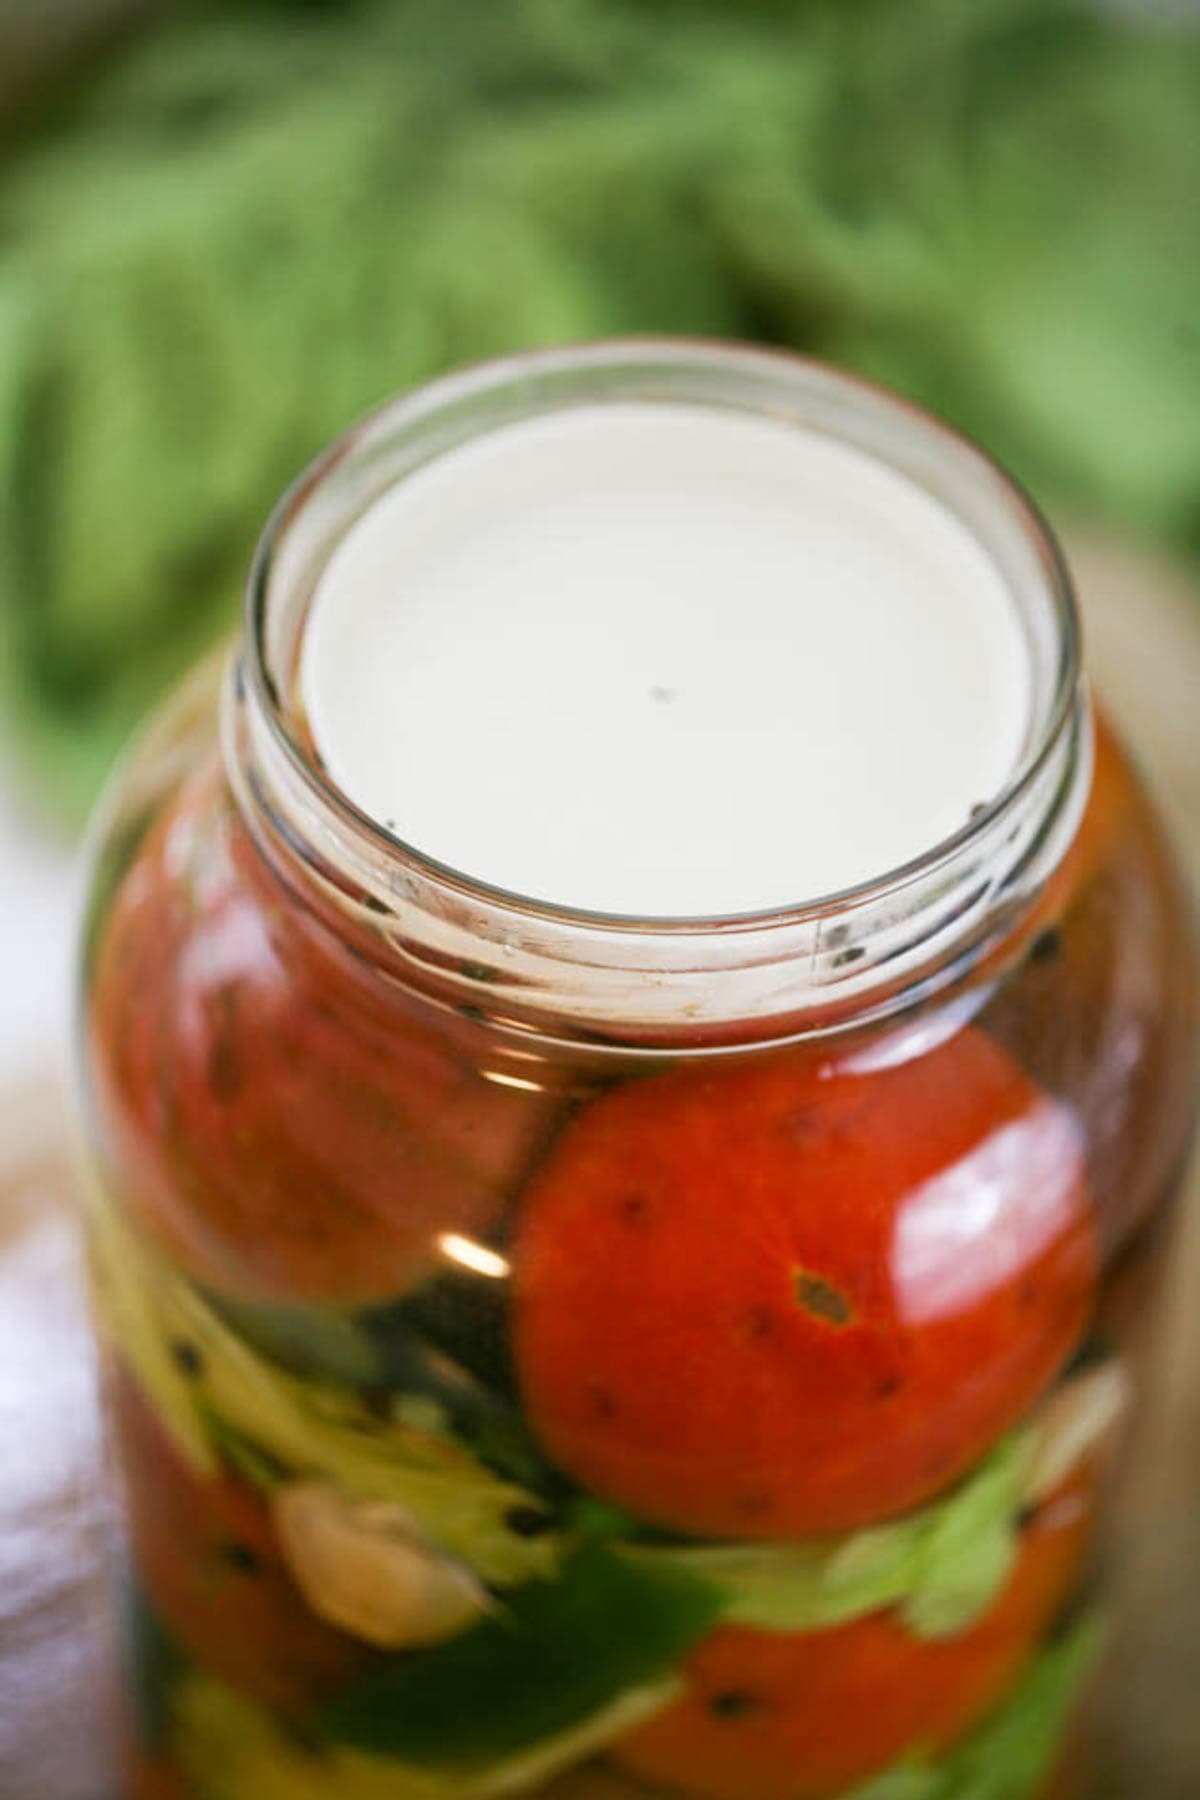
If you have a fermentation weight, place it on top of the tomatoes and make sure the brine is covering the tomatoes and the weight. If you don’t have a fermentation weight, you can use a wide-mouth freezer lid. Flip it so the brine can fill it and create a weight that will keep the tomatoes submerged.
Step 4 – let your tomatoes ferment. That’s it. All that is left to do is cover the jar and set it on a large plate (to catch some brine that will probably spill out as the tomatoes ferment). Leave the jar on the kitchen counter at room temperature to go through the fermentation process.
After a few days, the brine will start bubbling and create gas. We have to let this gas out once a day by simply twisting the lid open and then twisting it back (no need to completely lift it).
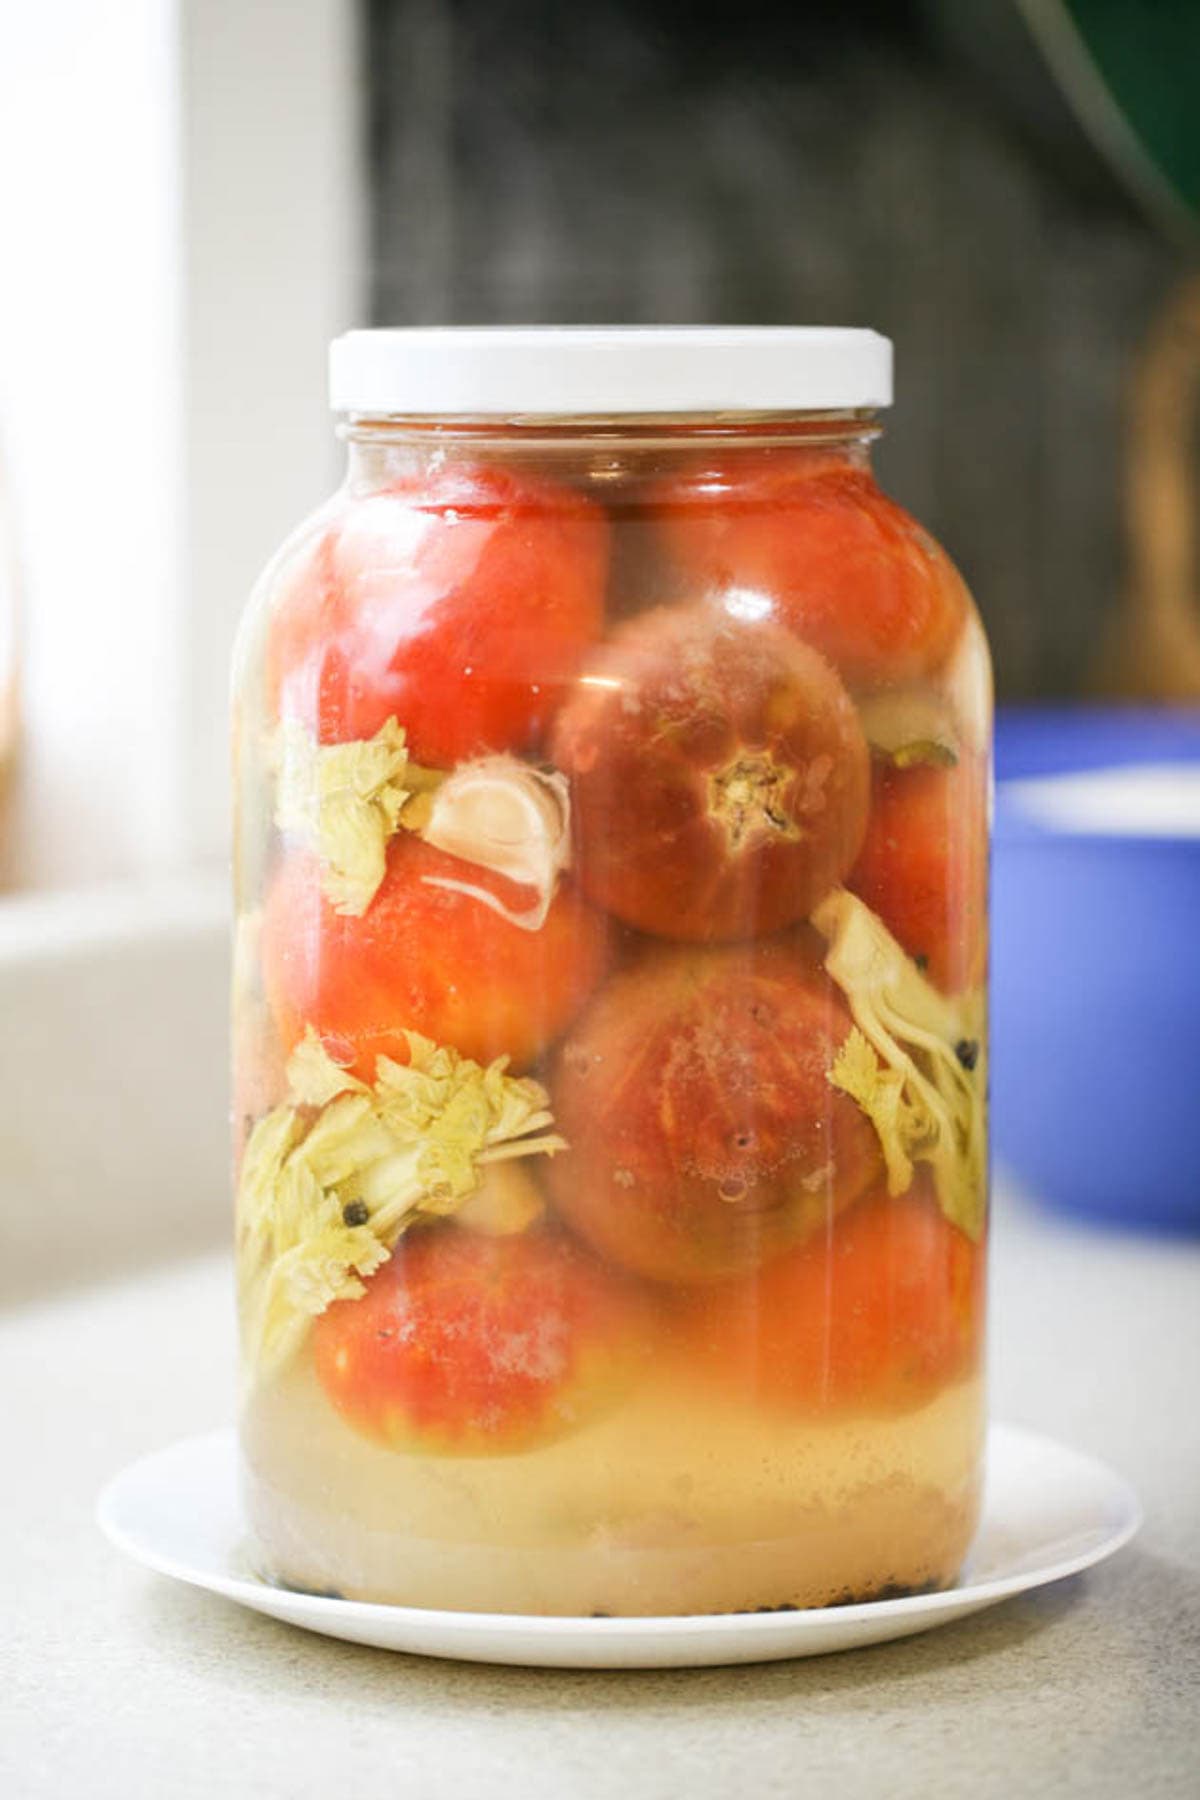
You’ll notice that the brine becomes really foggy after a few days. This is completely normal…
Once the liquid in the jar is clear again the fermentation process is done and the tomatoes are ready to eat (it will never be as clear as it was at the beginning but much less foggy). With a one-gallon jar, it will probably take a total of around 20 days at room temperature. Of course, if you are using a smaller jar, the fermentation process will take less time.
How to Store Fermented Tomatoes…
The best thing to do is to store these fermented tomatoes in a refrigerator or a root cellar. Around 40 degrees Fahrenheit is best if we want them to last longer. If you store your fermented tomatoes this way, they should last for a few months (6 months or so).
I stored this jar in the fridge and we used it within a month. It’s important to make sure that the tomatoes are still under the brine even after the fermentation process is done and you transfer it to the fridge. Also, it’s important to use a clean fork or spoon every time that you want to fish out a tomato.
Sometimes I get this thin white film on the top of the brine. The white film is called kahm yeast and won’t hurt you. I want to let you know that I never throw away my fermented goodness. I scoop the film out and keep eating my food.
How to Use Fermented Tomatoes…
Fermented tomatoes are soft, tangy, sour, yet still hold the tomato taste… It’s an interesting combination of tastes, I have to admit. You can eat them by themselves as a healthy snack. You can add them to sandwiches or salads, or as a side for an egg salad or a tuna salad or a chicken salad (or any other dish, really). I’ve also heard that they are great to make salsa and marinara sauce with but I haven’t tried this yet.
Frequently Asked Questions…
It’s important to use non-chlorinated water when making brine for fermenting so if you live in the city, you might need to purchase water. Distilled water is just fine for fermenting.
Yes! You can ferment any kind of tomato by following this recipe, even green tomatoes.
Yes! After a few days, you’ll start noticing some bubble action and the brine will turn foggy. This just means that the fermentation process has begun. Make sure to twist the lid once a day to allow the gas out for a few seconds before you close the jar again. And watch for the fogginess, once it clears, your ferment is ready for serving.
You can use as little as one teaspoon of salt per one cup of water but no less.
Yes! If you like the taste of vinegar, you can add up to two cups of vinegar to a gallon jar. Add the vinegar first and then add the brine.
Definitely! Add thyme, oregano, basil, or sage. Add pickling spice, mustard seeds, chili flakes… Really, there are no rules and the sky is the limit. Add something different each time and take notes until you find the combination that you like best!
Fermented tomatoes are a special and interesting thing to eat, for sure! I hope that this tutorial was helpful and that you’ll give them a try. If you do, come back and let me know what you think in the comments below.
More Fermenting And Pickling Tutorials…
- Fermenting Cucumbers
- Preserving Peppers in salt and Vinegar
- Lacto-Fermenting Green Beans
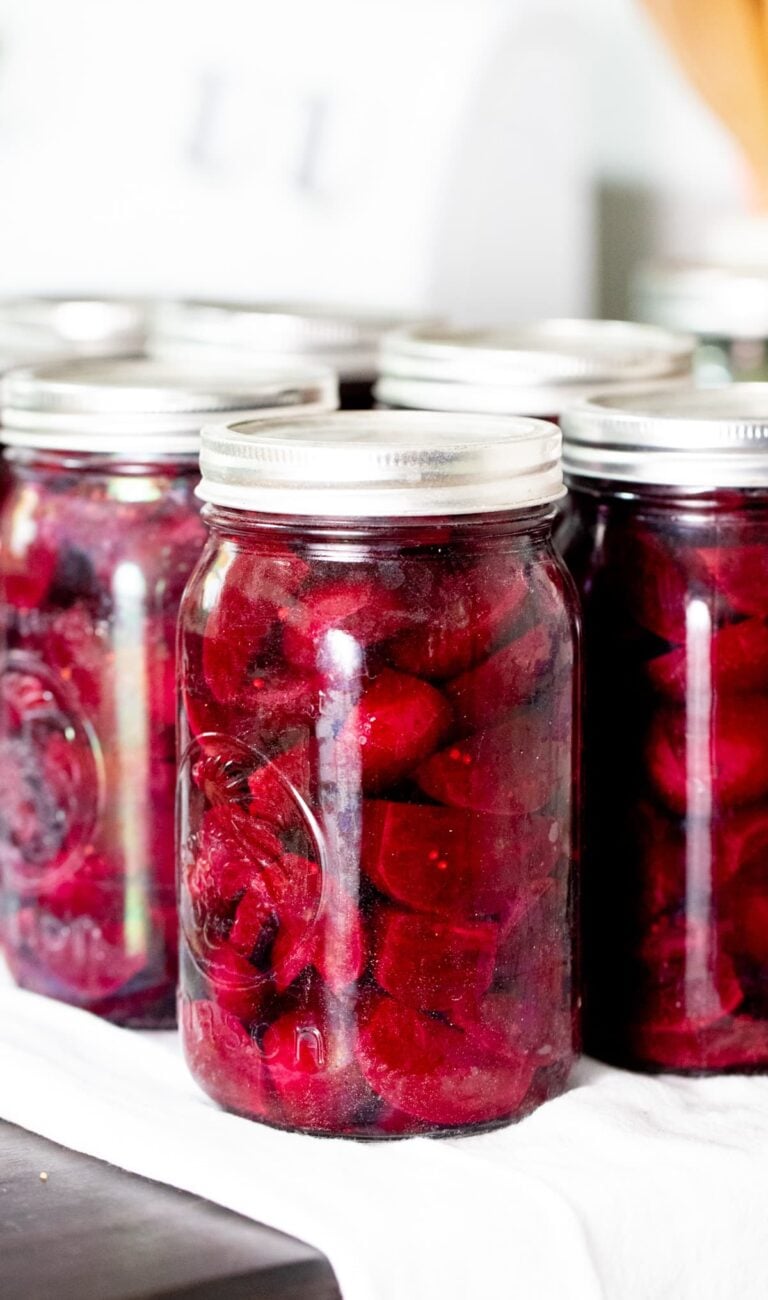
- Fermenting Beets
- Pickled Green Tomatoes
Fermenting Tomatoes
Fermented tomatoes are tangy, sour, salty, but still keep their tomato taste. It's an interesting way to preserve tomatoes and a healthy dish.
Ingredients
- Enough small to medium tomatoes to fill a gallon jar
- 5 celery stalks (use the center of the celery. The young stalks with leaves on them)
- 1 jalapeno pepper
- 8 cloves of garlic
- 1 tablespoon of peppercorns
- Non-iodized salt (sea salt, kosher salt, or pickling salt)
Instructions
- Wash your tomatoes. Use a bamboo skewer to poke a few holes in each tomato.
- Cut the stem off of the jalapeno pepper and half it. Remove the seeds and the white membrane and half each half again. If you want your fermented tomatoes spicy you don't have to clean the membrane and seeds from the pepper.
- Crush each garlic clove but leave the peel on.
- Wash a gallon jar well with warm water and dish soap.
- Add a few tomatoes into the jar, then a few garlic cloves, a couple of celery stalks, and a piece of jalapeno pepper. Repeat until the jar is full and you have used all of your vegetables.
- Add the peppercorns on top of the tomatoes.
- Mix a tablespoon of salt in a cup of water and add it to the jar. Keep adding brine until the jar is full. Make sure to leave about an inch or two of headspace.
- Place a fermentation weight on top of the tomatoes and make sure that all of the vegetables are submerged in the brine.
- Close the jar and place it on a dinner plate on the counter to ferment.
- After a few days, when the fermentation process starts (the water will become cloudy and there will be some bubbles on the top), remember to twist the lid open once a day and let the gas out (no need to lift it. Then close it back again (this is called "burping" the jar).
- After about 2 weeks the brine will clear again. This is a sign that the fermentation process is done. Your fermented tomatoes are ready for serving.
Notes
1. You can ferment any kind of tomato this way, even green tomatoes.
2. You can use less salt if you'd like but no less than 1 teaspoon per cup of water.
3. Once the fermentation process is done, store your fermented tomatoes in the fridge or in a root cellar. They should last for months.
4. Make sure that the tomatoes stay under the brine even after you store the jar in the fridge.
5. Always use a clean fork or spoon when you take a tomato out of the jar.
6. Serve as a side to any sandwich or add these fermented tomatoes to salads.
Nutrition Information:
Yield: 1 Serving Size: 1 gallonAmount Per Serving: Calories: 436Total Fat: 6gSaturated Fat: 1gTrans Fat: 0gUnsaturated Fat: 3gCholesterol: 0mgSodium: 312mgCarbohydrates: 96gFiber: 33gSugar: 54gProtein: 20g

This is my first year fermenting and I’m excited to try tomatoes! Everything I’ve done so far has been delicious and oh-so-easy! Nearly every source I’ve seen for fermented tomatoes keeps them whole. Is there a reason I’m not thinking of to avoid quartering the tomatoes? If one is already poking them for brine access, why not cut and fit more in each jar? Thanks for your expertise!!
With ripe tomatoes, it’s usually because they have a lot of juice in them and they tend to fall apart. Since we are trying to ferment them and not make tomato juice, we usually keep them whole so the juice stays inside and the brine can do it’s work without getting too mixed up with the tomato juice. I just posted a how to ferment green tomato recipe. These, don’t have any juice because they are hard and unripe so you can see in that post that I slice them. I hope this is helpfull and thanks for stopping by!
Do you know if the silicone fermenting lids can used instead of the regular lid that then needs to be burped?
Sure, any fermenting lid can be used.
Super interesting post. I have never tried a fermented tomato before and now I’m curious.
It’s not a common taste. Some love it, some not so much. Give it a try!
Here is another link to a site talking about fermentation without salt…
joybileefarm.com/ fermented-vegetables-no-salt/
Evan
I do trust this blogger! I’ve known her for a long time. I’ll try to read this later.
Hi Lady Lee! I just found your site when I did a search for fermenting tomatoes. I love how well you explain the process in such a friendly way. My question is this…
I want to ferment the tomatoes without any salt. I am on a no added salt diet and found a few sites that mention no salt fermenting processes. One can be found here…
fermentools.com/ 4-ways-to-ferment-vegetables-without-salt
They said instead of salt I could add fresh ‘whey’ which is full of good bacteria that will aid the fermentation process. They said you can use… “whey that you’ve drained off of kefir or yogurt, or whey from cheese making.”
They also mentioned fermenting at a colder temperature (60-70) to give the good bacteria a chance to take hold. I really want to ferment the extra tomatoes I grow because I have a ton of them, and I want to have access to my own salt free tomatoes during winter.
I can use more or less whey, colder temperatures, veggies with more sodium in them. Experiment with it. In any case I’m going to give it a go and see what happens. Any thoughts you have would be greatly appreciated!
Evan
I’ve never heard about using whey instead of salt… I’ll need to read more about it but definitely give it a try. I am assuming that the taste will be different… Let me know how it turned out.
Do take into consideration that most of the salt in a lact-fermentation process is consumed by the bacteria if I remember correctly. So your end product might not have as much salt in it as you think.
Hi!
I just did a jar of tomatoes 6 days ago. I checked them tonight. The three I took out of the top of the jar felt soft and rotten-like in spots. Are they supposed to feel like that? Do they stay firm? I’ve never done them before but have been anxious to try salt brined tomatoes.
Lisa
They will definitely soften. They can’t stay firm because of the salt.
Thank you!! I was afraid I’d have to throw out the whole jar. (There’s no mold or anything, just a small amount of the Kahm, which I’ll skim off).
Lisa
When lacto-fermenting dill pickles I add grape leaves to help the cucumbers stay crunchy. That may be a way to keep the tomatoes from softening too much. I haven’t fermented tomatoes yet, but I intend to this summer. I think I’ll add grape leaves to my first batch.
Can you warm up the tomatoes when wanting to eat them or does it kill the good probiotics?
Good question… I am guessing that if you warn them a little bit then probably not, however, if you boil them that might kill the bacteria. But I’ve never looked into it. I usually use them cold like other fermented vegetables.
Once you move the jar to the fridge can you just cap it with a normal lid in place of the fermentation lid (pickle pipe)?
Even when it’s in the fridge, it’s important for the veggies to stay under the brine. I usually leave the fermentation lid there for a couple of weeks. Once we start eating the veggies and there are fewer of them they usually stay under the brine and I can move the fermentation lid.
Hay to have found your page!
So, I have fermented a large crock of tomatoes.
Not sure! After one month there is a slight
smell and even tast of beer from them! Is this normal?
I did tast them and the texture i is indeed soft, tangy and even fizzy!
Not sure I have done it correctly. I only used a salt brine. Perhapps I just don’t like them!
I may try a brine with vinegar next. Thanks!
It’s hard to know. They do have a special taste to them so it might just be that you don’t like them but it can also be that something went wrong…
Thanks so much for the reply!
Thank you for this article! Quick question, I just packed five big glass jars full of tomatoes and now I’m realizing that one of the jars has an oddly sized mouth. It’s too big for the regular lids and too small for the wide lids. Can I just cover it with a couple layers of tin foil? Can I use of of the too-big lids and secure it with tape or something? Any other ideas? I really don’t want to dump out my jar! Thank you!
Yes, it shouldn’t be any problem.
Sounds like a great idea, last year I put in 32 different tomato plants. I was overwhelmed in tomatoes, my family didn’t want any. Canned most of them, but that was a lot of work as I had already canned 200 jars for sauce the week before. All I have to do is find 1 Gallon jars. Thanks
You can find one-gallon jars on Amazon. I link to it in the post. That was my reason too… Canning tomato sauce is a whole lot of work for sure! This is very easy but it’s not a taste we are used to. I hope you’ll like it!
Thank you for shring this recipe! I love tomatoes and will be trying this as soon as fresh tomatoes start coming in here; August. Can’t wait. Happy New Year. Shalom
I hope you’d like it! It’s a very interesting way to use tomatoes.