This post may contain affiliate links, view our disclosure policy for details.

Let’s learn how to grow beans for maximum production. You’ll learn everything that you need to know about growing beans; types of bean plants to choose from, how to plant beans, how to care for bean plants, and how to harvest and store beans.
I have to admit… I have a love-hate relationship with garden beans. On one hand, I seriously can’t imagine a vegetable garden without beans, especially here in the South. On the other hand, beans bring so many pests to the garden!
But you can’t blame the bugs. Beans are delicious and beautiful, and I can understand that the bugs want their share too. We are going to talk about how to deal with the bugs later in this post because we are going to grow beans, lots of beans, bugs or no bugs!
How to Grow Beans…
For now, just know that not only are beans delicious and so healthy (I am sure you know that!), they are also very good for your garden soil. In fact, beans improve garden soil because they fix nitrogen. I’ll also show you how you can make sure beans benefit your garden and build your garden soil long after you harvested the beans. Ok, let’s start…
Table of Content…
- The Difference Between Bush Beans and Pole Beans.
- Choosing Bean Variety for Your Garden.
- When to Plant Beans.
- Where to Plant Beans.
- Soil Requirements For Growing Beans.
- How to Plant Beans.
- Successive Sowing For Maximum Production.
- Caring For Beans in the Garden.
- How to Harvest and Store Green Beans.
- How to Harvest and Store Dry Beans.
- How to Clean the Garden After Growing Beans.
The Difference Between Bush Beans and Pole Beans…
The bean plant is divided into two categories…
Bush beans – are low-growing plants. Their mature size can be around 2 feet tall and they’ll grow to about one foot wide. They don’t need to be trellised, so they save you that work, however, you’ll have to bend in order to pick the beans.
They produce clusters of beans. With green bean varieties, one plant can produce for a while, as you pick, more and more beans will grow. If you grow dry beans, clusters of beans will grow on the plant but you’ll leave them there to dry, the plant will not produce any more beans as the season progresses.
Pole beans – these beans will grow as a long vine. They need support, it can be a fence, a bean trellis (I’ll show you my trellis later in this post), or even other plants. Native Americans used to plant a few bean seeds around every corn stalk they grew and the corn used to serve as a pole for the bean vine.
Just a note here… If you decide to try this, make sure you plant the corn first and give it a head start because once pole beans take off, I swear they grow a foot a day.
I feel like with pole beans there is a more continuous supply of beans from one plant and a much higher yield. They can keep producing a huge amount of beans over the whole season and you don’t need to bend to pick your harvest but you do need to build a trellis. They can climb to 10 feet tall easily but I usually keep my trellis no taller than 7 feet.
Choosing Bean Variety for Your Garden…
Once you decide whether you want to go with pole beans or bush beans you need to choose the variety of bean (or beans) you want to grow. There are so many options and it can get a bit confusing so we’re going to use Johnny’s Selected Seeds bean navigation bar to help us sort this out…
You can go to this page and click around to find the bean variety in each category.
Green beans – I am going to call all the beans that we can eat fresh with the pod and that we pick before they form large seeds inside green beans even though they are not all green! You will find these varieties under pole beans and bush beans on Johnny’s site.
You’ll find many different colors of “green beans” (also called string beans). They can be yellow or purple or yellow with purple spots and so on but as far as I know all of them will turn green when cooked or steamed.
You’ll find round pods or pods that are a bit flatter, some that are 4 inches long and some that are a bit shorter. Take into consideration that not all bean varieties are listed on the Johhny’s site but many of them are.
My favorite green bean varieties are Fortex (pole beans), Jade (bush beans), and Provider (bush beans). If you live in the South, I’ve heard very good things about a variety called Spike beans but I have never grown it myself.
Dry beans – I was so amazed to find out how many dry beans I was able to grow in a small space! Most dry bean varieties are bush beans. The plants will reach full size and start producing beans. The beans will reach full size but instead of picking them, you’ll just leave them on the plant and let them dry.
At the end of the season, from a 20-foot linear row of bean plants, I was able to harvest about 6 pounds of dry beans. Of course, if you are looking to grow a yearly supply of dry beans you’ll have to grow many more plants, but if you have space, you can plant them close to each other so there are no weeds (you don’t need the walkways since you are not doing any harvesting during the season…). All you’ll have to do is take care of the bugs which we will talk about later.
One big benefit of growing your own dry beans is that they take much less time to cook. Have you ever bought dry beans at the store and it took forever for them to soften when you tried to cook them?
That’s because most dry beans we buy at the store are very very old. The older the beans are the harder it is to cook them.
To keep this post from being too long I won’t go into details about Lima Beans, Fava Beans, Soybeans, and Fresh Shell Beans.
You can find more information about them on Johnny’s site. Most of these varieties will be bush bean varieties (and you’ll grow them the same way you’ll grow any bush beans), but don’t take my word for it. Whatever you choose, make sure you know ahead of time if you’ll need a trellis or not.
When to Plant Beans…
Beans are considered a warm-season crop. Let me fix this information and say that beans are a HOT season crop. They don’t germinate well in cool soil and the little plants simply can’t handle chili temperatures.
After I lost 500 plants one year because night temperature dropped to the lower 40’s for a few nights in a row and I wasn’t able to cover my plants I now wait for about a month after the last frost date to plant my beans.
Here in zone 7b our last frost is around the 17th of April. I usually wait until the middle of May to plant my beans (I plant them at the same time I plant my sweet potatoes).
This is a rule you are welcome to follow, or you can look up the right dates to plant beans in your area by simply Googling it. After you find your gardening zone, just Google something like “bean planting dates for zone …”.
You want soil temperature to average around 60F (just stick your kitchen thermometer in the soil and read it) for the seeds to have a good germination rate and you want your day temperature to average around 70 degrees F.
Watch your night temperatures! If your night temperatures drop to below 45 F, wait just a bit longer or make sure you are able to cover your young plants.
Where to Plant Beans…
In full sun! Remember, beans love the sun, so no shade for those plants. You can plant beans directly in the garden or in containers. They make a great container plant, just again, make sure you place the container in full sun.
If you are planting pole beans, take into consideration that they are going to climb high so place them in a spot that they don’t shade another crop (unless you want them to shade another crop…).
Soil Requirements For Growing Beans…
That’s the best thing about beans, they aren’t spoiled at all when it comes to soil. In fact, you can plant them in the worst location in the garden and they will help you build your soil in that spot. Soil pH should be anywhere from 6 to 6.5, beans can handle a tiny bit of acidity, in other words – just simple garden soil that drains well will do.
You see, beans fix nitrogen. They take nitrogen from the air and turn it into food that the plant can use. So really… Beans feed themselves! Actually, they store this nitrogen in nodules in their roots and it breaks down into the soil and feeds other plants too. Isn’t that amazing?
This is how beans can build your soil. I’ll explain more about it at the end of this post.
How to Plant Beans…
Beans are generally directly sown in the garden. The seeds are large and very easy to handle and it’s just so much simpler to plant them in the garden. However, I have heard about people who start their beans indoors.
If you do choose to start them indoors, make sure that you start them in containers that can decompose in the ground so you don’t have to remove them from the container.
I am planning to try and start a few bean plants in toilet paper rolls just for the sake of experimenting. The toilet paper rolls decompose so you don’t have to remove the plant. Just plant the roll with the plant directly in the garden.
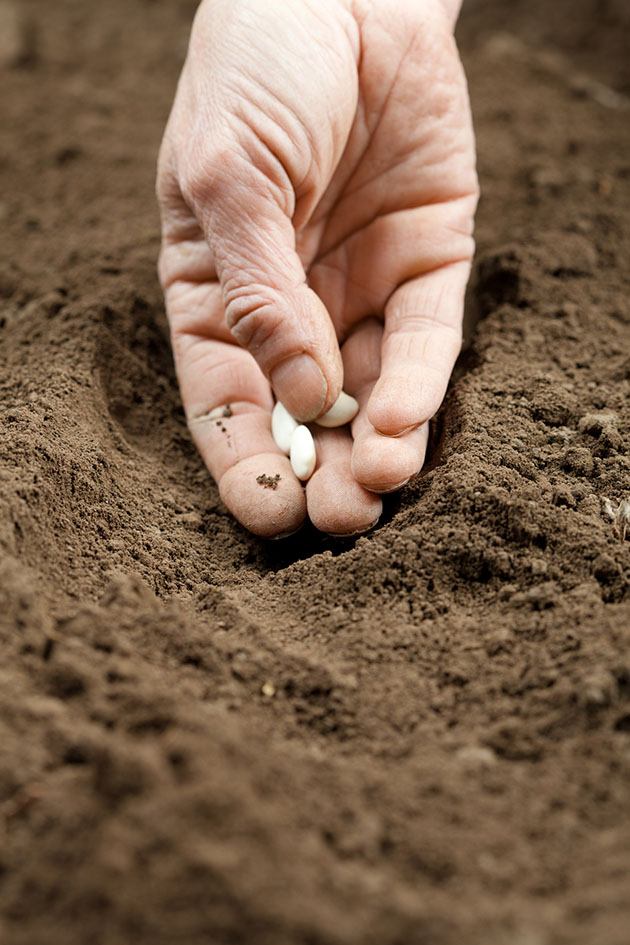
You can plant beans anywhere from 2” to 6” apart (look at the back of your seed packet for specific instructions for each variety). Plant bean seeds one inch deep. I use my hoe to make a one-inch deep trench, drop the seeds in the trench and cover them up.
If you are planting a pole variety, I’d say lean more towards 3” apart since they are going to climb and most of the growth will be up on the trellis.
If you are planting bush varieties, lean more towards 6” apart since more of the growth will be closer to the ground.
However, you don’t need to space more than that, in fact, bush varieties that produce a lot of beans might get a bit heavy so they will actually benefit from having other plants close by to stabilize them a bit.
What you do have to pay attention to is air flow, especially if you grow dry beans that need to dry. What I do if I feel like my plants are too crowded is simply trim some leaves to open up room for some air.
Space your rows 20 to 36 inches apart. You can also play with this number a bit. Sometimes I plant a double row. I have wide garden beds and don’t want to waste the space, so I plant 2 rows 10 inches apart. On both sides of this row, there is a 30” walkway and it works very well.
Successive Sowing For Maximum Production…
You can keep planting beans every 2 to 3 weeks all the way through mid-summer so you’ll have a continuous supply of beans.
If I only want beans for fresh eating, I might just plant once or maybe twice. If I want to be able to share, preserve, or sell some at the market I’ll plant three times or so.
Also, take into consideration that as you pick your plants, they’ll keep producing new beans, especially pole varieties… So you might not need to plant more than a couple of times.
Caring For Beans in the Garden…
We are going to start from the easiest to the hardest chore when it comes to caring for garden beans…
Feeding – If your garden soil is really bad, let’s say, you have heavy clay soil, your beans will probably benefit from mixing some compost in it. However, if you have decent garden soil, I say, don’t bother feeding your beans at all.
Remember that I mentioned before that beans fix nitrogen and basically feed themselves? This is the reason they don’t need much or any feeding. In fact, you have to make sure that if you do feed (especially if you use commercial fertilizer) that you are not adding too much nitrogen to the soil.
If you end up adding too much nitrogen you will notice that your beans grow dense foliage that is vibrant and green but don’t produce many beans.
Watering – no special instructions here… Like most garden vegetables, beans will benefit from about an inch of water per week. Here in the South, we can have wet summers, and generally, we don’t need to water much, but if you live in a drier climate you will probably have to do some watering.
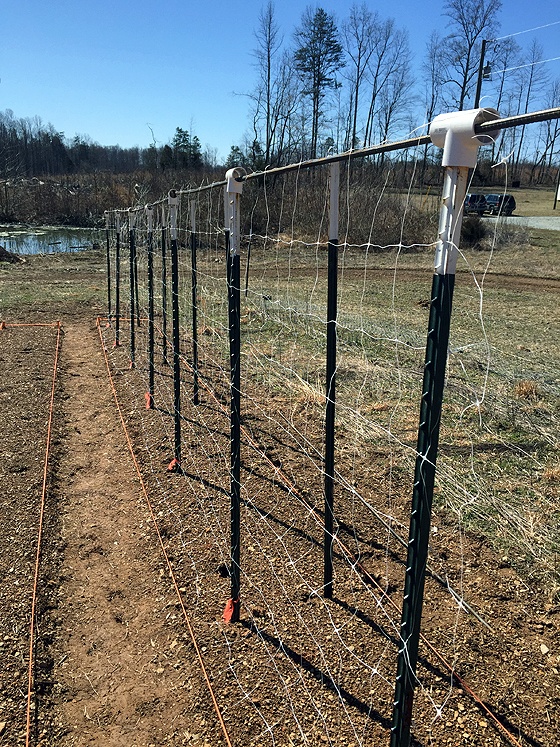
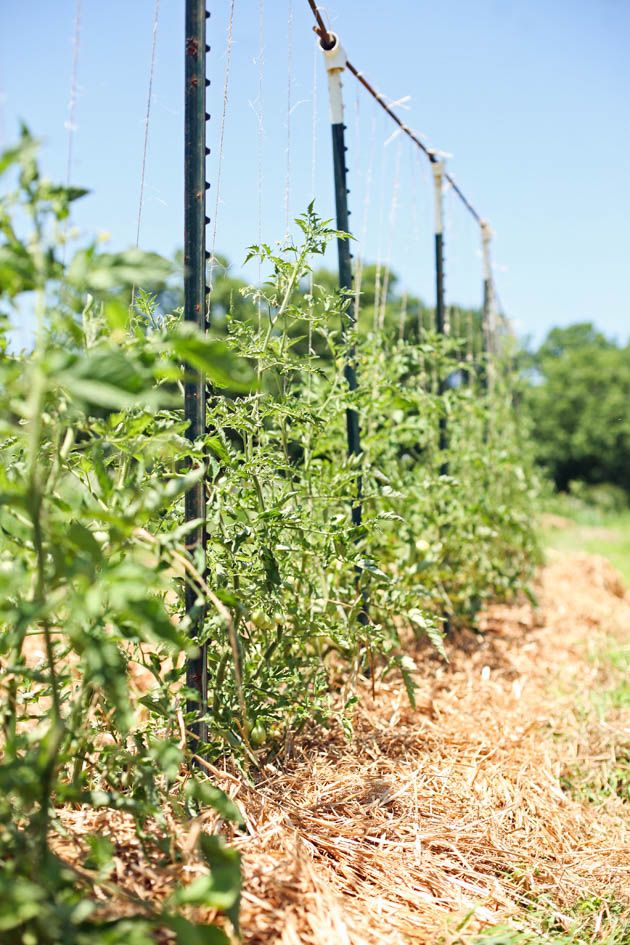
Trellising – if you choose to grow pole beans, you’ll have to provide a trellis for them. I use 7′ or 8′ T-posts, I pound them about a foot into the ground 4′-5′ apart. I use 1.25” 90 degrees PVC tees to hold 10′ rebars across the top. Then, I use this trellising net and attach it to the rebar and t-posts with zip ties.
The nice part is that you can leave this system in place and use it almost the same way to trellis tomatoes. I show how to do this in my post How to Build a Tomato Trellis.
Beans fix nitrogen and leave it in the soil, tomatoes are heavy feeders, so if you plant tomatoes after your beans you most likely are going to help your tomatoes and you don’t need to build another trellis! See how all this works together?
This trellis will also be great for butternut squash, cucumbers, different kinds of melons and so on which will all benefit from the nitrogen that the beans fix. Of course, you can also replace the net with cattle panels or just search sites like Pinterest for other trellis ideas.
Disease – I’ve never had any disease on my bean plants. I know that sometimes you can spot white mold on the leaves. If you do, it means that there is not enough airflow and your plants can’t dry well after the rain or after you water them.
So you can try to increase your planting spacing or trim some leaves here and there to help with air flow. Also, make sure to follow crop rotation principles and not plant beans in the same spot every year to reduce the chance of a disease that comes from the soil.
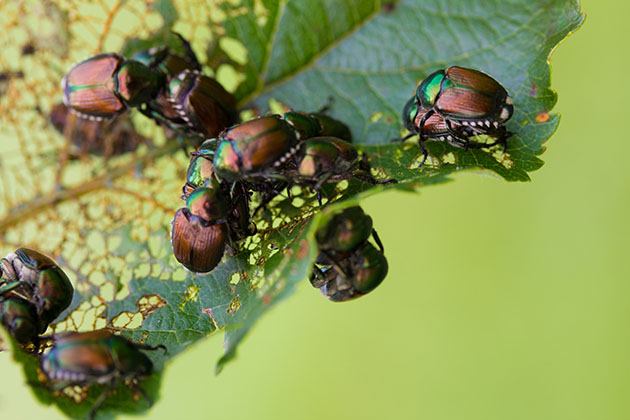
Pest control – Ohhh the beetles! The beetles! They just LOVE bean plants. There are two kinds you should look out for…
The first is the Mexican bean beetle. It looks a little like a ladybug, but this one is orange with black spots, and it’s actually from the same family, but it’s one of the few beetles in that family that feeds on plants instead of other insects.
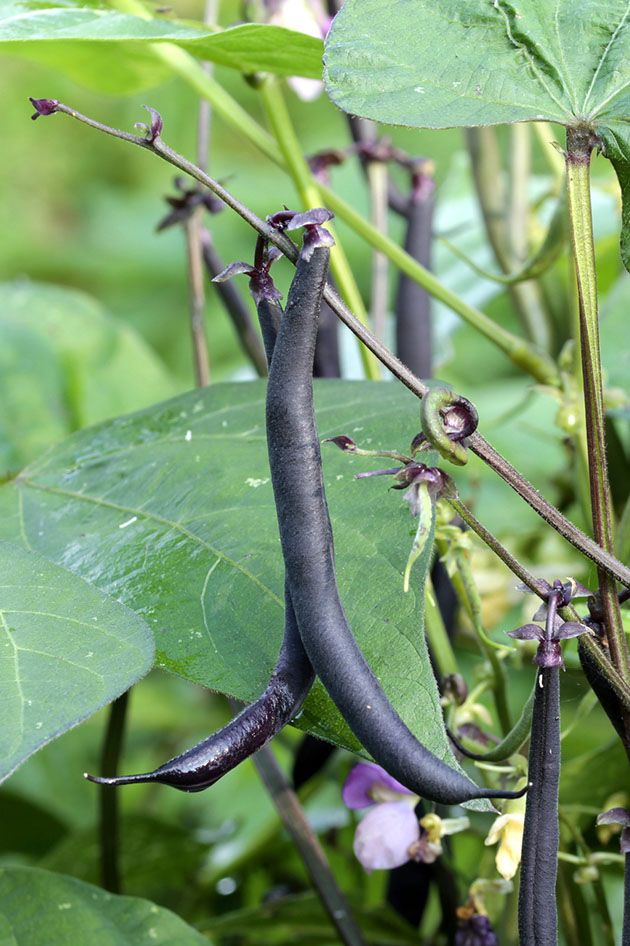
The other one is the Japanese beetle that you see in the picture above. This is the one that bothers us most here in the South. It multiplies much faster than a pack of bunnies and it’s just everywhere. I notice that it shows up right when the plant starts producing beautiful large green leaves and it never leaves!
Both beetles feed on the leaves and can kill a young plant easily and cause serious damage for an even older and more established plant.
If you want to go the natural way you can try to dust Diatomaceous Earth on your plants or you can spray them with neem oil (this is what I do. Read: Neem Oil Uses in the Garden). Just know that you’ll have to reapply over and over again throughout the season especially after a rainy day.
There are also beetle traps that you can hang around the garden. They are my favorite method and they saved many many bean plants for me!
You can also try products like Pyrethrin and Azadirachtin which are OMRI approved organic insecticides. For these products, make sure to follow the instructions provided with the bottle.
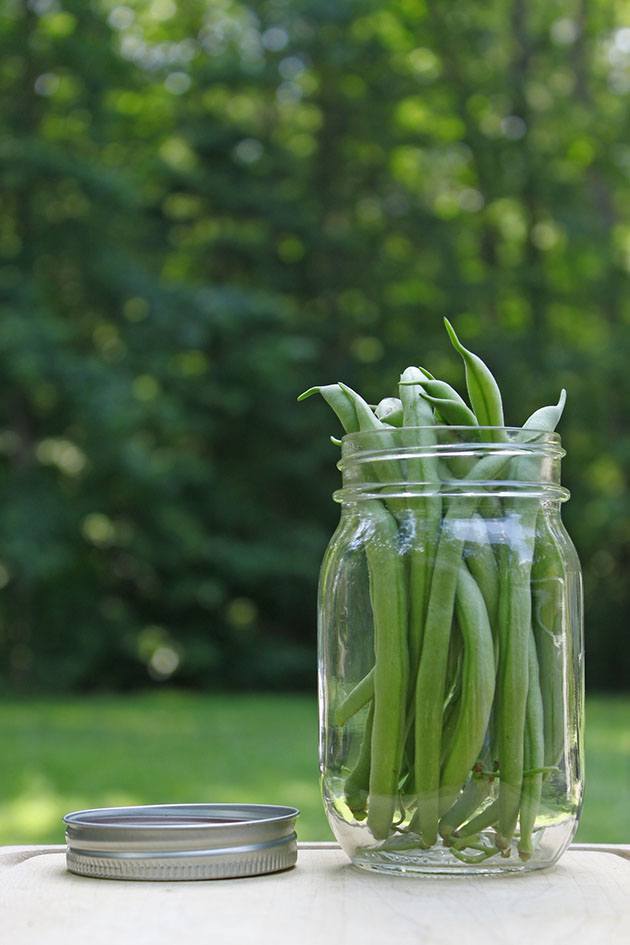
How to Harvest and Store Green Beans…
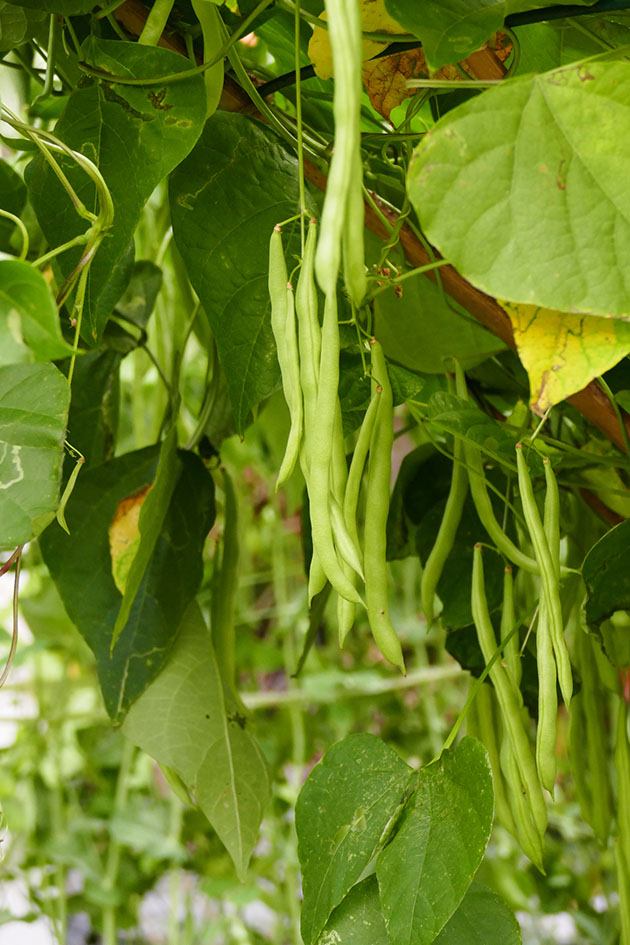
Most green bean varieties will reach the point of harvesting somewhere around 60 days after planting. You don’t really need to count days… It’s pretty simple to see when the beans are ready for harvest.
Of course, not all the beans on the plant will be ready for harvest at the same time. Make sure to hold the plant at the base of the bean before you pull the bean off the plant, or just clip the bean off with scissors. The point is, don’t damage or disturb the plant while you pick your beans.
Once you see that there are beans ready to harvest, start harvesting every three days or so to encourage the plant to produce more beans. Remember to always pick vegetables from the garden early in the morning when they are fresh and had a break from the harsh heat of the day.
Store your green beans in the fridge for fresh eating or you can blanch and freeze them, can them, or lacto-ferment them.
How to Harvest and Store Dry Beans…
When it comes to dry beans, the growing season is a bit longer, around 100 days. After you plant, you’ll see that your seeds germinate and the plants start growing just like green bean bush varieties. You’ll see the plants produce beans but unlike with green beans, you should not pick those pods.
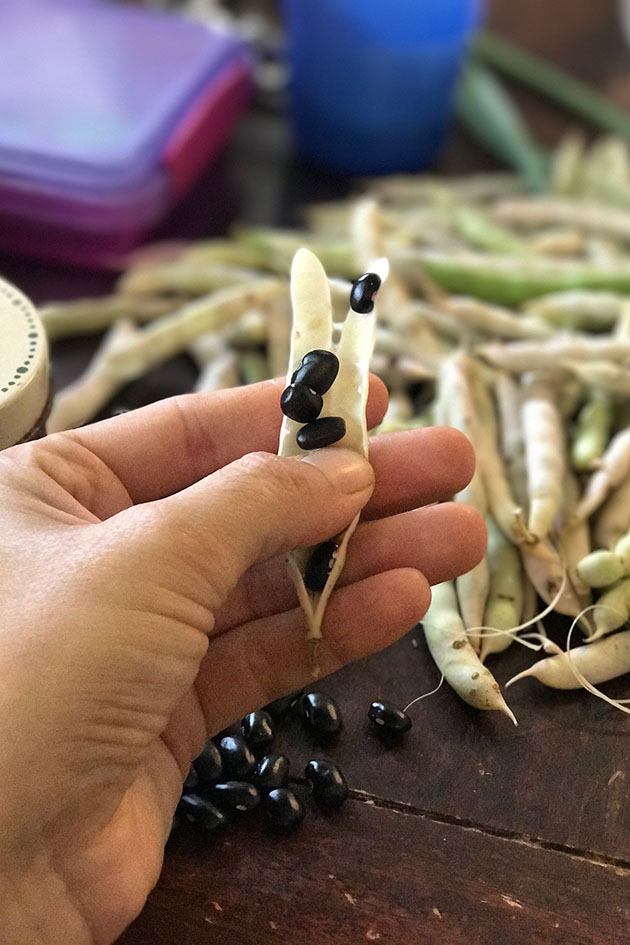
Instead, leave them on the plant. Gradually they will start to dry together with the whole plant and change their color from green to yellow/brown. Some of the leaves will drop to the ground and when the plant is dry and pretty much dead, it’s time to pick the bean pods.
In the picture above, you can see my black beans. At the end of the season, I harvested the pods and took them inside the house. Then, one pod at a time, I opened it and removed the black beans. This might sound like a lot of work, and it is, but it’s so therapeutic!
If your beans are not completely hard and dry when you get them out of the pod, just lay them on the counter for a few days and let them dry completely before you place them in a jar or a bag for storage (preferably in a cool place).
I ended up with a 6-pound bag of black beans. We don’t eat a lot of dry beans around here so it lasted us for a long while. I also have to say that they are much easier (faster) to cook than dry beans you get at the store because even though they are dry, they are much fresher. And, of course, much more flavorful.
Fava beans, soybeans, and lima beans can be harvested fresh or dry. Fresh shell beans are harvested fresh (you don’t let them dry). You can cook soybeans with the pod, but you only eat the bean inside. The rest (lima, fava, and fresh shell) need to be shelled even if harvested fresh.
All those beans take around 75-80 days to reach maturity. Then, if you want to pick them dry, you’ll have to allow more time for the drying process.
How to Clean the Garden After Growing Beans…
Ok, one last note before we are done… We talked before about nitrogen fixation and how beans feed themselves.
The nitrogen that the bean plants fix is stored in the roots of the plant. After the season is over and it’s time to clean the garden, make sure you leave the roots of the bean plant in the soil. Instead of pulling the whole plant, simply cut the stem close to the ground and throw it in the compost pile (or give it to the goats) but leave the roots in the soil.
Then prepare your garden for winter, the roots will decompose in the soil and release that nitrogen which will be available for the plants you plant in that same spot next season. This is how beans can help you build your soil and feed your garden!
I know we covered a lot of information! Growing beans is not that complicated once you figure out how to battle the beetles.
I grow beans every year and really can’t imagine my garden without them. I love that the plants produce so many beans. Even though my kids eat them fresh from the vine, I can still harvest enough to cook and freeze.
I hope that I shared enough information with you that you can now go and grow your own beans, dry or green. I’d love to hear your thoughts and I’d love for you to share your experience with me in the comments below if you’ve been growing beans in your garden.
If you liked this post, make sure to check these as well…
How to Plant and Grow Asparagus

I grew Borlatto beans for the first time this year. Thanks for all the good info! I think I may have planted them too far apart, but am excited to do it again. I think this is the most comprehensive post I’ve read on drying shelling beans. Thank you.
Help! My g beans (poke) haven’t grown more than 4/5 inches tall (it’s been almost 100 during the day (colorado) and 70 at night. I plants 1.5 months ago. The few leaves I have are bright green but no new growth. Is it getting too much sun? I feel moisture when I stick my finger in an inch. It’s covered in a layer of mulch. Help!!
Are you sure that you planted a pole bean variety? Can it be that you planted a bush variety instead? Beans love the heat so that shouldn’t be the issue, Soil shouldn’t be too moist but that is usually not a big deal either…
I’m a newbie to gardening. You imparted so much useful information about planting beans. Thanks so much.
Beans are relatively easy to grow, especially since they are not spoiled when it comes to the soil they grow in. So they are a great crop to start with! Just plant, keep an eye for the beetles, and harvest. Good luck and thanks so much for stopping by!
Such a fantastic and informative post! Thank you so much for sharing your wisdom and experience. We’re getting the spring garden ready and this most definitely helped me out in the bean department. We’re not rookies, but we’re not experts either. So I appreciate all your insights.
Oh, you’re welcome. Thank you for the feedback and the kind words! And thanks for stopping by.
The article was very informative
Happy it was helpful! Thanks for stopping by!
Thank you! I am starting a garden next year. Spent this summer preparing with fence and welded wire above and under ground.
I appreciate the trellis with t-posts and will build before next years seasons starts.
I love that beans put nitrogen into the soil!
Beans are a great crop to plant in a new garden!
I mast suggest, if you can, set up an irrigation system before the gardening season!
Wow! Very interesting blog. I like to grow both green bush beans and yellow wax beans, but I realize that I can benefit from that additional info. Thanks! Province of Quebec, CA
Thanks for stopping by!
Wow.. love love loved your post.. the perfect information I was looking for my Indian beans.. thank you so much for posting this!
You are welcome! Happy it was helpful.
this page has given me a new insight into planting green beans. i am sure to do it and thank you
So happy that you learned something new! Beans are fun to grow!
Wow, thx alot, I’ve never read before Full details like this, very helpfull, I ll sow my seeds tomorrow
Thanks for reading! I’m happy that you found the post helpful!
My favorite is the yellow wax bean – stays yellow when cooked and it is delicious with just butter, salt and pepper. They do take a bit longer to cook than the green beans.
I have never planted those! Will be interesting to try. This year I have green (both pole and bush) and the purple ones. I’ll put the yellow wax on my list for next year. Thanks.
Hi I live sub-tropical Australia and the best time to grow is in the spring. I have tried many times to grow in autumn (fall) but we have what is called the bean fly. It lays eggs in the stem and larvae come out and eat the inside stem and the plants topples over and dies. This happens at about the 4 true leaf stage. Do you have any ideas how to stop this?
Wow, I’ve never heard of it in beans. Generally, bugs don’t like diatomaceous earth and neem oil so maybe you can try one of those. The other thing that I can think about it maybe fly traps. I have no clue if you have those but it’s worth checking.
I absolutely loved your bog on beans?? I always had beautiful plants but never could get beans??Now I know why because you explained so many things.
Hopefully this year will be a better bean year!
Thanks for stopping by!
Great post! Thank you so much for this information. I love green beans and haven’t been very successful at growing them.
I hope that this information will help you!