This post may contain affiliate links, view our disclosure policy for details.
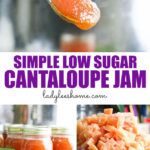
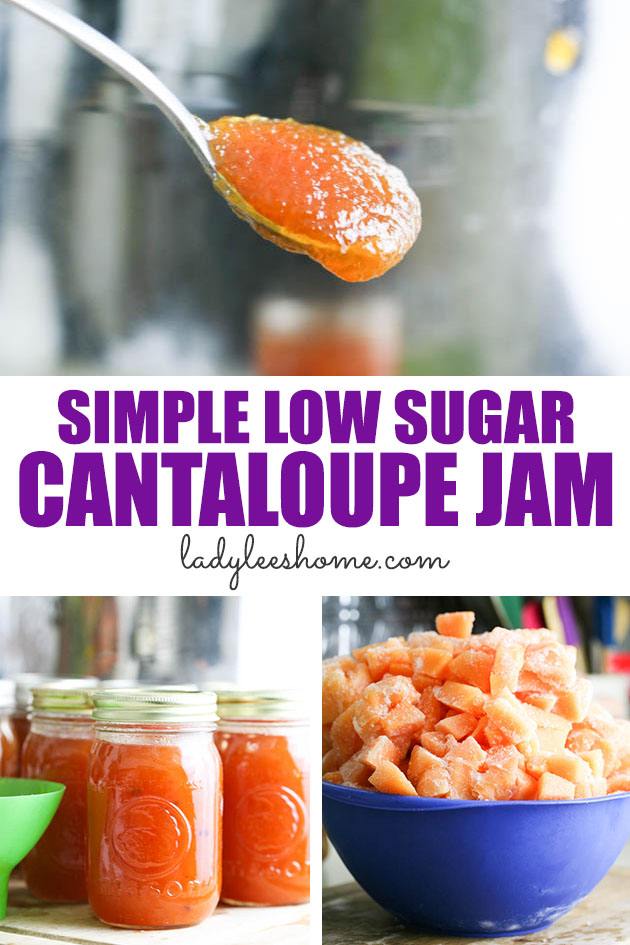
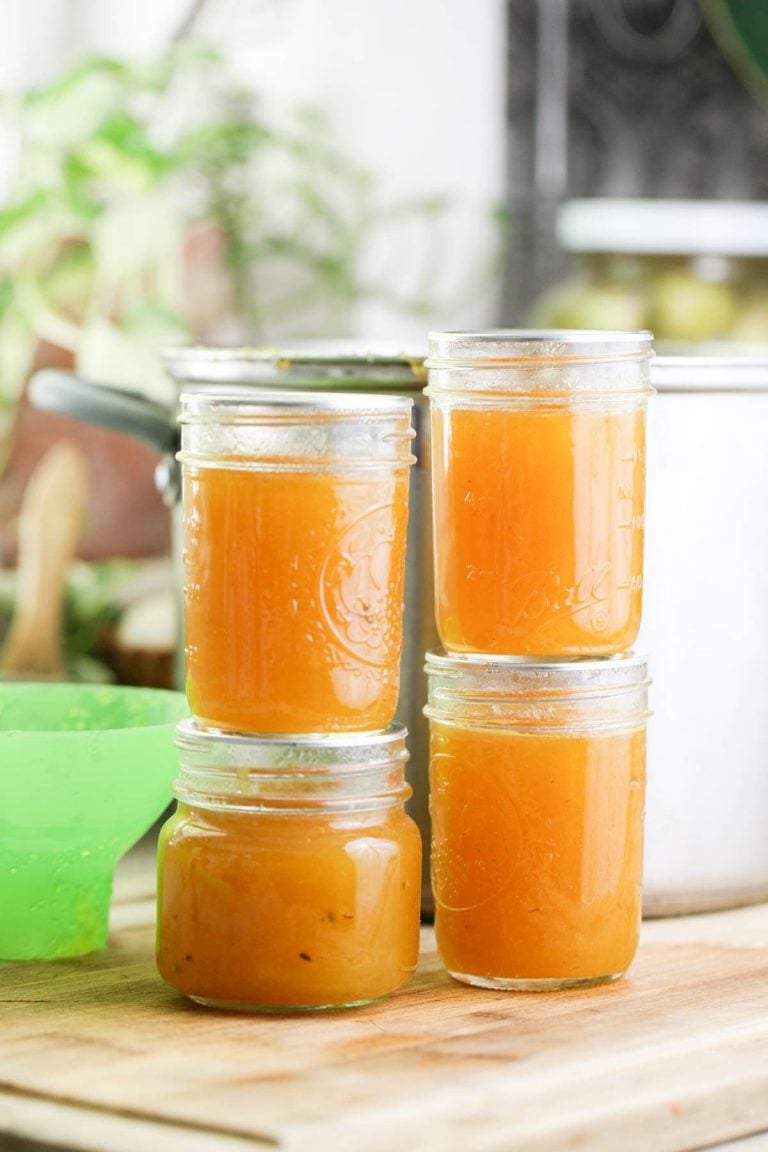
You won’t believe how delicious cantaloupe jam is! It’s simple to make and tastes like candy. It’s a great use for summer cantaloupe and it’s definitely the best conversation starter!
This is not an old family recipe… It’s not a kind of jam that I remember from my childhood or a special recipe I learned from my grandma… Honestly, until just a few months ago, I had no clue that it was possible to make jam from cantaloupe!
Here is what happened… Last year, I had a raised bed of cantaloupe in the garden. It did so well! From the few plants that I planted in that raised bed I got so so many delicious, sweet, and juicy cantaloupes. I sold some of them at the farmer’s market but I was still left with so many. So I diced them and divided them into portions for smoothies and stuck the bags in the freezer.
Low Sugar Cantaloupe Jam…
My thought was that I’d use the cantaloupe for smoothies with whatever other fruit I had fresh or frozen during the winter until the next summer when new fresh cantaloupe would be harvested. Arrr… I have to admit that I am horrible at making smoothies. My kids love them but they somehow never fit in my day… It’s just so much easier for me to hand the fruit fresh to the kids and move on to the next kitchen activity.
Anyway, the frozen cantaloupe was left in the freezer forgotten for months. I try to make it a rule that I use all of my preserved food within a year of freezing it. So before I started planting seeds indoors for the approaching growing season, I had to go through the contents of my freezer and clean it out.
I stared at the bags of cantaloupe and had no idea what I was going to do with so much of it… So I asked the amazing folks on my Facebook page if they had an idea and a few people mentioned cantaloupe jam. Seriously, I hadn’t even considered it… They also mentioned cantaloupe cake which I’ll have to try this summer but if you’ve been hanging here with me on the blog you know that I love making jam and the whole family love consuming jam.
Whether it’s strawberry jam, peach jam, blueberry jam, mulberry jam, grape jam… Whatever jam it is, we love it and there is always a use for it around here in sandwiches, cakes, and cookies.
The decision was made, I was going to try and make cantaloupe jam! I looked around and like always all the jam recipes that I found included three tons of sugar… This was a new jam for me so I wasn’t sure if my regular process of reducing the sugar was going to work but I decided to give it a try.
It worked so so well! I made this cantaloupe jam just like I make all of my other jams; with much less sugar and no store-bought pectin. I was so surprised by the taste of it… It tastes like candy. If I didn’t know that it was cantaloupe I would not have guessed it. It’s sweet and special and delicious! Ok, shall we make cantaloupe jam? We shall!
Ingredients…
- Cantaloupe – I processed a whole lot of cantaloupe here but you don’t have to follow this recipe exactly. Clen your cantaloupe from seeds, peel it and dice it, and then weigh your fruit.
- Sugar – use half of the amount of fruit in sugar (I keep a one part fruit to one-half part sugar ratio). So If you’re processing 4 pounds of cantaloupe, use 2 pounds of sugar. In fact, cantaloupe is so sweet that you can use a bit less sugar if you want.
- lemon juice – for the large amount of cantaloupe that I processed here (11.5 pounds), I used the juice from one whole lemon. If you are processing less, use the juice from one-half lemon.
- Lemon seeds – since we are not using the traditional one part fruit to one part sugar ratio, we can’t use store-bought pectin. Lemon seeds have a lot of natural pectin in them so all that you have to do is add a few of them to the jam towards the end of the cooking to help it gel.
- Vanilla extract – this is optional but makes the jam even better! Once it’s done cooking, we’ll add a couple of teaspoons of vanilla extract.
Kitchen Tools That You’ll Need…
- Mixing bowl – you will need a bowl to place all of your cantaloupe pieces in as you cut and so you can weight the fruit.
- Cutting board – to cut your cantaloupe into small pieces.
- Knife – to cut the cantaloupe.
- Large pot – you’ll see below that I processed a large amount of cantaloupe. I used a large pot but you might be able to use a smaller one if you are not processing as much cantaloupe as I did.
- Kitchen scale – you’ll have to measure how much cantaloupe you have in order to know how much sugar you’ll need. And then, you’ll have to measure your sugar as well.
- Wooden spoon – to stir the jam.
- Immersion blender – to blend the fruit and smooth the jam.
- Canning utensils – we’ll use almost all of them.
- Ladle – to ladle the jam into the jars.
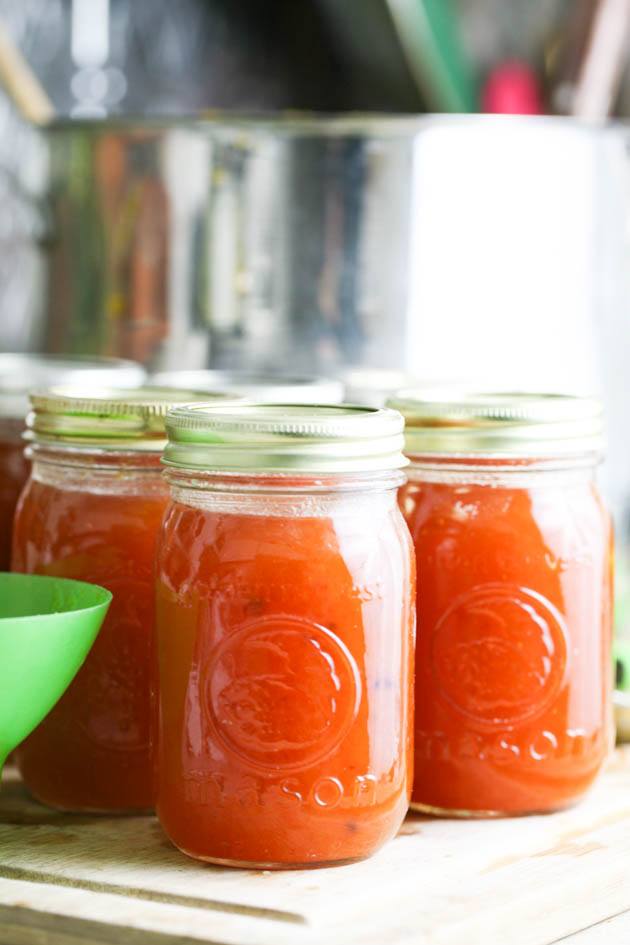
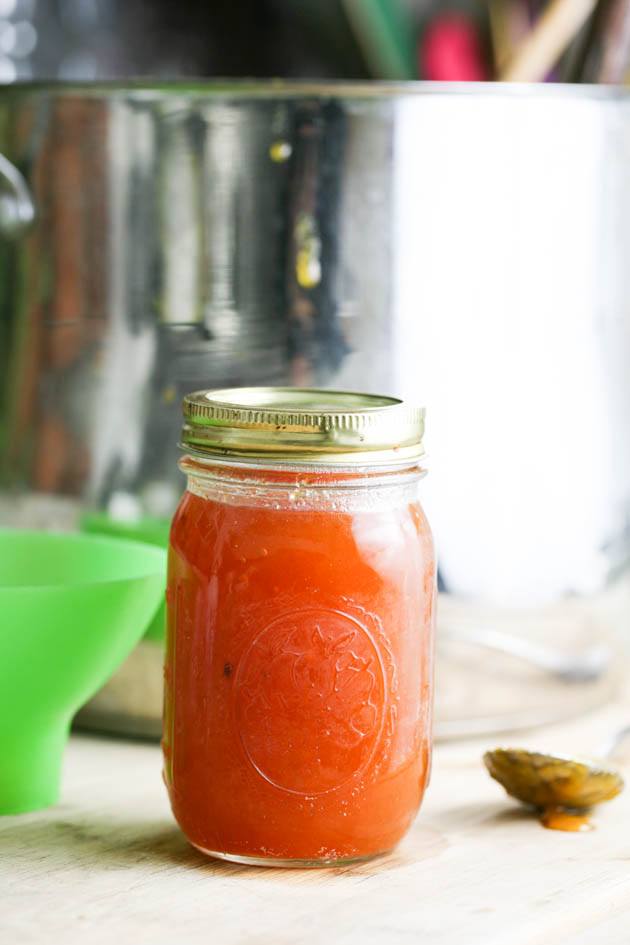
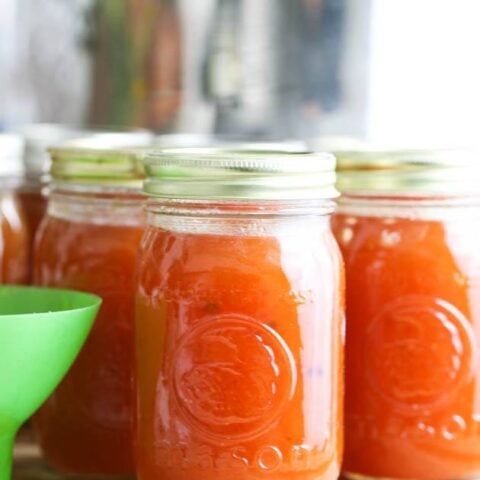
- Pint jars – I think that the best jar size for this jam is either pint or half-pint with a regular mouth.
- Paper towel – I always use a damp, clean paper towel to clean the rim of my jars before I cover and close them.
- Lids and bands – to cover and close the jars before processing.
- Small pot – to sanitize the bands and lids.
- Water bath canner – to process the jam.
How to Make Cantaloupe Jam…

Step 1 – prepare the cantaloupe. As I mentioned before, my freezer was full of cantaloupe and it was time to clean it before the growing season. So I pulled all the bags of cut cantaloupe out of the freezer and set them on the counter. Then I removed the bags and ended up with 11.5 pounds of frozen cantaloupe.
If you grow cantaloupe and don’t have time to process jam during the growing season then it’s really easy to cut it and throw it in the freezer. There is no need to blanch it as you would with potatoes, beans, carrots, leeks or any other vegetable. Then, you can use it frozen whenever you want to make jam. If you are using fresh cantaloupe, remove the skin and seeds and dice it. Then weigh your cantaloupe so you know how much sugar to add.
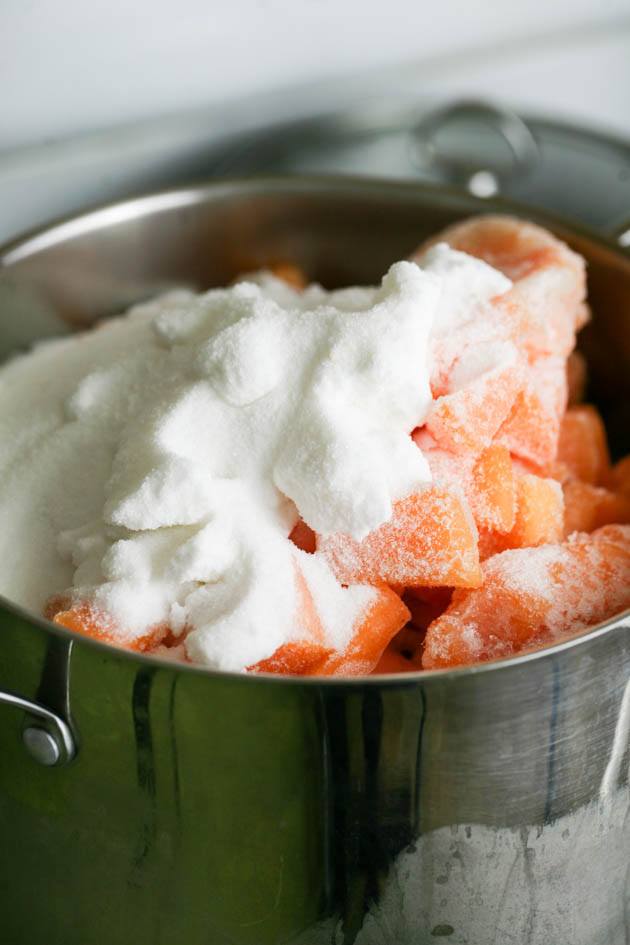
Step 2 – cooking the fruit. Add the cantaloupe into a pot, in this case, it was a large stockpot because I had so much cantaloupe. Of course, if you process less cantaloupe you can use a smaller pot. Next, add the sugar. Again, no matter how much fruit you are processing, add half of its weight in sugar. Turn the heat to medium-high and start cooking the fruit. Make sure to stir frequently so the bottom doesn’t burn.
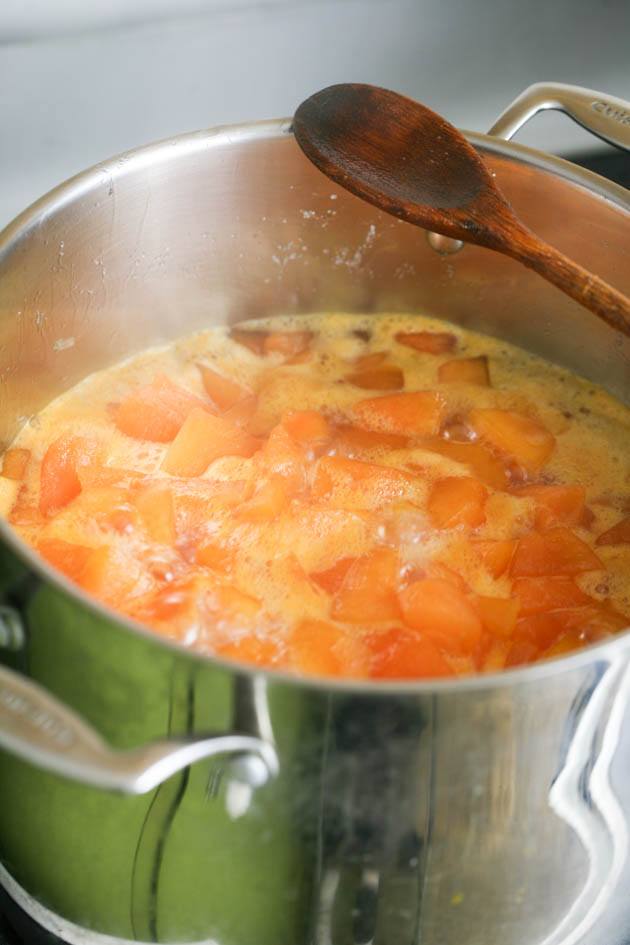
Bring the fruit and sugar mixture to a boil, lower the heat just a tiny bit and let the mixture boil gently for seven minutes or so. Then, lower the heat to medium-low for the rest of the cooking. You might notice some foam forming but you don’t have to remove it right away. Keep cooking the jam and stirring. Most of the time it goes away on its own (but, you can remove it with a spoon if you’d like).
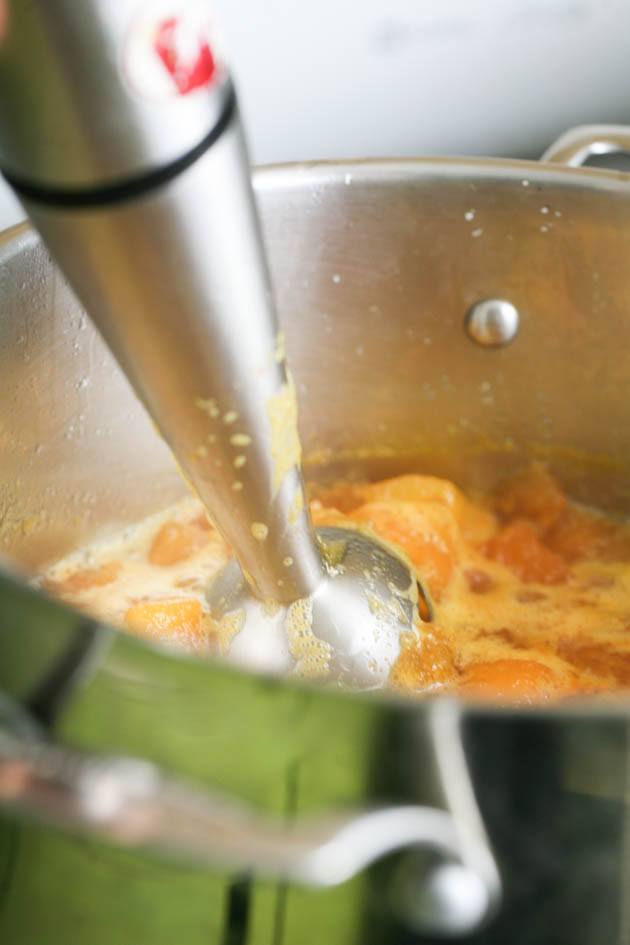
Step 3 – blending the jam and adding lemon. When the fruit is soft, use an immersion blender to blend it. I like my jam pretty smooth (except for my fig jam which I like to leave chunky) so I blend the fruit all the way. If you like some larger chunks of fruit in your jam, feel free to not blend it all the way.
Keep cooking, stirring frequently until you notice that the mixture is starting to thicken. In this case, it was an additional 40 minutes of cooking, but again, if you are processing less fruit it will probably be less time. It also depends on how juicy your fruit is to begin with so you’ll just have to adjust accordingly.
Once you notice that the jam is starting to thicken, add the lemon juice and the lemon seeds to help it gell and come together.
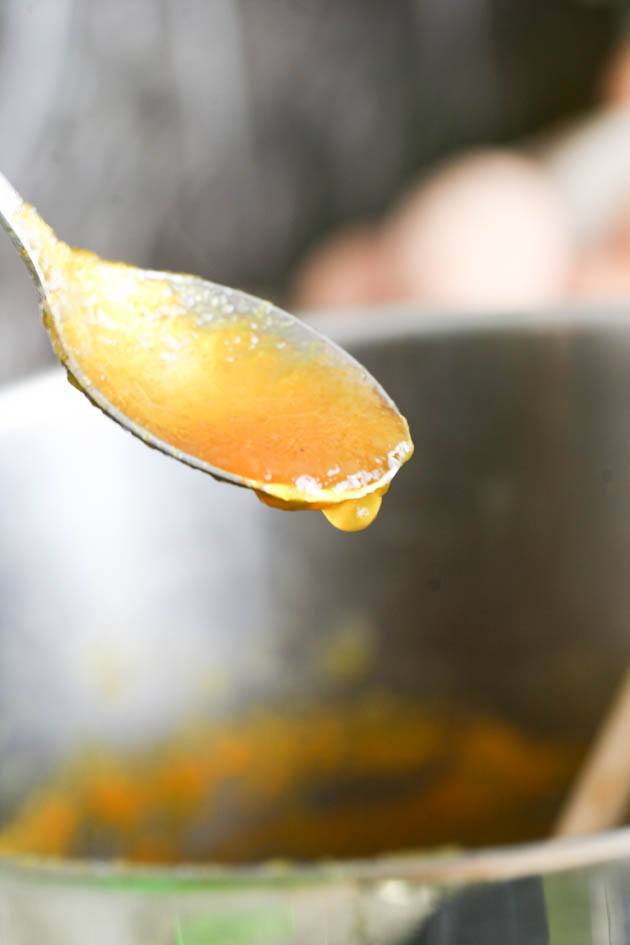
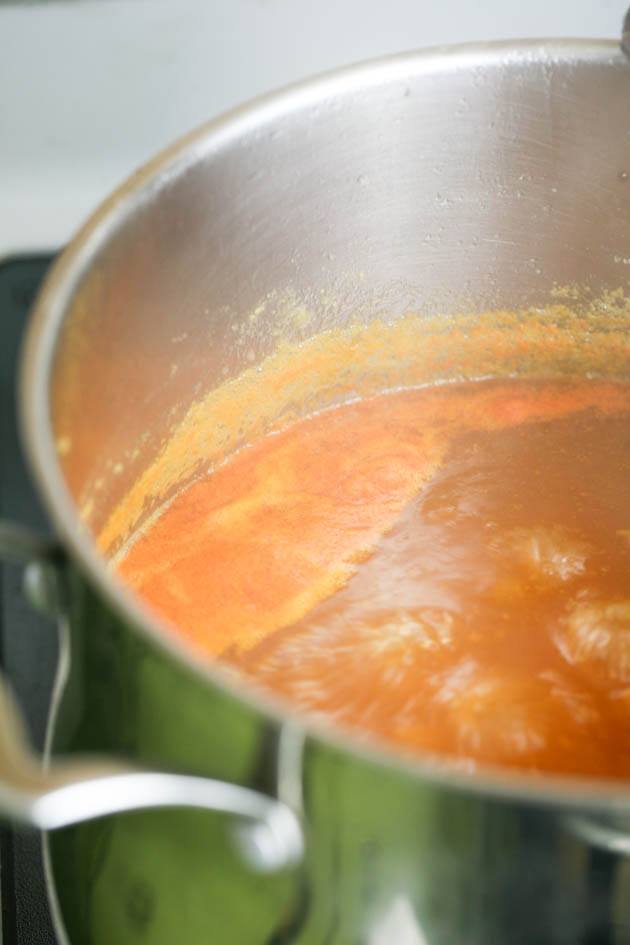
Step 4 – check if the jam is ready. After you add the lemon seeds, it’s probably going to take an additional 15 minutes or so of cooking until the jam reaches gel phase. If you are an experienced jam-maker, you’ll probably notice this stage, however, if you need help figuring out if the jam is ready you can always do the spoon test.
Scoop a little bit of jam in a spoon and set it on the kitchen counter to cool for five minutes. Then, add it back to the pot and as it leaves the spoon you’ll be able to measure how thick it is. Just remember that jam keeps on thickening in the jars while it cools completely so you don’t want it too thick before canning it.
Once it reached your desired consistency, turn the heat off, add two teaspoons of vanilla extract and stir them in.
Canning Cantaloupe Jam…
Step 5 – prepare the jam for canning. While the fruit is cooking, fill the water bath canner with enough water to cover your jars by about an inch. Set it on the stovetop, cover it, and turn the heat to medium-high to bring the water to a boil. I usually do this as the jam is cooking so that the water bath canner is ready at the same time that the jam is ready.
Now, since we are going to process this jam for 10 minutes in the boiling water, there is no need to sanitize the jars. Simply wash them well with hot water and dish soap and do the same for the lids and the rings.
To prep the jars for canning…
- Add the jam to the jars, leaving 1/2 inch of headspace…
- Use the bubble remover to remove air bubbles (by running it along the walls of the jar from the inside)…
- Use a damp paper towel to clean the rim of the jar…
- Center the lid and close the jar with the band fingertight.
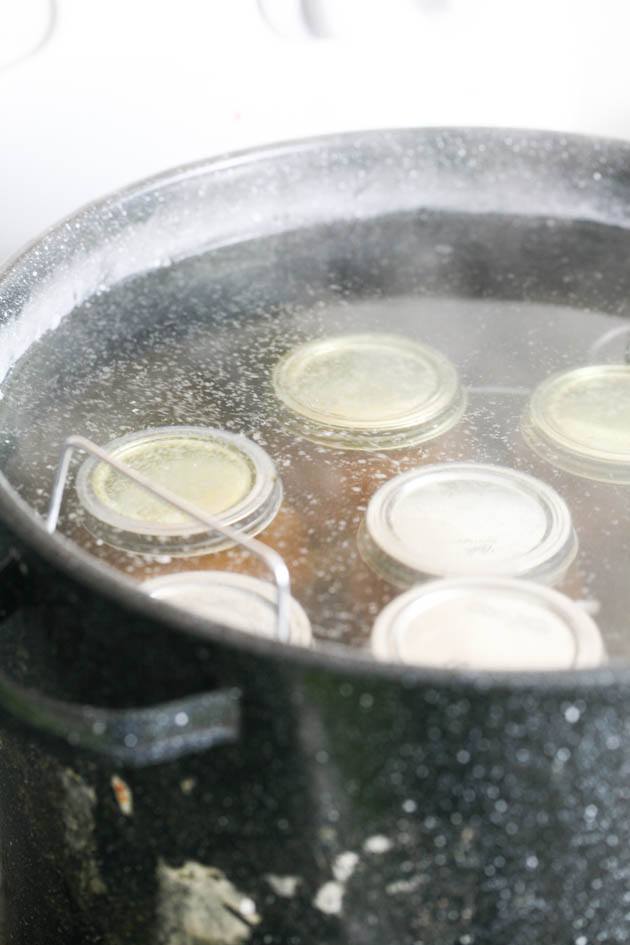
Place the filled jars on the rack of the water bath canner, lower them to the boiling water and cover the pot. Process both pint and half-pint jars for ten minutes. Remember to adjust processing time according to the table below if you live above 1000 feet in elevation.

Once processing time is over, turn the heat off, uncover the pot, and let the jars rest in the hot water for five minutes or so. Then, use the jar lifters to lift them out of the canner and set them on a kitchen towel on the counter. Let the jars cool completely overnight.
Storing Cantaloupe Jam…
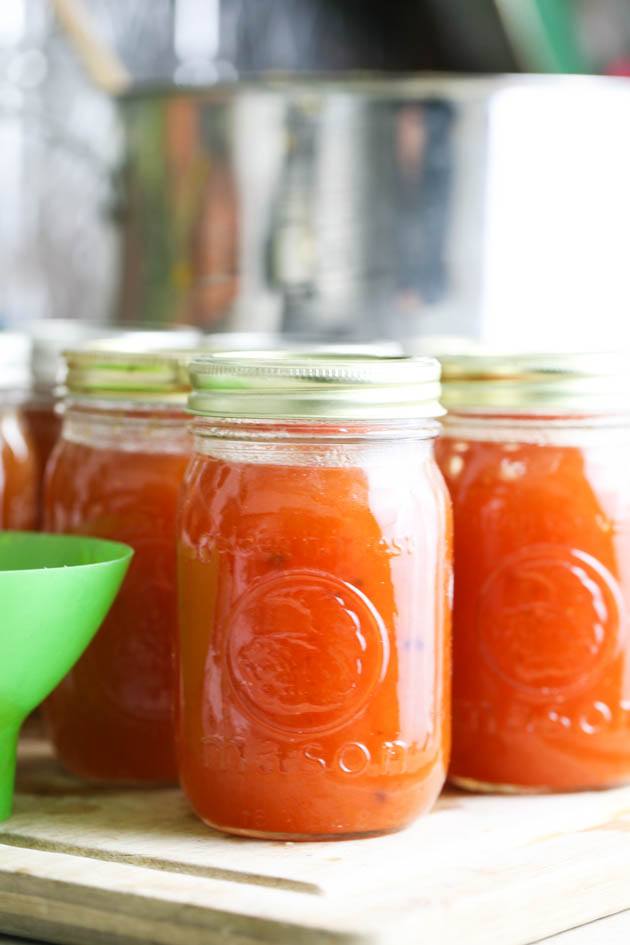
Before you store your cantaloupe jam, make sure that the jars have sealed by pressing on the center of each lid. If there is no movement there it means that the jars are sealed and ready for storage. If you happen to have a jar that didn’t seal properly, you can store it in the fridge and use it first.
I usually wipe my jars, label them, and remove the band before storing them in the pantry. If you leave the band on, it sometimes rusts and it’s hard to open the jars down the road. It’s also easier to monitor what is happening inside the jar if the band is not in the way.
Serving Cantaloupe Jam…

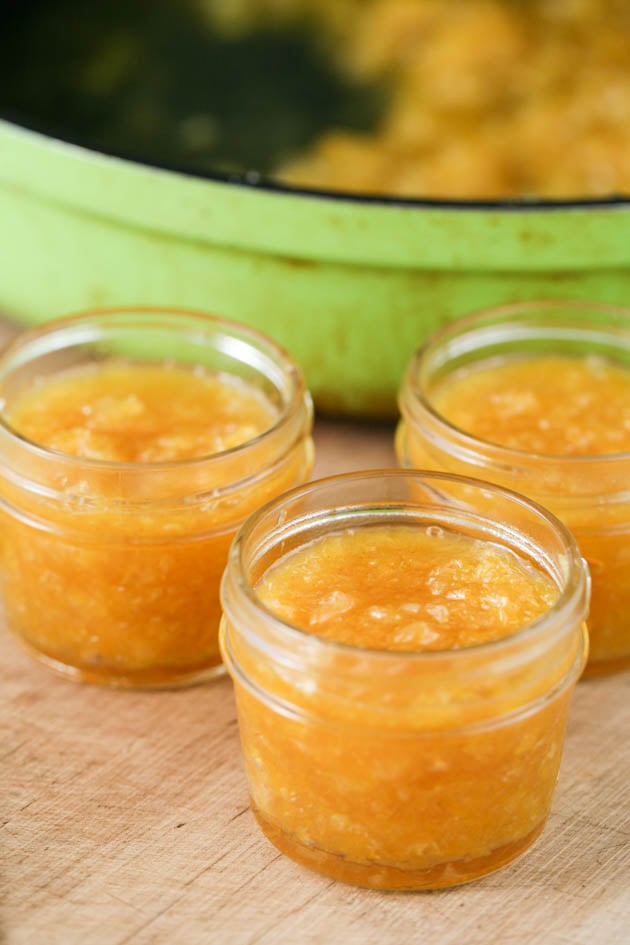
This jam is delicious! It literally tastes like candy. It’s smooth and not too thick and is an amazing companion for your morning coffee. I spread some butter on toast (or homemade bread) and top it with the jam. All I need is a cup of hot coffee. In my book, that’s the right way to start the day!
My kids love it with peanut butter in a sandwich. Sometimes, I’ll also add it on top of yogurt with or without my homemade granola. You can also use it in baking or any other way that you’d use jam.
Cantaloupe jam has this unique taste to it and it’s not something I’ve ever seen available in a store. It’s a special homemade jam which makes it even tastier. Here in the South, it’s pretty simple to grow cantaloupe and it’s a beautiful plant that I love having in the garden. It produces well but cantaloupes don’t last fresh for too long so I’m really happy that I came across this cantaloupe jam idea. I hope that you’ll give it a try!
If you liked this post, you might like these ones as well…
For a list of all the jam recipes that I have here on the blog check my low sugar jam recipe page!
Low Sugar Cantaloupe Jam
Delicious cantaloupe jam with less sugar and no store-bought pectin.
Ingredients
- 11.5 lbs cantaloupe, peeled, seeds removed, and diced (or as much cantaloupe as you want to process. PLEASE READ NOTES BELOW).
- 5 lbs Sugar (add half or a little less than half of the weight of your fruit in sugar)
- Fresh lemon juice from one medium lemon
- 8-9 lemon seeds
- 2 teaspoons of vanilla extract (optional)
Instructions
- Add cantaloupe and sugar to a pot. Set on the stovetop and turn the heat to medium-high. Bring the mixture to a boil, stirring frequantly.
- Turn the heat down just a tiny bit and let the mixture boil gentaly for seven minutes before lowering the heat to medium-low for the rest of the cooking.
- Cook for an additional 10 minutes or so, stirring frequently until the fruit is soft. Use an immersion blender to blend the jam.
- Keep cooking the jam for an additional 30 minutes or so until the juices reduce and it's starting to thicken. Cooking time might change depending on how much fruit you are processing and how juicy it was to begin with.
You might notice some foam forming, you can remove it with a spoon or leave it (usually it disapears as the jam cooks). - Add the lemon juice and the lemon seeds and stir them in.
- Cook, stirring frequently, for an additional 15 minutes or until the jam is as thick as you like it. You can scoop a little bit of jam on a spoon and leave it on the counter to cool for five minutes. Then add it back to the pot and as it leaves the spoon, you;ll be able to measure how thick it is (just remember that jam keeps on thickening a bit further in the jars after processing).
- When the jam is done, remove the pot from the heat and stir in the vanilla extract.
- To can this jam, add enough water to the water bath canner to cover your jars by about an inch. Set the canner on the stovetop, cover it, turn the heat to high and bring the water to a boil.
- Wash the jars, lids and bands well with hot water and soap (there is no need to sanitize them).
- Fill the clean jars with the hot jam leaving 1/2 inch of headspace. Use the bubble remover to remove bubbles. Use a clean, damp paper towel to clean the rim of the jar before you center the lid and close the jar with the ring fingertight.
- Place the jars on the rack and lower them into the hot water. Cover the canner and process the jars for ten minutes (adjust processing time if you live above 1000 in elevation. Adjustment table is in the notes below).
- Turn the heat off and uncover the canner. Let the jars rest in the hot water for 5 minutes before you take them out. Place them on a kitchen towel on the counter to cool completely overnight.
- Check that your jars have sealed by pressing the center of each lid. Wipe the jars, remove the band and store in the pantry for up to 18 months.
Notes
I am writing this recipe card describing how I made my jam with the amount of cantaloupe that I had to process. I harvest my cantaloupe during the summer from the garden and freeze it. Then when the season is over and I have more time I make cantaloupe jam.
I started with a huge amount of frozen cantaloupe. If you are starting with fresh cantaloupe or with a smaller amount just adjust the cooking time accordingly.
Also, weight your cantaloupe before you add it to the pot. Then weight your sugar. Just follow the rule of adding half of the weight of your fruit in sugar. This will be enough to sweeten the jam but not lose the flavor of the fruit and enough sugar to preserve the jam for a year.
If you are processing less cantaloupe than I did, add the juice of half a lemon instead of a whole lemon and add one teaspoon of vanilla instead of two (if you choose to add vanilla extract).
As for the lemon seeds... They have natural pectin in them and they help to thicken the jam. I used 8-9 for the amount of fruit that I processed. If you process less cantaloupe you can add fewer lemon seeds.
Also, remember to adjust processing time according to the table below if you live above 1000 feet in elevation...
Nutrition Information:
Yield: 304 Serving Size: 1 tablespoonAmount Per Serving: Calories: 35Total Fat: 0gSaturated Fat: 0gTrans Fat: 0gUnsaturated Fat: 0gCholesterol: 0mgSodium: 3mgCarbohydrates: 9gFiber: 0gSugar: 9gProtein: 0g

Half the weight of fruit and that is low sugar? Are you serious?
Traditional jams are made with one part fruit to one part sugar. So cutting sugar in half is low sugar in my book. If you do not want to can your jam and store it for long term storage at room temperature go ahead and cut as much sugar as you want. However, if you are going to can your jam for long-term storage, the sugar is an important preservative. So yes. Dead serious.
I am sold on this cantaloupe jam business ***except*** those lemon seeds! Do you remove them after the jam is cooked? Or do they dissolve? I mean, I understand why you’d use them, but the idea of encountering a seed in my jam seems icky. Please help!
If they bother you you can definitely remove them at the end before you can the jar. You can also try to add them in one of those stainless steel tea mesh balls so it’s easier to find them later.
Can you use frozen lemons ?
You mean frozen lemon seeds? You can use those. I’ve never tried to freeze lemons before so not sure about that…
Can you use reg lemon juice in bottle instead of real lemon and how much is needed
Preferably not. I don’t think that it has the same level of acidity and not sure about the natural pectin that is still in there after they process it. But you can try. I’d probably add a tablespoon or two.
Do you leave the lemon seeds in and they just dissolve or do you eventually fish them out right before putting them in the jars?
I leave them in. They don’t dissolve, don’t change the taste of the jam, and it’s pretty easy to fish them out later. You can always fish them out before canning as well.
Mine is in the canner right now and I already know it’s going to be great! It thickened up nicely as it cooked, and it’s plenty sweet. I used one medium cantaloupe and I got four half pint jelly jars. It’s a very pretty bright amber color!
Yes, it’s a pretty color. I’m happy that you like the taste. It’s definitely a different sort of jam but we love it too.
Have you ever tried this with low sugar pectin instead of lemon seeds? Both Ball and Sure Jell make low sugar pectin.
Can this be made with and alternate sweetner, such as Monk Fruit or a Stevia+Eryhritol mix?
I’ve never tried. I did try honey though and it works great with honey.
Thanks