This post may contain affiliate links, view our disclosure policy for details.
Homemade feta cheese is easier to make than you might think! It takes some time but I’ll show you how to make a large batch of feta and preserve it so you only need to do this every few months if you want a constant supply of feta in your fridge. I am making this feta cheese with store-bought milk but you can do the same exact process with raw milk.
If you’ve been following my blog for a while you know that I am from Israel.
If you are new here, well, first, welcome! Second, it’s important that you know that I am from Israel and it’s also important that you know that an Israeli cannot exist without feta cheese.
It’s just not possible. It’s like an American without a hamburger… Doesn’t make sense, right? Right.
Homemade Feta Cheese…
So I moved here to the U.S. back in 2005 and right away, within a few short weeks I noticed two problems with this wonderful place that I call home that really puts it at serious danger for all kinds of bad things if you ask me.
The first thing is that a mysterious someone is cutting the leaves off the tops of the celery before selling it at the grocery store. Who is cruel enough to do something like that is beyond me!
Do you know how many fabulous things you can do with the tops of the celery? Do you know how healthy and tasty they are?
The second thing that I noticed shortly after I landed here is the availability (or none thereof) and quality of feta cheese.
People, the $1200 plane ticket to Israel is worth it just for the feta cheese. Trust me and get that ticket! It will change your life forever.
So I am still hard in search of the someone who has the audacity to cut off the tops of celery all over America, but the feta cheese situation ends right here and now cause I am going to show you how to make your own!
Making feta cheese at home takes just a little bit of cheese-making knowledge and a gathering of some basic supplies and ingredients. Once you have everything you need it’s a walk in the park.
I’ll show you how to make enough cheese that you can freeze some of it.
Feta cheese freezes with no problem and is just as tasty after you thaw it as it is the day you make it. If you make a large batch and freeze some of your feta, you’ll only need to do this once in a while in order to have a constant supply of feta.
This is also one of my favorite ways to process and preserve my raw goat milk. Another one of my favorite ways is this super easy raw goat cheese recipe and this soft cheese from goat milk and I also like canning my milk sometimes.
Supplies You’ll Need to Make Feta Cheese…

Let’s talk supplies for a moment, shall we? Here is what you need…
A large stainless steel pot – we are going to process two gallons of milk here so you’ll need a pot that is large enough to hold that amount.
It has to be either stainless steel or enamel because aluminum will leach into your cheese.
Heating milk to the right temperature is the most important part of cheese-making, therefore, many places will tell you to use a double boiler system or to purchase a cheese vat which is a special pot for cheese-making.
You can create your own double boiler by placing a pot within a pot or you can go ahead and purchase the cheese vat, but I found that if I turn the heat to medium on my stove and make sure to stir the milk it does great in a regular pot.
Measuring spoons – we are going to use 1/8 of a teaspoon and 1 teaspoon and also
Measuring cups – we are going to use the 1/2 cup.
Cheese thermometer – when you purchase a cheese-making thermometer, make sure the range of temperatures is between 80F to 200F at least.
Once you get into cheese-making you’ll want to try and make other kinds of cheeses so that thermometer should be useful for you beyond the feta. It’s really helpful if you can clip the thermometer to the pot.
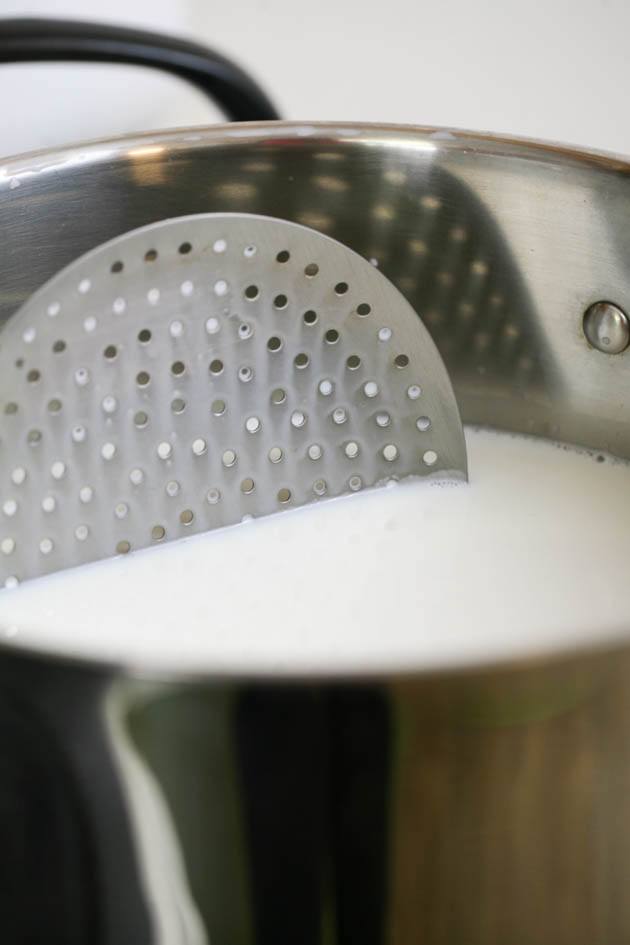
A stainless steel skimmer – we will need this to stir the milk.
A curd knife – we will need a curd knife to cut the curds. This can be just a simple icing spatula or even a large kitchen knife.
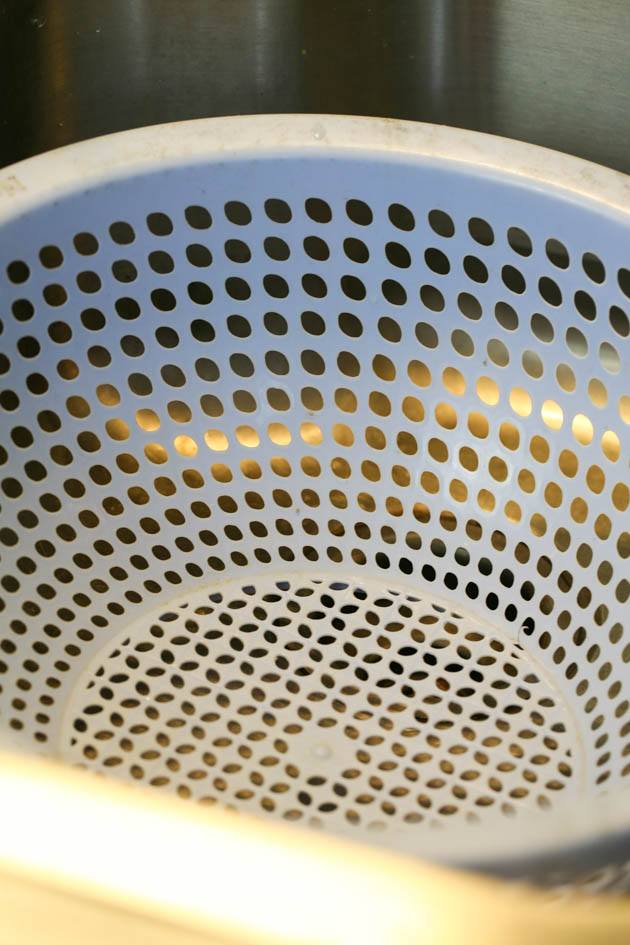
A colander – you’ll need a large colander that can catch all the curds.
Cheesecloth – let me tell you a secret…
You don’t really need a fancy cheesecloth! Your local Walmart sells a pack of five or so flour sack tea towels for something around $5. I am linking to a “proper” cheesecloth in case you are not sure what a cheesecloth is.
The flour sack towels that I get at my local Walmart work better than a cheesecloth in my opinion and they are so cheap! It’s really all you need.
A bowl – to catch the whey. I use the largest from this set.
A cutting board – I used my wooden one.
A knife – to cut the ball of cheese.
A 9 x 13 inch casserole dish – to place the cheese in when we salt it and age it in the fridge.
Ingredients You’ll Need For Homemade Feta Cheese…
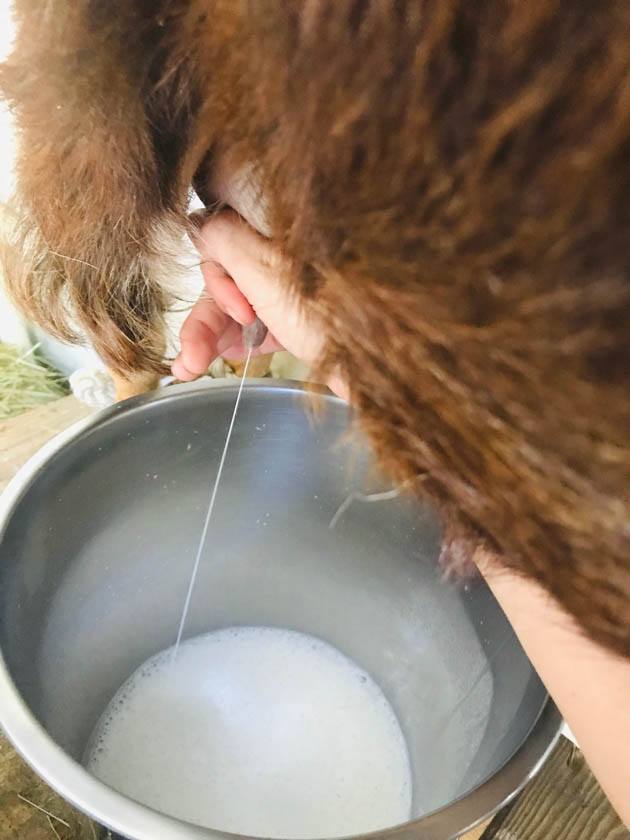
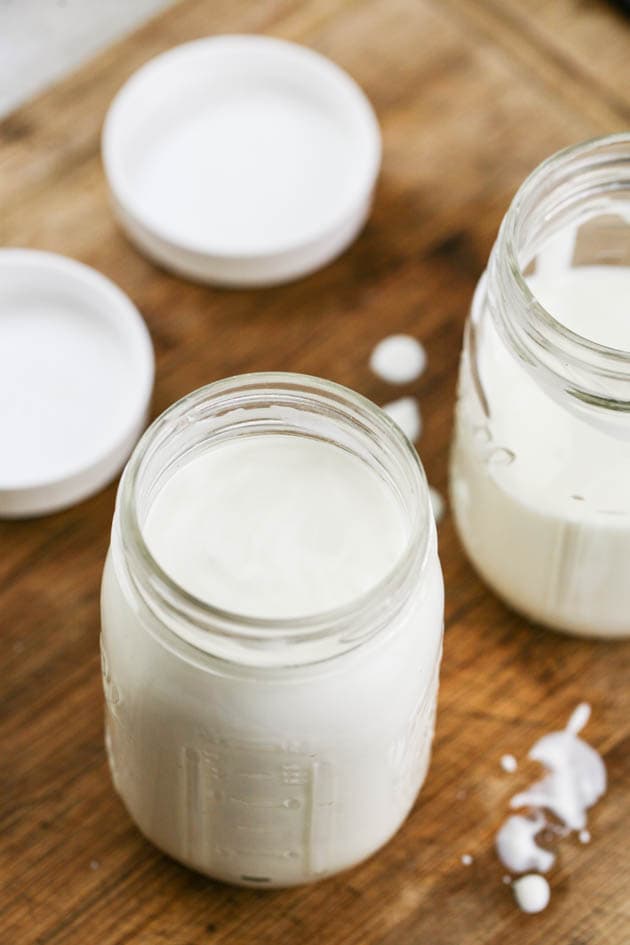
Milk – we are going to need 2 gallons of milk, but it doesn’t matter if it’s cow’s milk or goat’s milk and it doesn’t matter if it’s raw or from the store, it’s still going to be the same recipe and process.
In this tutorial, I am going to use two gallons of store bought 2% cow’s milk.
Calcium Chloride – you will need calcium chloride ONLY if you are using store-bought milk because it has been processed (pasteurized and homogenized) and it won’t give a good set without the addition of calcium chloride.
DVI Feta culture – I use a feta culture but you can also use mesophilic culture.
Rennet – I use animal rennet but there is also plant based rennet available.
**My calcium chloride, feta culture, and rennet were purchased from Hoeggers Supply Company (you can also find some of the supplies there) but you can also find them on Amazon.
Make sure to keep your rennet and calcium chloride in the fridge and the culture in the freezer and they should last for a long time.
Kosher salt – we are going to need to salt this cheese, of course! You can use cheese salt or just kosher salt from the grocery store. Don’t use regular table salt because it has iodine in it and will color your cheese blue.
For a comprehensive list of cheesemaking equipment and ingredients, make sure to visit my cheesemaking equipment post.
Ok, we are ready to go through this feta cheese tutorial. You’ll find all the steps below, however, if you want to have a better understanding of the cheesemaking process, please visit my How to Make Cheese at Home post.
Heating the Milk…

Start by adding the milk to the pot and setting it on the stove top. Turn the heat to medium and heat your milk to 86 F.
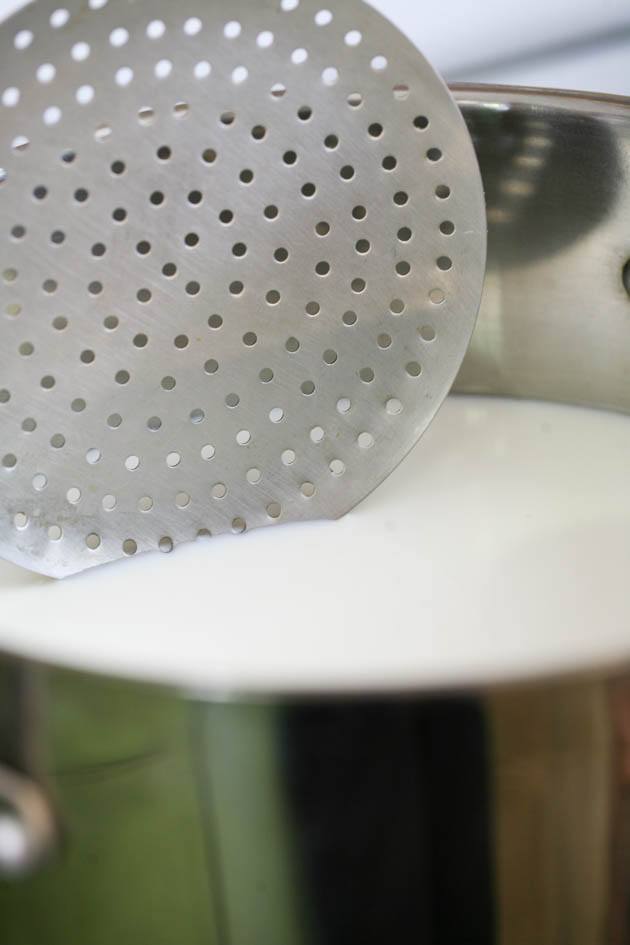
Make sure to use your slotted spoon to stir the milk constantly so the bottom doesn’t burn.
This is not the time to go do the dishes, stay with your milk, stir it and watch that thermometer. A lot of cheese-making failures are a result of heating the milk too much (don’t ask me how I know this please!).
Adding Calcium Chloride and Feta Culture…
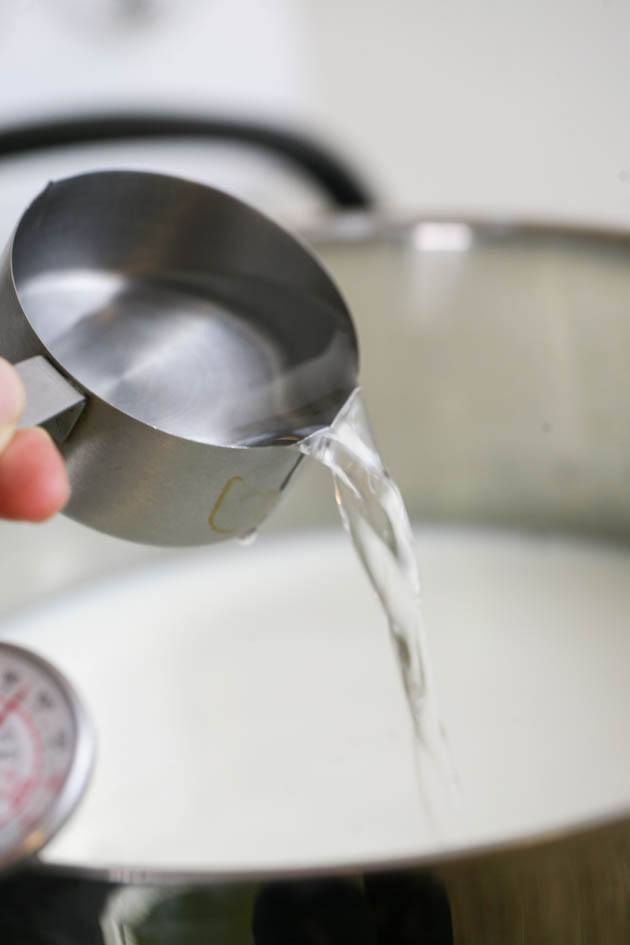
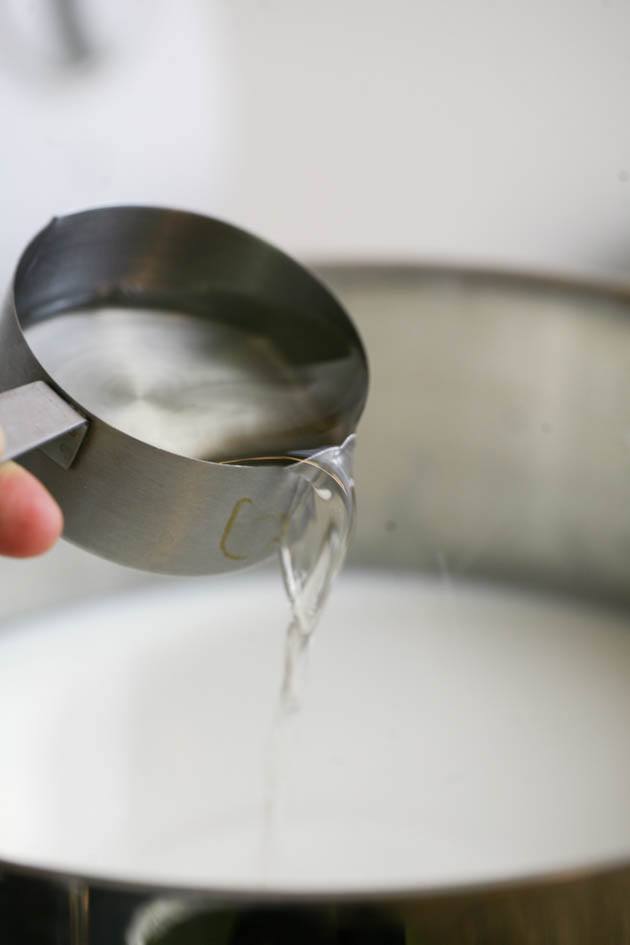
Once the milk reached 86F. Remove the pot from the heat. Add one teaspoon of calcium chloride to your 1/2 cup measuring cup and fill the rest of the cup with water.
Add this to the milk and stir…
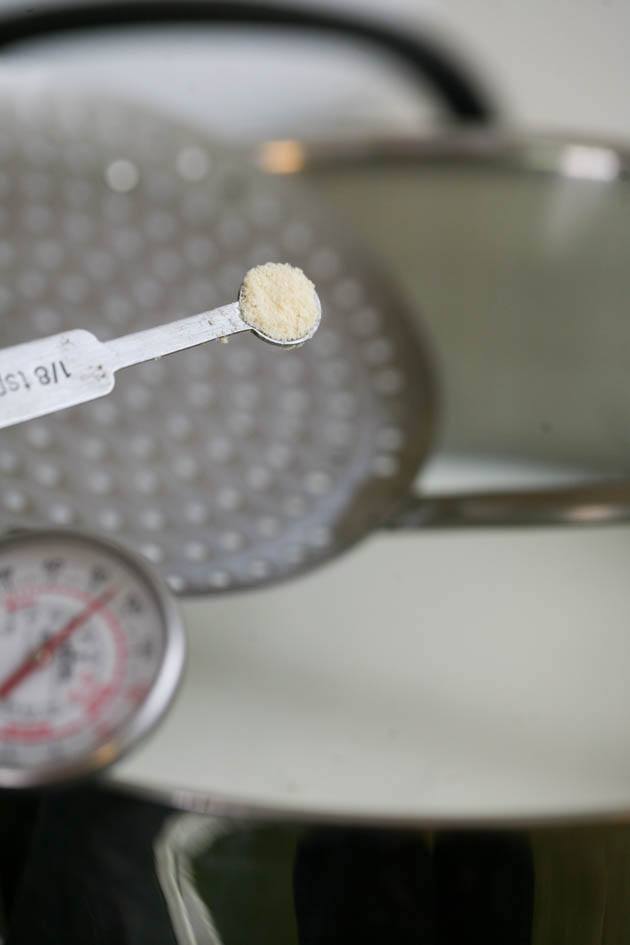
Then, sprinkle 1/8 teaspoon of the feta culture on top of the milk…
And use your slotted spoon to mix it in well.

Cover the pot and let the milk rest for 1 hour. During this hour, we want to try to keep the temperature at 86 F
It’s best to do this in a warm house. If your house is cool, just get ready to wrap the pot with a fuzzy blanket or set it in a sink full of warm water in order to keep the temperature.
Adding Rennet…
After an hour, when you uncover the pot, it will look like nothing happened.
The milk will look just as it looked before and that’s fine. Add a teaspoon of liquid rennet to your 1/2 cup measuring cup, fill the rest with water, stir, and add this to the milk.
Immediately, stir the milk with the slotted spoon to mix the rennet in well.
Before you cover the pot again, make sure to use your thermometer to check the temperature of the milk. Again, we want to keep it at 86 F (or very close to it) which is not hard to do if your house is warm.
If the temperature is low, fill your sink with hot water and carefully set your pot inside the sink.
Ok, so once you checked the temperature, cover the pot again and let it rest for another hour.
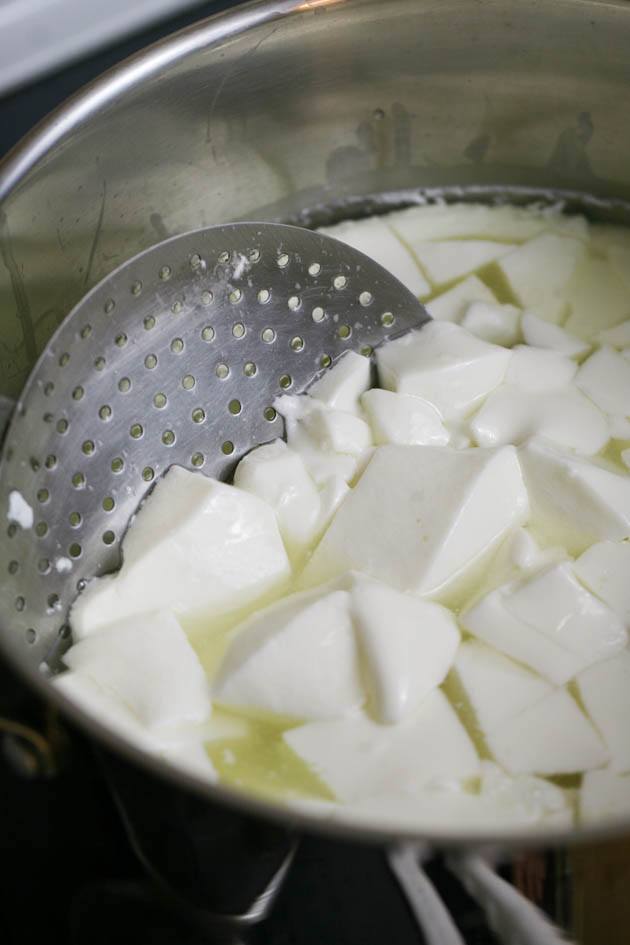
Cutting the Curds…
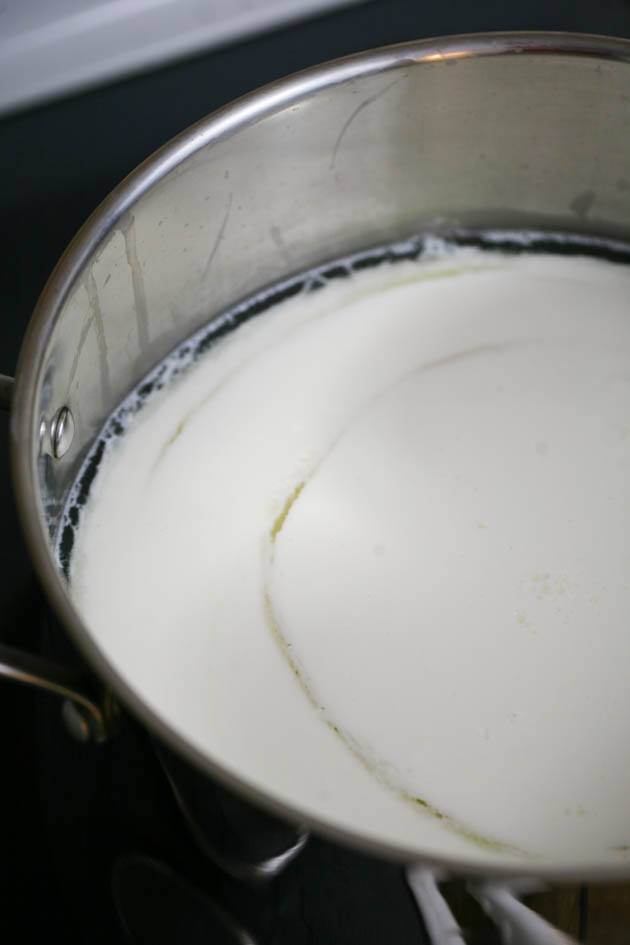
When you come back to your milk after an hour, it should look like this. The milk has completely coagulated and set because of the rennet.
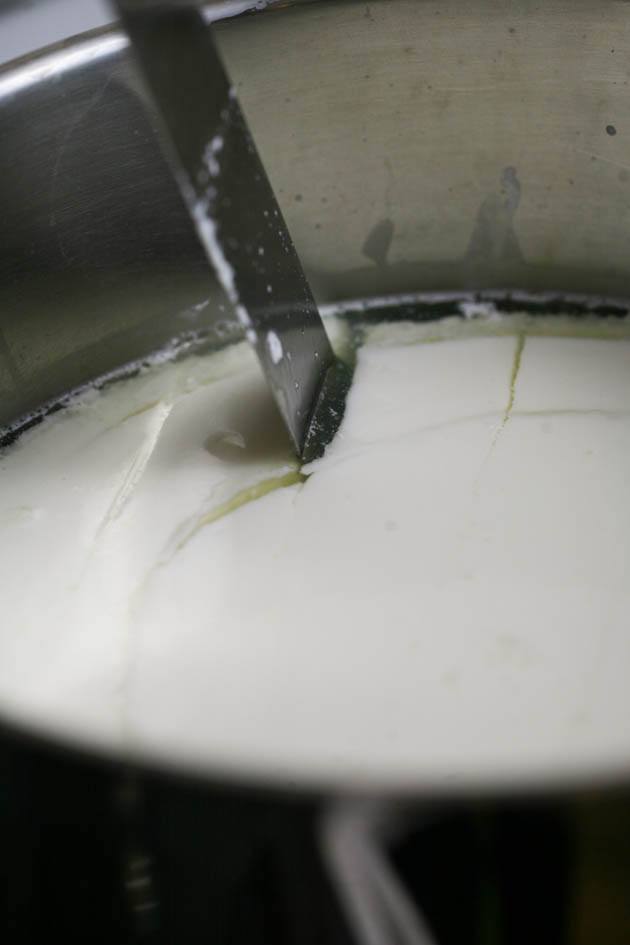
Grab your icing spatula and let’s cut those curds! We start by cutting vertically. Make sure you reach all the way down to the bottom of the pot and space your cuts about 1 inch apart…
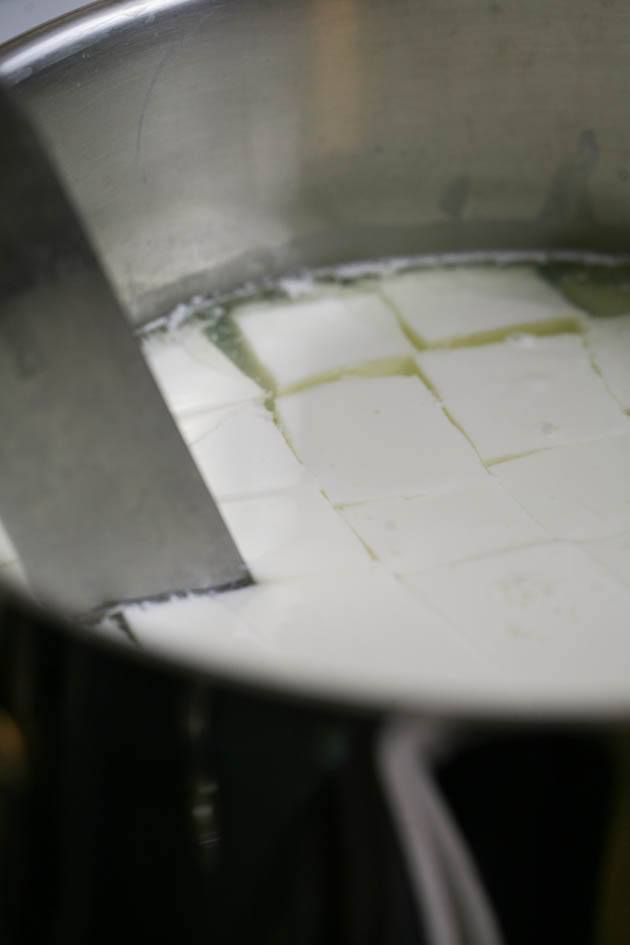
Next, we cut at a 90-degree angle to form 1 inch squares on the top surface (again, make sure that your knife goes all the way down to the bottom of the pot).
Lastly, hold your knife at a 45-degree angle and make sideways cuts.
It doesn’t have to be perfect. Once you cut your curds, cover the pot and let the curds rest for 5 minutes.
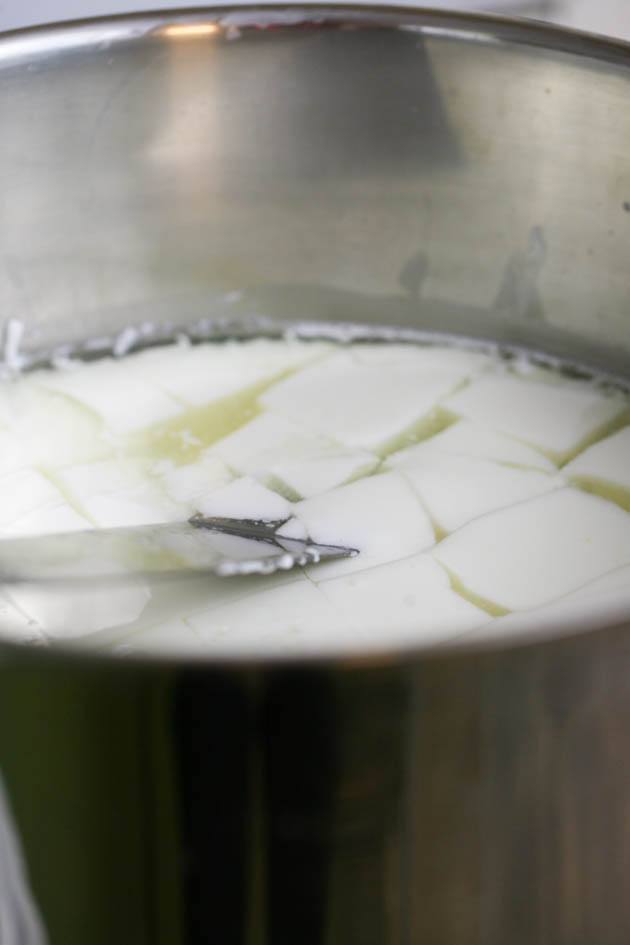
Mixing the Curds…
After 5 minutes, mix the curds with your slotted spoon…
Be gentle and slow here! Your movement should be from the bottom of the pot to the top, and in circles. We want to break those squares that we made after cutting the curds.
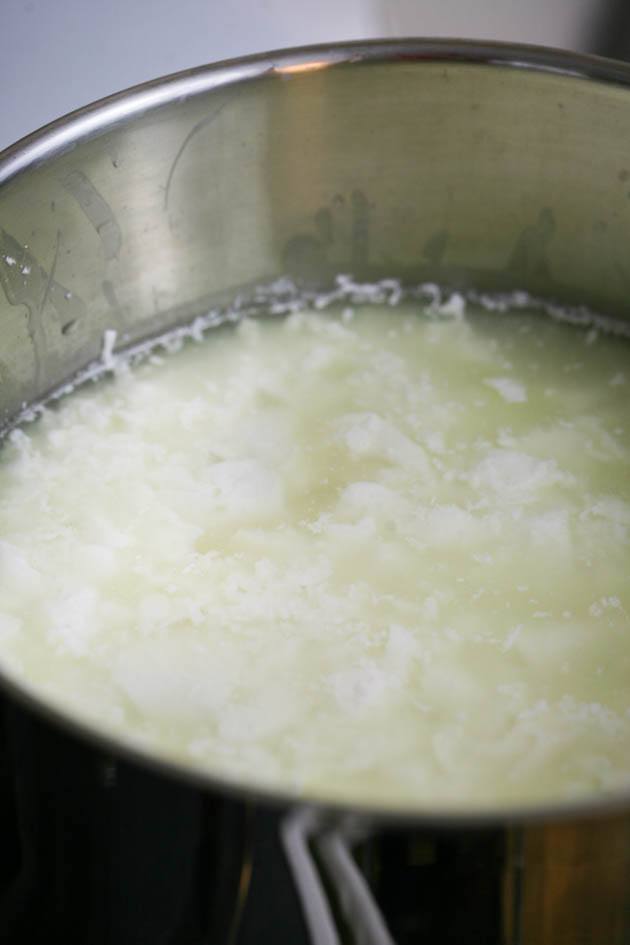
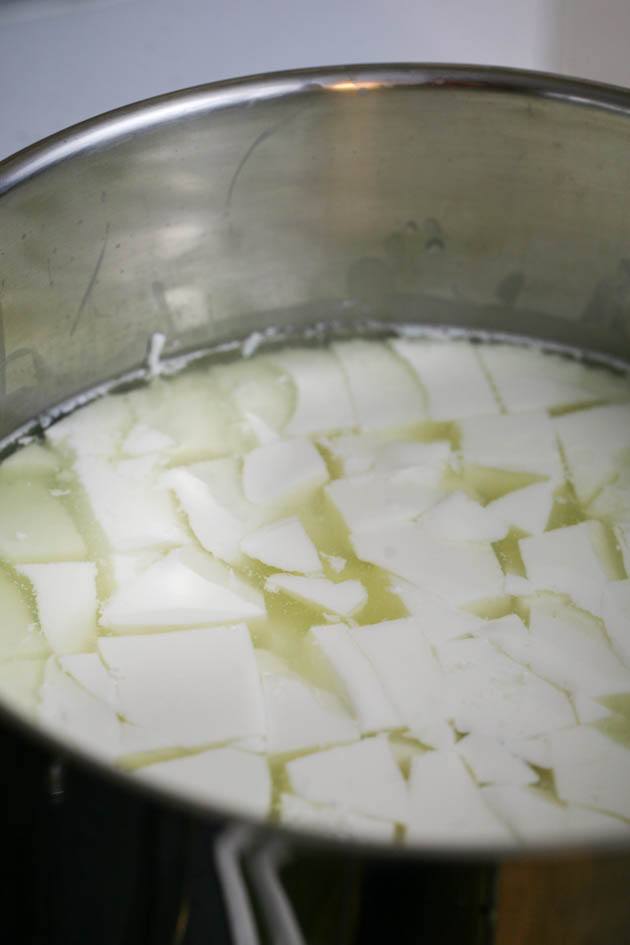
After a couple of minutes, you’ll have something that looks like the picture above. Smaller pieces of curds swimming in their whey. Cover the pot and let the curds rest for 5 more minutes.
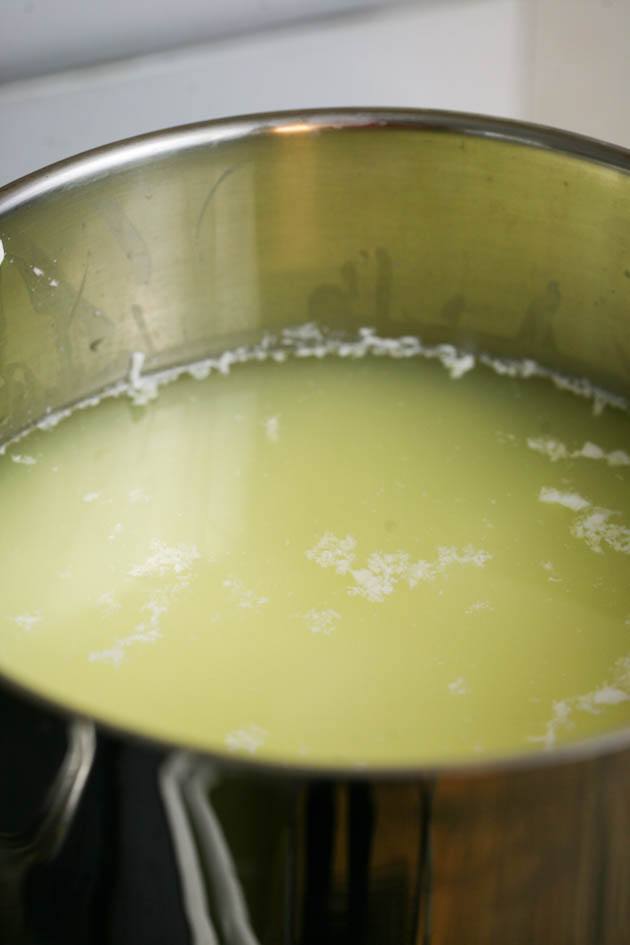
When you uncover the pot you’ll notice that all the curds sunk to the bottom.
Get your slotted spoon and stir again, slow and gentle to prevent the curds from sticking together. Then cover the pot and let the curds rest for an additional 5 minutes.
Uncover the pot one last time and stir the curds again. So we stirred the curds 3 times in 5 minutes intervals over 15 minutes. This allowed the curds to extract as much whey without sticking together.
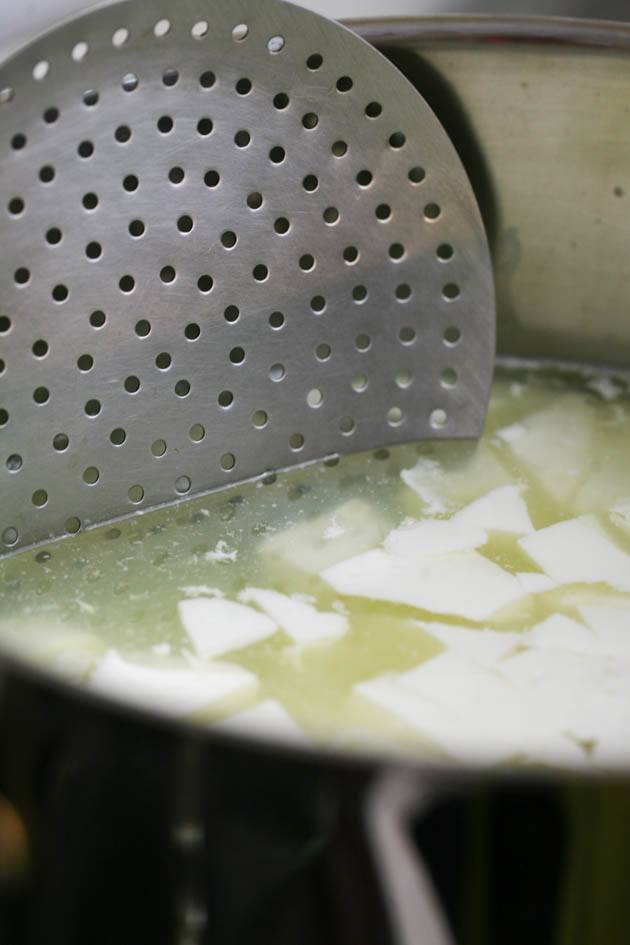
Hanging the Curds…
The curds are ready for hanging at this point and we need to transfer them from the pot to the cheesecloth (or flour sack in this case…).
You can catch the whey and make ricotta cheese from the whey, you can use it to substitute water in recipes (it’s great in bread recipes) or give it to the animals… There are many uses for whey.
If you want to collect it, place your colander inside a large bowl. If you don’t want to collect it you can place your colander inside the sink and let the whey go down the drain.
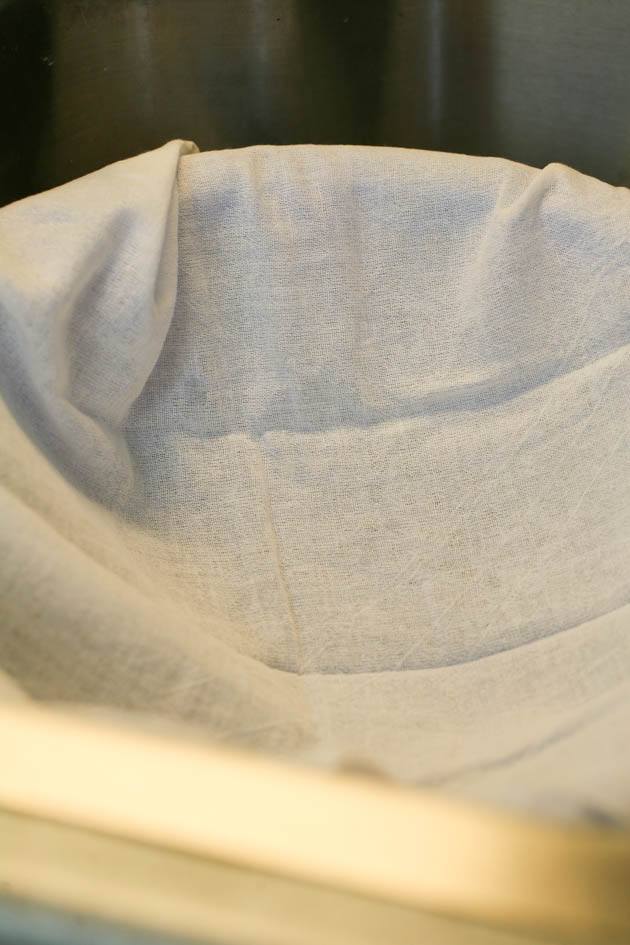
Line your colander with the cheesecloth or flour sack…
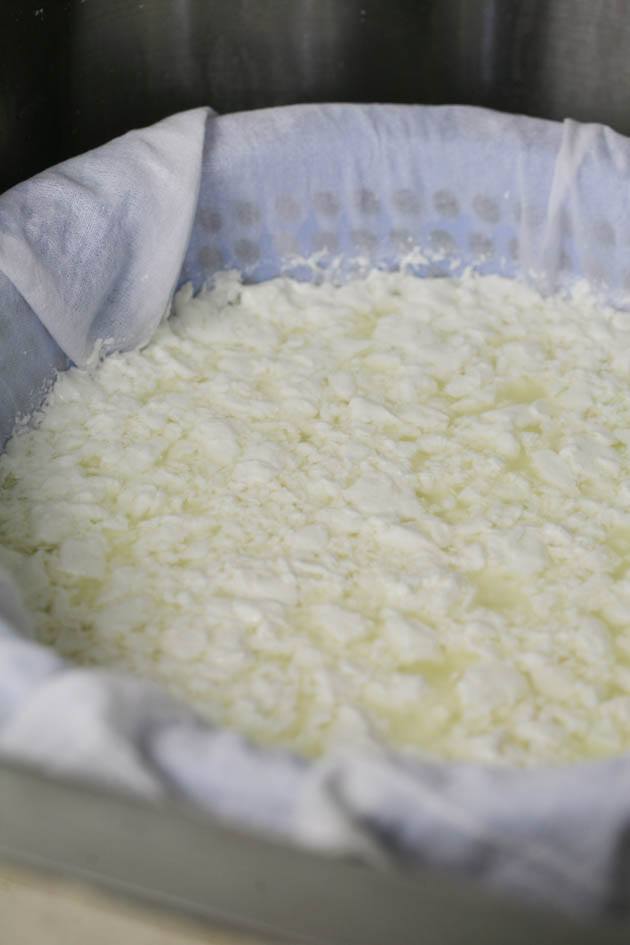
Grab your pot of curds and transfer them to the colander. This can be a messy business with whey splashing all over but it is what it is…
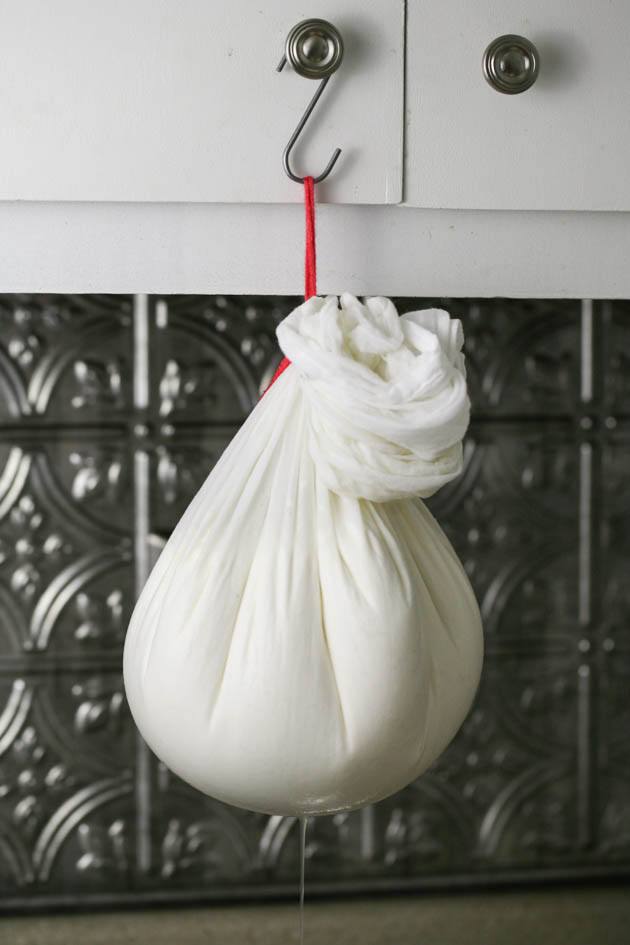
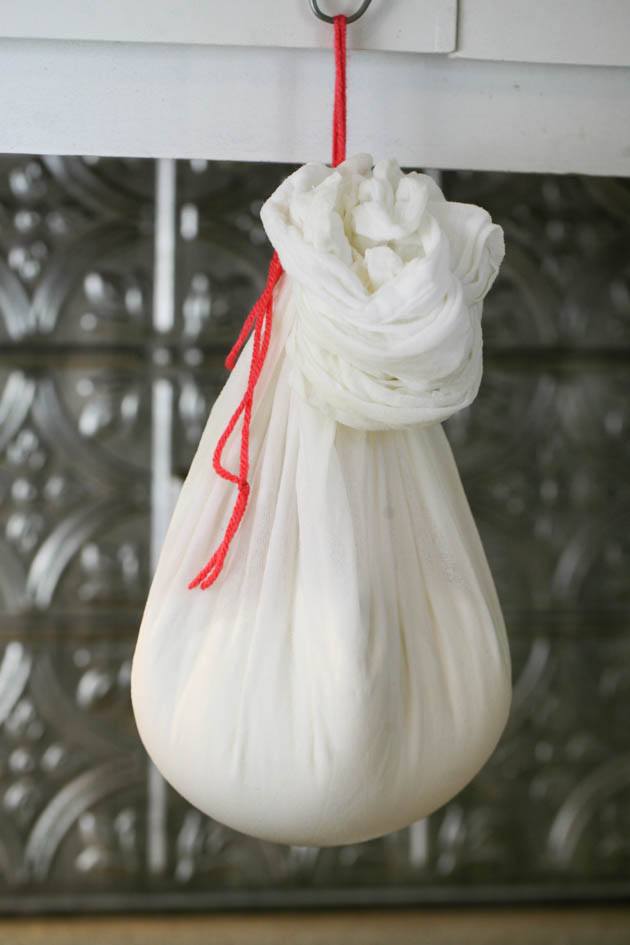
Once all of your curds are in the colander, collect the corners of the flour sack and use a string (I use yarn) to tie the sack together.
Then use a hook to hang it on one of your kitchen cabinets (you don’t have to use a hook, of course, it just makes it easier…).
Draining the Curds…
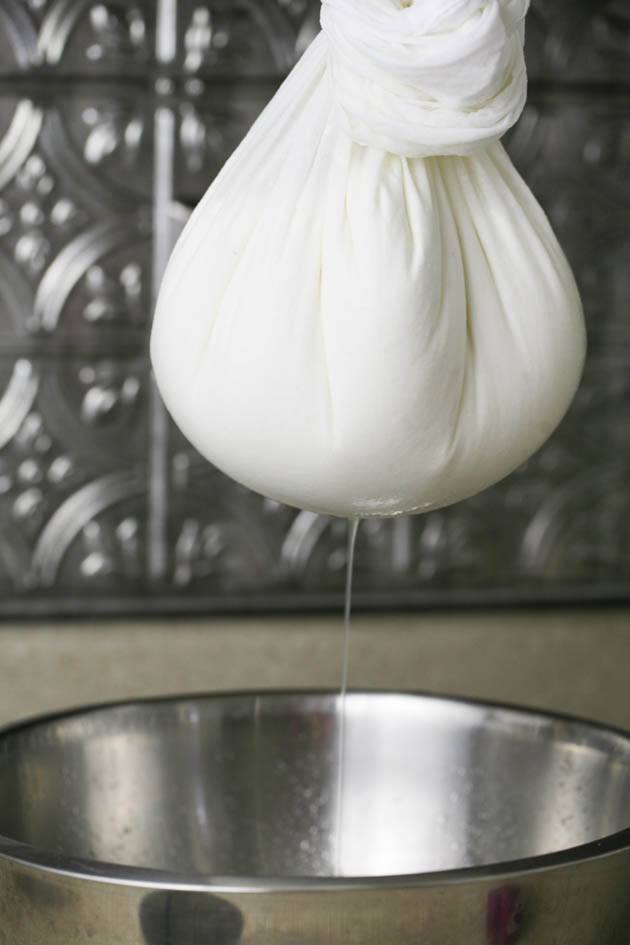
Make sure to place a large bowl under your hanging bag to catch all the whey that is dripping out.
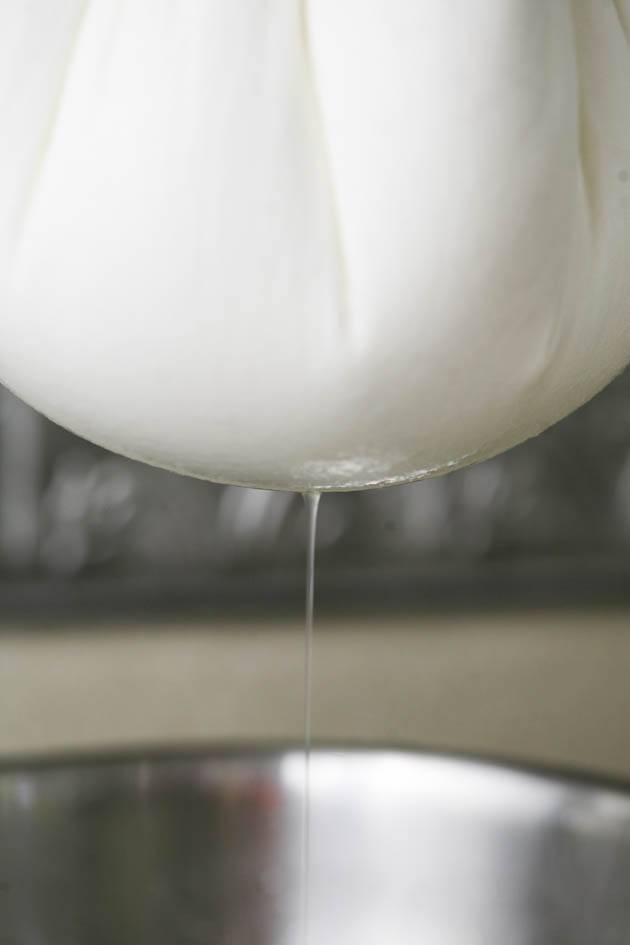
Let this hang overnight. I usually start making my feta cheese around 6 pm, this way, before I go to sleep I hang the bag and it has a whole night to get rid of the whey.
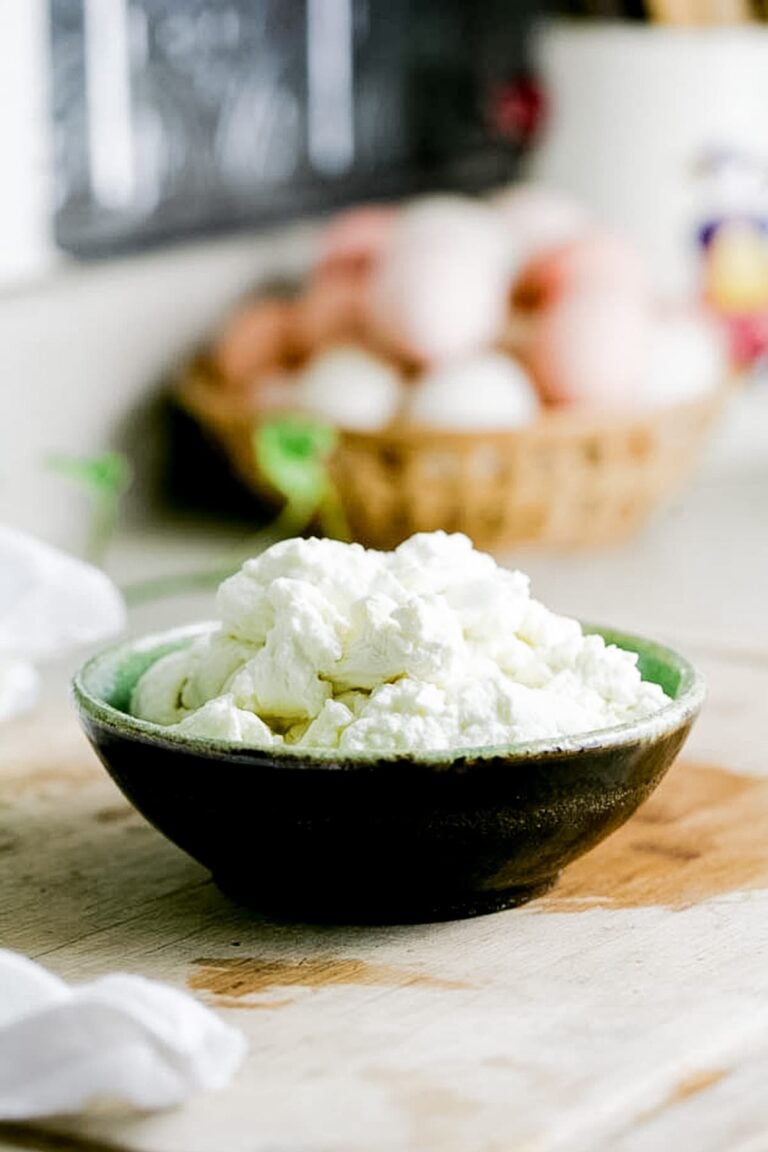
When you wake up in the morning, your bag is going to be half the size you left it the night before. Almost all the whey is gone and it’s now a solid cheese!
Cutting and Salting Homemade Feta Cheese…
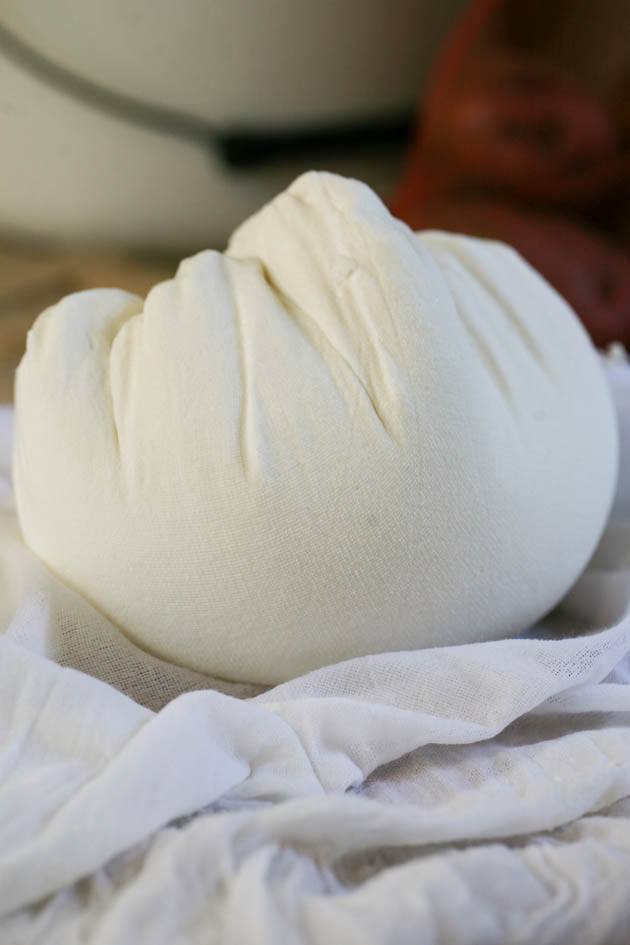
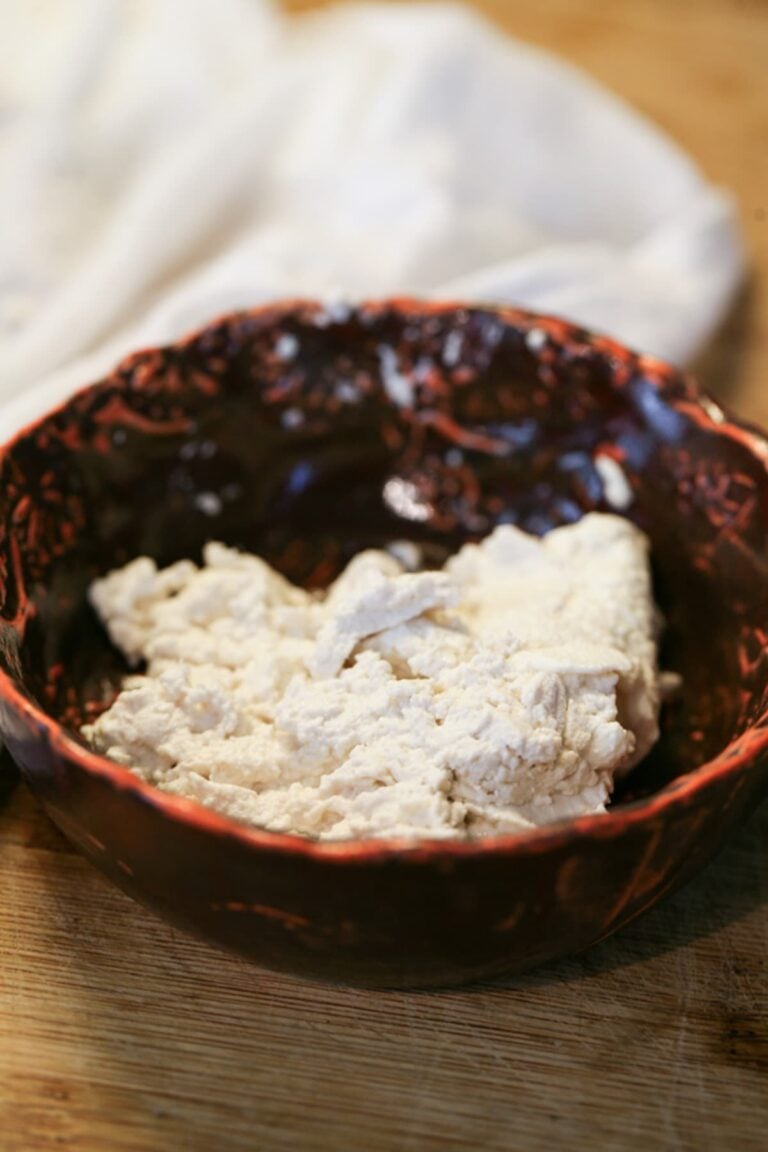
Take your bag down from the cabinet and set it on a cutting board. Gently, open and uncovers your beautiful ball of cheese.
I always need to take a moment here and just stand and look at it in amazement, it’s like collecting eggs from the chicken coop, it never gets old!
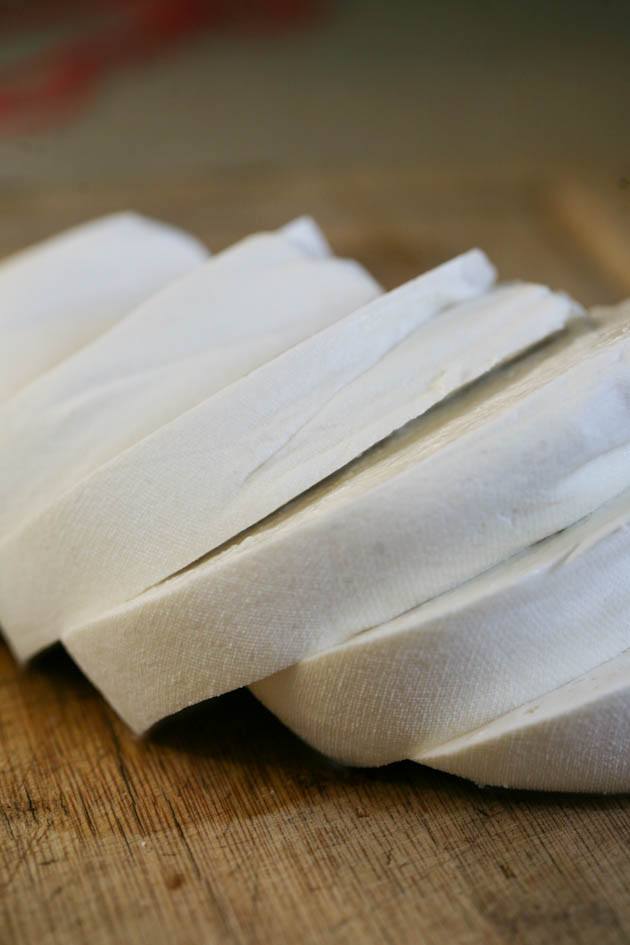
Remove the flour sack (you can wash it and reuse it or just wash it and use it as a kitchen towel) and set your ball of cheese on the cutting board…
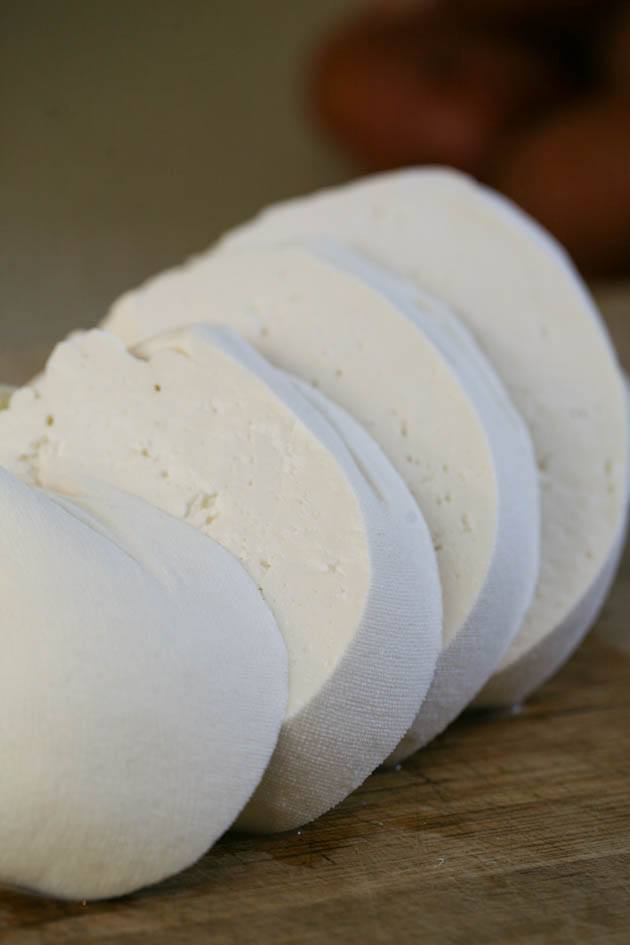
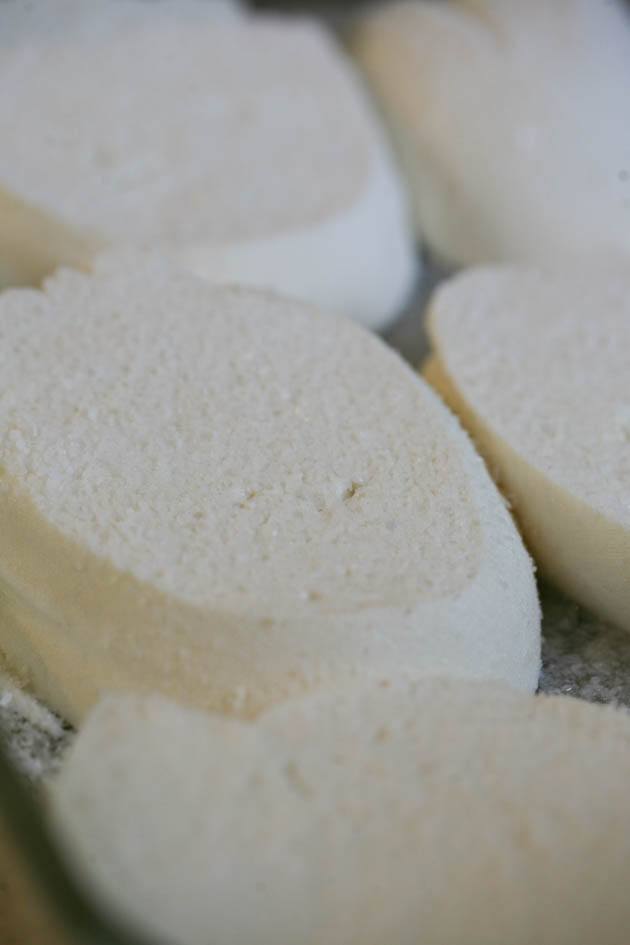
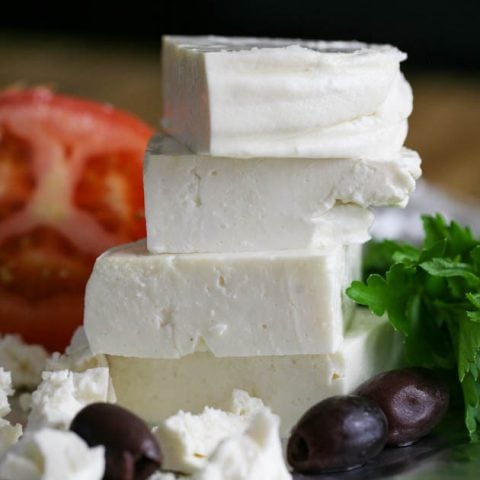
Use a large kitchen knife to cut the cheese into 1 inch thick slabs…
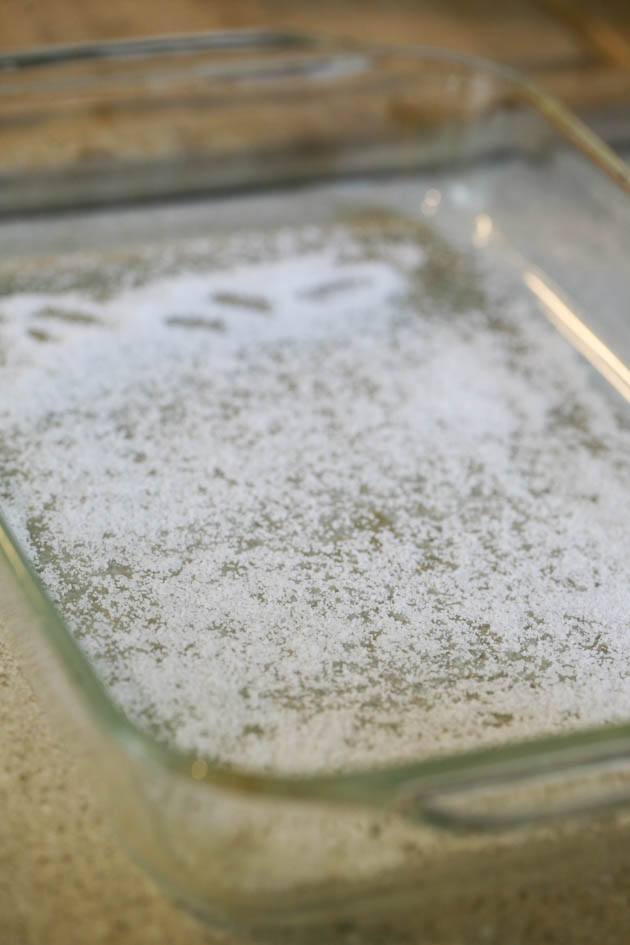
Take a 9×13 cake pan or casserole dish and cover the bottom with some kosher salt, about 2 tablespoons or so…
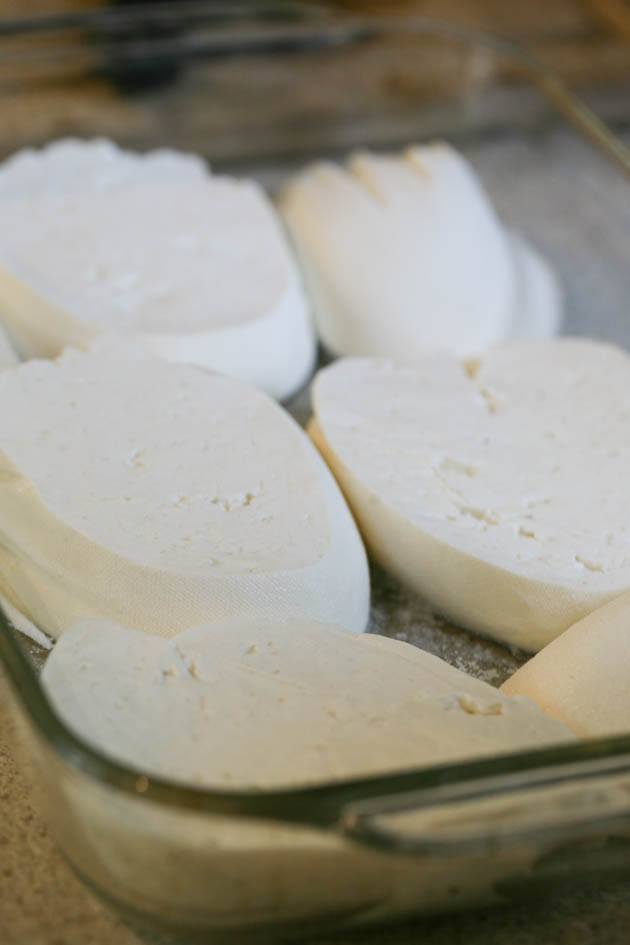
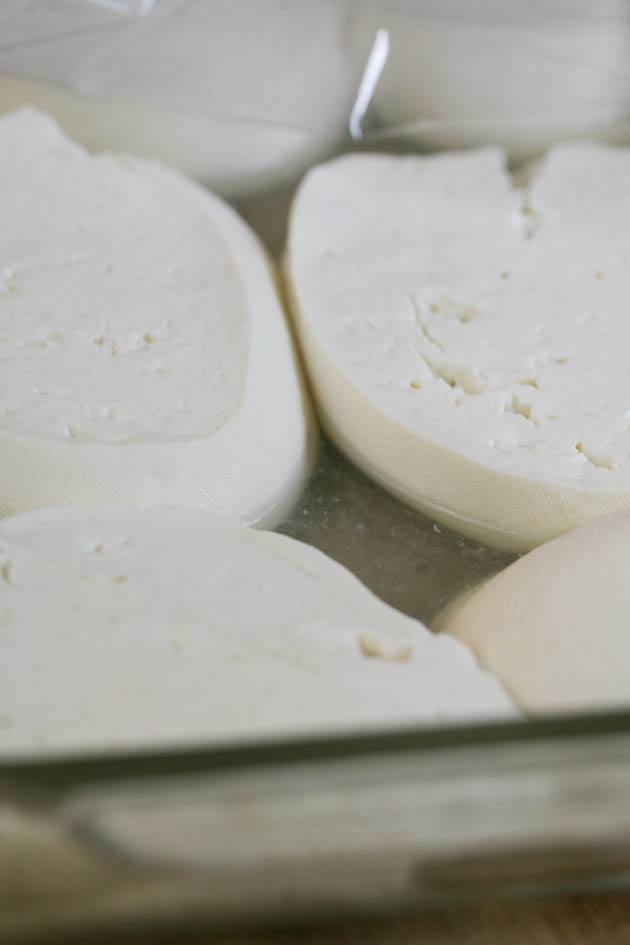
Take your slabs of cheese and set them in one layer in the dish…
Then sprinkle some more kosher salt on the top of each slab. Cover the dish with a plastic wrap and place it in the fridge.
Curing Homemade Feta Cheese…
The salt will dry the cheese and more whey will come out. After a few hours, take your cheese out of the fridge, gently tilt the dish to dump the whey, salt the top of the cheese, turn each slab and salt the other side.
We are going to let the cheese cure in the fridge for 24 hours. During those 24 hours get rid of the whey and salt the cheese two or three times.
Try to not get carried away with the salt, each time, just salt lightly. But also don’t worry about the cheese being too salty.
If later you find that it’s too salty for you, you can just wash it with cold water before you eat it to get rid of some of the salt.
Serving Homemade Feta Cheese…
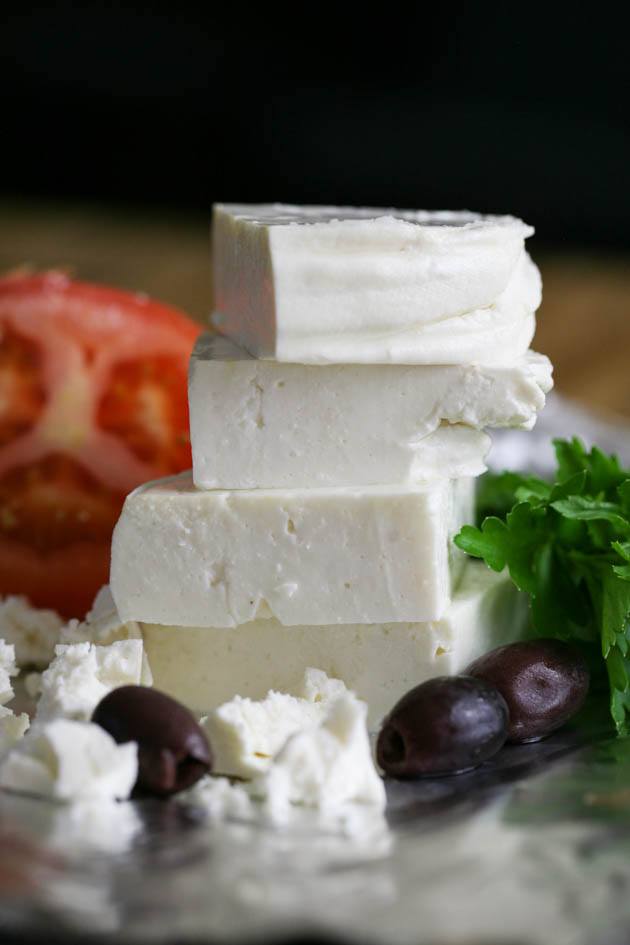
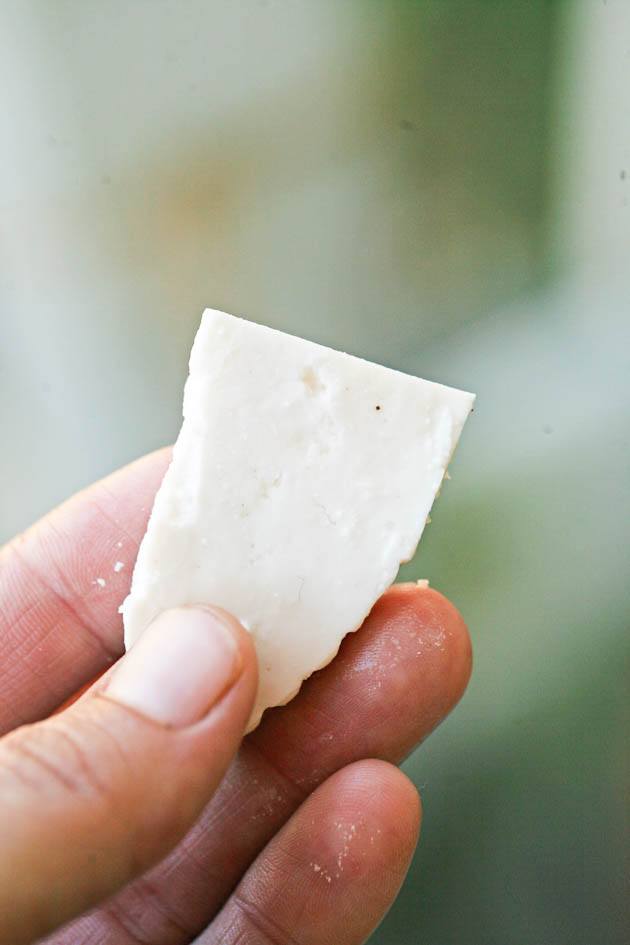
The next morning your feta cheese is ready to eat! There are so many things you can do with feta cheese…
You can add it to sandwiches, casseroles (like this healthy zucchini casserole), pasta sauce…
But my favorite thing is just to stick it in every salad. It will go so well with this Mediterranean egg salad, or this beet salad, or those garlic beans.
Also, there is nothing like feta cheese and a perfectly cut sweet watermelon in the summer! Sweet and salty, dry and juicy… It’s a perfect combination.
Freezing Homemade Feta Cheese…
Before we are done here, let me just say that we just made a large batch of feta cheese.
There is no need to leave all of it in the fridge unless you are having company and you know that you are going to use all of it in the next 10 days or so.
There are a couple of ways to preserve feta cheese…
You can cut your cheese into cubes, pack them in a jar and top it with olive oil. Go ahead and add rosemary and garlic in the oil and it will season your cheese as well.
It’s so tasty and as long as the cheese is under the oil and you keep everything clean, you can leave your jars at room temperature.
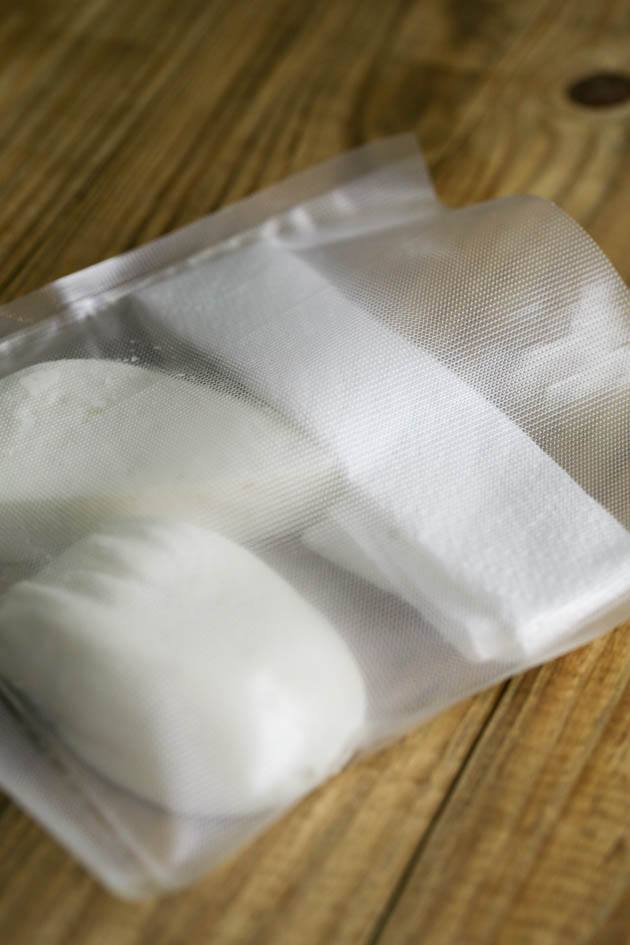
Another way to preserve your feta cheese (and a cheaper way since olive oil is expensive…) is to freeze it.
I have a Nesco food vacuum sealer and I use these vacuum bags. I place a couple of slabs of cheese in a bag, then fold a sheet of paper towel and stick it inside the bag between the cheese and the top of the bag.
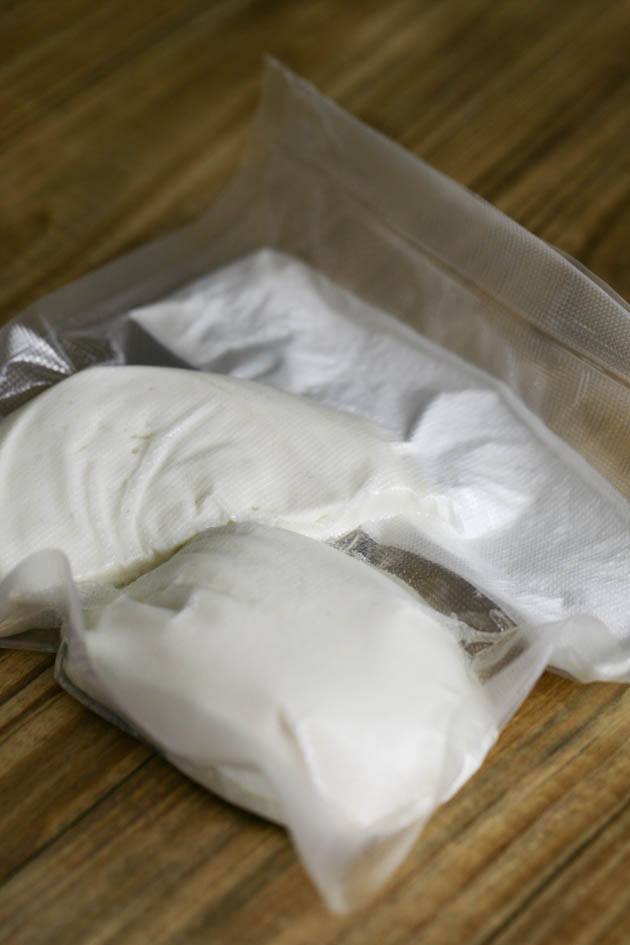
Then, when I vacuum the bag, all the moisture that is pulled out of the cheese is caught in the paper towel and doesn’t interfere with the sealing process.
For the life of me, I can’t remember where I learned this trick but it’s one you must know if you vacuum food for freezing.
Make sure to label your bag and it is ready for the freezer! It should last in the freezer for a long time. When you want to use your cheese just thaw it and use it. It will be just as fresh and tasty.
I hope this was a clear tutorial. Don’t get overwhelmed by the steps, there are a few of them but they are very simple. After you make feta a couple of times this will be easy peasy.
If you liked this post, make sure to check these as well…
Homemade Crockpot Yogurt From Store-Bought Milk
Spinach Patties Recipe (you can use this feta in them!)
Homemade Feta Cheese
Delicious homemade feta cheese recipe. Learn how to make feta cheese at home.
Ingredients
- 2 gallons of milk (whatever milk you'd like to use)
- 1 teaspoon calcium chloride diluted in 1/2 cup of water (only if you are using store-bought milk).
- 1/8 teaspoon feta culture or mesophilic cheese culture
- 1 teaspoon rennet diluted in 1/2 cup water
- Kosher salt
Instructions
- Add milk to a large pot and set on the stove top. Turn stove top to medium heat and heat your milk to 86F. Make sure to stir constantly so the milk doesn't burn.
- Once the milk reaches 86F, remove the pot from the heat and add the diluted calcium chloride. Stir it in with a slotted spoon.
- Sprinkle the cheese culture on the milk and use the slotted spoon to mix it in well.
- Cover your pot and let the milk rest for an hour while keeping the temperature at 86F.
- Uncover your pot and add the diluted rennet, stir the rennet in immediately with the slotted spoon.
- Cover your pot and let it rest for another hour.
- After an hour your milk should be completely coagulated and it's time to cut the curds. Cut them with a large knife or a large icing spatula vertically and then at a 90 degree angle to form squares on the surface of the curds. Than cut the curds at a 45-degree angle.
- Cover your pot and let the curds rest for 5 minutes.
- in the next 15 minutes, uncover and stir the curds three times at an interval of five minutes between each stirring. Make sure to stir from the bottom to the top and around the pot.
- Set a large colander in your sink and line it with cheesecloth or flour sack. Transfer your curds into the colander and give the whey a couple of minutes to drain.
- Collect the sides of the cheesecloth or flour sack and tie them with a string to form a bag. Hang your bag on a kitchen cabinet. Place a bowl under the bag to catch the whey and leave your bag hanging overnight.
- In the morning, set your bag on a cutting board. Open the bag and gently remove it, set your ball of cheese on the cutting board.
- Use a large kitchen knife to cut the ball into 1 inch thick slabs of cheese.
- Sprinkle two or three tablespoons of kosher salt on the bottom of a 9x13 inch pan. Set your slabs of cheese in one layer in the pan and sprinkle another thin layer of salt on top of the slabs. Cover the dish with a plastic wrap and set in the fridge for 24 hours.
- During those 24 hours, take the pan out a couple of times, get rid of the whey and lightly salt the cheese from both sides again.
- After 24 hours, your cheese is ready to eat!
Notes
To preserve your cheese, you can cut some of it into cubs, add the cheese cubs to a jar and cover them with olive oil. Feel free to add garlic cloves, rosemary, thyme... Or any other seasonings you'd like. You can leave the jar in room temperature.
The other option is to freeze some of your cheese. I use a vacuum sealer to do that and I show in the post how I do it.
With both methods, the cheese should last for months.
Nutrition Information:
Yield: 20 Serving Size: 1Amount Per Serving: Calories: 206Total Fat: 8gSaturated Fat: 5gTrans Fat: 0gUnsaturated Fat: 3gCholesterol: 33mgSodium: 243mgCarbohydrates: 20gFiber: 0gSugar: 0gProtein: 14g

Such nice simple easy instructions. Will try it soon. For some reason I just cannot get my milk to set.in order to form curds. Please can u explain why?
Many thanjd
Warm regard
Dianna (South Africa)
Make sure your temperature is right and make sure that your rennet is still good. You might need to replace it.
Can not wait to try this I live on a farm so will be nice to have the cheese whenever instead of waiting for a trip to town. It also happens to be my favorite cheese Thank You!
I make as much as I can during the milking season and freeze it. One cheese that we can’t live without!
Thank you! So excited to try making this today. I just got a jersey cow that I milk 2+ gallons a day and most time it’s just me here at home so I have too much milk. I’m going to try with using a mesophilic culture as that’s what I have on hand. Perfect timing to get this recipe/technique down to make Christmas gifts.
Oh, I just noticed, in the printable recipe, it says 1 TABLESPOON Rennet, not 1 Teaspoon like instructions with the pictures. I know it’s just a teaspoon but thought you might want to correct in case someone doesn’t follow the great step by step with photo instructions. I can’t imagine what 1 tablespoon of rennet would do.
Oh my! Thanks for letting me know. Will change it right now. Also, did you see this recipe: https://ladyleeshome.com/easy-raw-milk-goat-cheese/
It’s a super simple cheese that I learned from someone who had to process a whole lot of milk every day. I make it in the post with goat milk but you can make it with cow’s milk too. I think you’ll love it. It’s simple and you can make it salty like the feta.
This looks super tasty!! I can’t wait to give it a try! It’s all delicious ingredients 🙂
Yes! It is delicious cheese and it makes a large batch so you have a lot to freeze and it’s just as delicious when you thaw it.
We tried the recipe and nothing happened. It still is milk. What did I do wrong?
Nikki, where did you get your culture and rennet? How old is your rennet? Did you pay close attention to temperatures?
Hi not sure if you are still running your blog but here goes. It’s 2017 I really enjoyed reading your info on making feta. I too have just caught the feta making bug. My question is Why do you keep it on the bench in the oil ? Will it go off ? Why not keep it in the fridge as when I buy it in Coles infused in oil it’s kept in the fridge and that’s how I continue to keep it once I have bought it home.
Hi Wendy,
Keeping cheese in oil is just a way to preserve it and make it last longer in case you don’t have electricity. Back in the day they didn’t have fridges so keeping cheese in oil was just a way to make it last longer.
Most oils prefer being kept at room temperature. If the cheese is kept in oil you don’t have to place it in the fridge.
Thank you for sharing! I followed this and my cheese turned out so delicious! Only one problem – we can’t keep our hands off of it for 5 days to let it age!! 🙂
I know! This is a problem here too. I’m happy you liked it.
After I eat the feta cheese out of the olive oil, could I use the olive oil that is left for storing more feta cheese?
You know, I never tried it because I usually use it to fry eggs or to dress a salad since it has so much flavor from the herbs. But you can definitely try, I don’t see why it won’t work. I would take out the herbs, though. Either replace them with new ones or use just the oil without more herbs. The oil is already flavored at that point and I think it will be too strong if the herbs are left in there.
I think I might have to try this, thanks for the great directions! I’ve only made mozzarella, cottage and ricotta before, so it is time to branch out into some more complicated cheese. That feta looks delicious!
You can do it! It’s really not that hard. Just make sure you use the right tool. Good luck!
We use raw cows milk in my house…can you tell me how to adjust for raw milk? I want to make this but don’t want to screw it up and ruin my coveted raw milk! Thanks!
As far as I know, the only difference between making cheese with raw milk and store-bought milk is that when you use raw milk you don’t have to use calcium chloride. The rest is the same. Good luck!
What a great tutorial! Making this has been on my bucket list for a long time.
This is a great page! I eat feta everyday and the price makes me grimace but you have just given me the ability to make my own! Thank you, I have just put all the ingredients on my list for the health food store.
I love garlic in olive oil. I will peel enough cloves to fit into a half pint container and cover them with olive oil then set it in a shallow pan of water and gently simmer it. The garlic infuses into the oil and the oil enters the garlic and I can eat them with a spoon! My favorite way is hard toast with feta cheese, black olives then the oil infused garlic with the oil drizzled over the whole thing with a little sprinkle of pink himalayan salt!
Thanks again for sharing!
Kirsten Mia
Oh my! This sounds so good I want to come for dinner at your house please! I think you will get along just fine in Israel, it is the land of garlic! I am so happy I inspired you to make your own Feta. Don’t give up if it doesn’t go well the first time, cheesemaking takes some practice. Also, just make sure you use the right tools. Good luck and thanks for visiting!
Lee good morning from Pa. I could not find your tool list when i clicked where it highlited tools. I just goes to all your other amazing things. Where do you get rennit and cal. chloride? So many farms have stopped doing dairy cows by me. It is a scarey thing.
Hi Kathy!
I have to update this post, sorry about the link issue. I got all my cheesemaking supplies at Hoegger Supplies.
I found that Walmart has a five pack of flour sack kitchen towels for something like $4. I use those instead of cheesecloth now and they are just fine, but other than that, everything else is from Hoeggers.
Hi I just finished making your feta cheese recipe. My cheese is quite soft wonder if it is because I used yogurt with active bacteria instead of the culture. I also used lactose free milk wonder if that could be the reason why it turned out soft. My rennet is still active. It is laying in kosher salt right now. Thank you for sharing. I will definitely make it again and get the proper ingredients. It tastes wonderful.
Probably because of the yogurt… I can’t be sure.
Wow, I haven’t made feta in a long time. I like your recipe though. Part of the reason I haven’t made it in so long is because by my recipe, it was a days long process. It called for letting the cheese set over night before even cutting the curd.
I’m off to pin this for later. Thanks for sharing! 🙂
I milk two Jersey cows and regularly make feta from the raw milk (so I don’t need the calcium chloride). It’s one of our favourites and we keep it in a large jar of flavoured olive oil (garlic, rosemary, chili). I haven’t had it dissolve in the brine but it just gets too salty. The oil marinated feta makes a great gift.
I am all envy! I wish to have a cow one day. Any cheese from fresh milk will be a million times better than cheese from store-bought milk. Cheese from fresh milk will probably won’t be as hard to keep in brine since you don’t have to mess with calcium chloride. My mother in law washes her cheese with cold water if it gets too salty. It works great.
I have goats and I make cheese. I also have her book. I only made feta once but I don’t think I used her recipe. The recipe had me put the cheese in brine. It made it very salty so I did not leave it in the brine very long.
I thoroughly enjoyed reading this post. It’s very well done.
Years ago when our youngest raised dairy goats as a 4-H project I made different cheeses (and soaps) from the milk. I used a lot of recipes from Mary Jane’s book Goats Produce, Too, and we loved most of them, including the feta cheese. We no longer have the goats, but you have inspired me to make feta again. I’ll have to order some rennet, etc. and try your method of preserving it in olive oil as I really like the sound of that. Thanks so much for taking the time to post your cheese making adventures. Have a great weekend!
I am sure this cheese will be seven times better with fresh raw goat milk. One day I hope to have goats and try all kinds of cheeses. But is is still very tasty, even from store-bought milk. Thanks for visiting!
I have two pgmy goats that I milk. They are very gentle and easy to care for. I get enough milk for my husband and myself, plus I make cheese, yogurt and soap and sometimes have enough to share.
Goats must be wormed regularly. I give mine Demaceous Earth every day and once a week I worm them with a herbal wormer that i purchase from Hoegger Supply.
I love my pygmy goats!
I also enjoy reading your posts.
Thanks! I envy you for all this fresh milk. One day, hopefully I’ll be able to own goats. Thanks for stopping by.
Can I use this recipe with my fresh raw goat milk? Or do you have a recipe for raw goat milk?
It will be seven times better with raw goat milk! The only thing different is that you don’t need to add calcium chloride. So after you heat the milk, you only add the culture and then let the milk rest for an hour. Come back to let me know how it was if you end up making it.