This post may contain affiliate links, view our disclosure policy for details.
In this post, I’ll show you step by step how to skin a chicken. If plucking is not your thing and you want to try to skin your chicken instead of plucking then this post will show you exactly how I do it. There is more than one way, I am sure, but this is how I skin a chicken. By the end of this picture tutorial, you’ll have a better understanding of how to skin a chicken.
I used to always pluck my chickens after butchering them because when roasting a chicken the skin keeps the meat moist and it is crispy and delicious.
When we raised Cornish Cross chickens for meat, I usually made this super easy and delicious roasted chicken in salt.
Cornish cross is a breed that you grow especially for meat production and they don’t move much, therefore, the meat is soft and it’s easy to roast them (they are the chickens you find at the grocery store).
But I didn’t really like this breed of chickens (learn more about them in my post about Cornish Cross chickens) so I decided to grow the dual purpose Black Australorps instead.
How to Skin a Chicken Step-by-Step…
These chickens do move (just like any other normal chicken), so their meat is a bit tougher. Instead of roasting, I now process most of my chicken meat in the pressure cooker to soften it a bit before I use it (for BBQ pulled chicken, chicken chili, chicken tacos, and so on…).
Since I’ve been doing that, I found that I don’t have a use for the chicken’s skin (it’s soft after processing) so I decided to try and skin my chickens instead of plucking them in hopes to save some processing time and mess.
I’m sure that there is more than one way to skin a chicken but I’m going to take you with me and show you how I do this. It will help you understand the basics of how to skin a chicken. After doing it a few times you’ll probably change things around according to what’s comfortable for you.
Since we are at it with a dead chicken and bloody knife, we’ll just go ahead and butcher the chicken and send it to the fridge.
Here is what we are going to go over…
- Skinning a chicken vs. plucking a chicken.
- Equipment needed for skinning a chicken.
- Kill your chicken.
- Skin down the belly of the chicken.
- Separate the throat from the skin.
- Skin the chicken’s legs.
- Skin the chicken’s wings.
- Skin the chicken’s back.
- Remove the chicken’s feet and head.
- Gut the chicken and remove the chicken’s tail.
- Wash your chicken and refrigerate.
Skinning a Chicken vs. Plucking a Chicken…
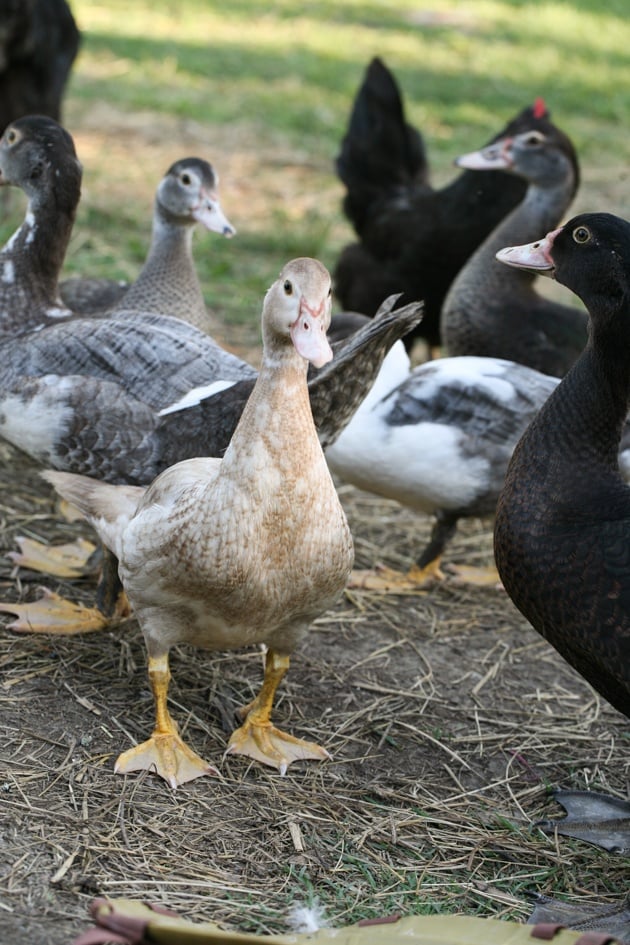
I first learned how to skin a bird from my friend when we were butchering ducks. Besides chickens, I also raise Muscovy ducks for their eggs and meat. I found that it’s not an easy task to pluck a duck.
After we skinned the ducks I was wondering if it would be worth it for me to try it when I butchered my chickens.
The decision whether to skin a chicken or to pluck a chicken comes down to two things…
First, do you want the skin? It’s full of flavor and fat and can keep the meat moist if you roast your chicken. Some people like to make crispy chicken skins as a snack, some just like the taste of it…
Obviously, if you want the skin you’ll have to pluck your chicken. If you skin it, the skin is gone with the feathers.
The second consideration is how much time does it save you. If you raise chickens for meat regularly and butcher many of them at the same time, you might want to invest in a plucking machine to make the plucking job oh so much easier (you can see how Melissa from Melissa K. Norris uses a plucking machine here).
However, if you don’t want to invest in such a machine you can pluck your chickens by hand, which is really not that hard at all, or, you can skin them.
I hate titles such as “how to skin a chicken in 30 seconds” or “how to make a million dollars in an hour” or “how to break apart a pallet in 2 minutes” (I came across many of those when I was building my chicken coop from pallet wood!), I don’t know if they apply to anyone but they sure don’t apply to me.
Truth is, it might be a little bit faster to skin a chicken than to pluck a chicken but for me, it’s not by much.
Honestly, what I like the most about skinning a chicken is that I don’t need to bring a huge pot of water to a boil (to scald the chicken. This makes plucking easier) and that I can work outside and eliminate the feather mess.
I suggest that you try to skin a chicken a couple of times and choose for yourself whether you like it better than plucking and if it really saves you time.
Equipment Needed for Skinning a Chicken…
Not much is needed for skinning a chicken. You’ll need a…
A killing cone – to kill your chicken.
Butchering knife – whatever butchering knife you choose just make sure it’s super sharp.
A cutting board – it’s always better to use a cutting board that is not made of wood when working with raw meat (especially chicken), just easier to clean them.
Gloves – some people prefer working with latex gloves.
That’s it, pretty much. You might need a couple of plastic bags. One for the skin/feathers and the guts (unless you are going to throw them in the woods for the other animals to enjoy or bury them in your garden), and the other for your clean chicken.
Also, make sure you’re working close to running water (I love to use my garden hose).
How to Skin a Chicken…
Ok, we have all the equipment that we need and we have a chicken! I choose one of my older laying hens (not a Black Australorp) that keeps flying over the fence and ruining my garden.
I tried to clip her wings a few times but somehow she still finds a way out of the fenced area. She is old, her egg production is low, and she is annoying… It was time for her to go.
Kill Your Chicken…
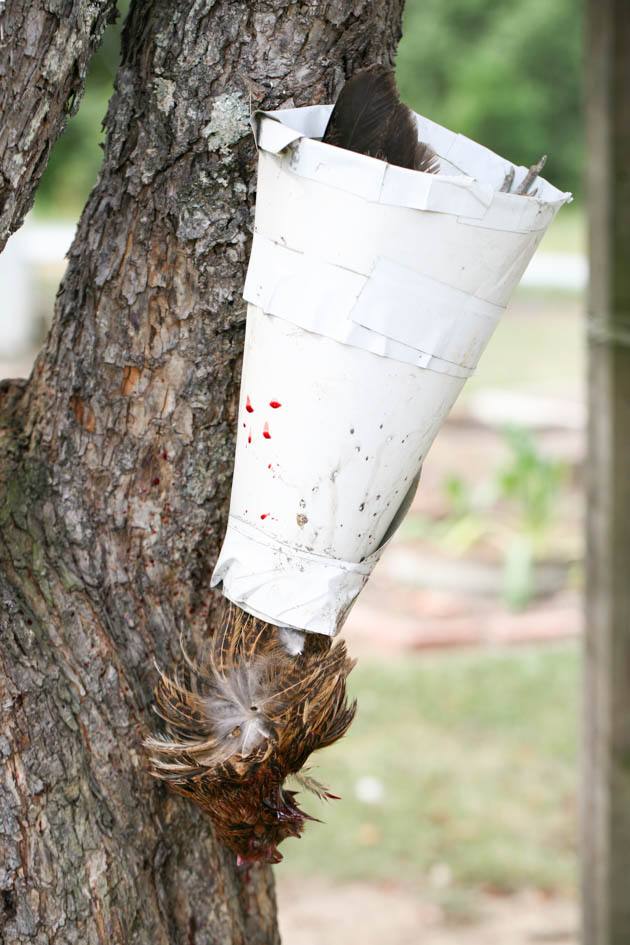
I place my chicken in the killing cone and let her relax for a couple of minutes. Then I extend her neck and with my very sharp knife, I make a cut on the side of her throat right above her jaw.
This will cut the main artery and some blood will come out. I wait a few minutes until the chicken stops pulsing and until most of the blood is out.
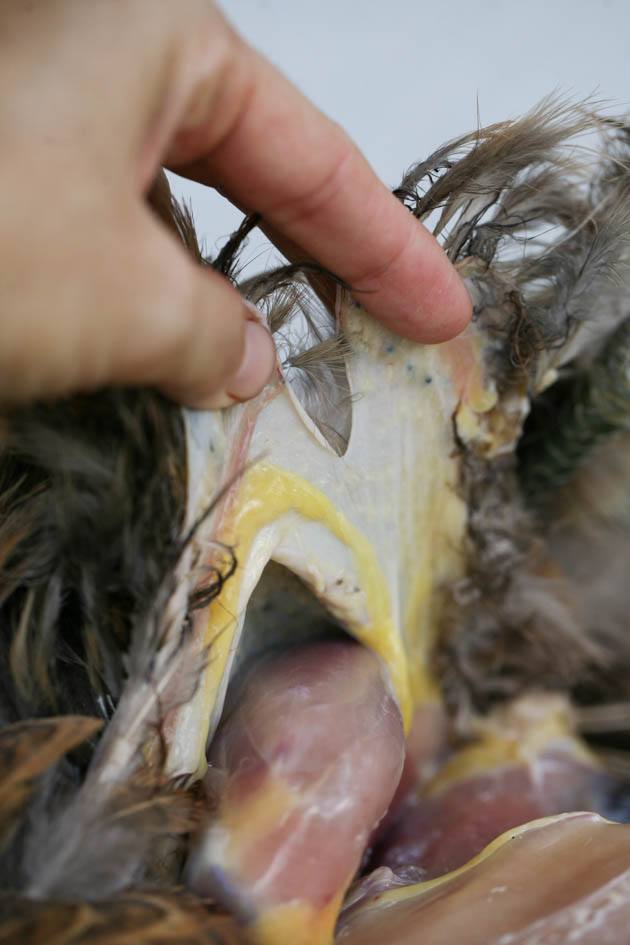
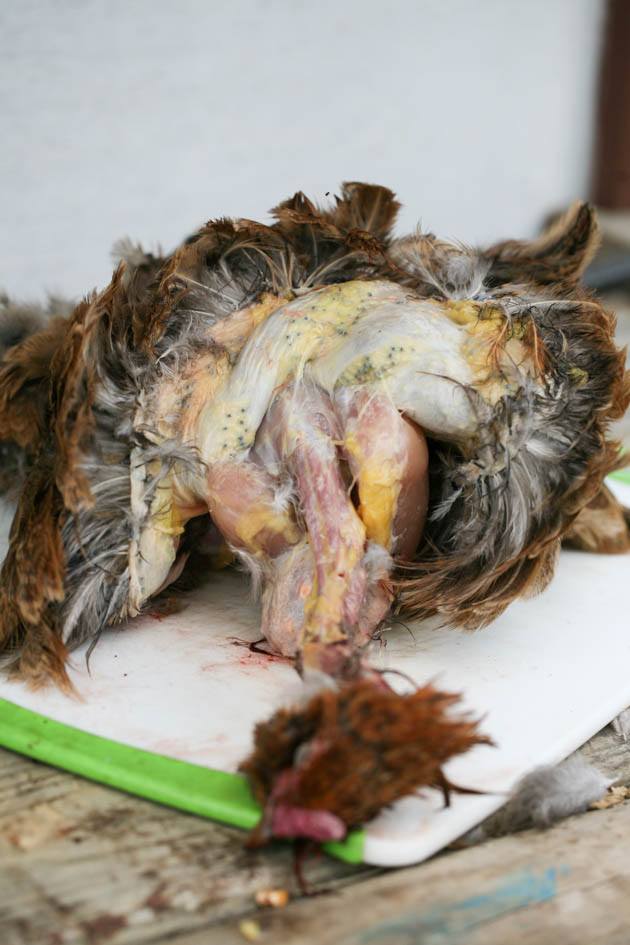
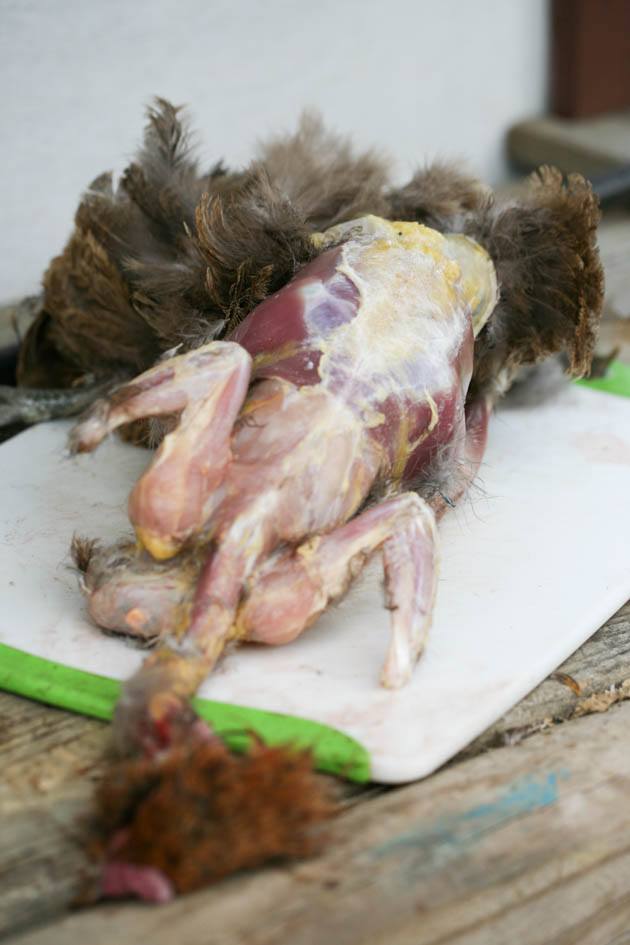
Skin Down the Belly of the Chicken…
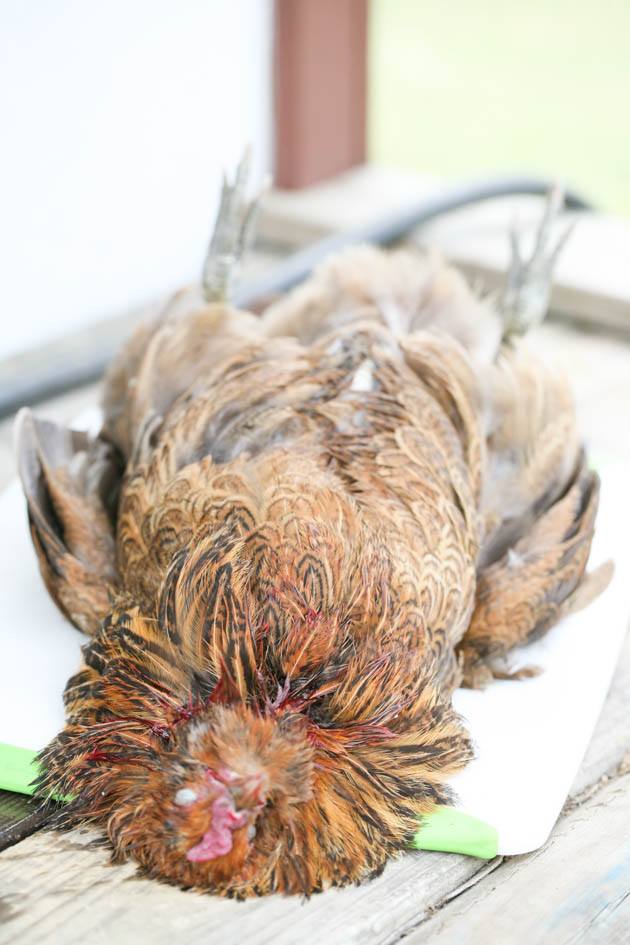
I lay the chicken on her back on the cutting board, head towards me…
And find the opening in the skin that was caused by the knife when I killed the chicken…
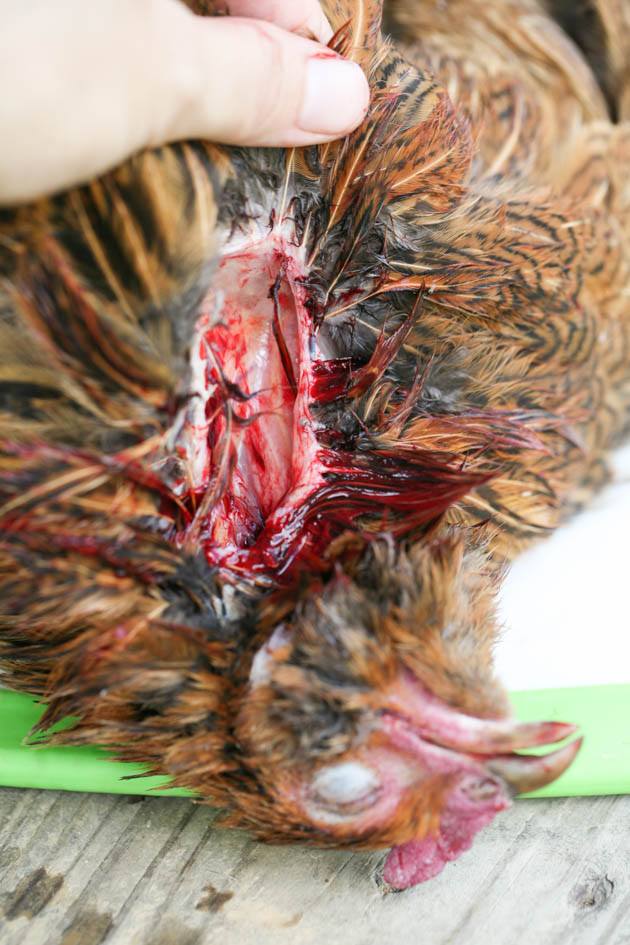
I make a small vertical cut in the top of it that will allow me to pull the skin apart down the belly of the chicken.
Then, I just work with my hands, tearing the skin down the belly of the chicken.
You’ll notice that most of the skinning work is done by tearing the skin, there is very little knife work.

I keep tearing the skin all the way to the vent. When I get to the vent I don’t do anything special, I leave the skin as it is and move back to the throat area.
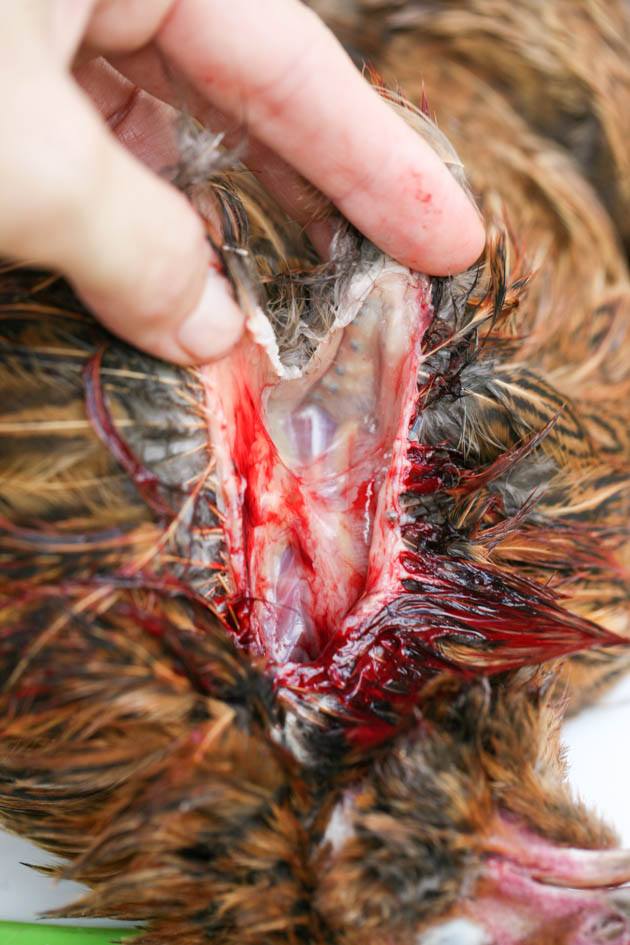
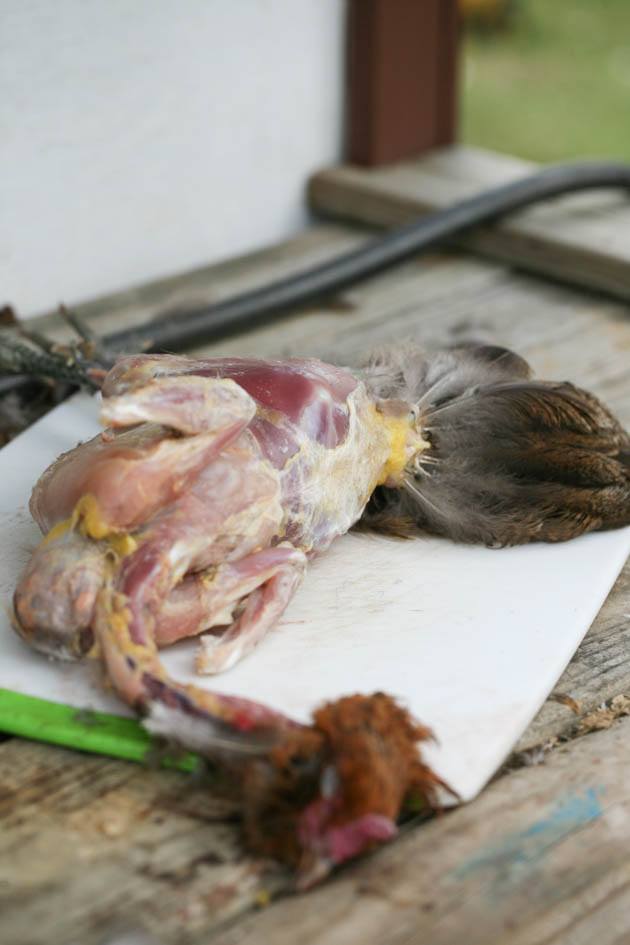
Separate the Throat from the Skin
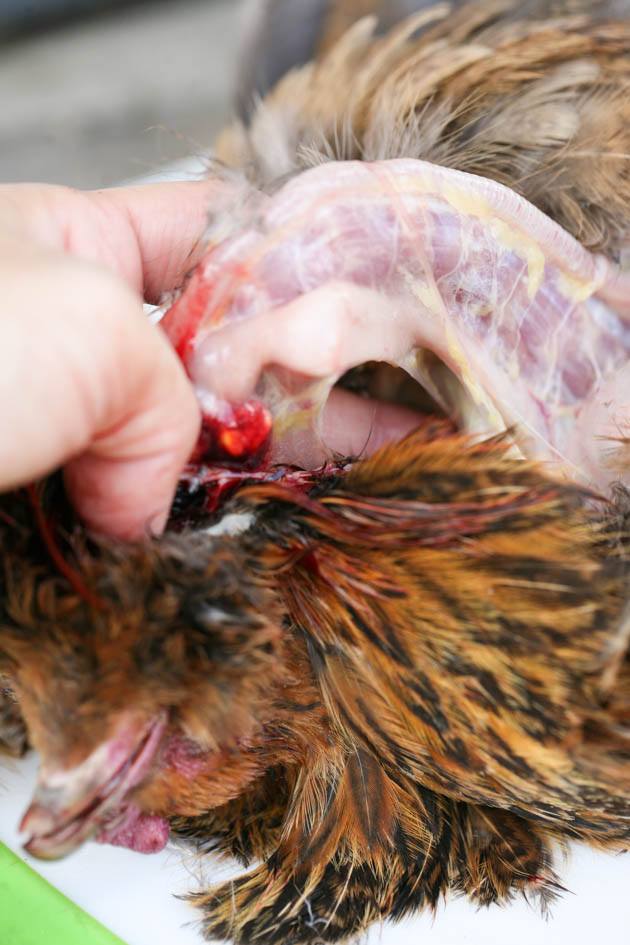
The next thing that I do is separate the throat from the skin.
I just grab the throat and pull the skin around it. The head is still connected, I don’t remove it in the process (you can if you’d like to).
Sometimes I need help from the knife to cut the skin around the head but most of the time I can just tear it.
I leave the head and the throat as they are and go to work on the legs.
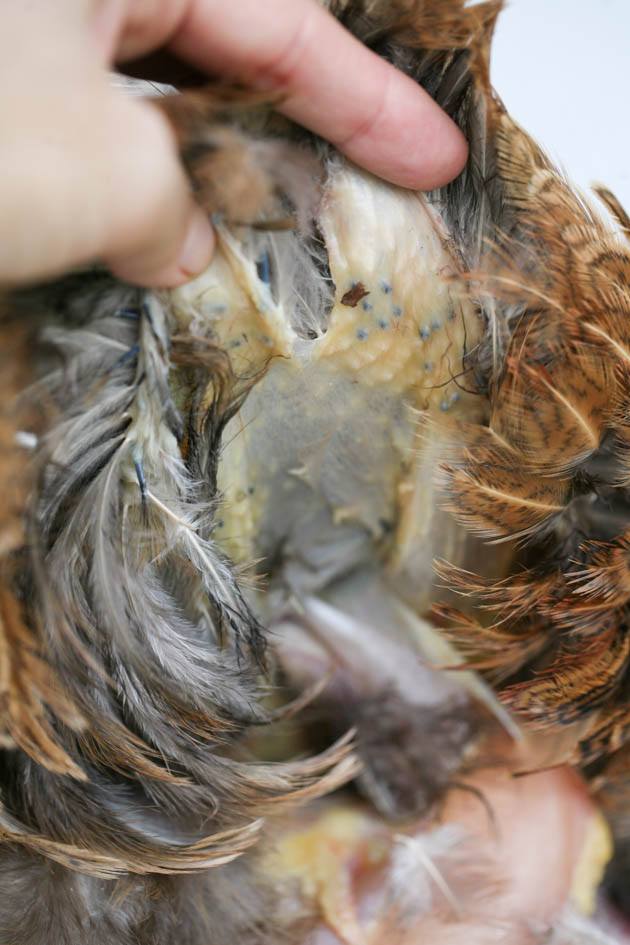
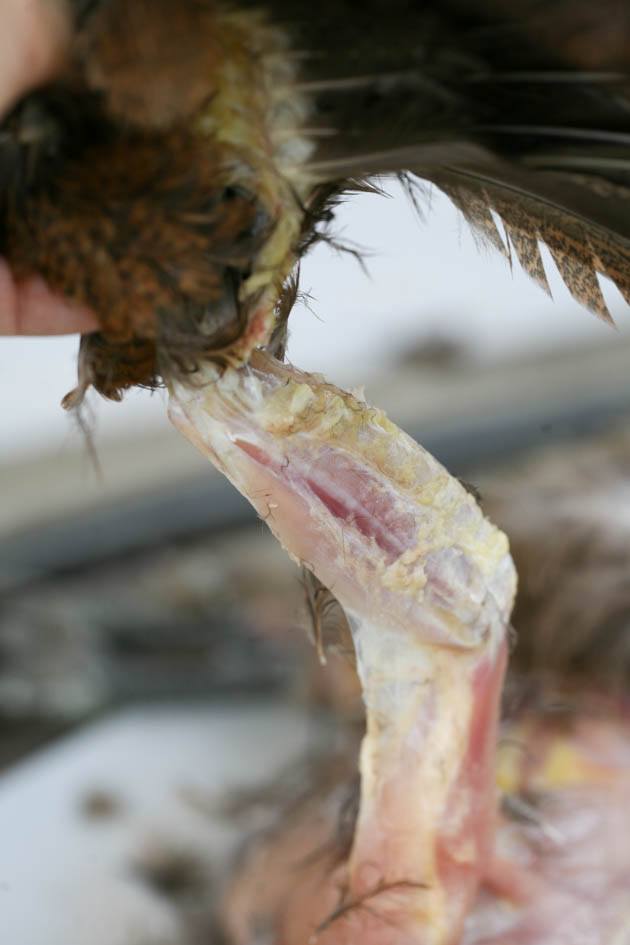
Skin the Chicken’s Legs…

I grab the skin that is now loose in the chest area and start pulling it around the legs…
When it’s getting hard to tear the skin, I make a little cut with the knife to help me get a good spot to start tearing from…

I keep going, tearing the skin all the way down to the joint…
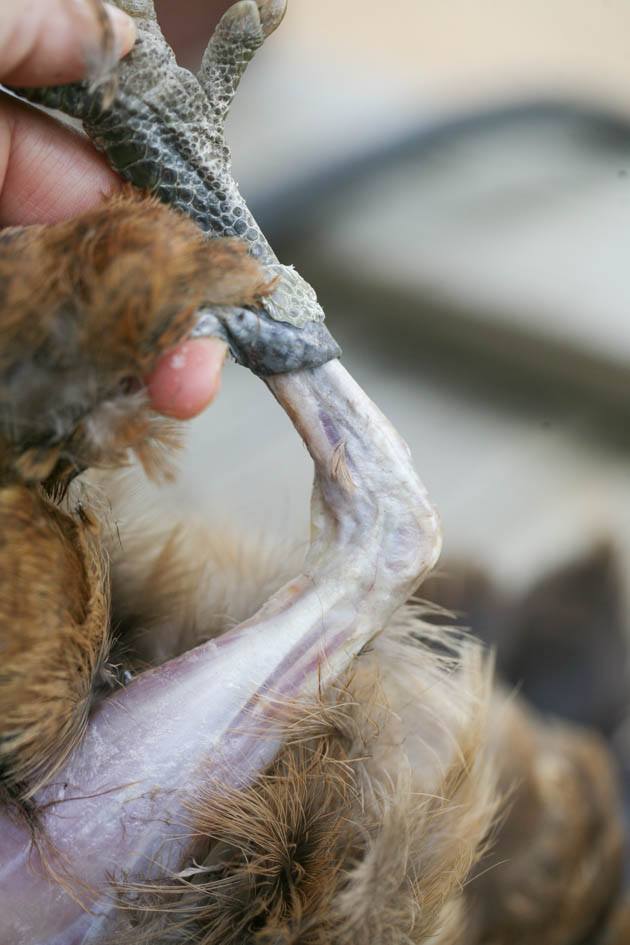
Sometimes, the skin of the feet will come off too with the feathered skin, You can keep on pulling or use the knife to cut the skin around the chicken’s feet.
I do this same process on the other leg before moving onto the wings.
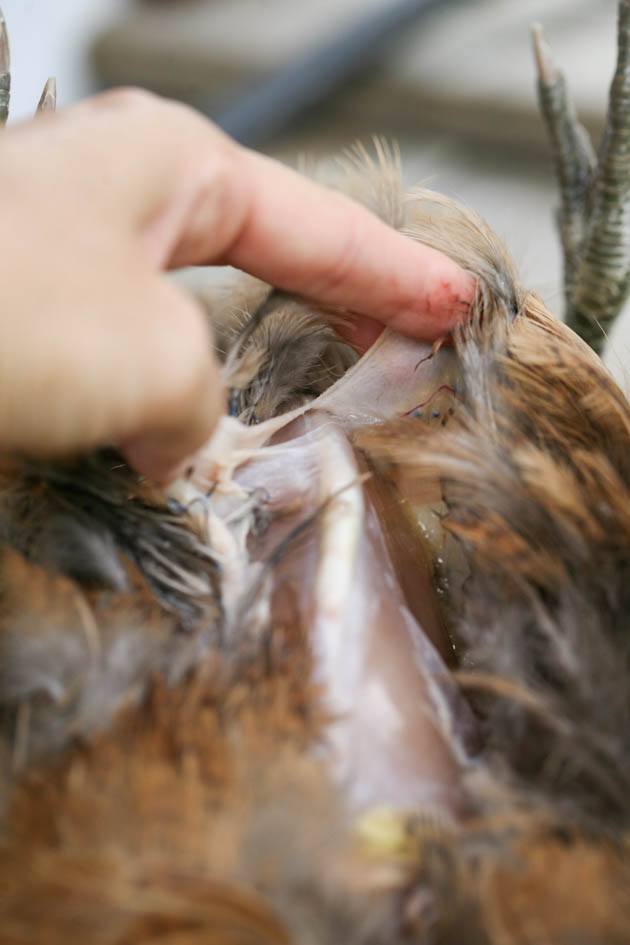
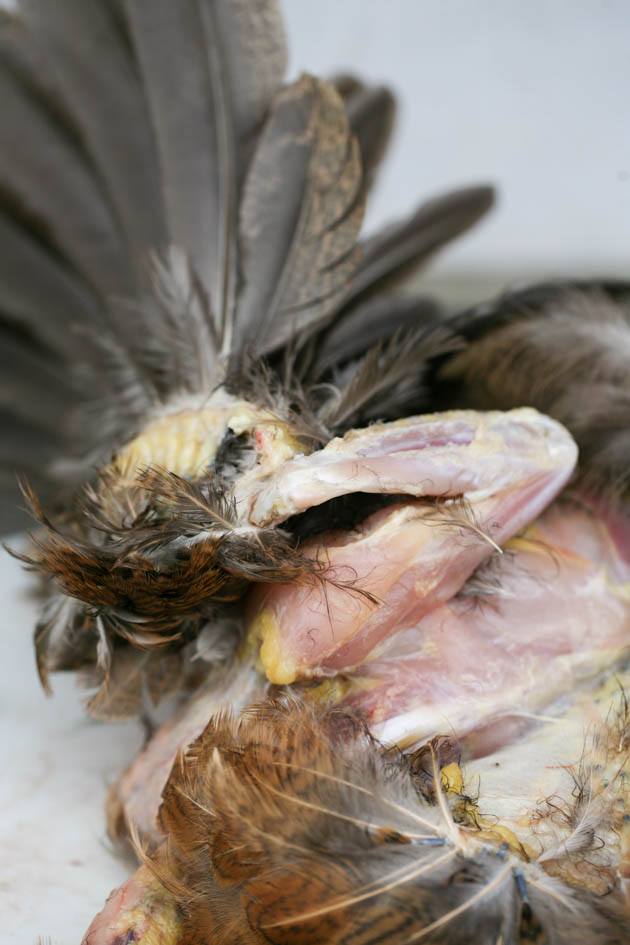
Skin the Chicken’s Wings…
All right, the belly and the legs are skinned. Now in order to work on the wings, I turn the chicken on its belly, hold the peace of skin that I loosened from around the neck and pull it down the back of the chicken to the wing line.

Then I start skinning one wing at a time. This is the part that takes the most time when skinning a chicken.
I work slow and use my knife to make little cuts to help me tear the skin around the joints. Because of how the wing is bent, it’s the hardest part to pull the skin off of so I usually use my knife more when I skin the wings.
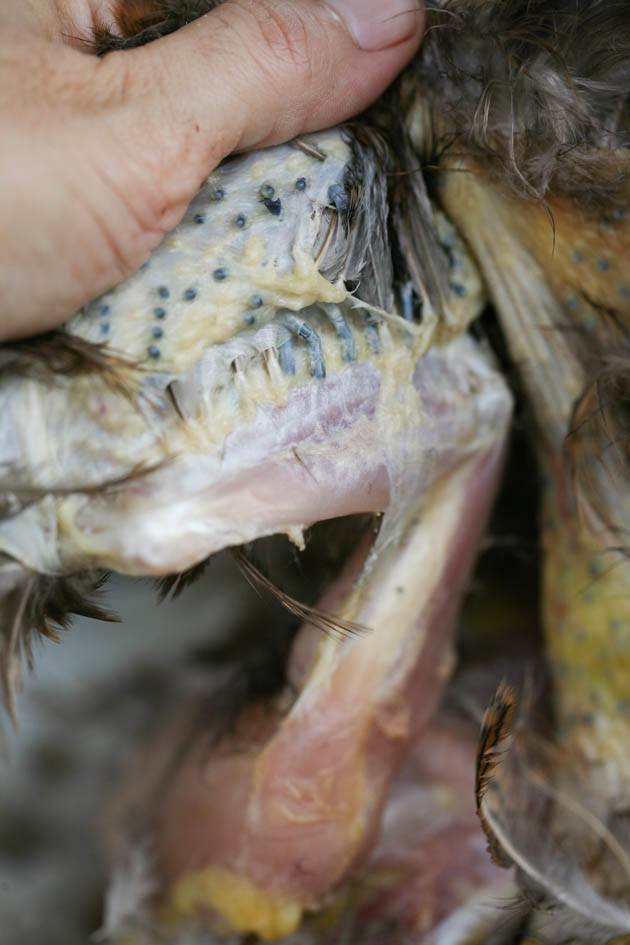
The first part of the wing is relatively easy to skin. The second part of the wing, after the joint, is a bit harder because the skin won’t come off by pulling…
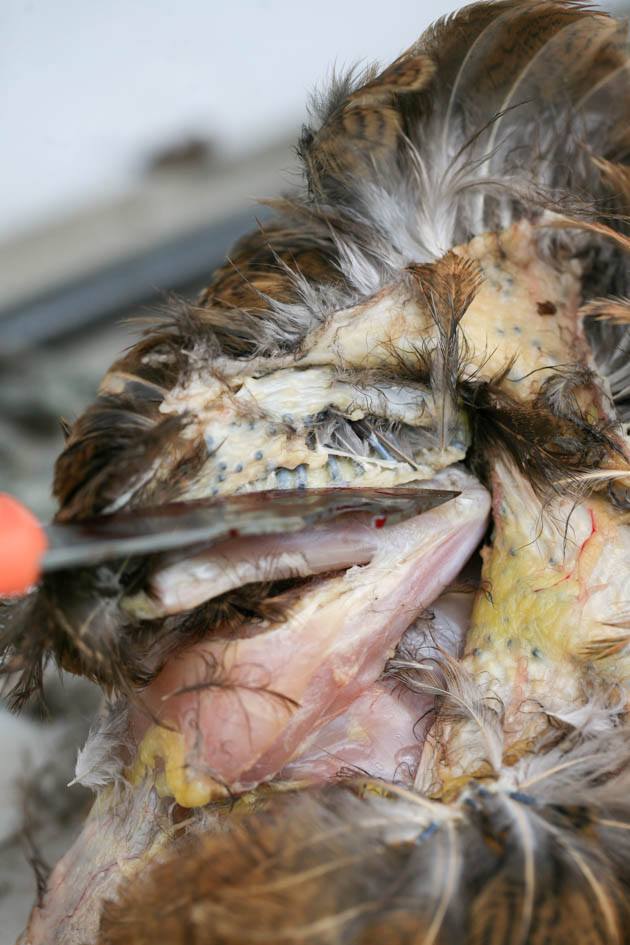
Here, I use the knife to carefully cut the skin from the meat…
It doesn’t take long before the second part of the wing is freed from the skin…
Now, the third part of the wing is the part that has the large flying feathers and there is no meat there whatsoever…
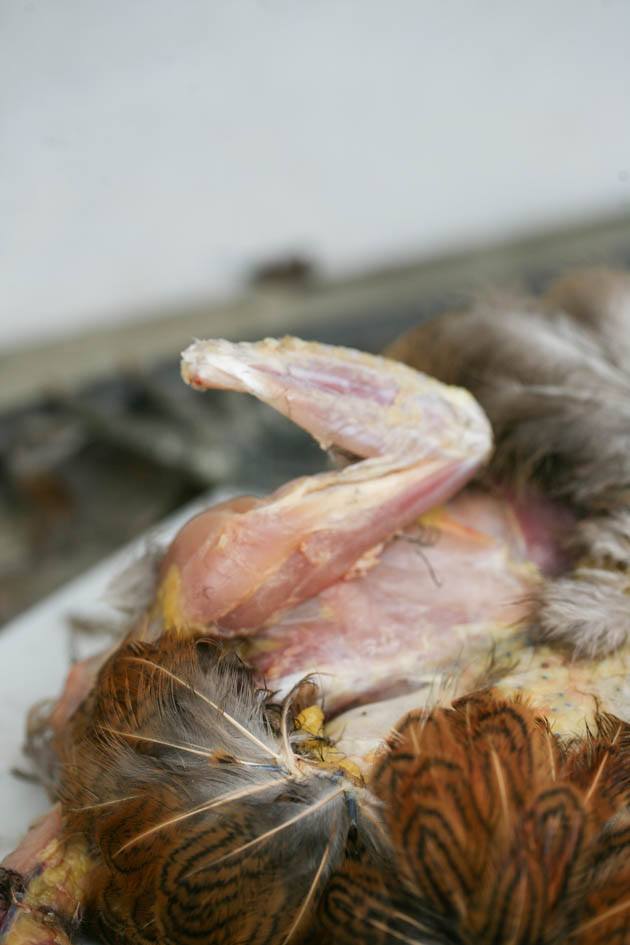
So instead of wasting time on trying to skin it, I just cut it off. In order to not dull your knife, always make sure that you find the valley between the bones of the joint and cut there, where the bones connect. Don’t try to cut the bones.
I do the same thing with the other wing before moving to the back of the chicken.
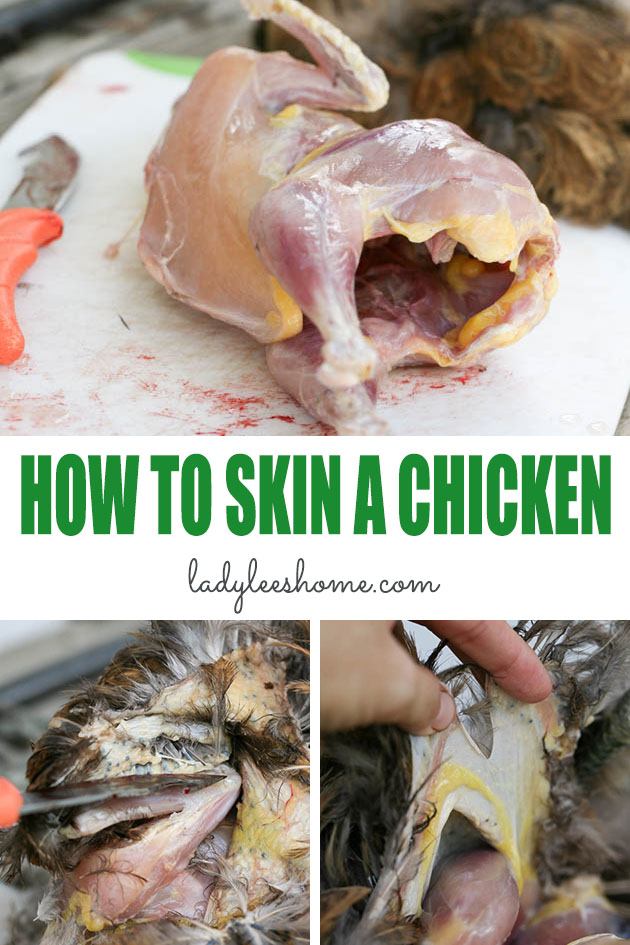
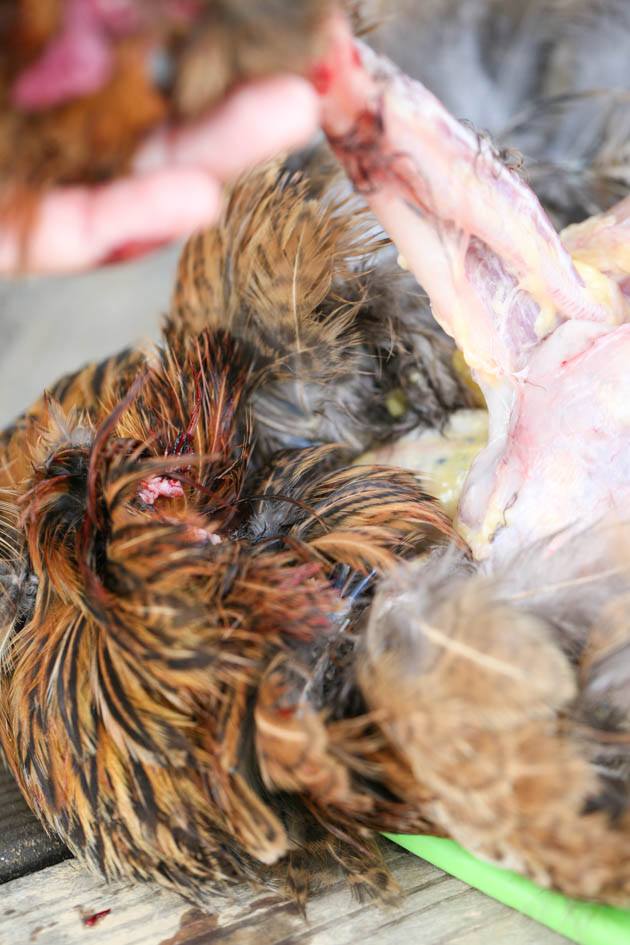
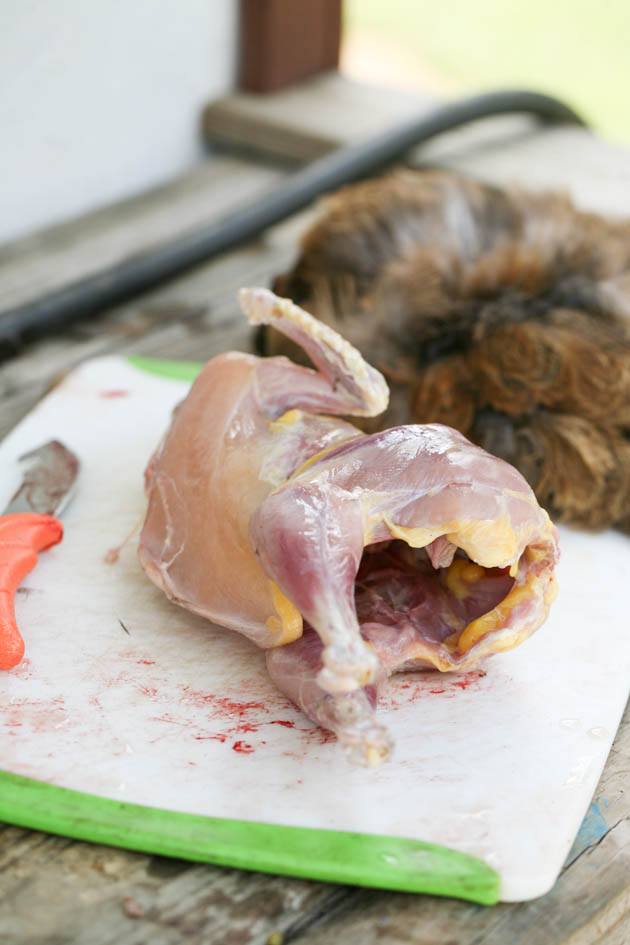
Skin the Chicken’s Back…
The chicken is still laying on its belly and now the skin around the wings is freed, so all I have to do is gather the skin in my hand and keep pulling it down the back of the chicken…
All the way to the tail.
When I get to the tail, I tug on the skin to pull it off completely. The feathers that you see in the picture are the tail feathers. I don’t mind about those because I remove the tail when I process my chickens (you’ll see how in a minute).
Skinning is done! The only complicated part is skinning the wings, but once you get the hang of it it’s really not that hard. This is how to skin a chicken; now it’s cleaning and gutting time.
Let me show you the rest of the process…
Remove the Chicken’s Feet and Head…
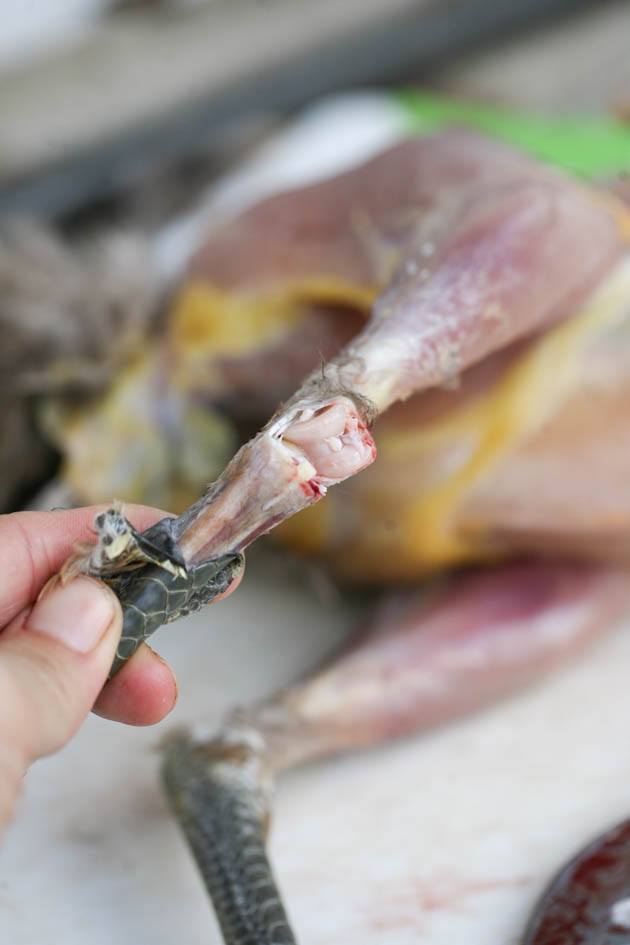
To keep cleaning this chicken, I move back to the feet and remove them.
Again, I bend the joint and find the valley where the bones connect, I carefully cut between the bones and bend and pull to remove the feet.
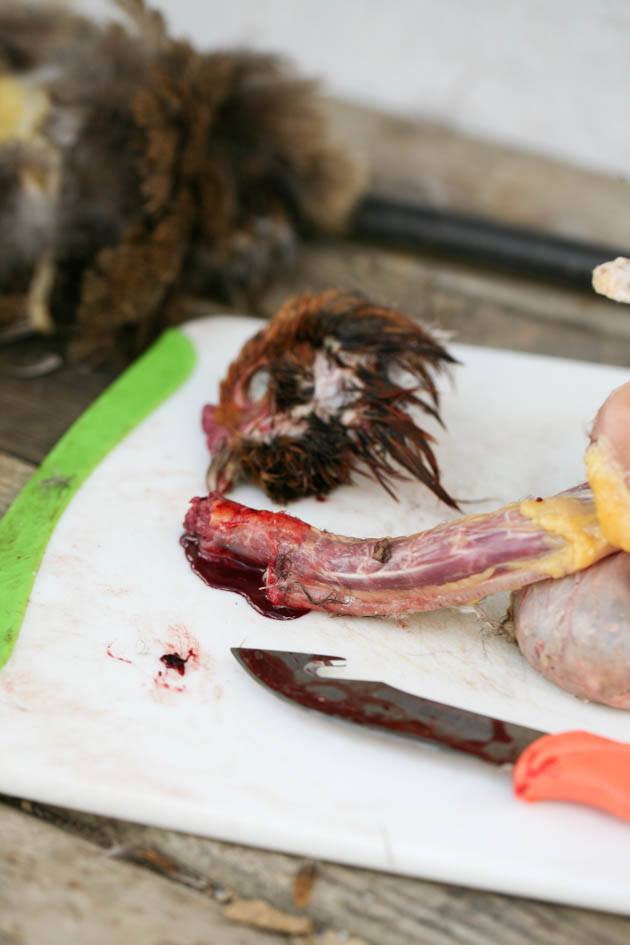
Once both feet are gone (you can save them for soup if you’d like. They have lots of gelatin in them which is very healthy), I remove the head.
No special trick here, I simply pull and bend and sometimes cut between the bones with my knife to disconnect it from the neck.
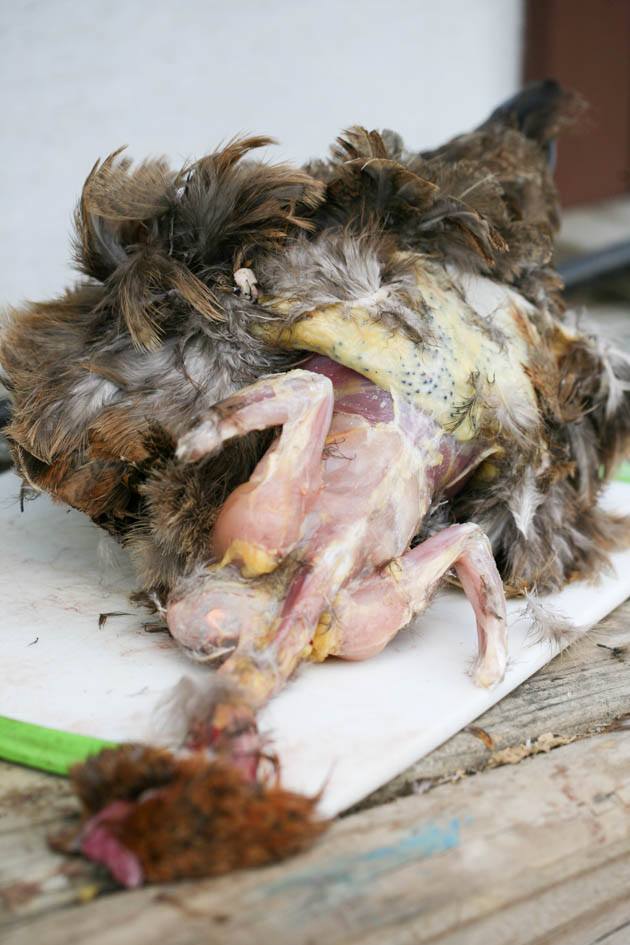
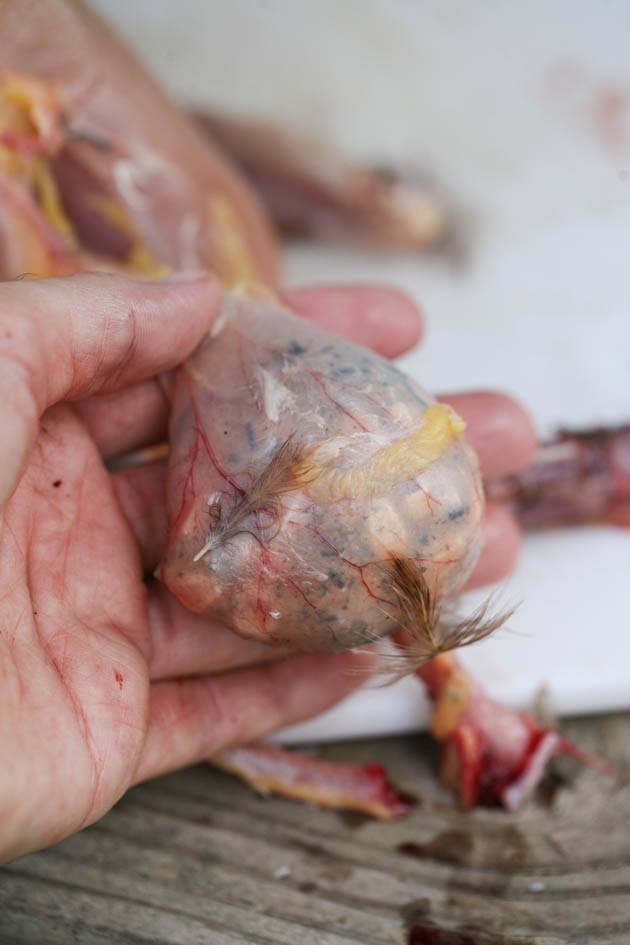
Gut the Chicken and Remove the Chicken’s Tail…
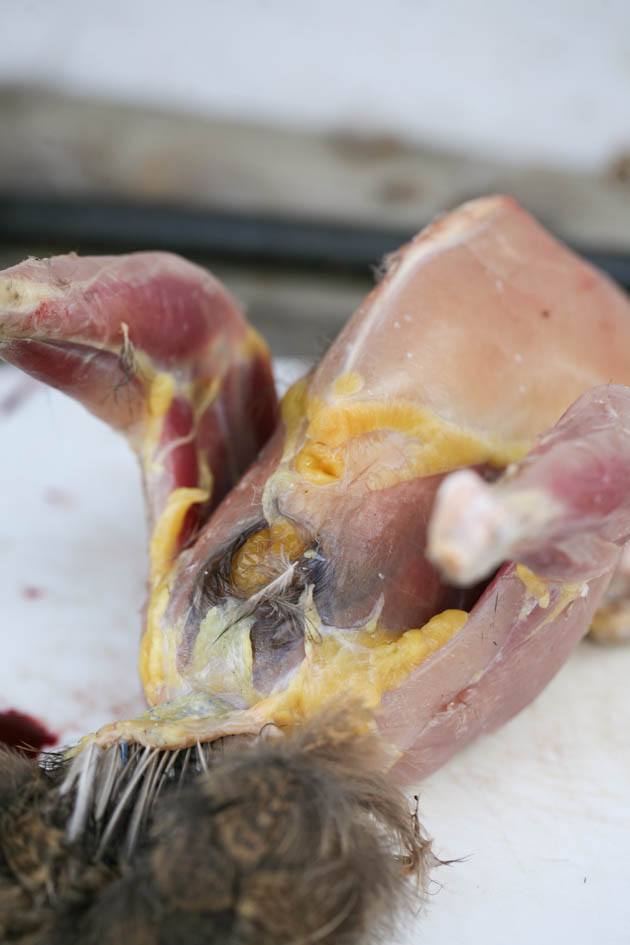
Now, I lay the chicken on it’s back with its tail pointing at me…
I make a tiny little cut right between the vent and the breast bone. I make sure to be really careful when making this cut, I want to make an opening without cutting the intestines.
Once I have my little cut, I use my hands to tear and enlarge the area and give me access to the intestines.
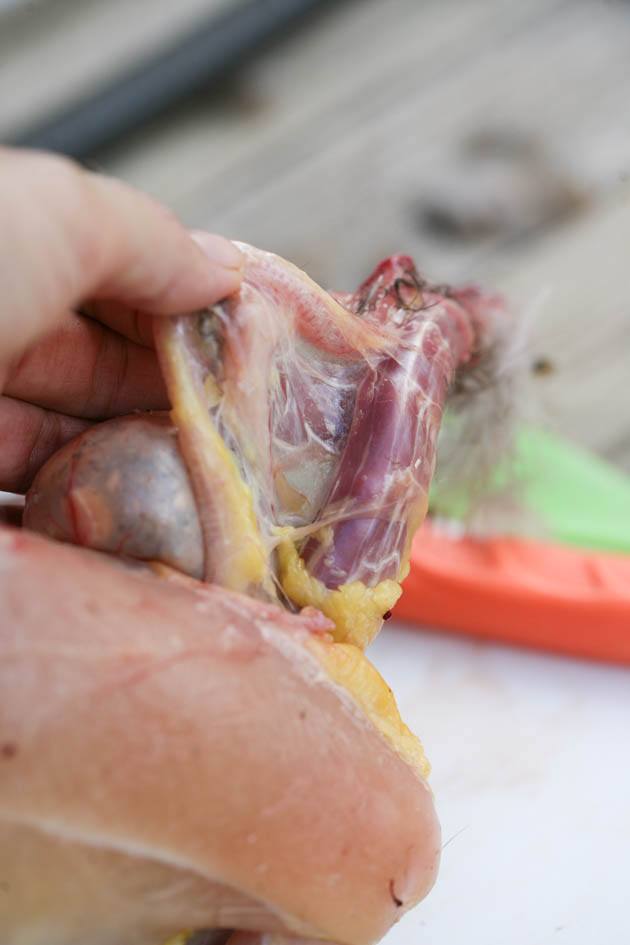
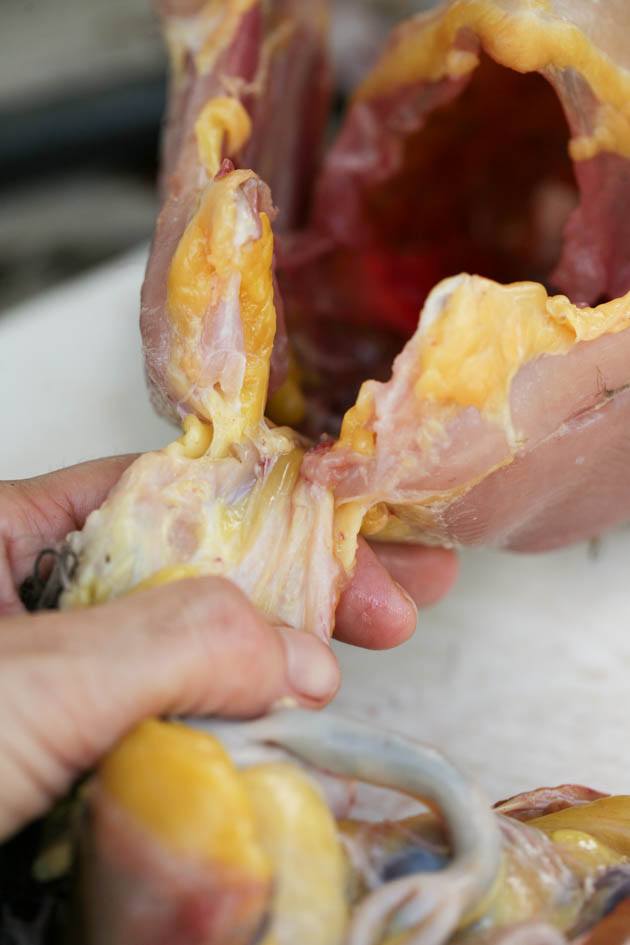
I move back to the throat and separate the two pipes from the neck (the windpipe and the esophagus).
It’s just connective tissue that holds them to the throat and it’s simple to tear them by hand. No need to use a knife here.
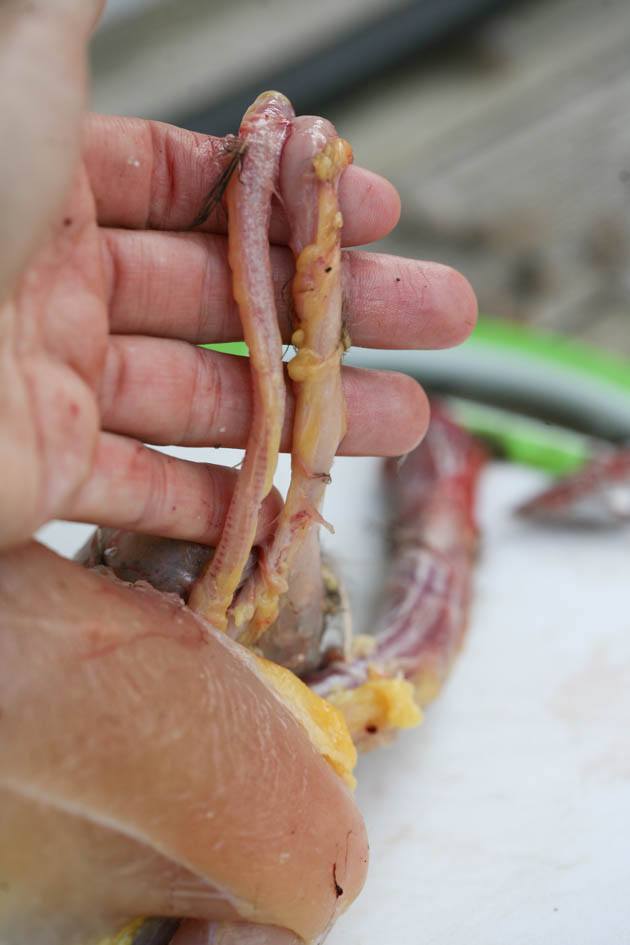
At the base of the esophagus, you’ll see the crop, a sack that is a part of the esophagus where food is stored after it’s swallowed.
The right thing to do is to place your chicken in a box or a dog kennel and not feed it 12 hours before butchering. This way the crop will be empty and you can pull the esophagus out easily when you pull the intestines out.
Obviously I didn’t do that. These days I tend to grab a chicken and butcher it whenever I have time here and there and not prepare a whole chicken butchering day like when we raised Cornish Cross for meat.
Since there was a lot of food in the crop, and this sack won’t be able to fit through the chest bones and come out with the rest of the intestines once I pull them from the tail end, I just cut the esophagus off under the crop and removed it.
I know it might sound gross, but I throw that sack right back in the chicken yard and they eat the food that is inside. Chickens are something, I tell you…
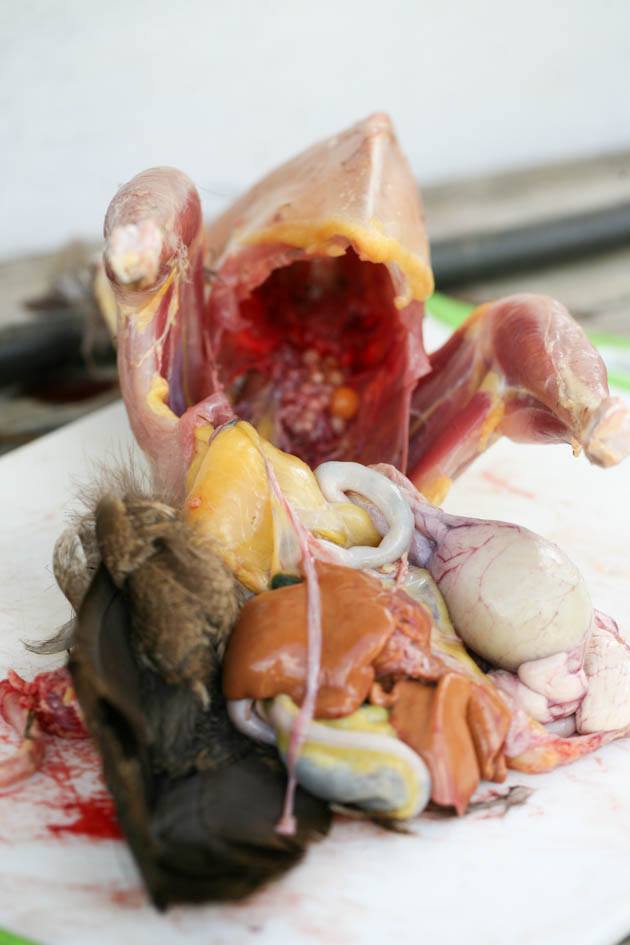
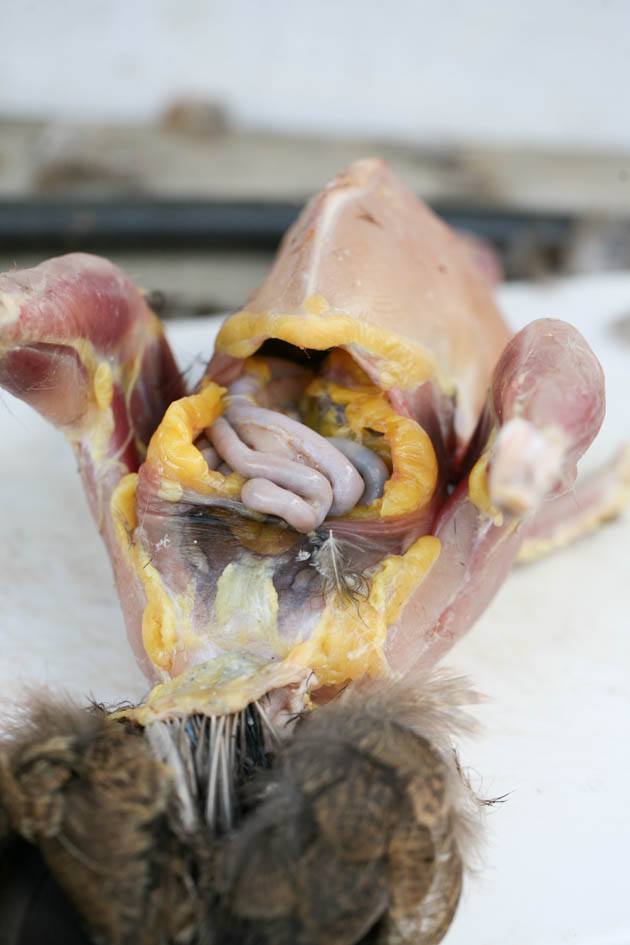
Ok, so what I have left to do now is to move back to the opening that I made in the tummy, stick my hand in there all the way to the windpipe, hook it around my finger and carefully wiggle all of the intestines out.
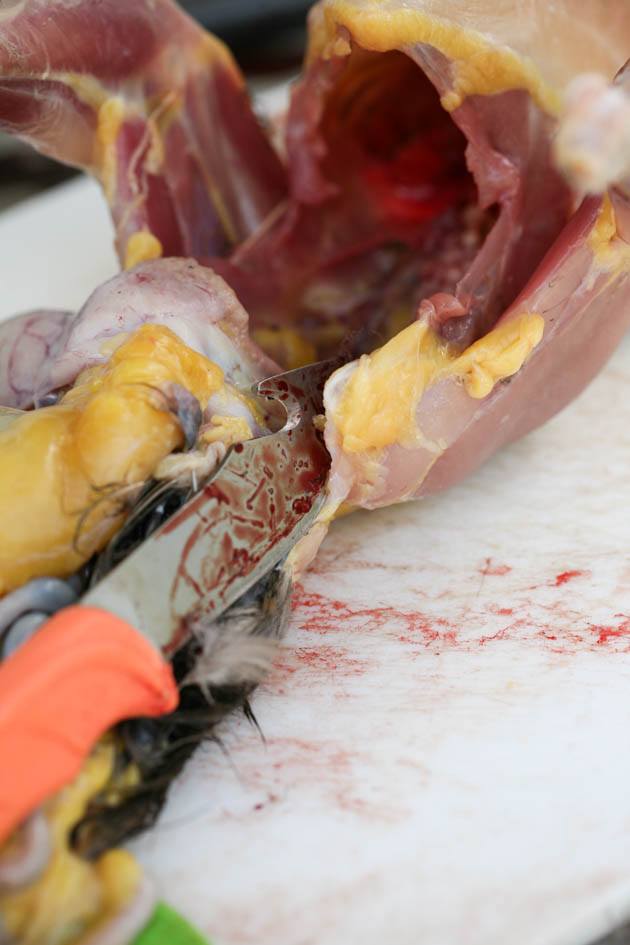
Once everything is out, I make a cut on either side of the tail, careful not to cut the intestines…
I bend the tail backward and pull the whole thing off the bird.
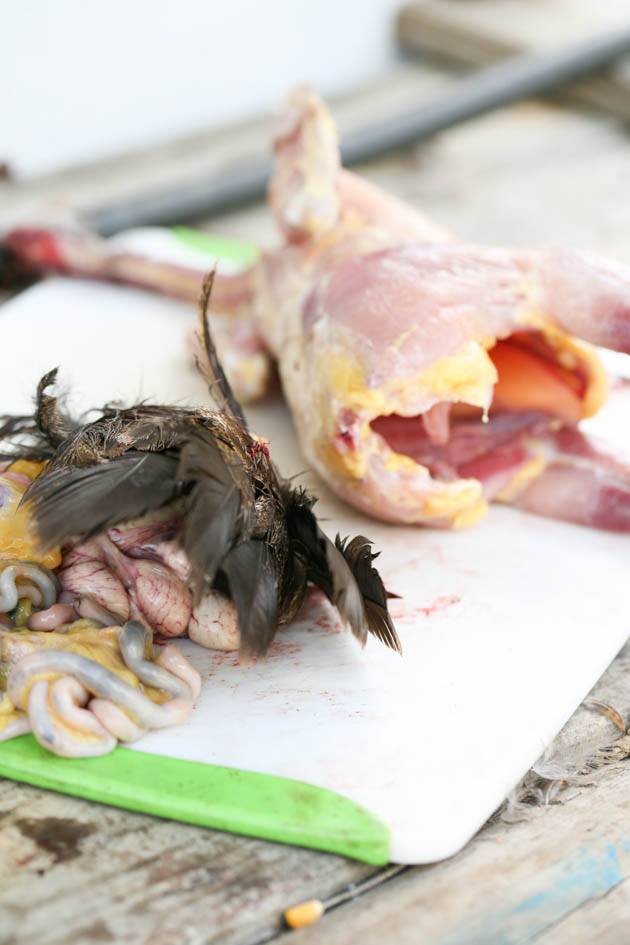
As you can see, the last of the feathers that were attached to the tail are gone with it and the bird is clean.
I used to bury all this and the skin with the feathers in the garden. It’s amazing food for your plants! But my dog keeps digging in the garden to expose it. She never eats any of it but she enjoys messing with it.
So now I take the head, feet, and intestines and throw them in the woods for nature to take care of. I do keep the liver and the heart to make a delicious liver and onions dish, but the rest is going in the woods.
Wash Your Chicken and Refrigerate…
Cleanup is the only thing left to do here. I wash the skinned chicken well with cold water, place it in a plastic bag and store it in the fridge for 24 hours.
After 24 hours, I either cook it or I pack it with my vacuum sealer and send it to the freezer. Or sometimes I can the chicken meat (learn more about canning chicken).
I hope this picture tutorial on how to skin a chicken showed you exactly what you are getting into if you choose to skin your chicken instead of plucking it.
Skinning a chicken is really not that complicated. Like everything else, it takes some practice but after doing it a couple of times it’s quick and easy and eliminates the scalding part which is my favorite benefit of the whole thing and my main personal reason for skinning my chickens.
If you have a moment, leave me a comment below and tell me what you think… Why are you thinking about skinning instead of plucking? Have you done this before? Do you feel that it was easier than plucking?
If you liked this post, you might also like…
How to Butcher a Chicken (with plucking)
thank you. I have this chore today. six chickens go to the freezer this week and your tips helped me get the. job done.
Awesome! Glad it helped and good for you! The way I see it is every chicken we put in the freezer is one chicken we save from commercial chicken houses.
Thank you for the explanation and pictures. I will be processing chickens in a couple of weeks for the first time so I’m just soaking in all the info I can. I’m saving this post so I can return to it when the time comes!! Thank you for the time you put in this post!
You are welcome! I know its a bit scary but you’d feel much better after your first batch. It’s really not that hard.
Thank you for the great breakdown. I use to butcher my cornish cross but they were 8-12 weeks old (depending on size). EZ-Peezy to scald, pluck and gut. Now all I’m butchering is the roos that come from my layer replacement hatches and, of course, roosters always seem to outnumber hens. First one I did I plucked, the skin was tough, dry and riddled with pin-feathers so I decided to skin the next one. I hadn’t skinned anything but rabbit and large game before so decided that method would work. Bad decision and thanks to you I will do my next one on a cutting board and neck down. Definitely not an easy task with the older ones, more tendons, tighter joints, and in my case what I thought was a really sharp knife was not adequate for the entire process. Lessons learned. Thank you!
You are welcome. Skinning is a good idea in some cases but it’s not always the easy choice. Cornish Cross are easy birds to butcher. Once you decide to venture into different breeds they some times become more challenging.
Thanks for sharing all the details of skinning chickens. I watched my aunt do it years ago. I have 16 chickens that are due to be harvested. I will only have my teenage boys to help me and I really want it to go quickly. So, I’m thinking our first try should be as simple as possible. Also, I don’t have all the equipment for plucking.
It’s such a great lesson for them! I’m glad this helped. Thanks for stopping by.
Generally, I prefer to pluck and leave the skin on. However, if your chickens are in moult, plucking incoming feathers is more difficult and I prefer to skin the bird. It’s easier to hang the bird by its feet and start at the legs, as with other livestock. This leaves both hands free to use for the task.
Great tips! Thanks.
This article answers all of my questions, so, Thank you. We started raising chickens again for the eggs, and ended up with three roosters from the batch of eggs we got from a friend. Like you, I didn’t want to mess with the boiling pot or plucking, since we’re going to be killing one rooster at a time until we get the best one of the three for breeding more chickens. Your article was well done and the photos cleared up any questions I may have had. My wife plucked chickens for her grandma when she was a kid and wasn’t looking forward to doing it again.
Thanks for the feedback and I’m so glad this was helpful! Thanks for stopping by.
this was very helpful. explained very well. I haven’t done this in years and was a little antsy but I fell better now. thanks for the information!
You are very welcome! Thanks for stopping by!
thanks for the tutorial
couple of huskies killed 5 birds yesterday and farm boss was gonna throw them away! i skinned and cleaned them and now have a huge pot of broth going.
Good work!!
I’ve plucked my fair share of chickens. My dad’s career was meat cutting. Butcher is a word describing what I saw in other videos! The carcass is beneficial but they discard it. Only using the thigh/drumsticks & breast. Waste too much food.
I’ve never skinned a bird but with dark feathered might be beneficial.
With my experience but pretty much on my own with this process at my age, I may try skinning. I have old hens costing me money. Thanks for a good video.
You are welcome. I’m getting ready to butcher some old hens too.
Thank you for the tutorial. I have 4 young roosters I need to take care of and was not looking forward to the scalding process..
I hope that this will be easier for you!
Growing up we always butchered chickens. Daddy would ring their necks and hung them after they quit moving by their legs. We would pinch the skin and put a slit in it and put our fingers in between the skin and meat and just yank the skin right off. Then we’d cut the breast down the front and we’d carefully gut them. What fond memories of my youth living on a farm.
Thank you for sharing these memories! I sure hope that my kids will remember these days as fondly as you remember yours when they grow up!
We used to hang the chicken from the clothesline from their feet to skin them as it gave full access to the body. Cut around the feet, down the thigh and breastbone and peel whole skin off. Much easier option and can hang multiple at the same time, some draining while processing others.
But grea5 article.
I didn’t think of doing that! It’s just like we butcher the larger animals like deer, for example. I didn’t think about doing it with the smaller animals too. Something to try! Thanks.
We have an abundance of roosters. It was suggested to skin rather than pluck and only use the breasts as the rest tends to be tough. Thoughts?
I don’t think that there will be any difference in the toughness of the meat between breast and thigs or the rest… And the breast is the dryest meat on a bird so if there will be a difference I think that the breast will most likely be the toughest part.
What are you trying to accomplish?
Are trying to find a quick way?
Do you want the carcass?
How old are the birds?
What breed is it?
I’ve plucked chickens as a kid with my mom and skinned them as an adult. I think the skinning is easier and I like not having the skin, although I think it makes for better gravy, when frying them up. We just got chickens this year and have been raising them for the first time. In the past others raised them and I paid and benefitted. This time, its all on us! Thanks for the tutorial. It’s been too many years and I was trying to remember how to do everything. I’m just going to start with three chickens and go from there. We mostly want eggs, but ended up with too many chickens and we have several adult kids that will be wanting the meat. My hubby is not a fan of chicken meat and will rarely eat it, so it mostly gets given away. Thanks again!
You are welcome! I’m happy it was helpful. Butchering is a whole lot of work for sure!